
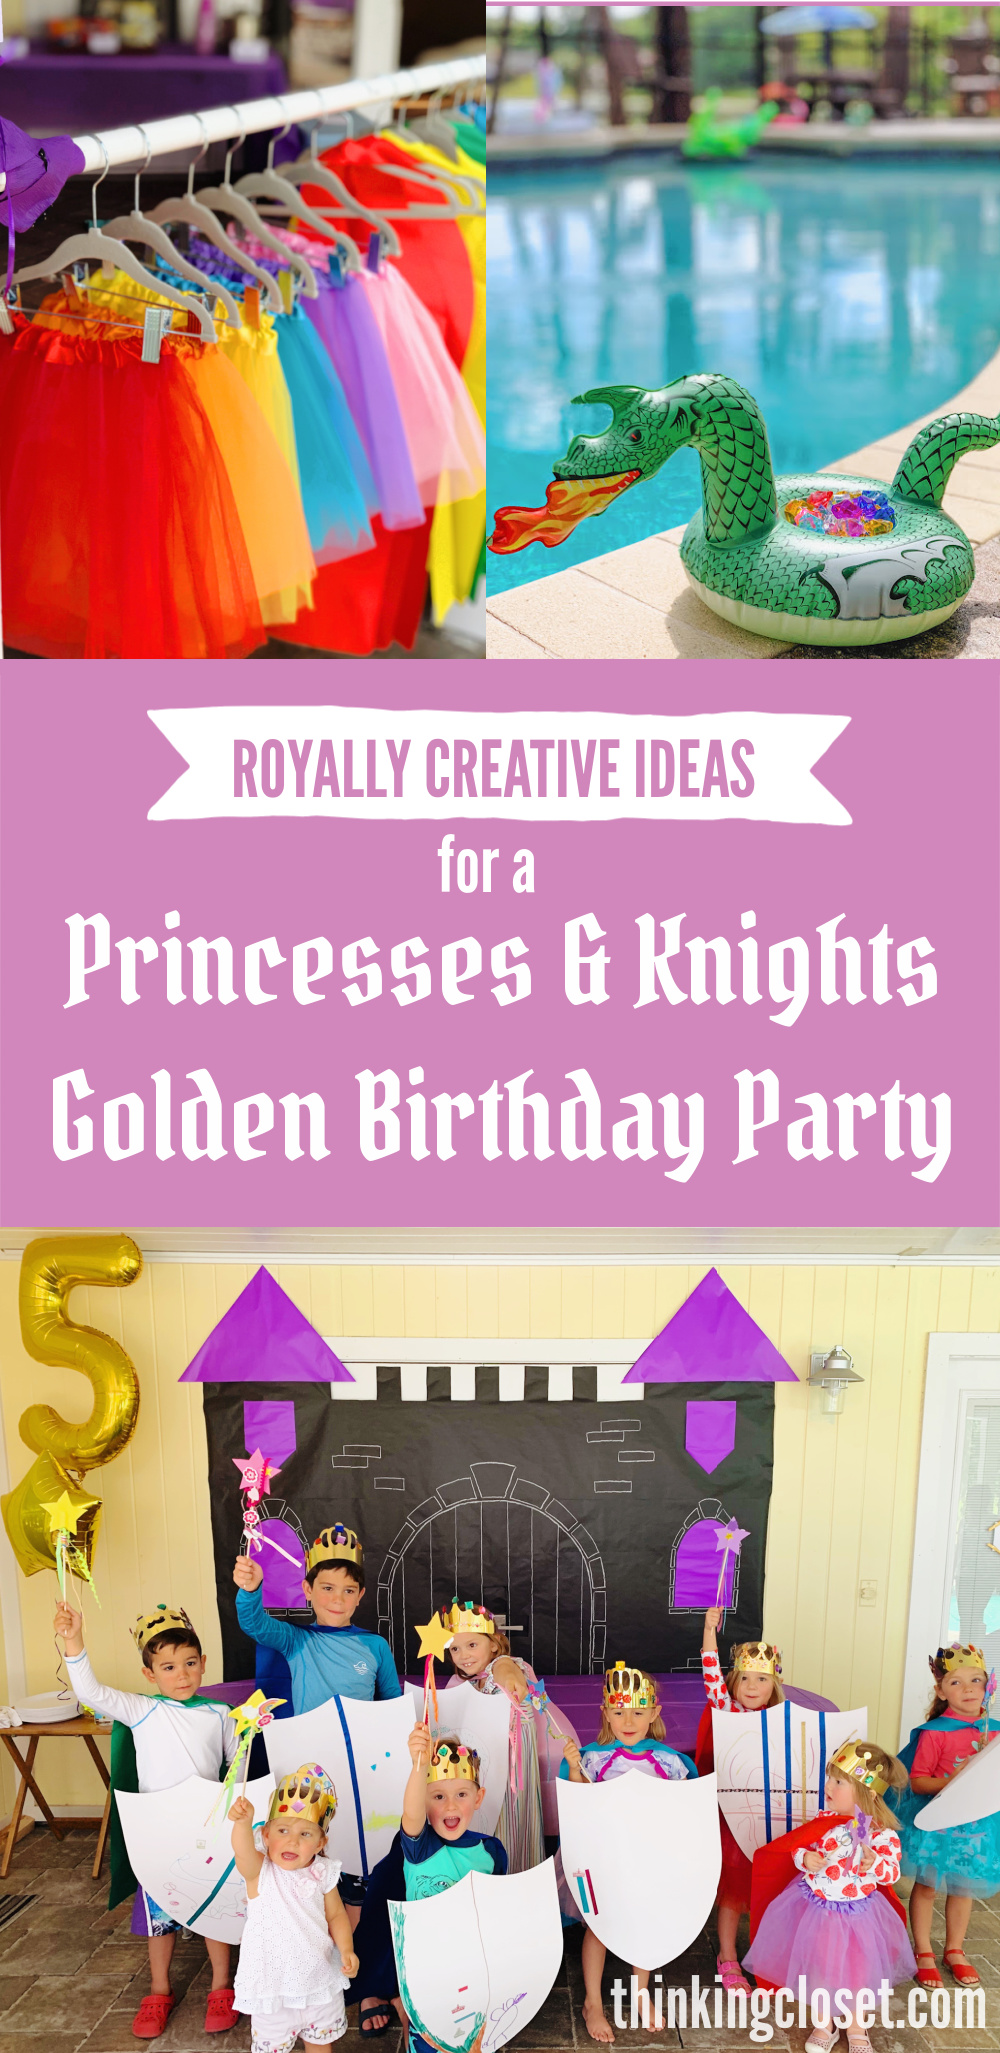
Juniper’s Princesses & Knights Golden Birthday Party: Royally Creative Ideas
How to host a royally fun princesses & knights themed birthday party with a punny invitation, DIY castle backdrop, a golden birthday banner, creative activities for kids of all ages & party favors galore!
Party Theme
As we left Raina’s “princesses & knights” themed birthday party this March, Juniper leaned over to me and said,
“I want to have a birthday party just like this!”
She didn’t have to ask me twice!
I mean, the party was pretty much already planned for me thanks to Raina’s mommy, my friend Keely (the same Keely who wrote the masterful lyrics to our Hamilton parody music videos last Halloween). And she was so generous to let me borrow party inspiration…and all of her Amazon links, which really made planning this shin-dig easy as medieval meat pie!
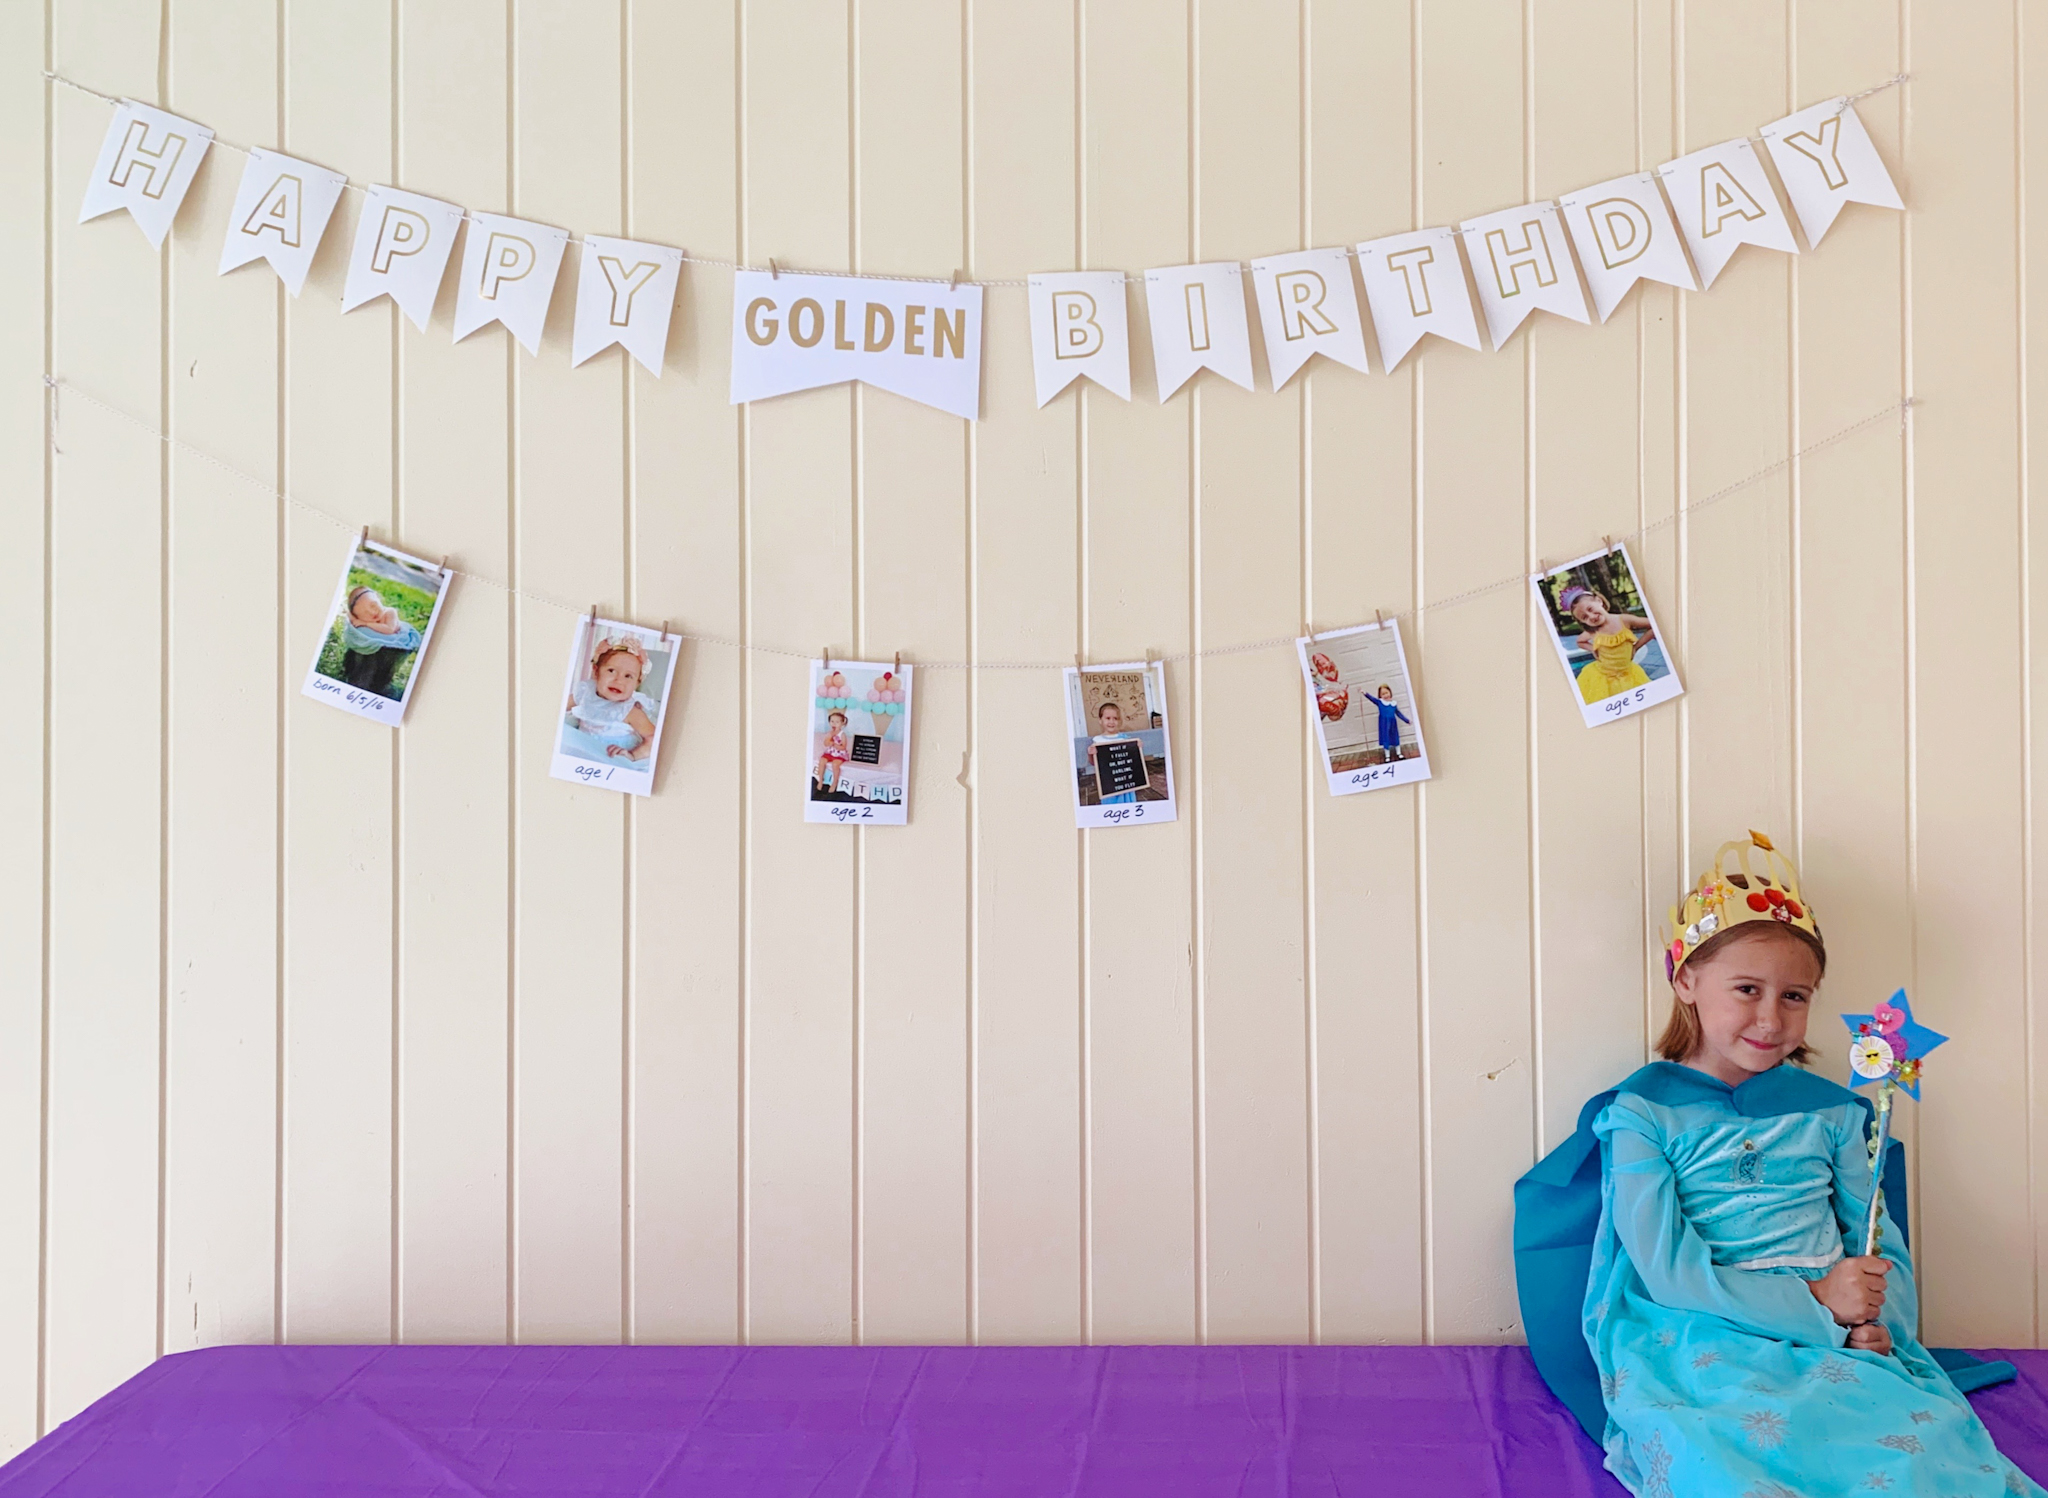
Also, this year, Juniper celebrated her golden birthday–turning 5 years old on the 5th of June. And what better accessory to wear on your golden birthday than a “golden” crown?!
Juniper’s “Princesses & Knights” Golden Birthday Pool Party was a royally fun time this summer, and I’m delighted to dive into sharing all of the party details to inspire your own celebration for the little princesses and knights in your life!
*I’ve included affiliate links for your convenience. I’ve also complied an Amazon storefront with a handy collection of all the party supplies we purchased, which you can peruse HERE.
Invitation
We decided on a pool party to keep the event outdoors, inviting a small group of families from Juniper’s preschool class and church. I whipped up an Evite using this fun “Once Upon a Time” design.
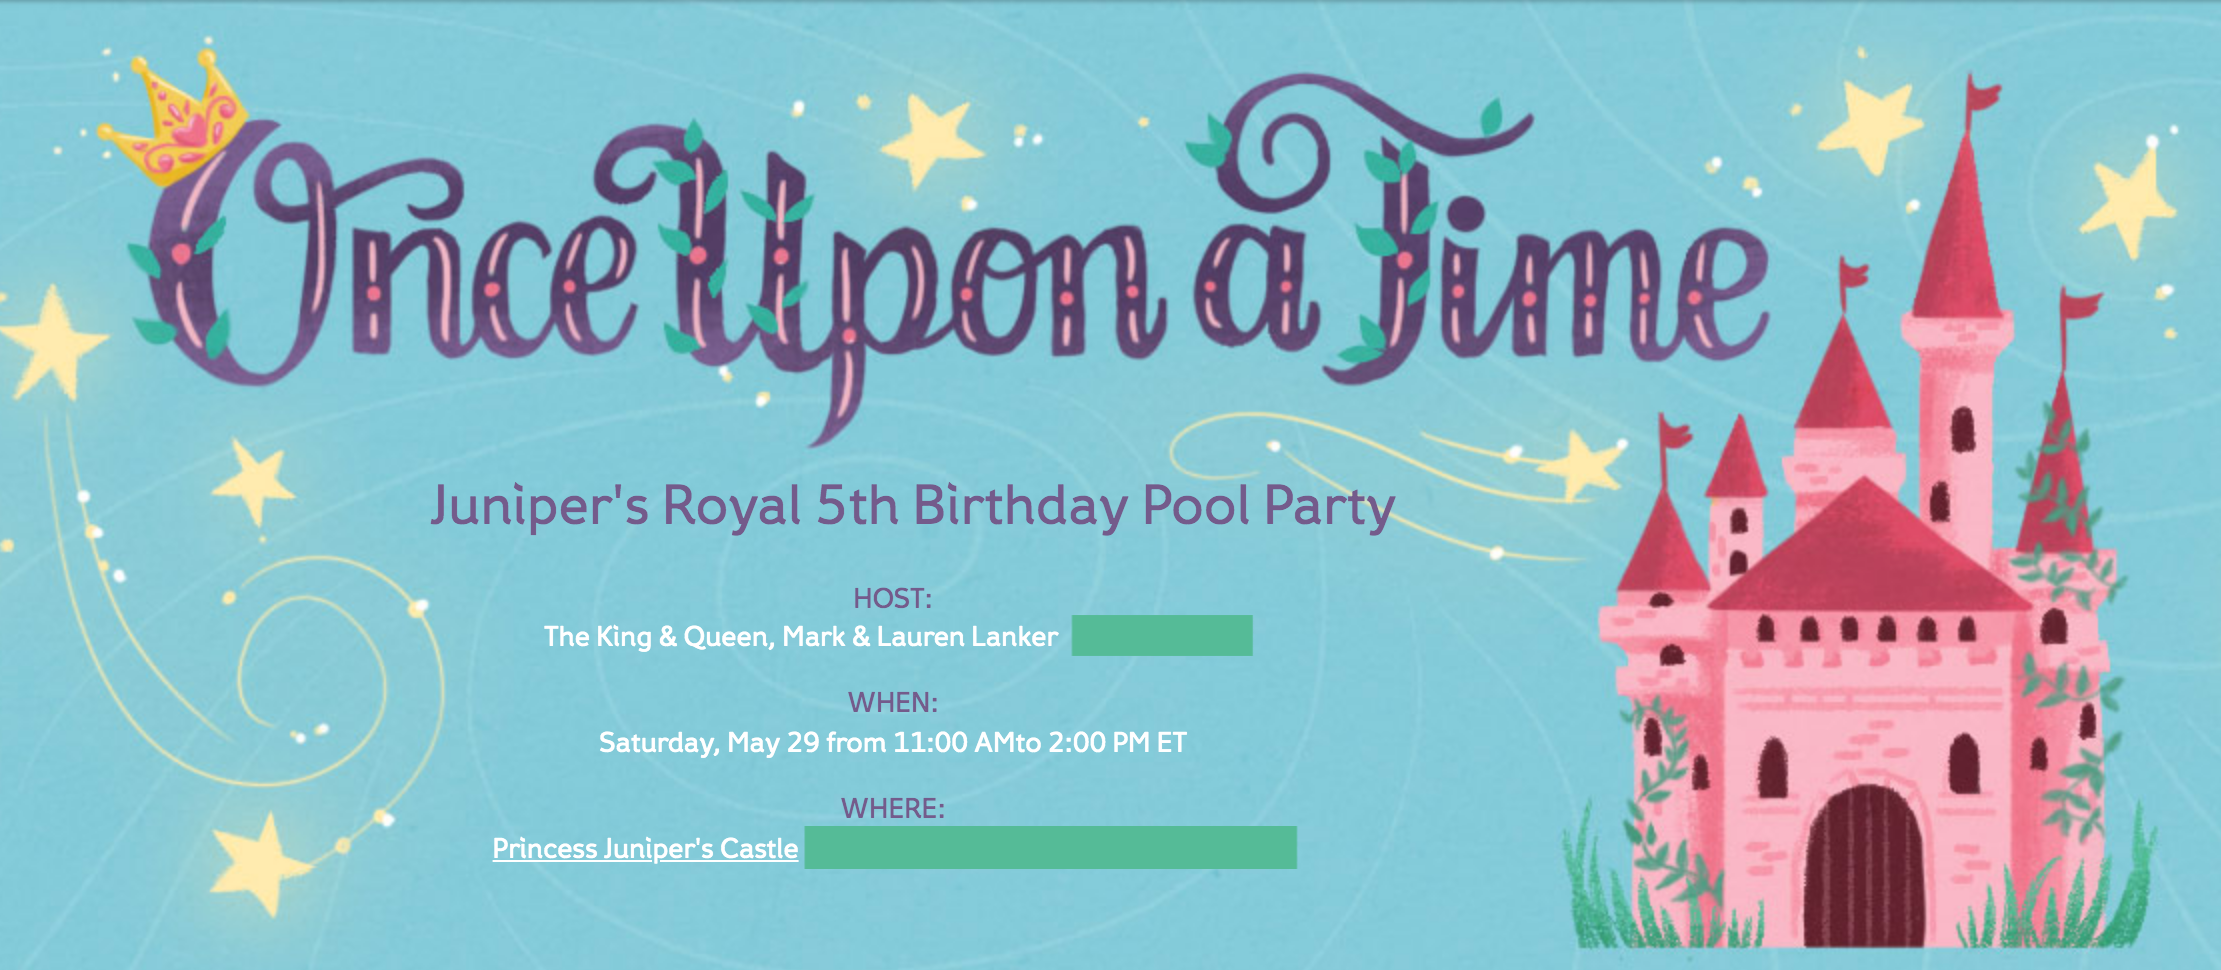
Then, in the party details section, I attempted to whisk our party guests into an imaginative world of princesses, knights, castles, and dragons:
Hear ye, hear ye! All princesses and knights from across the land are hereby summoned to join the 5th birthday celebration of her royal highness, Princess Juniper. 👑
Festivities start at 11:00 in the morning on Saturday the 29th of May and will conclude at 1:30 in the afternoon.
Wear your swimsuits and bring your towels for pool-time fun. Come with hungry bellies for a royal feast of pizza and cupcakes. And we’ll have some fun activities for the princesses and knights. It’ll be truly magical time!
All royal family members invited. But no dragons, please. 🐲😉 We hope you can make it!
Princess Juniper’s Castle:
{ADDRESS}
Driveway and street parking are available for your royal carriages. Take the footpath around the right-side of the castle to join us out back by the “moat.” We’ll be there, rain or shine! 🏰
Kindly RSVP by Saturday, May 22nd so we can ensure to have plenty food for our royal feast.
The King & Queen are requesting no gifts for the birthday girl, but she would be delighted to receive a handwritten birthday card from her friends!
Party Decor: Princess Castle Backdrop
I love adding some instant party atmosphere with a fun backdrop behind our food table. (Case in point: this ice cream cone balloon backdrop from Juniper’s 2nd birthday.)
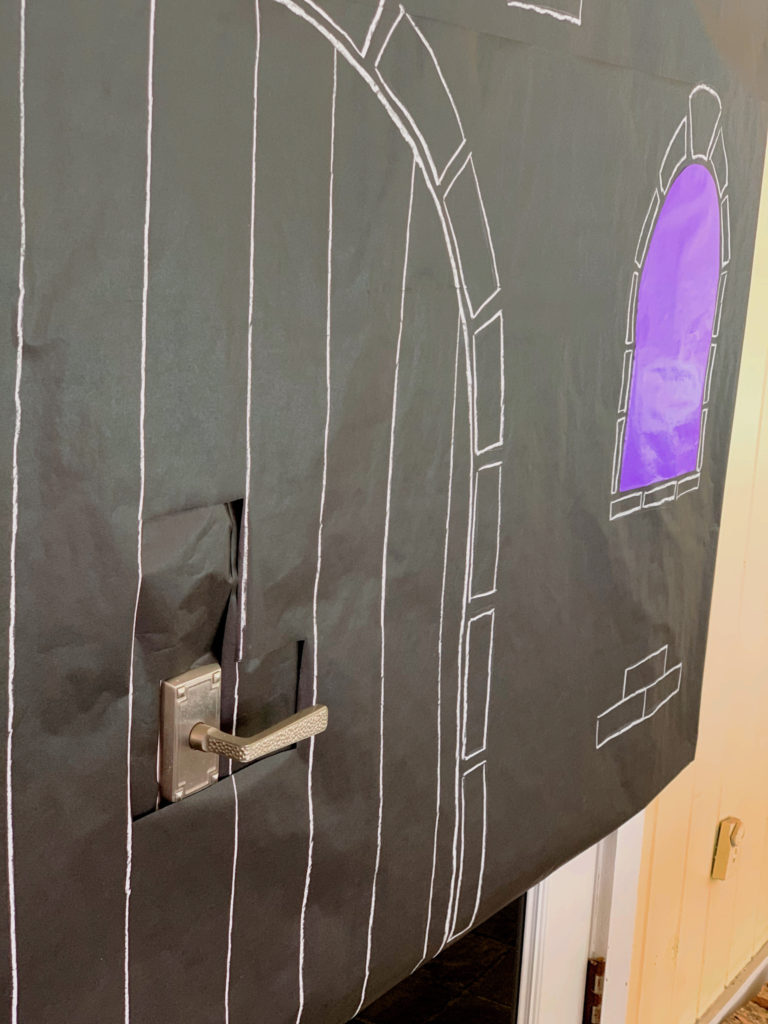
And I was mega-inspired when I came across this DIY castle backdrop by Megan from Balancing Home, especially since I had a roll of black kraft paper and white chalk on hand already. I made my own adaptation to the design, incorporating purple wrapping paper from the dollar store and some gold balloons, and it immediately transformed our pool area into a magical kingdom.
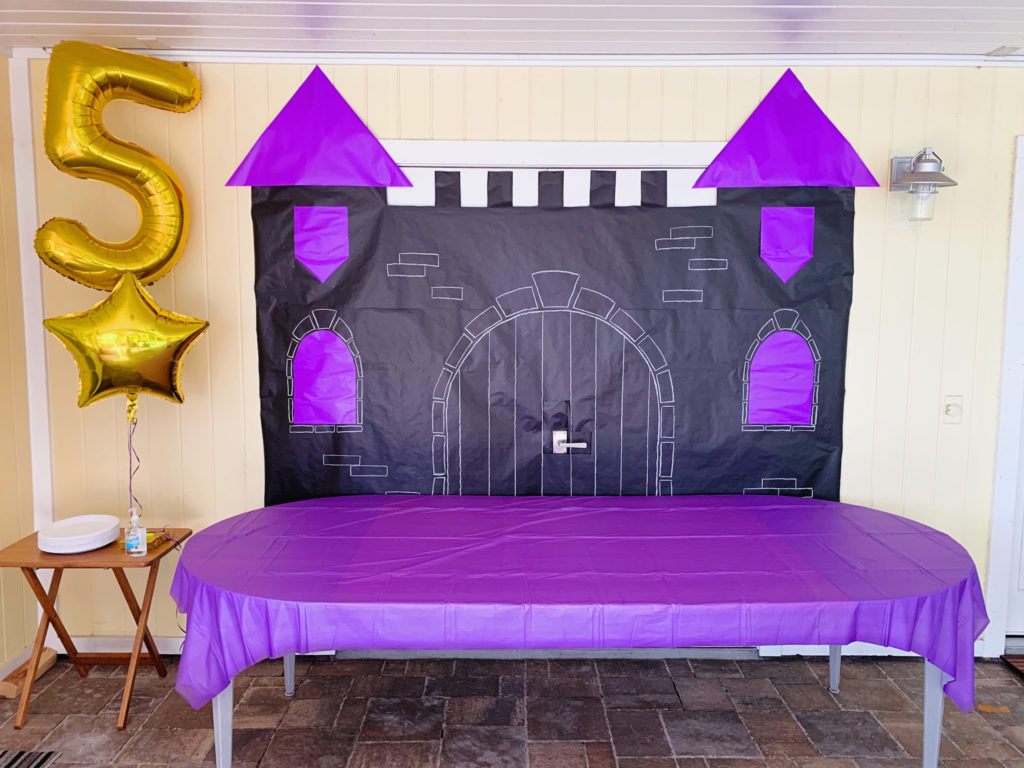
A few notes on the execution of this backdrop for those planning to create their own:
- I hung this backdrop using a few push-pins across the top of door frame of some french doors the backdrop covered.
- I added the purple tower turrets separately, securing them with painter’s tape.
- This was a happy accident, but as I was trying to figure out how to deal with laying the backdrop over the door handle, I realized I could incorporate the handle into the design. Eureka! So, I just cut a hole for the handle to poke through so it would all lay flat.
- The chalk was very easy to work with, but it’s also easy to smear. So grab a partner to help hang it…and put those communication skills to the test! {Tee hee.}
- If I had had a little more time, I would have added some gold emblems to the two shields on the castle. Perhaps a heart on one and a crown on the other.
Of course I had to snap some shots of our 5-year-old royal highness, Princess Juniper, in front of her castle!
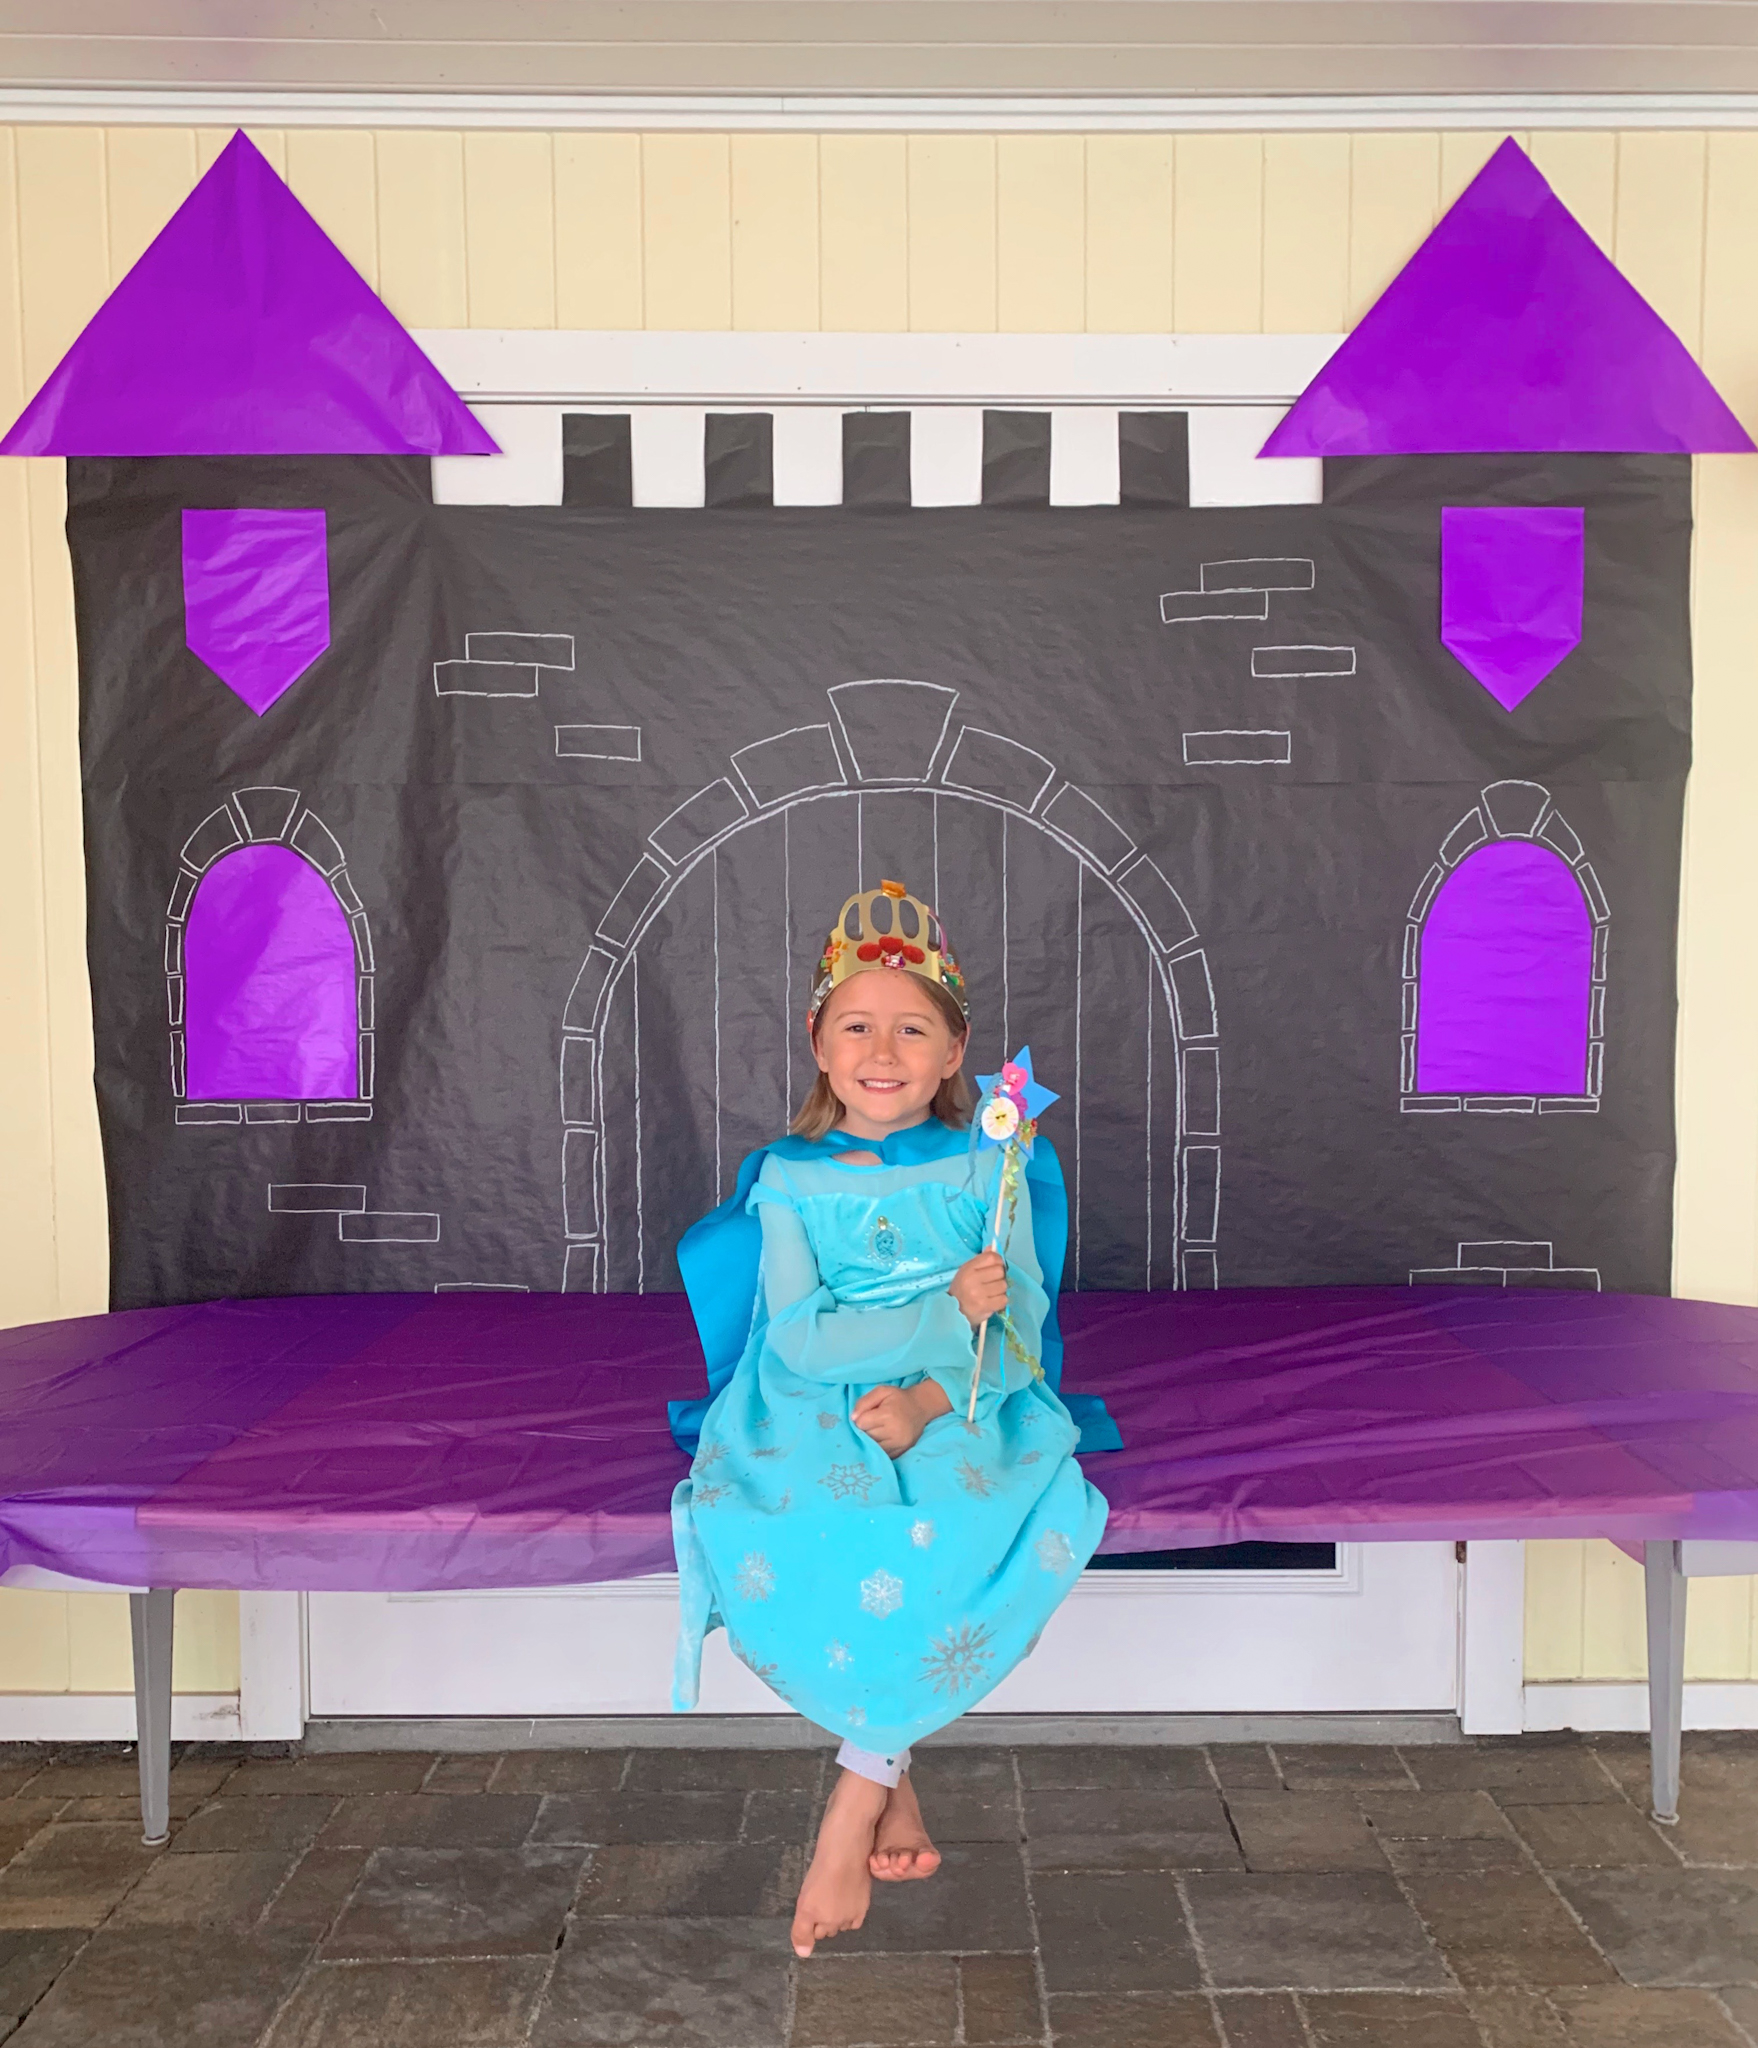
(Footwear is optional for princesses in Florida.)
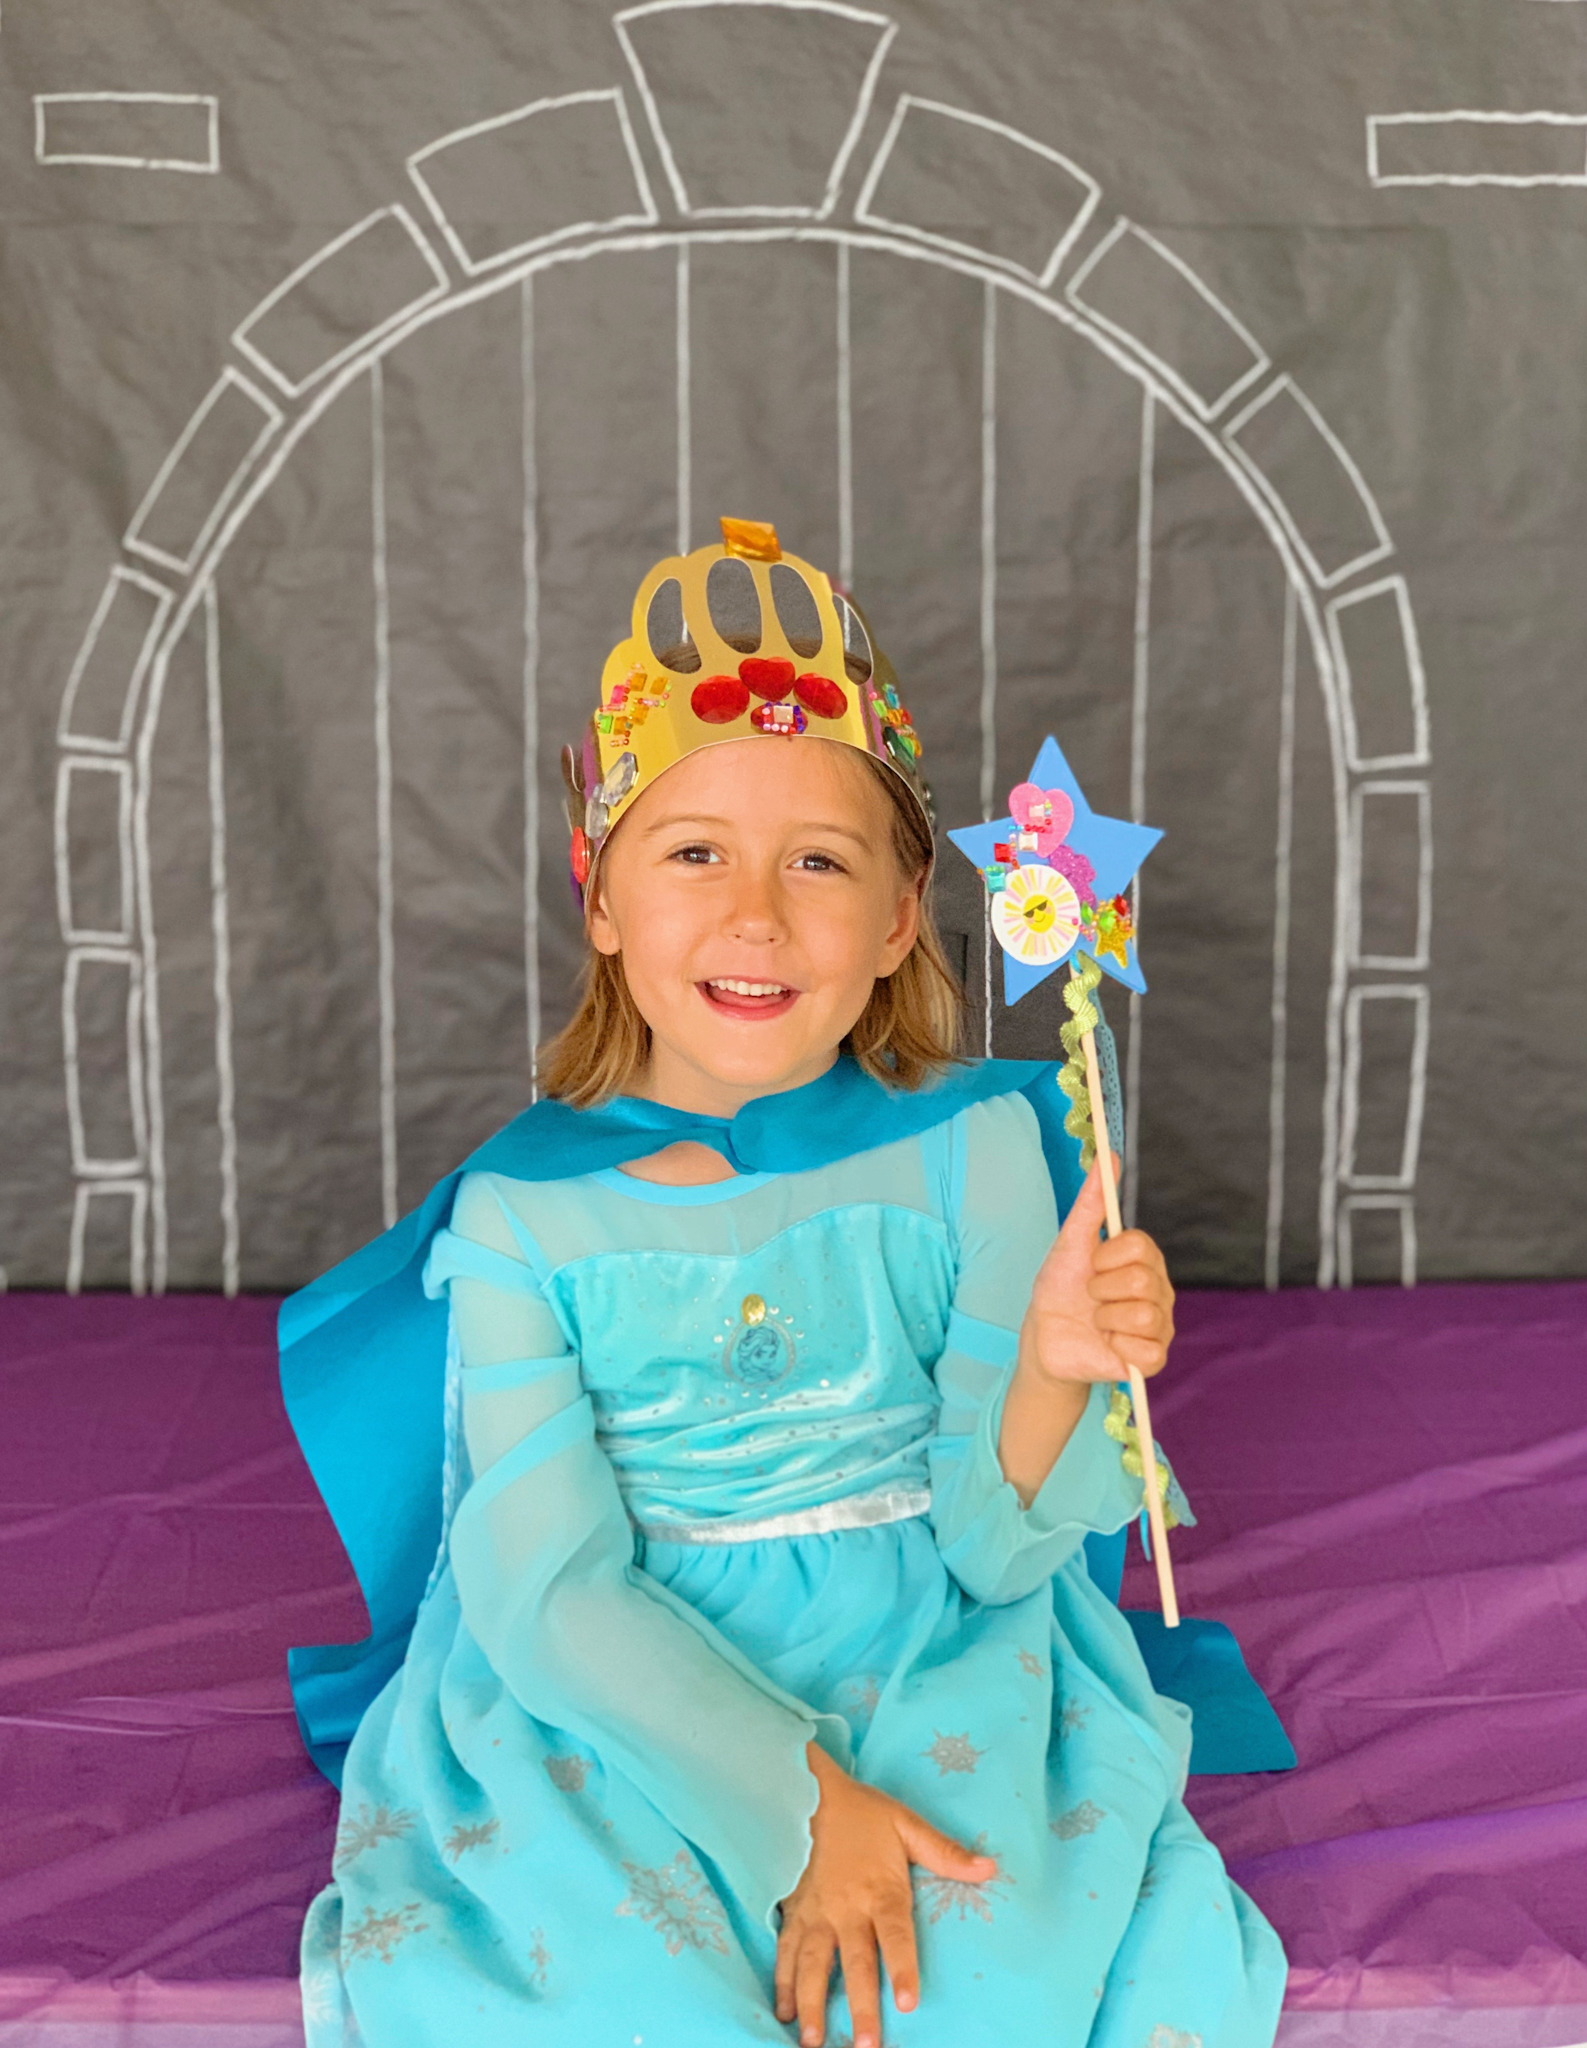
Looking regal indeed!
Party Decor: Golden Birthday Banner & Photo Display
In celebration of Juniper’s “Golden Birthday,” turning 5 on June 5th, I printed out photos from each of her birthdays, mounted them on white cardstock with space at the bottom for writing out her ages, and strung them across some twine with mini clothespins.
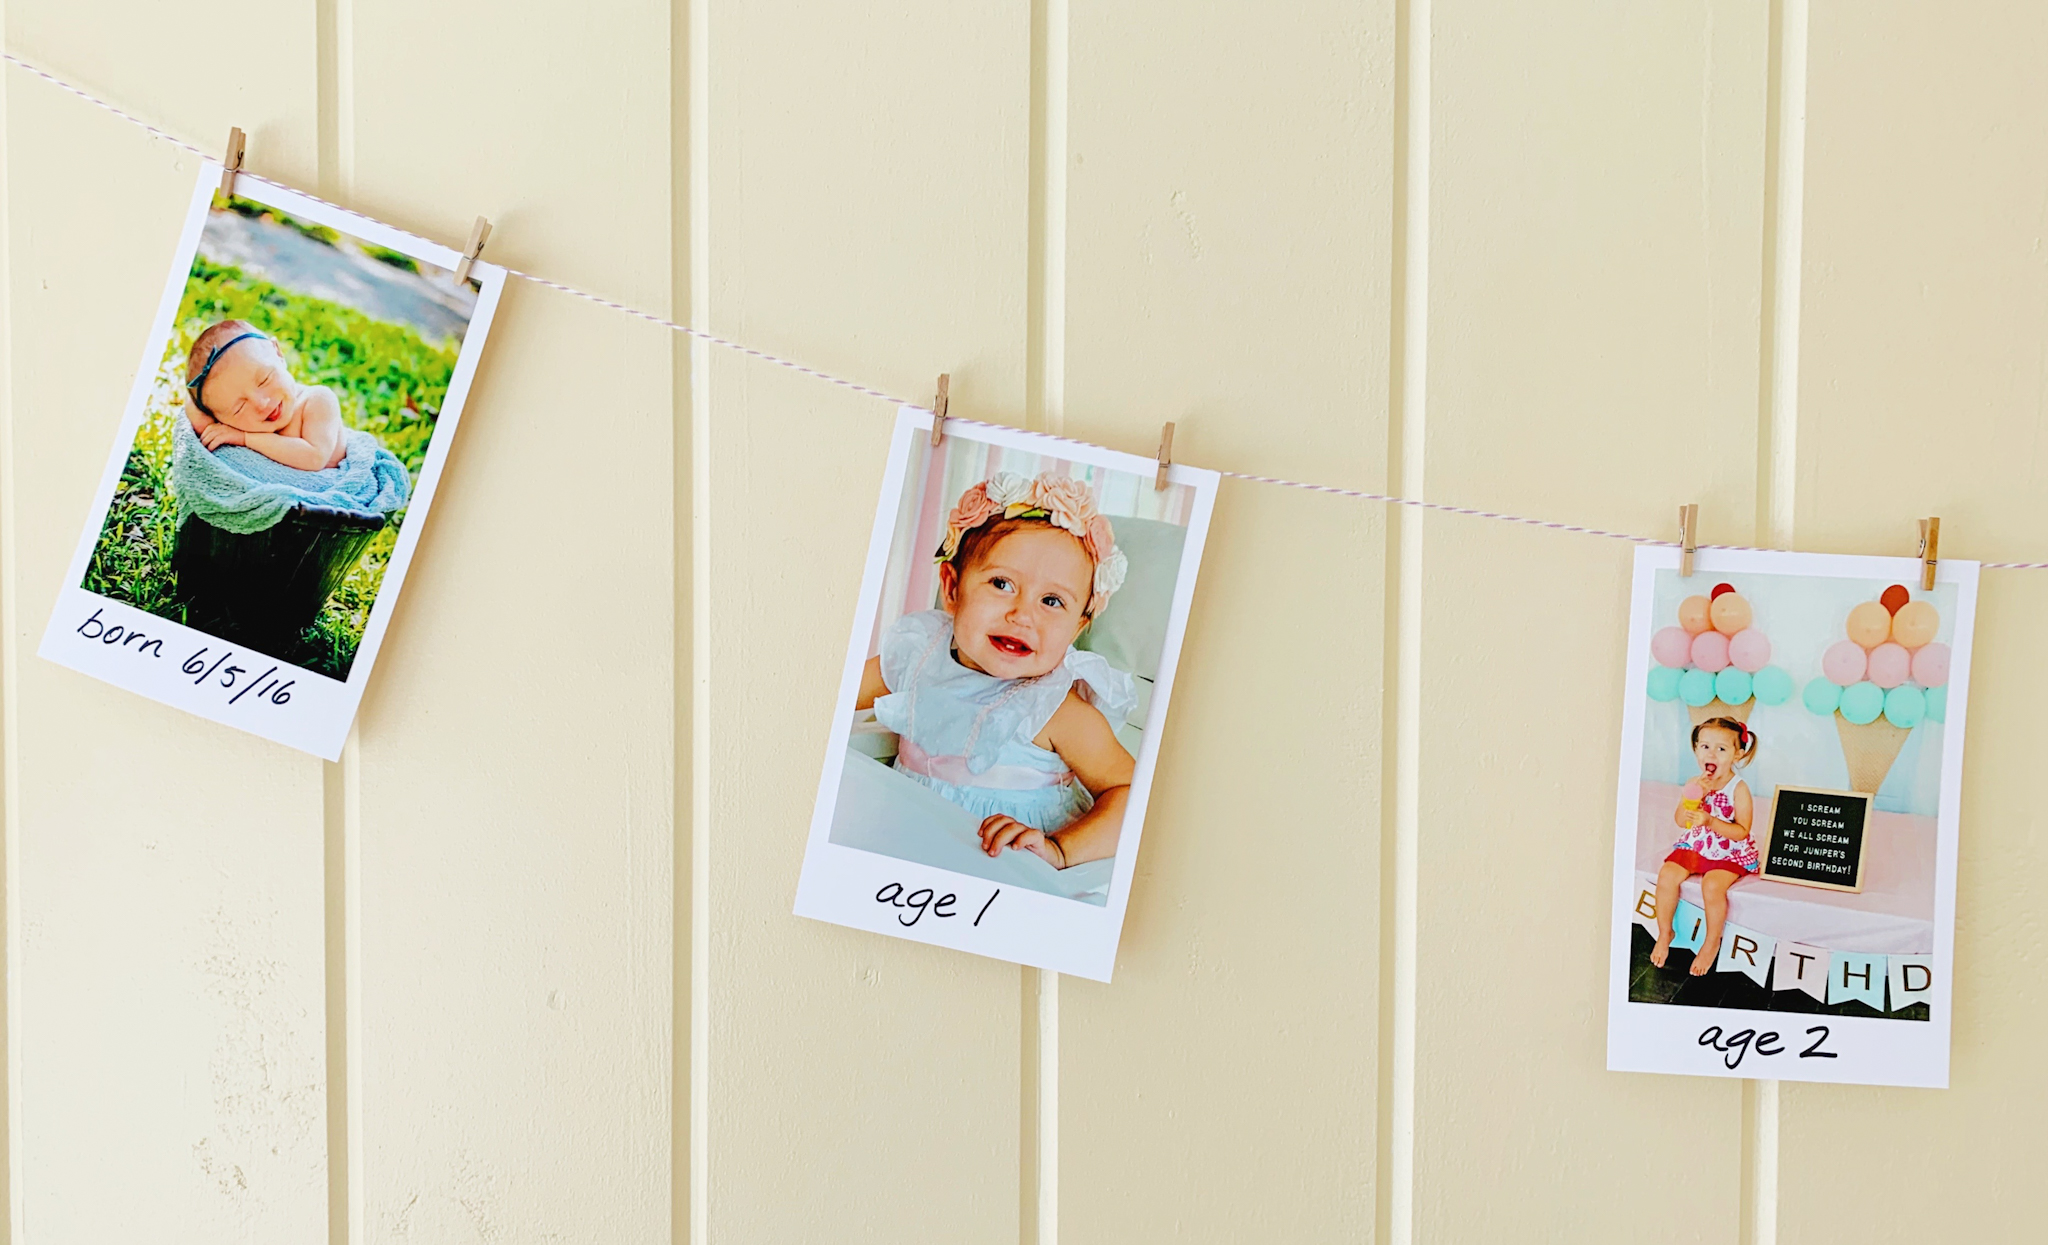
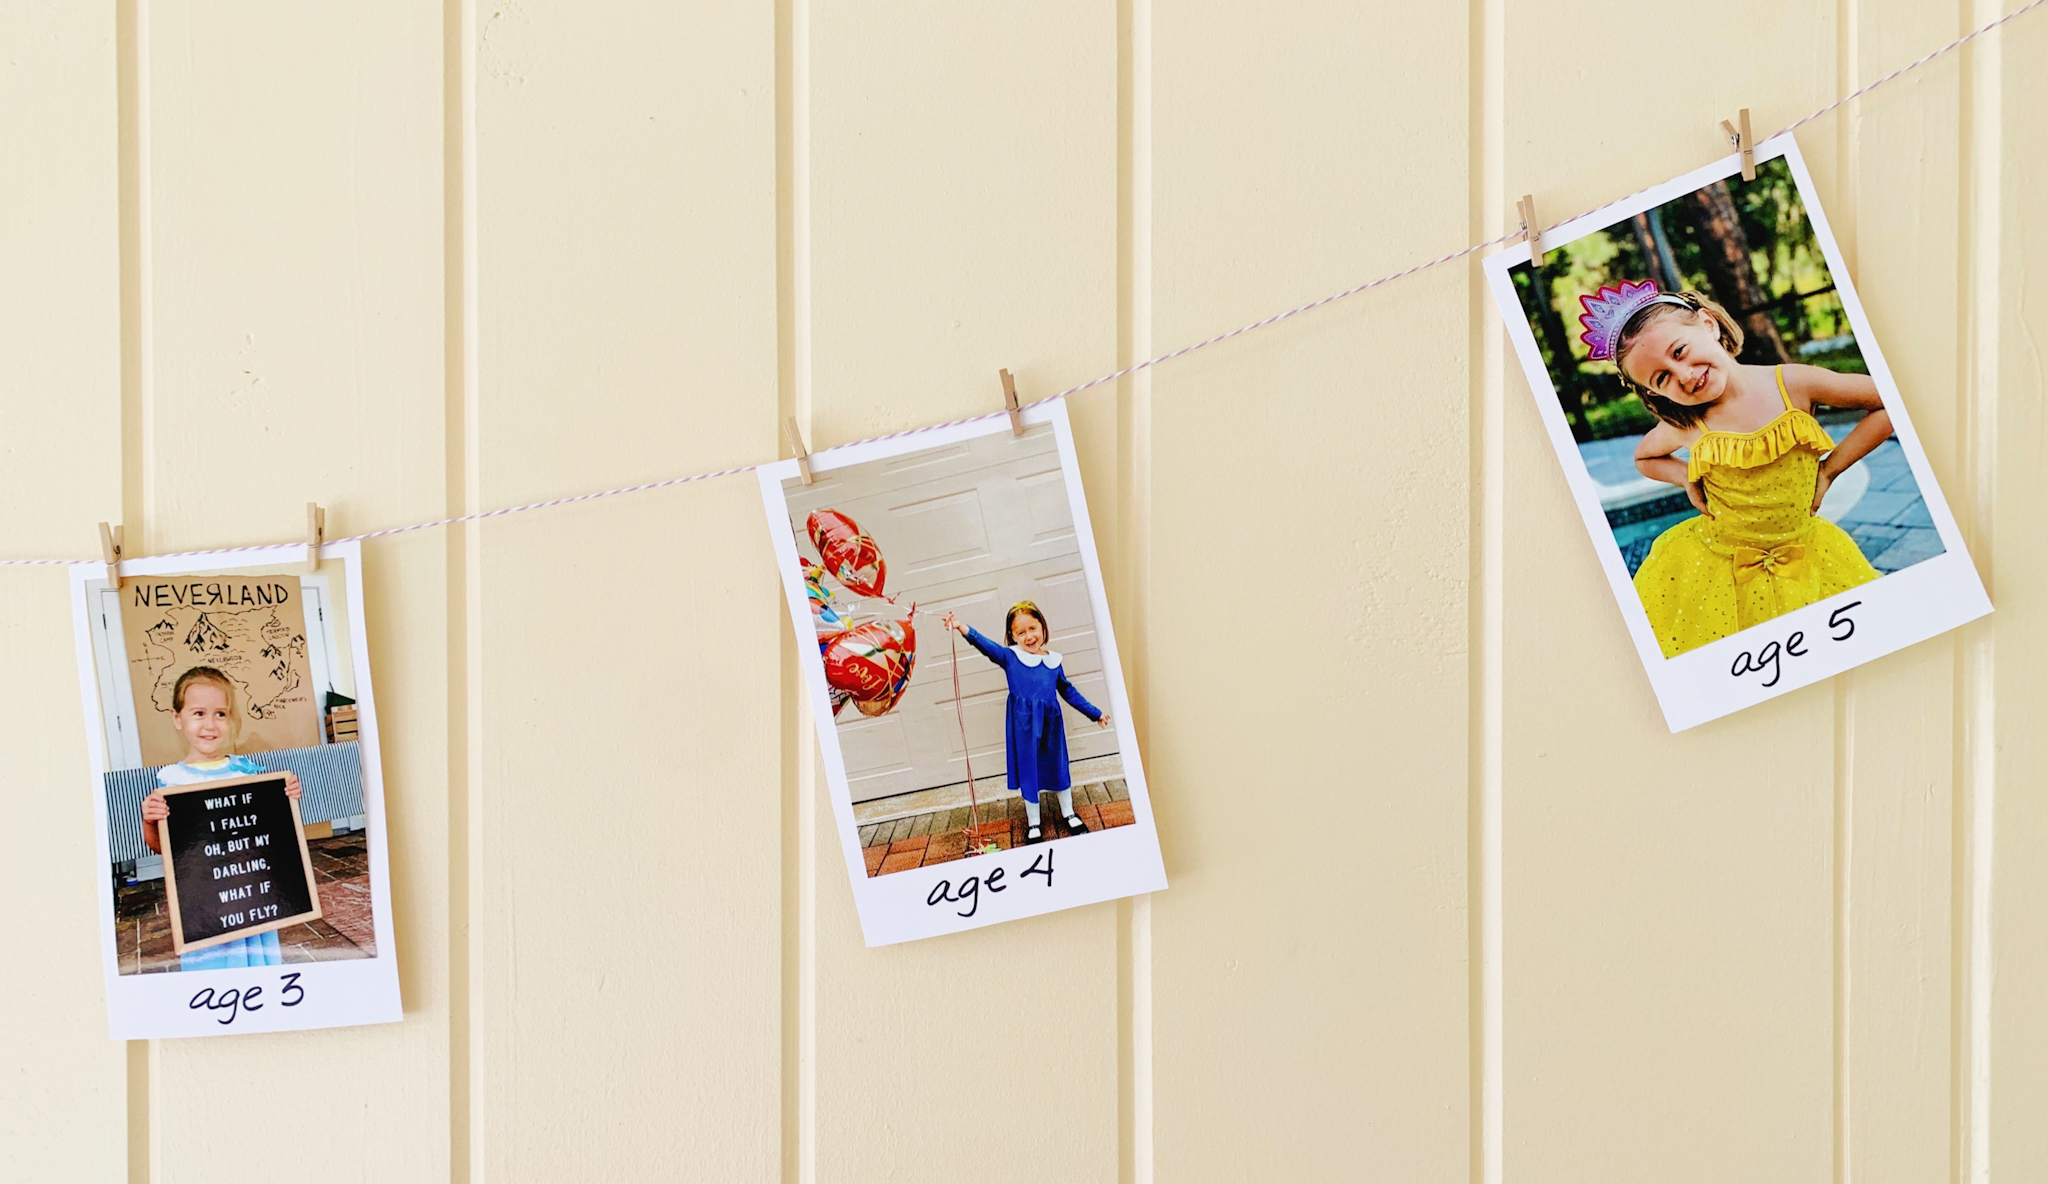
I then created a “Happy Golden Birthday” banner by creating my own “golden” sign with white cardstock and gold sticker letters to display in the middle of a birthday banner I had on hand. It made for really festive decor above our 4th activity station.
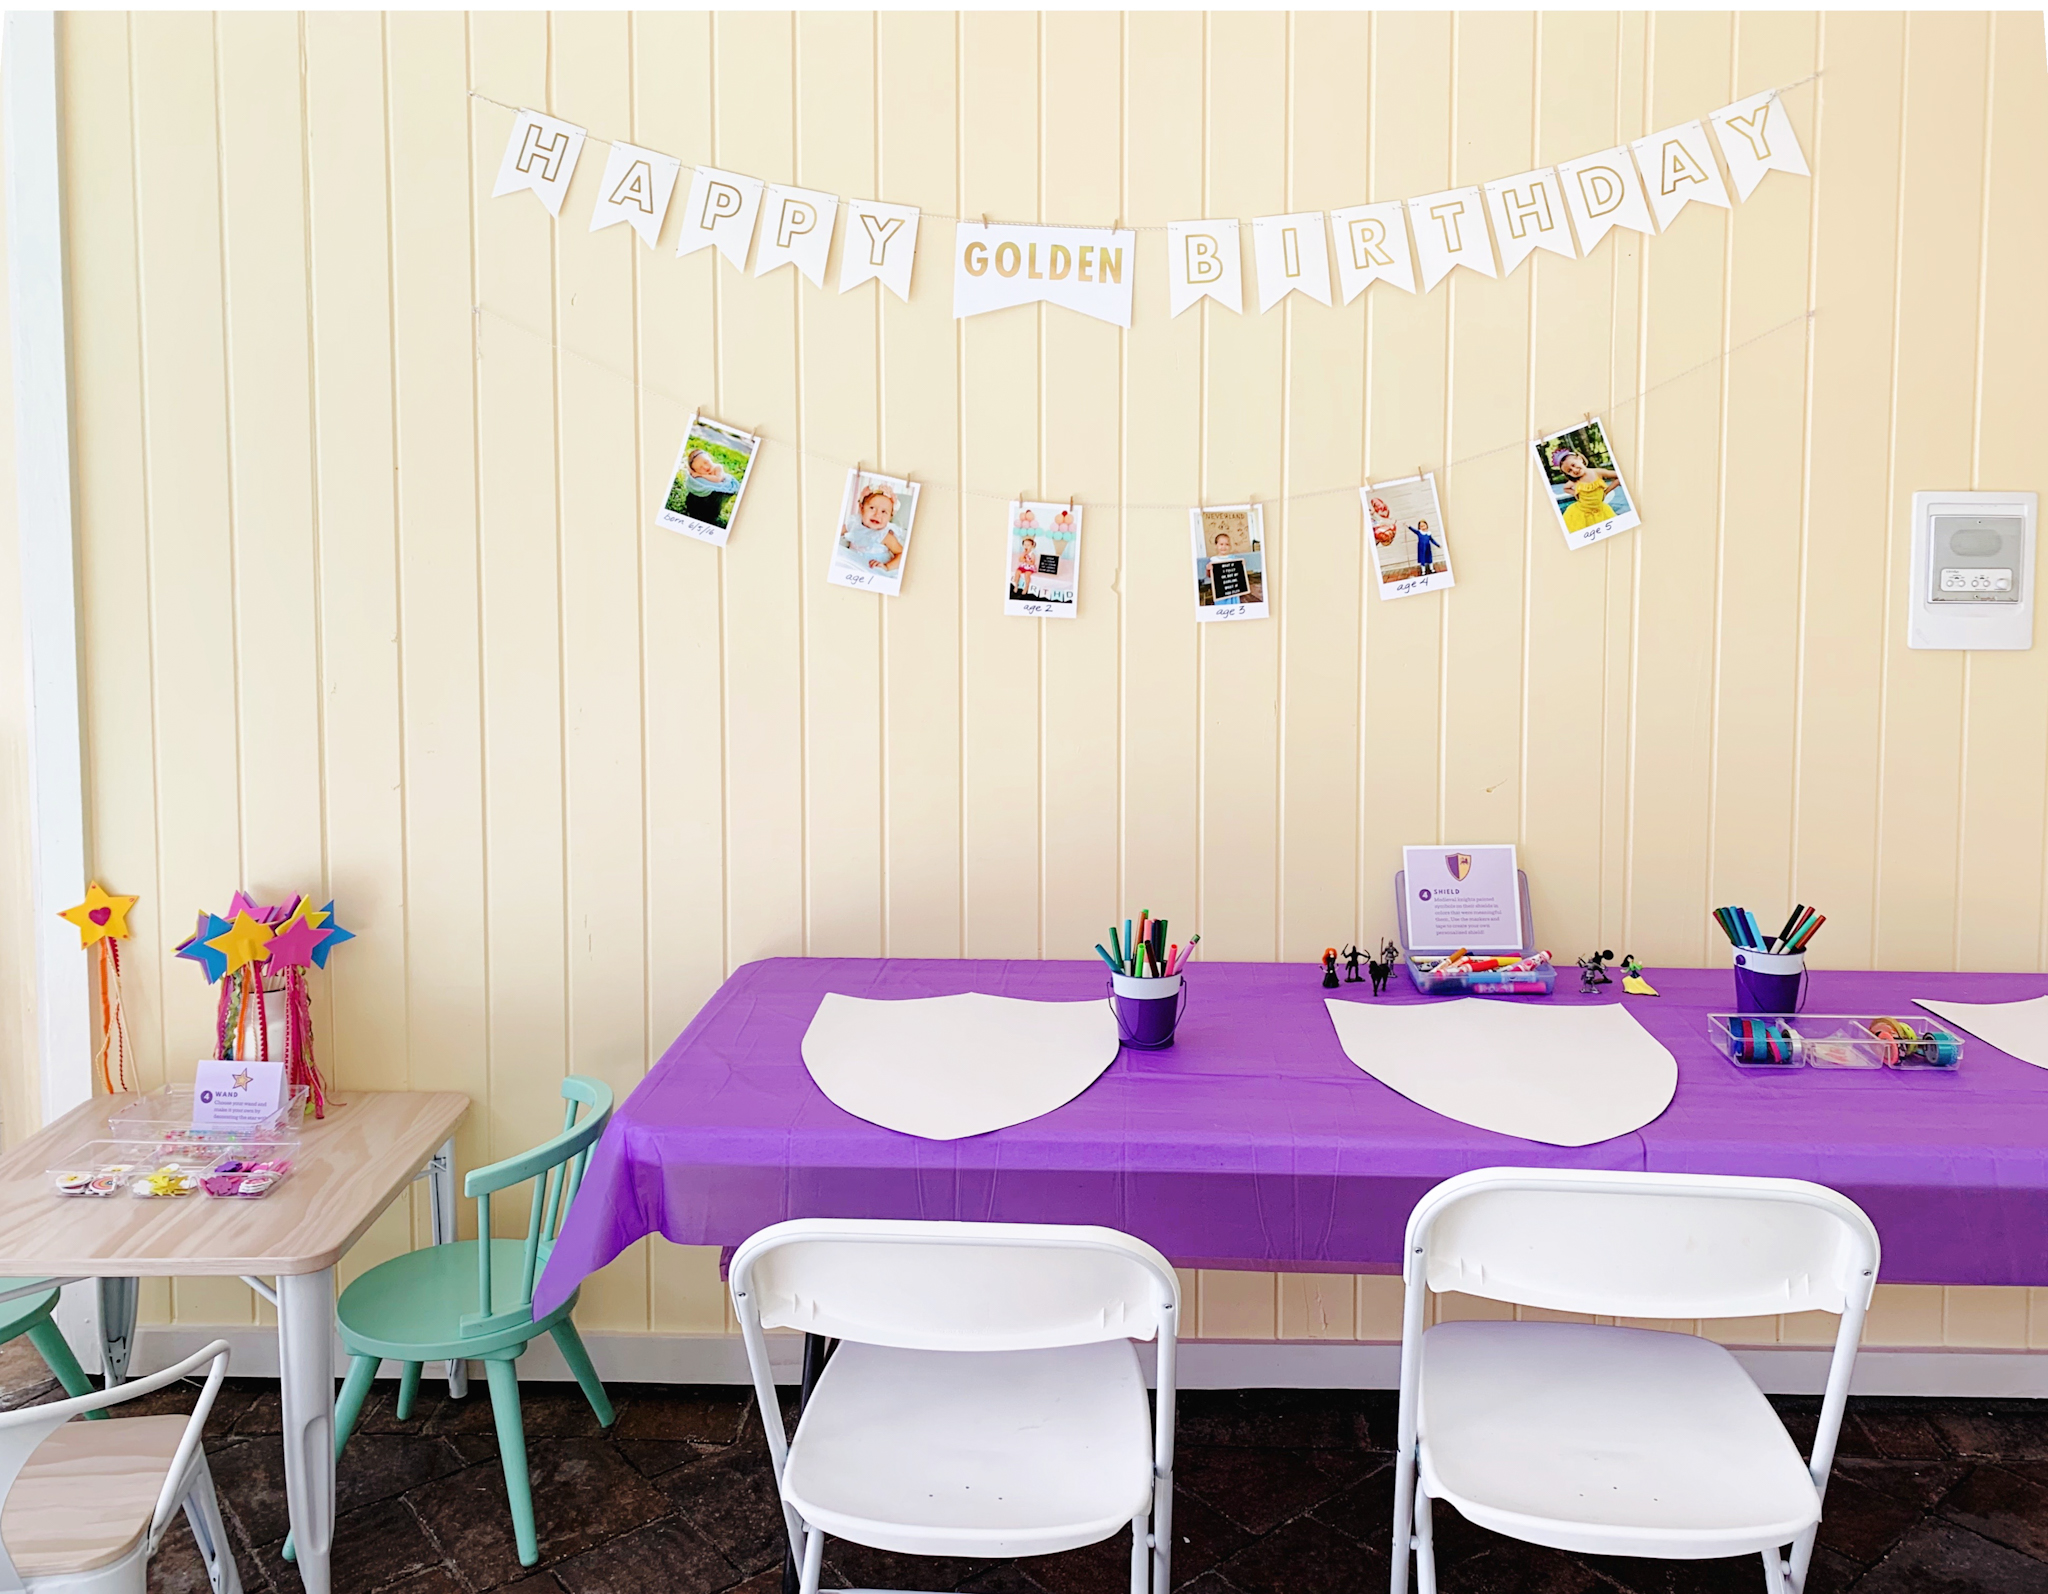
We loved the banner so much, we moved it inside after the party and left it up for a few months. I think it could be fun to hang up the photos each year, adding new ones to the banner with each birthday.
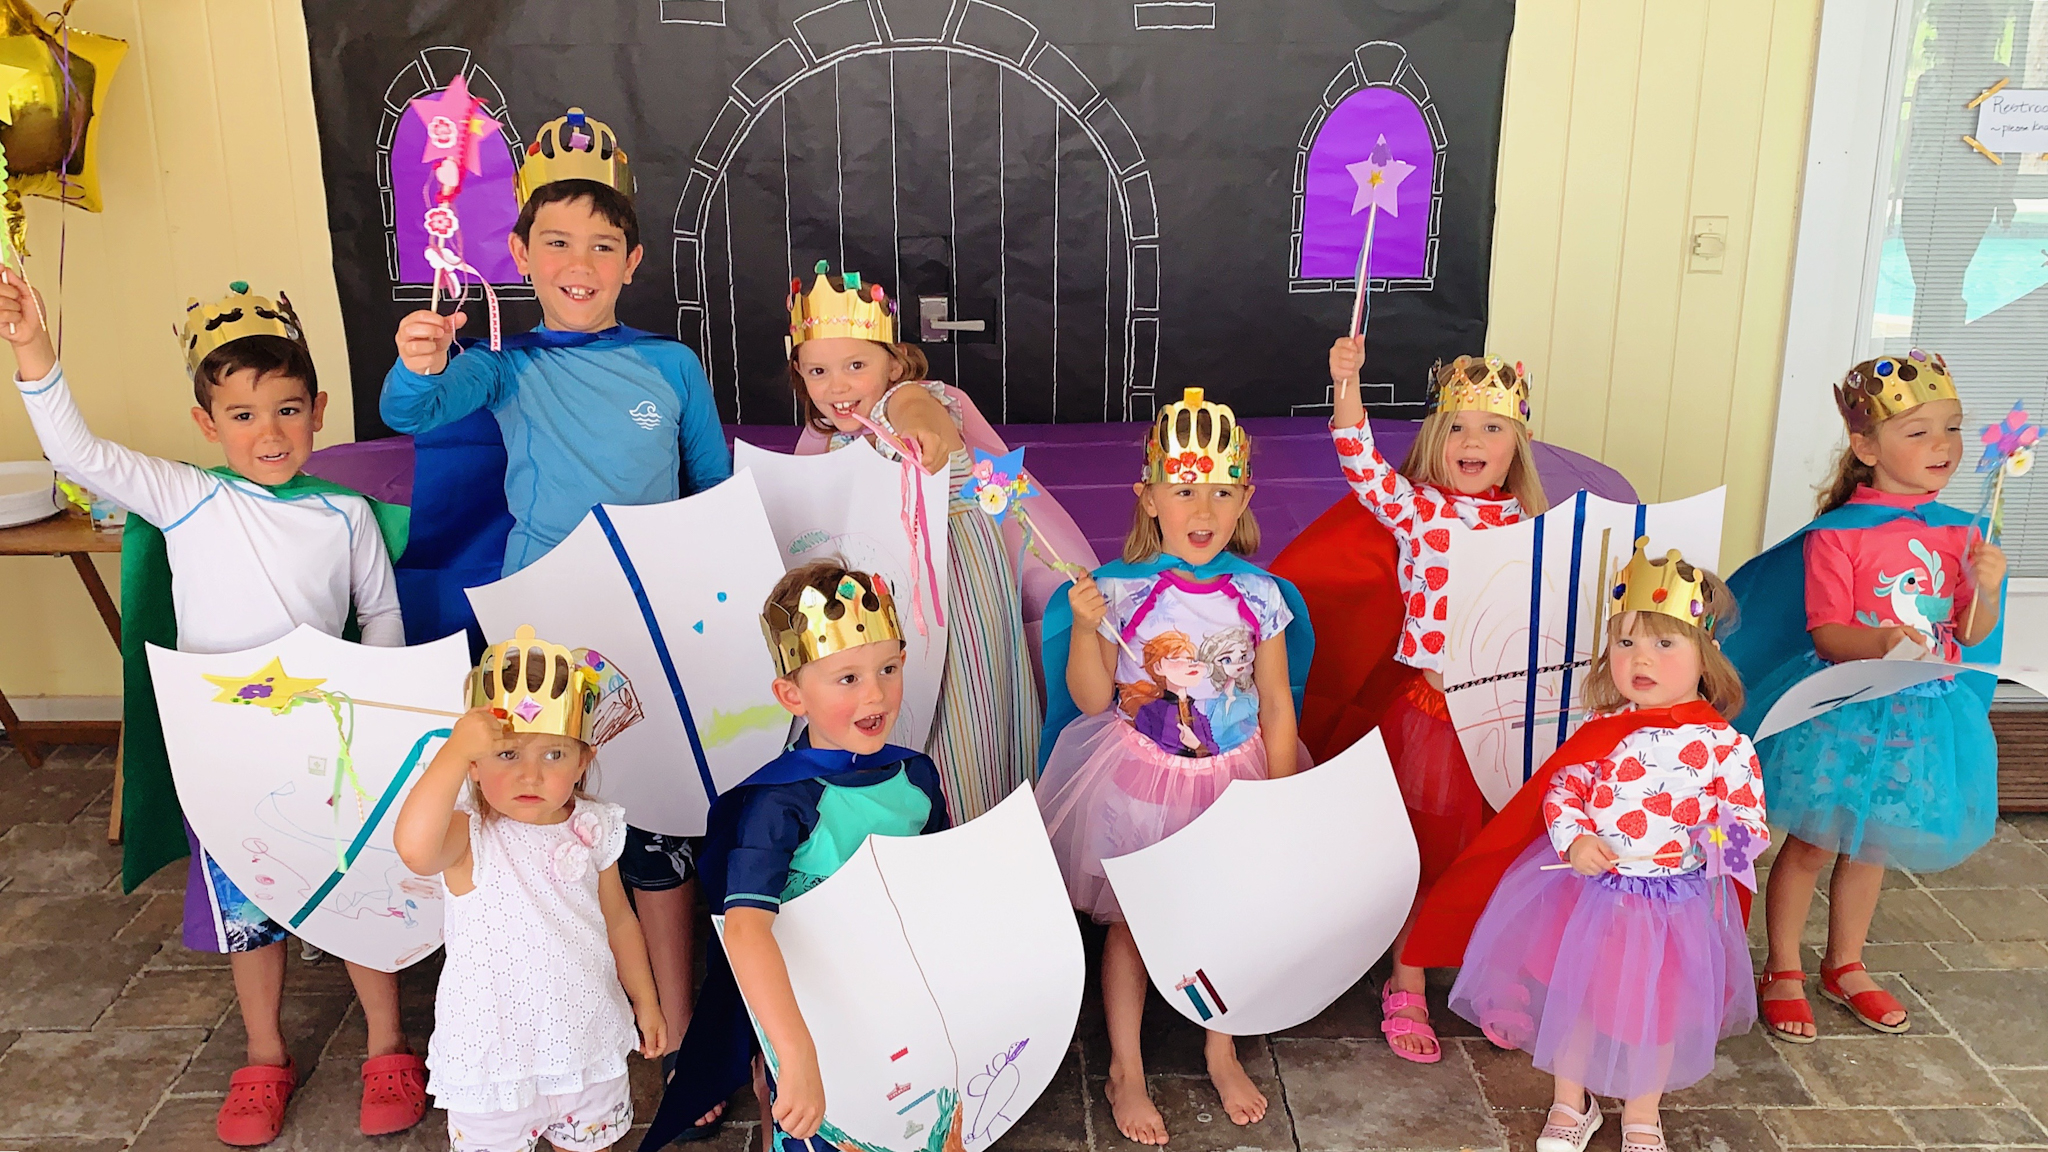
Kids Party Activities
With Pepper’s Puppy Paw-ty on the brain from just a few weeks earlier, I decided to create a similar experience for the party guests where they would journey from station to station, completing different activities as princesses and knights!
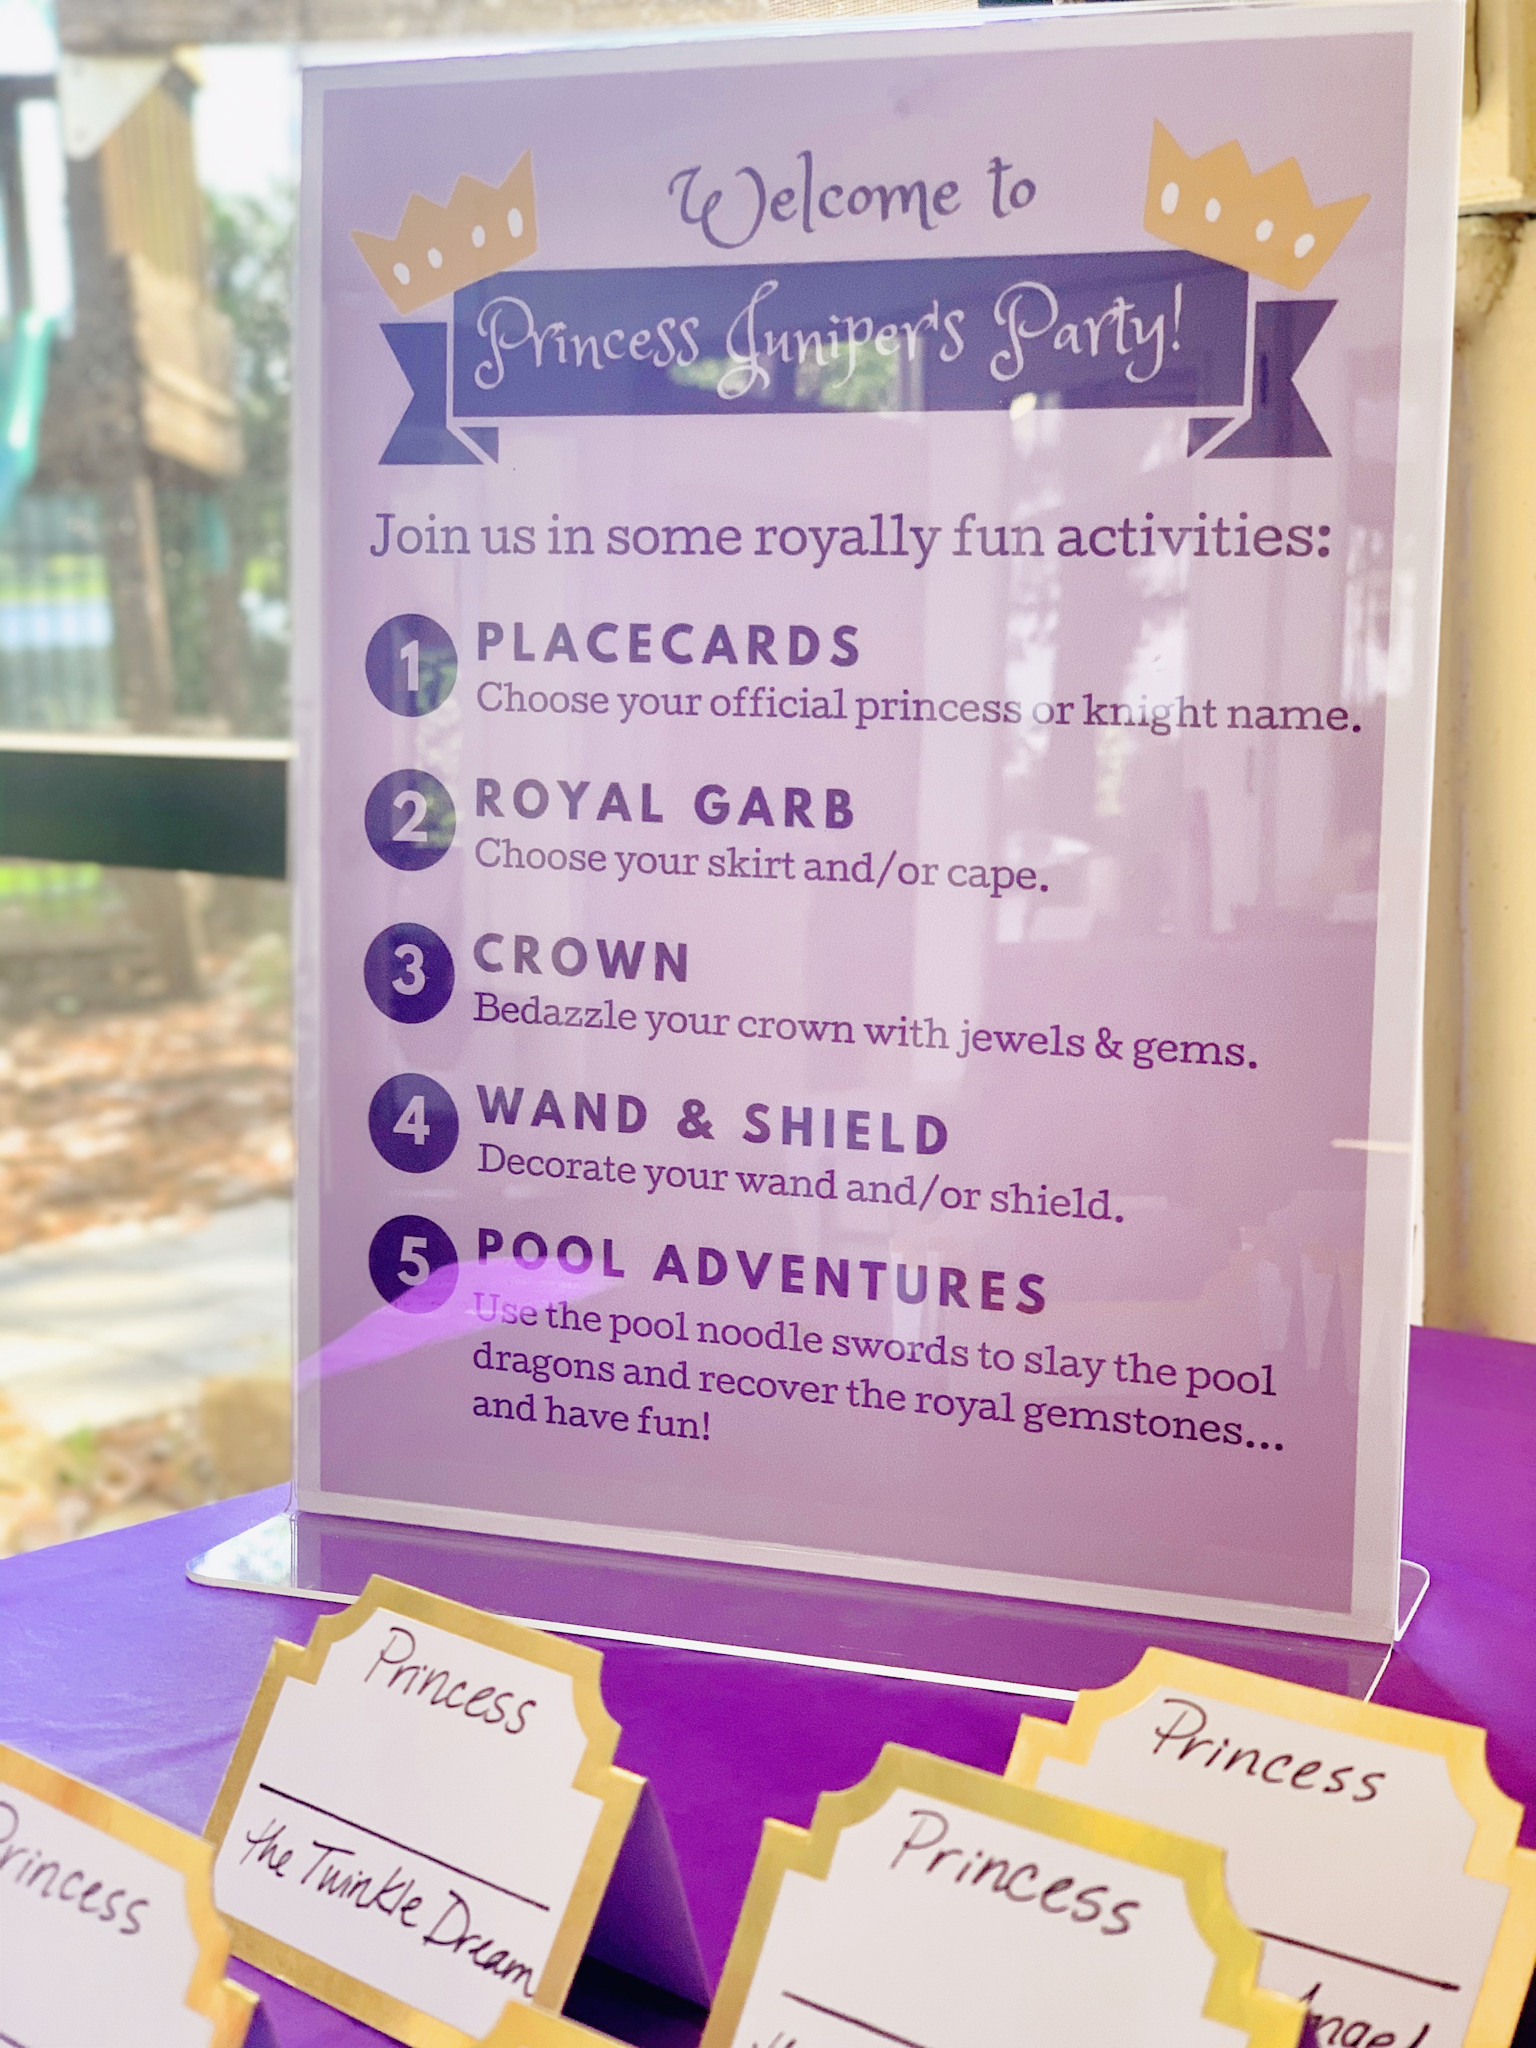
So, I used PicMonkey to create my own printable to help guide the kids step-by-step through 5 different stations, plus table signs at each station:
- 1. PLACECARDS: Choose your official princess or knight name.
- 2. ROYAL GARB: Choose your skirt and/or cape.
- 3. CROWN: Bedazzle your crown with jewels & gems.
- 4. WAND & SHIELD: Decorate your wand and/or shield.
- 5. POOL ADVENTURES: Use the pool noodle swords to slay the pool dragons and recover the royal gemstones… and have fun!
And guess what? I’m happy to offer up all of the purple-colored printables I created for FREE for all newsletter subscribers. So you can sign up HERE to download your PDF or below in the nifty sign-up box.
And a few tips for the downloads:
- In the free download, you’ll find both a princess version and a knight version of the step-by-step printable with a space for filling in their name with a marker or alpha stickers.
- I recommend printing on white cardstock in your printer’s highest quality photo settings.
- For station 4, we gave party guests the choice of making a wand, a shield, or both! That’s why you’ll find two signs with the number 4.
- If you are not having a pool party, you can just use scissors to trim off the bottom of the printable with the 5th activity.
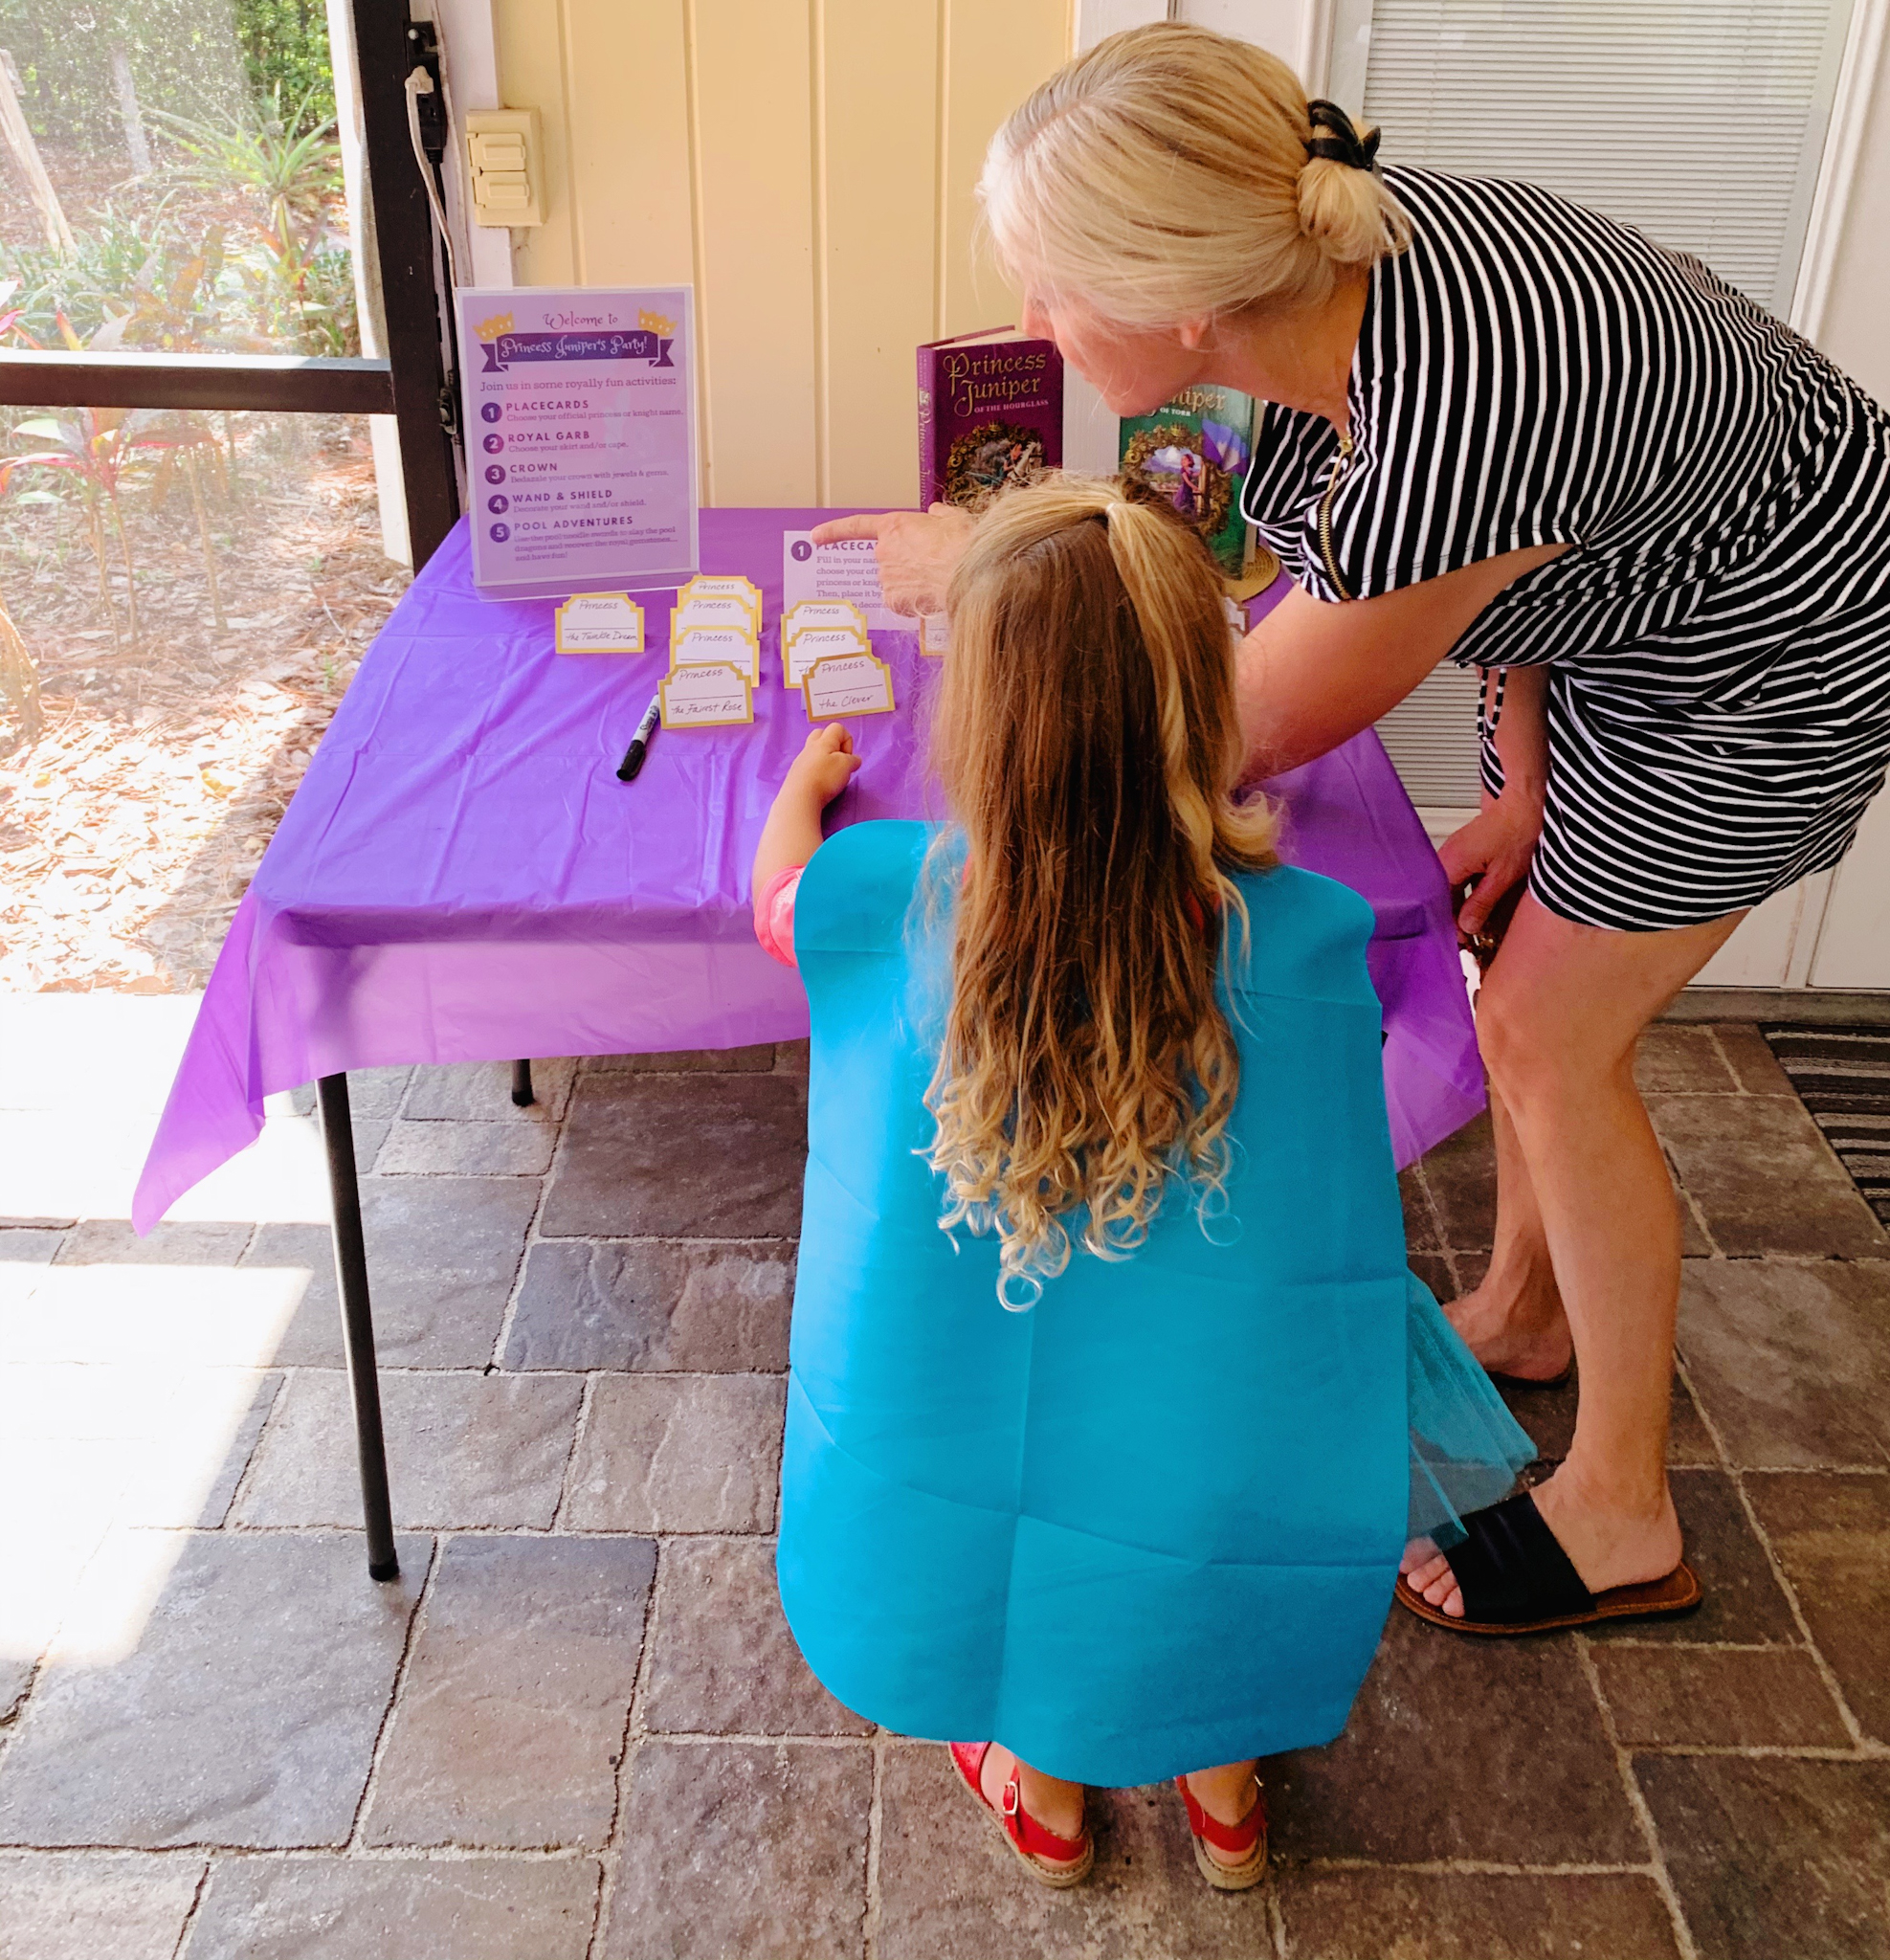
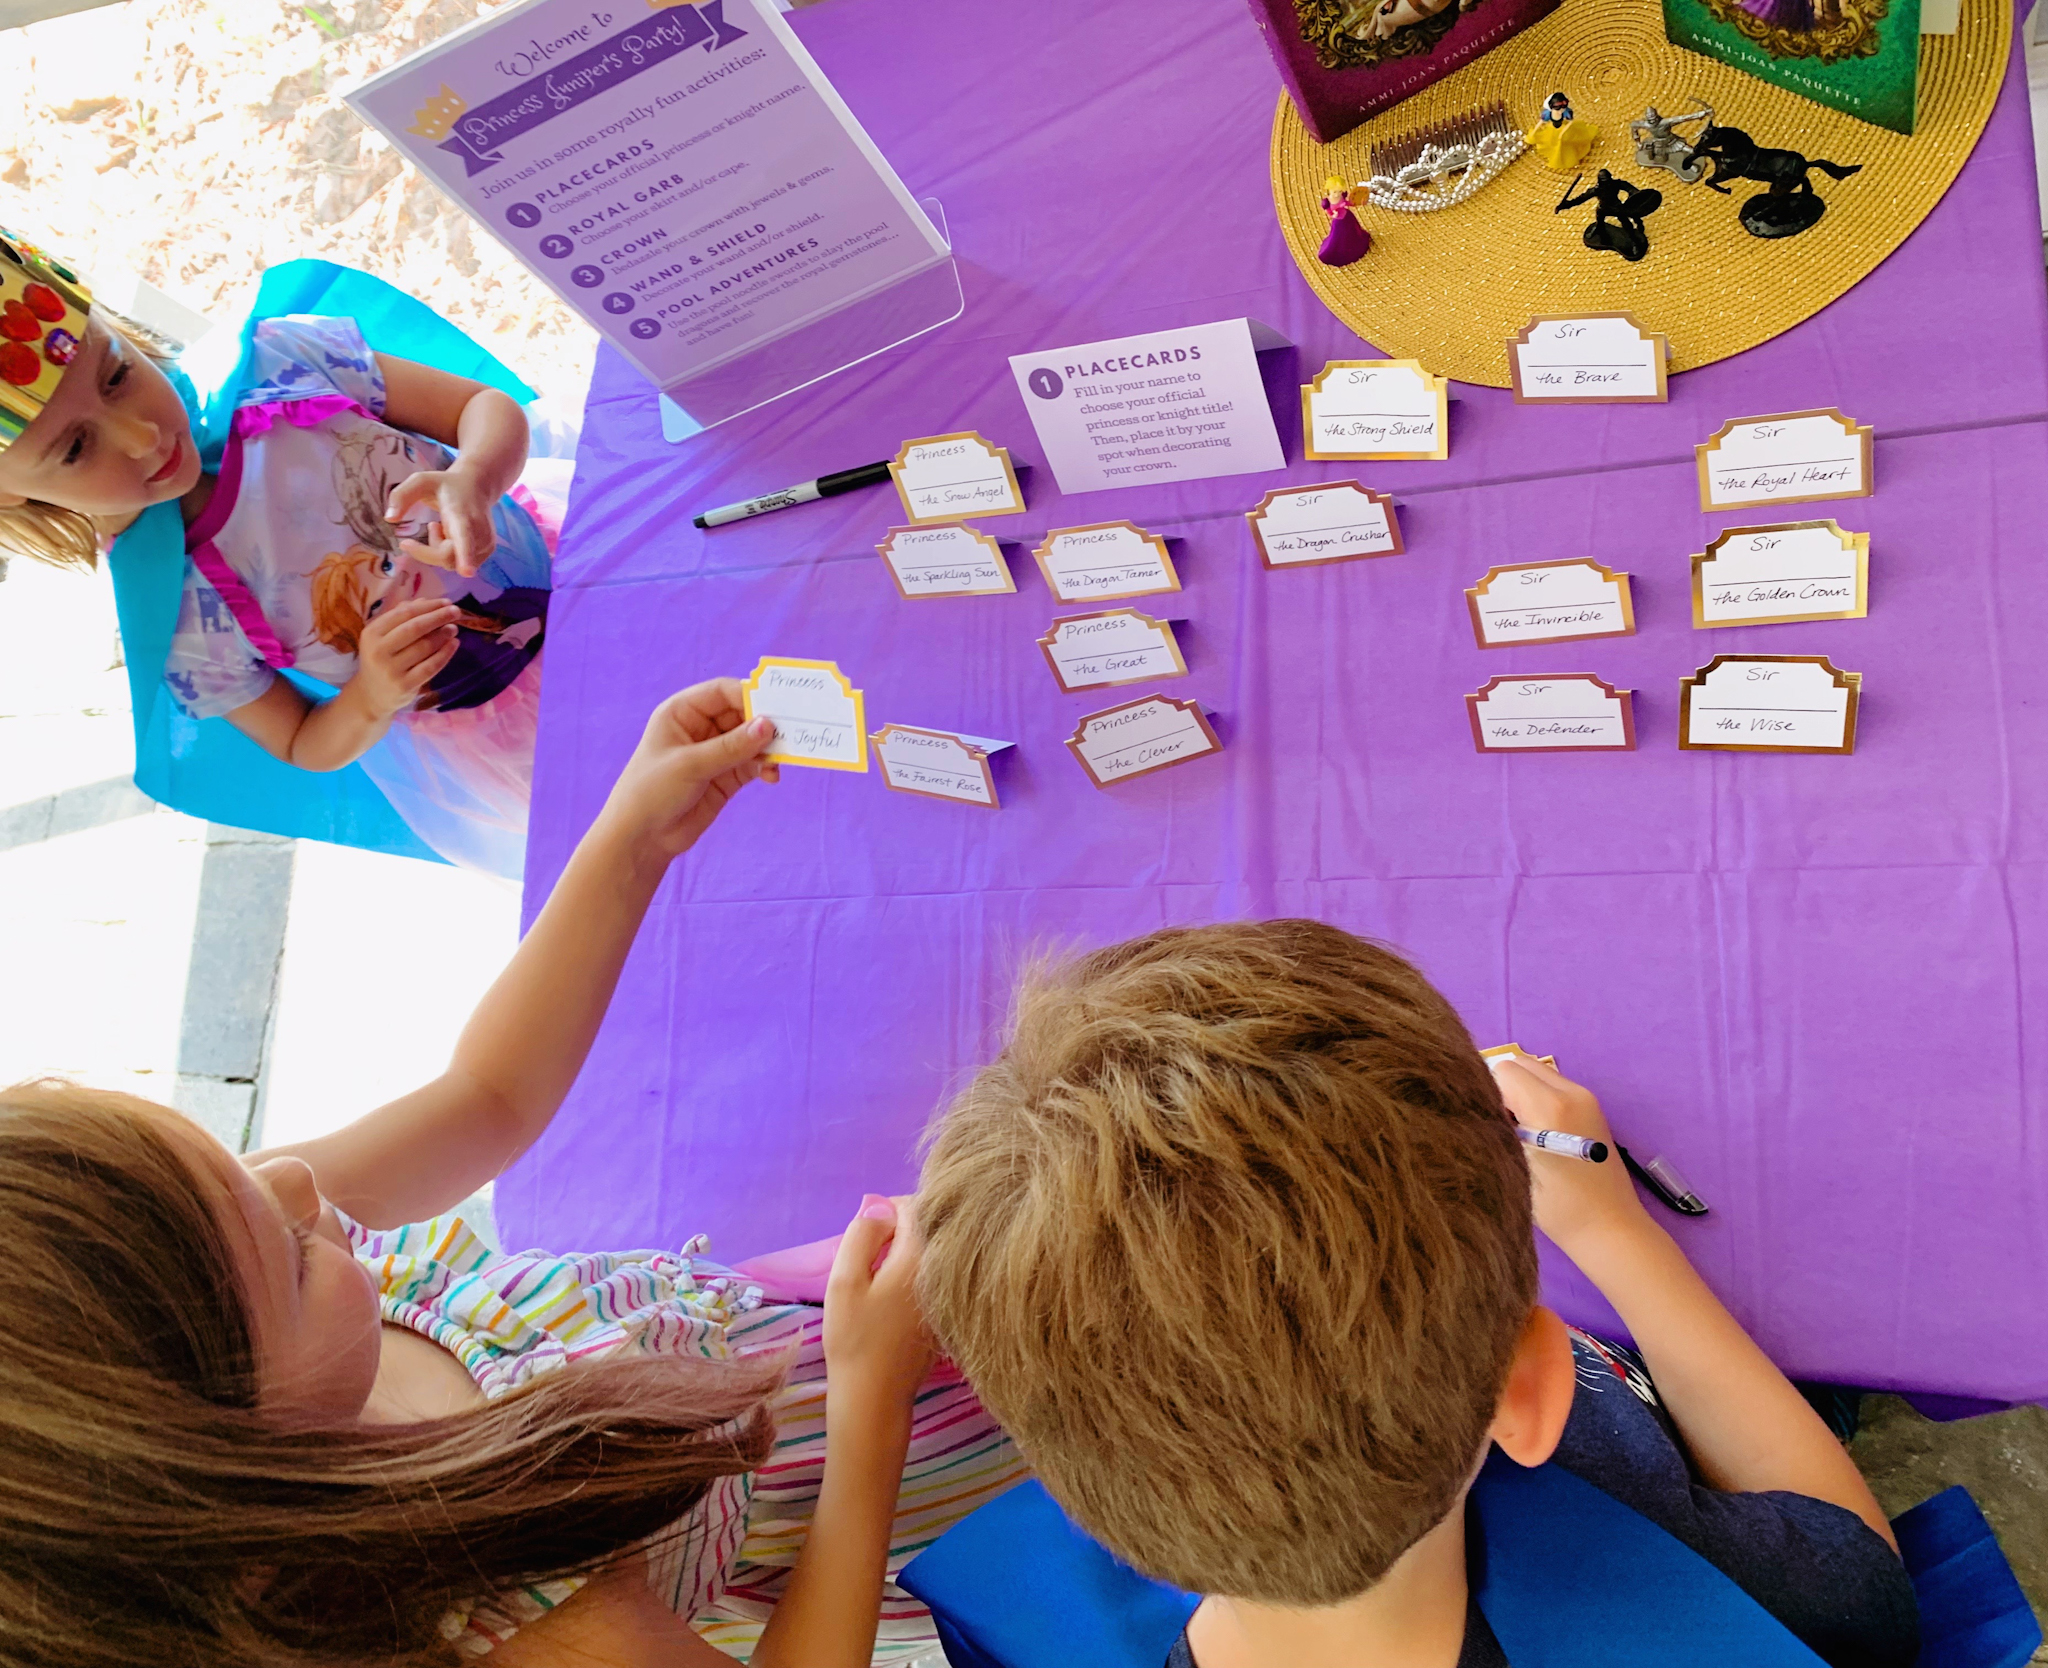
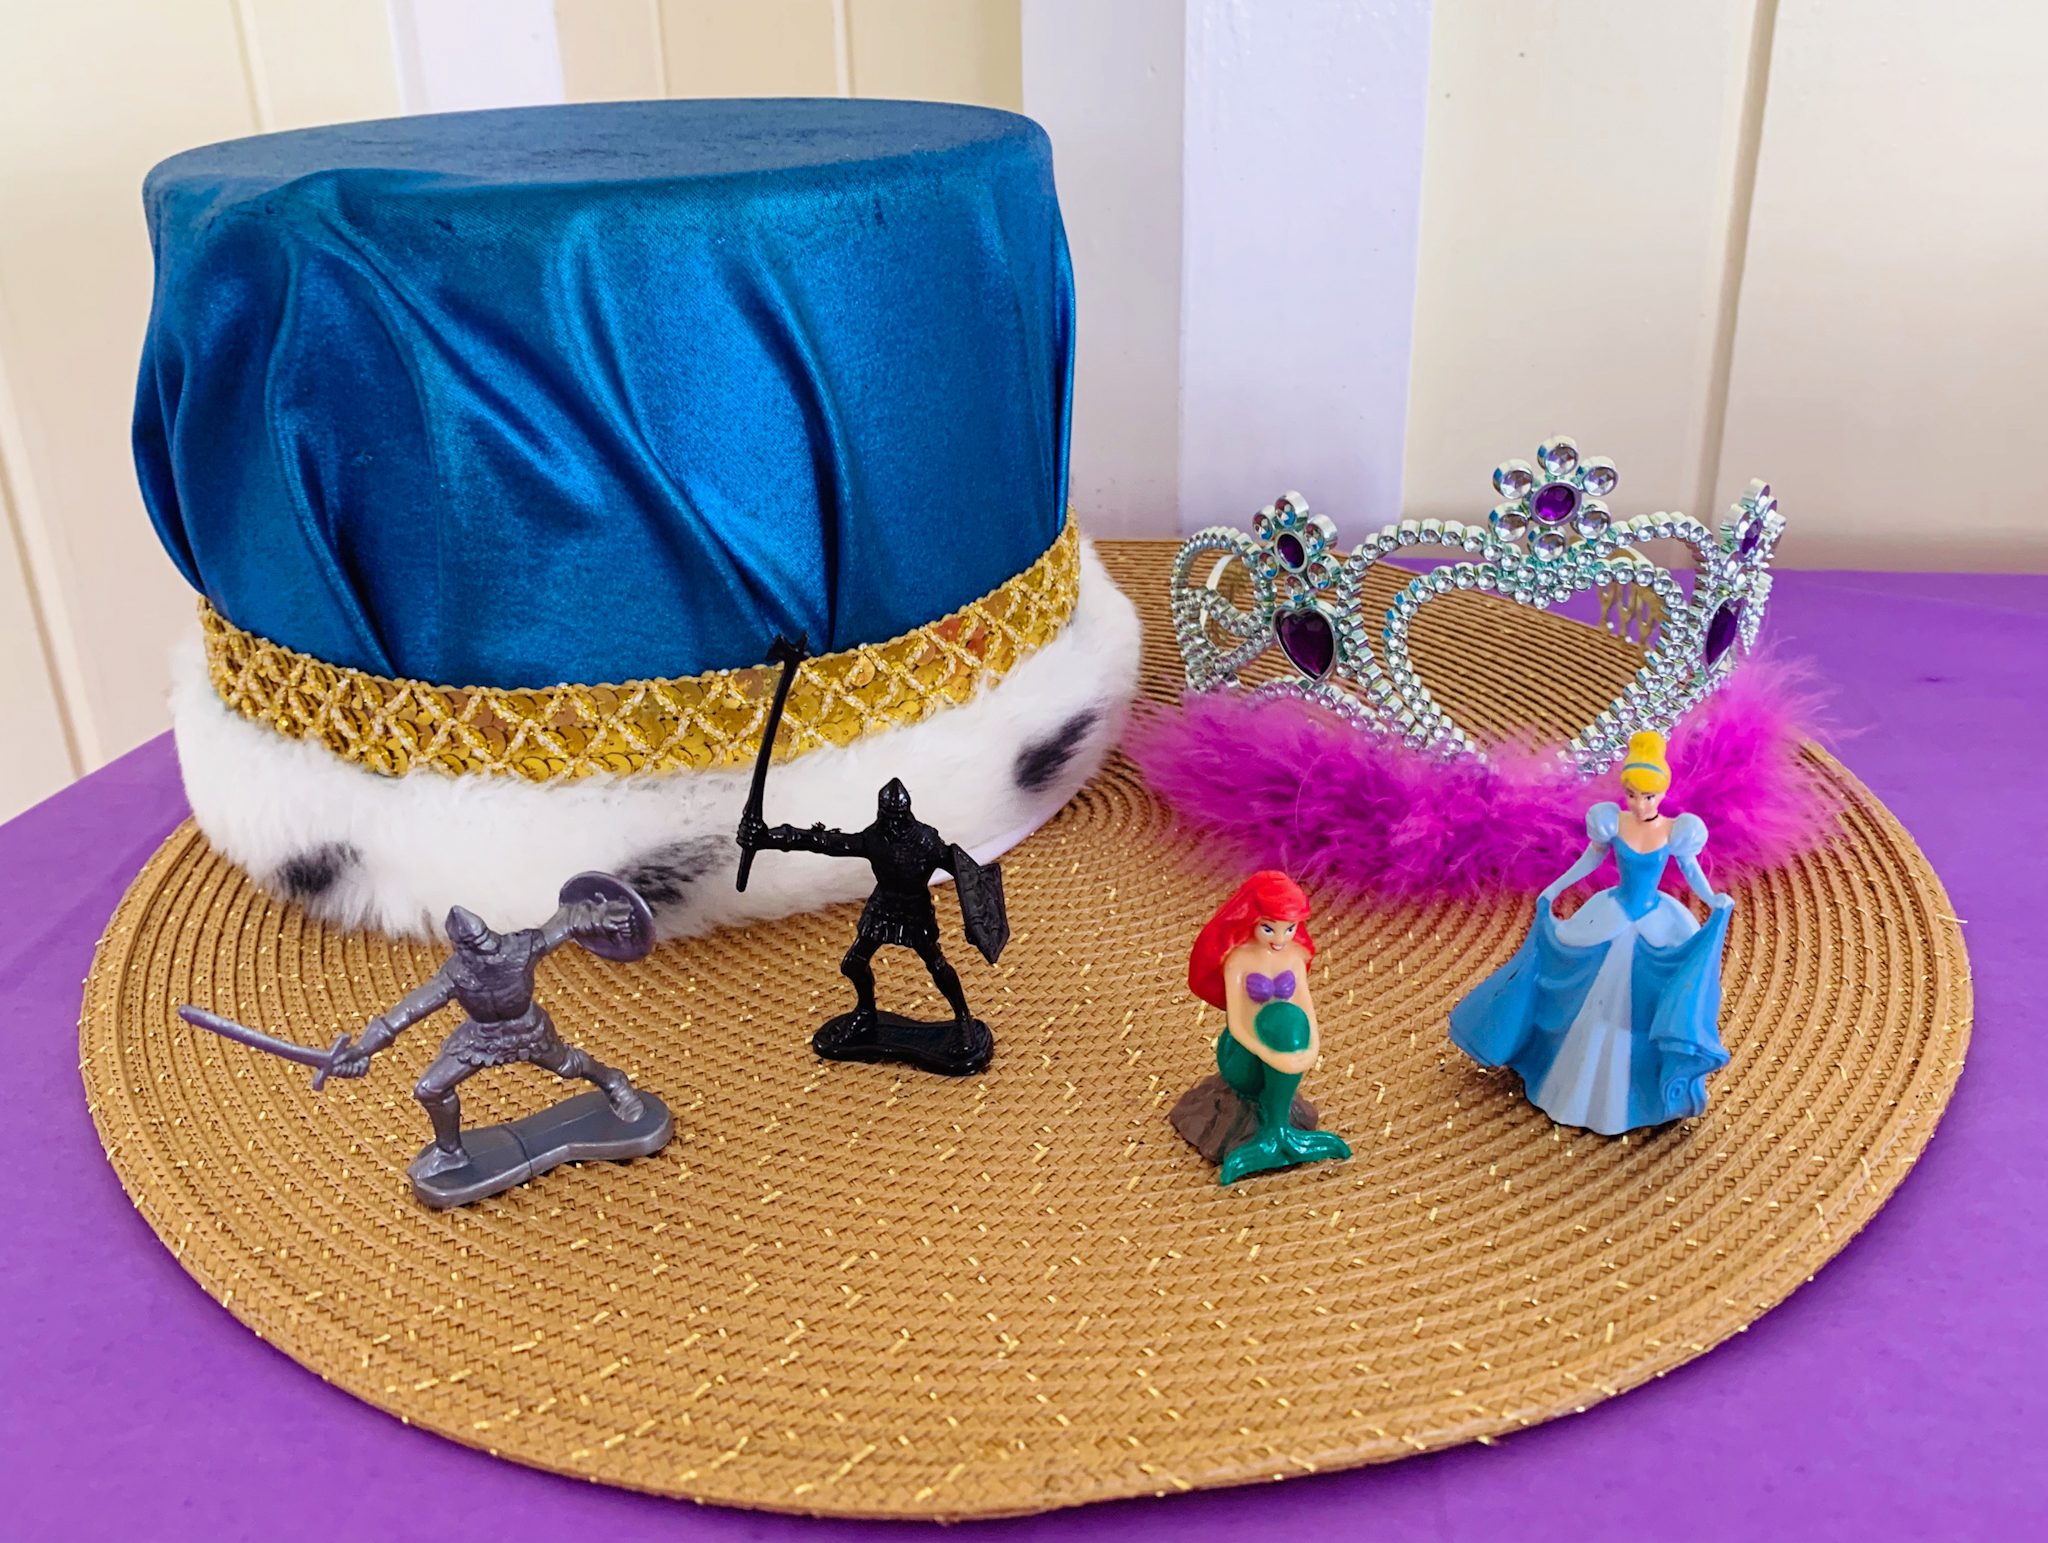
Station 1: Princess & Knight Place Cards
I set up our first station on a small card-table near our pool area entrance so it was the first stop for our party guests, decorating it with some princess & knight figurines and a few “Princess Juniper” books we were gifted by a family friend. How fitting!
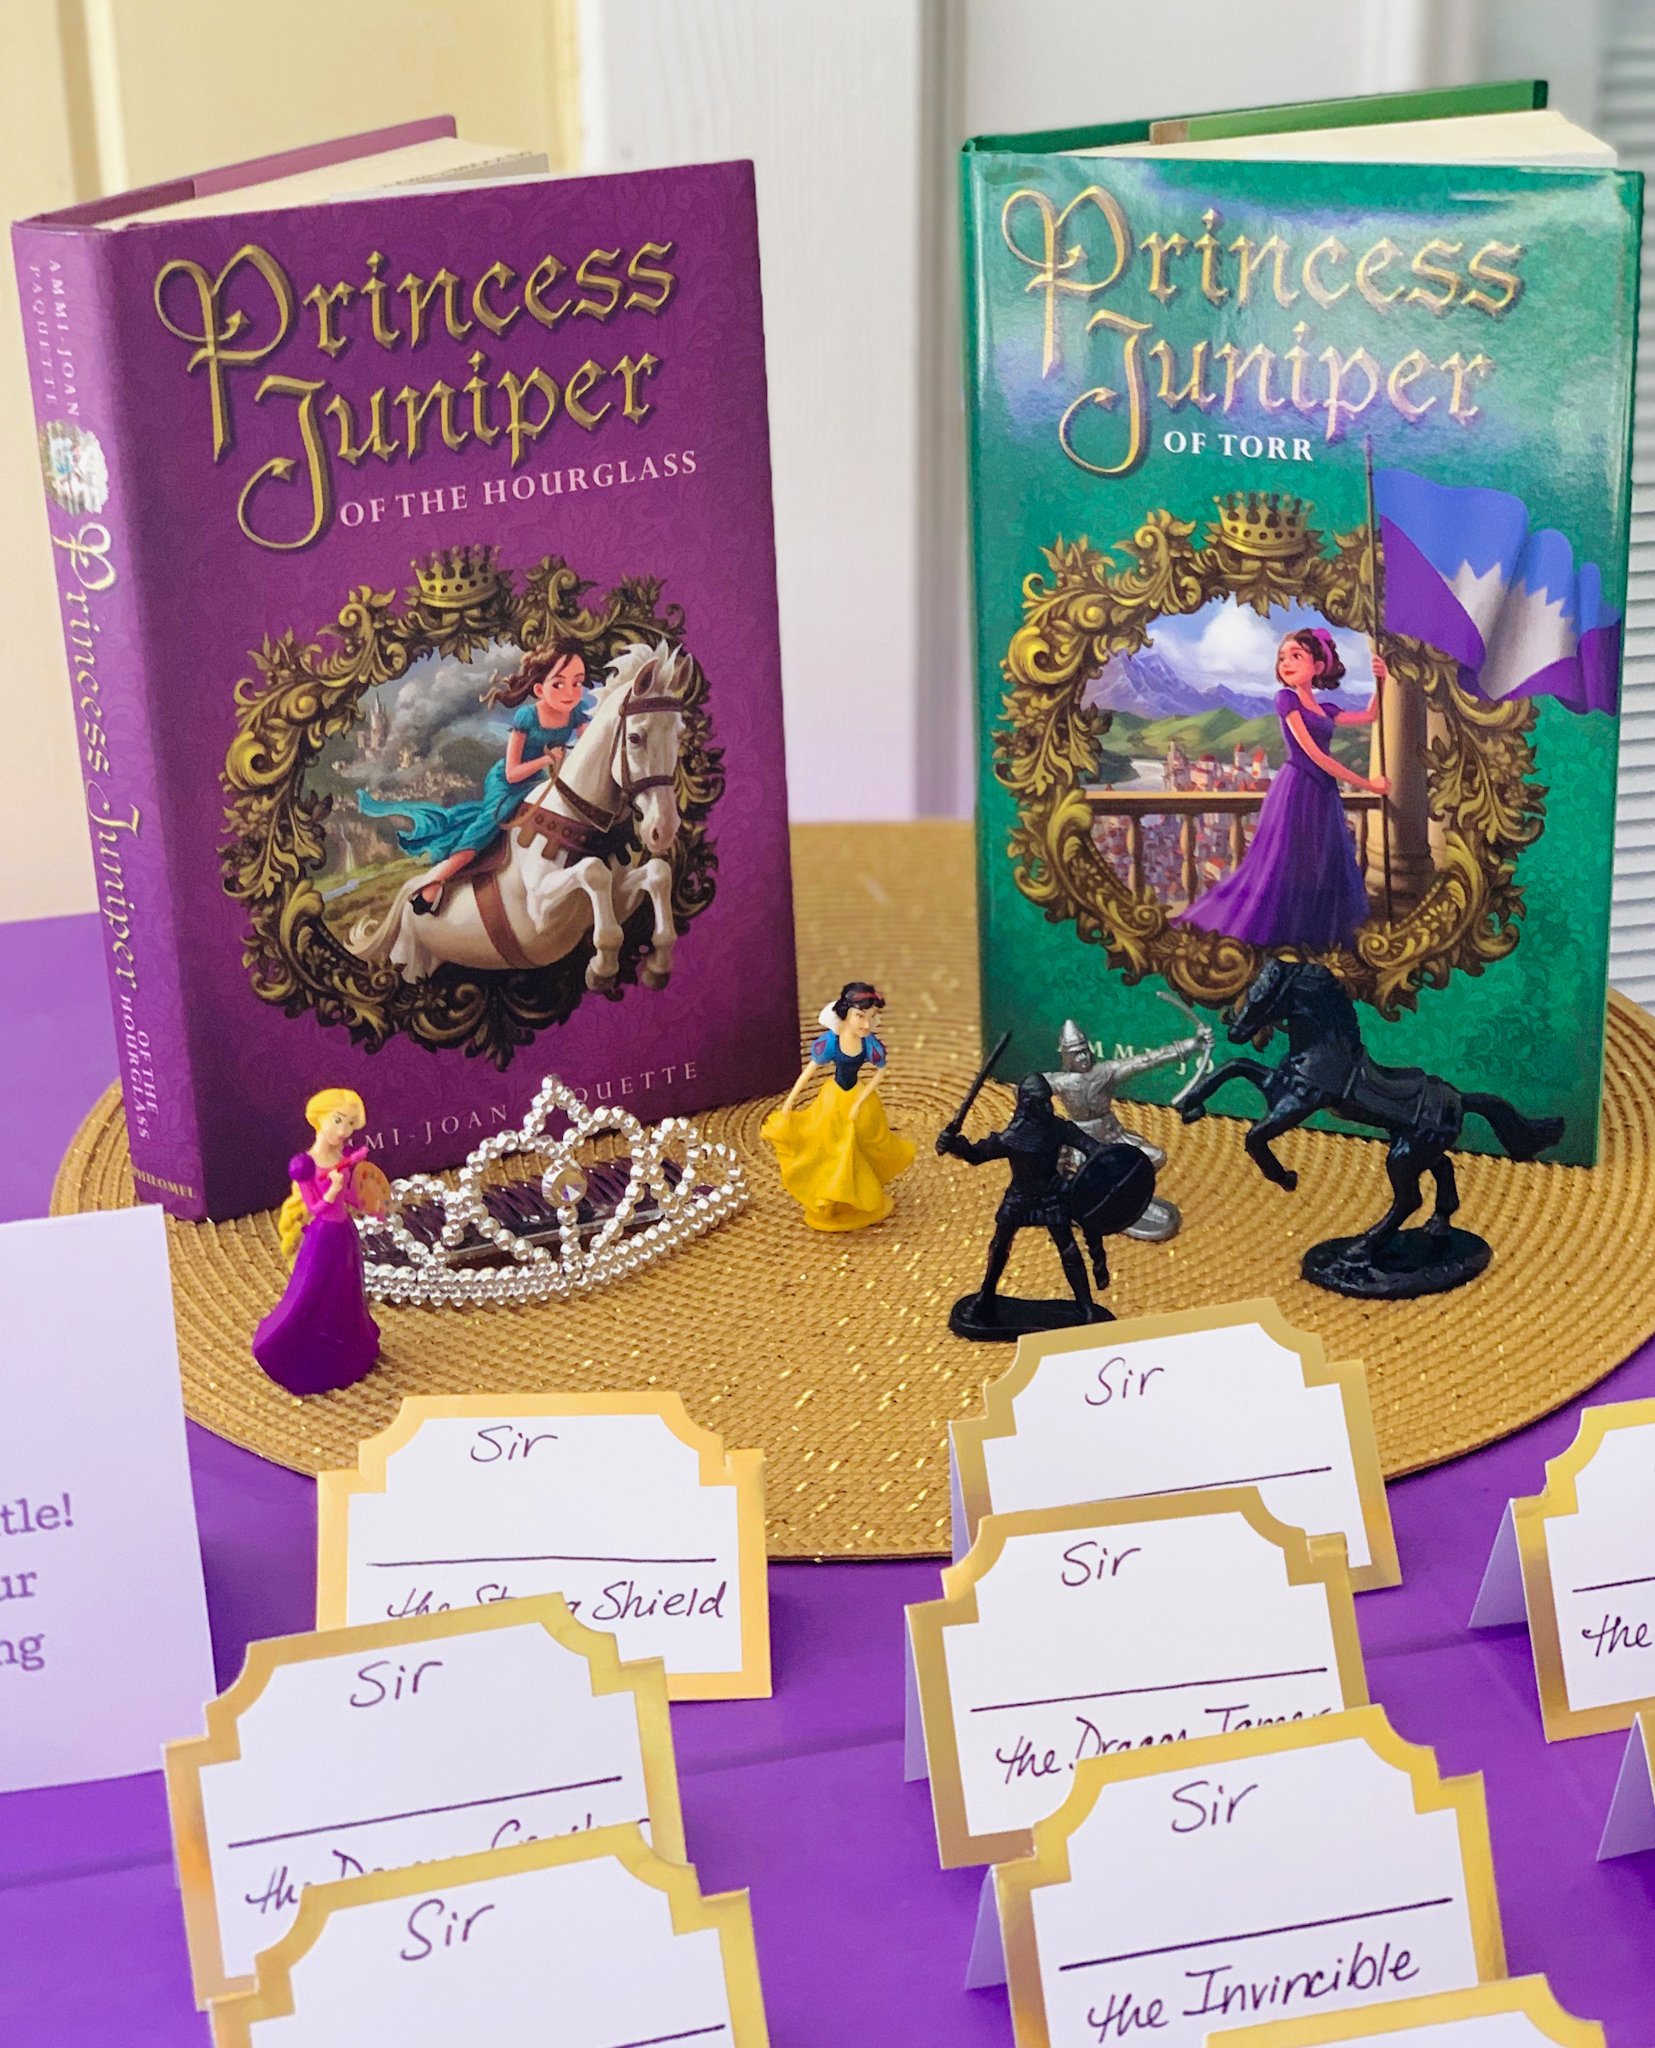
At this first station, we invited guests to join in our imaginative play by choosing their princess or knight name from a variety of options before them.
Here were some of the titles they could choose from:
Princess _________ the Twinkle Dream, the Sparkling Sun, the Dragon Tamer, the Kind-Hearted, the Joyful, the Great, the Brave, the Fairest Rose, the Clever, the Snow Angel
Sir ___________ the Strong Shield, the Brave, the Royal Heart, the Dragon Catcher, the Dragon Tamer, the Treasure Seeker, the Invincible, the Golden Crown, the Great, the Defender, the Wise
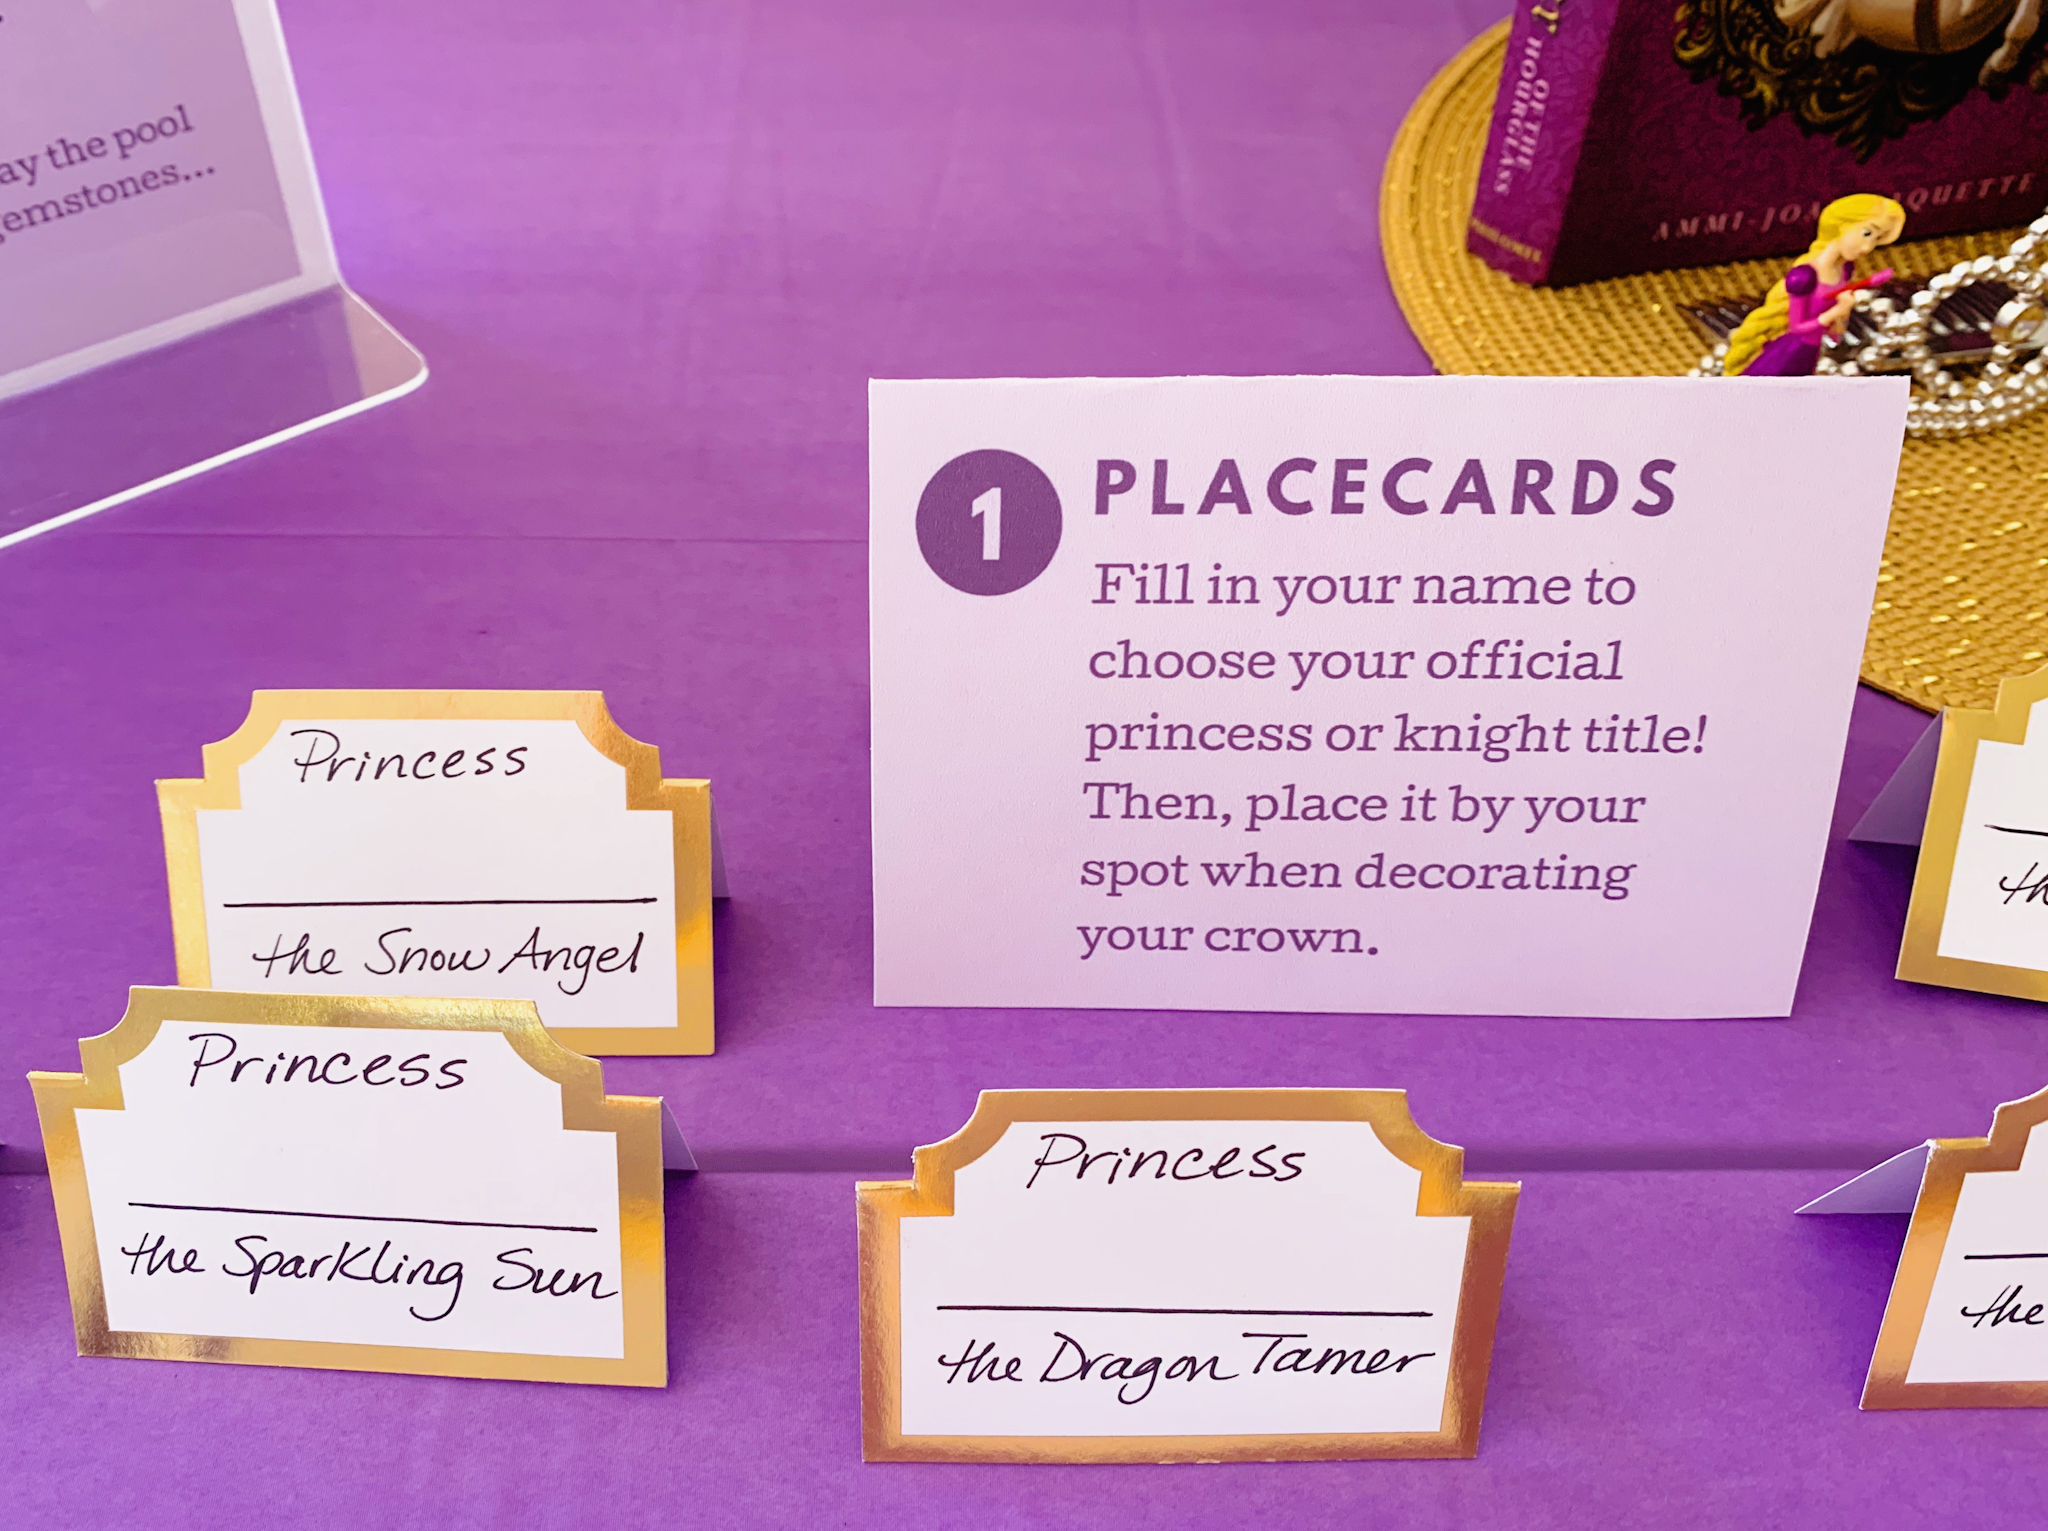
Once our guests filled their name in the blank on one of the gold-trimmed placecards, claiming their official royal title, they placed their card by their spot at the crown-decorating table.
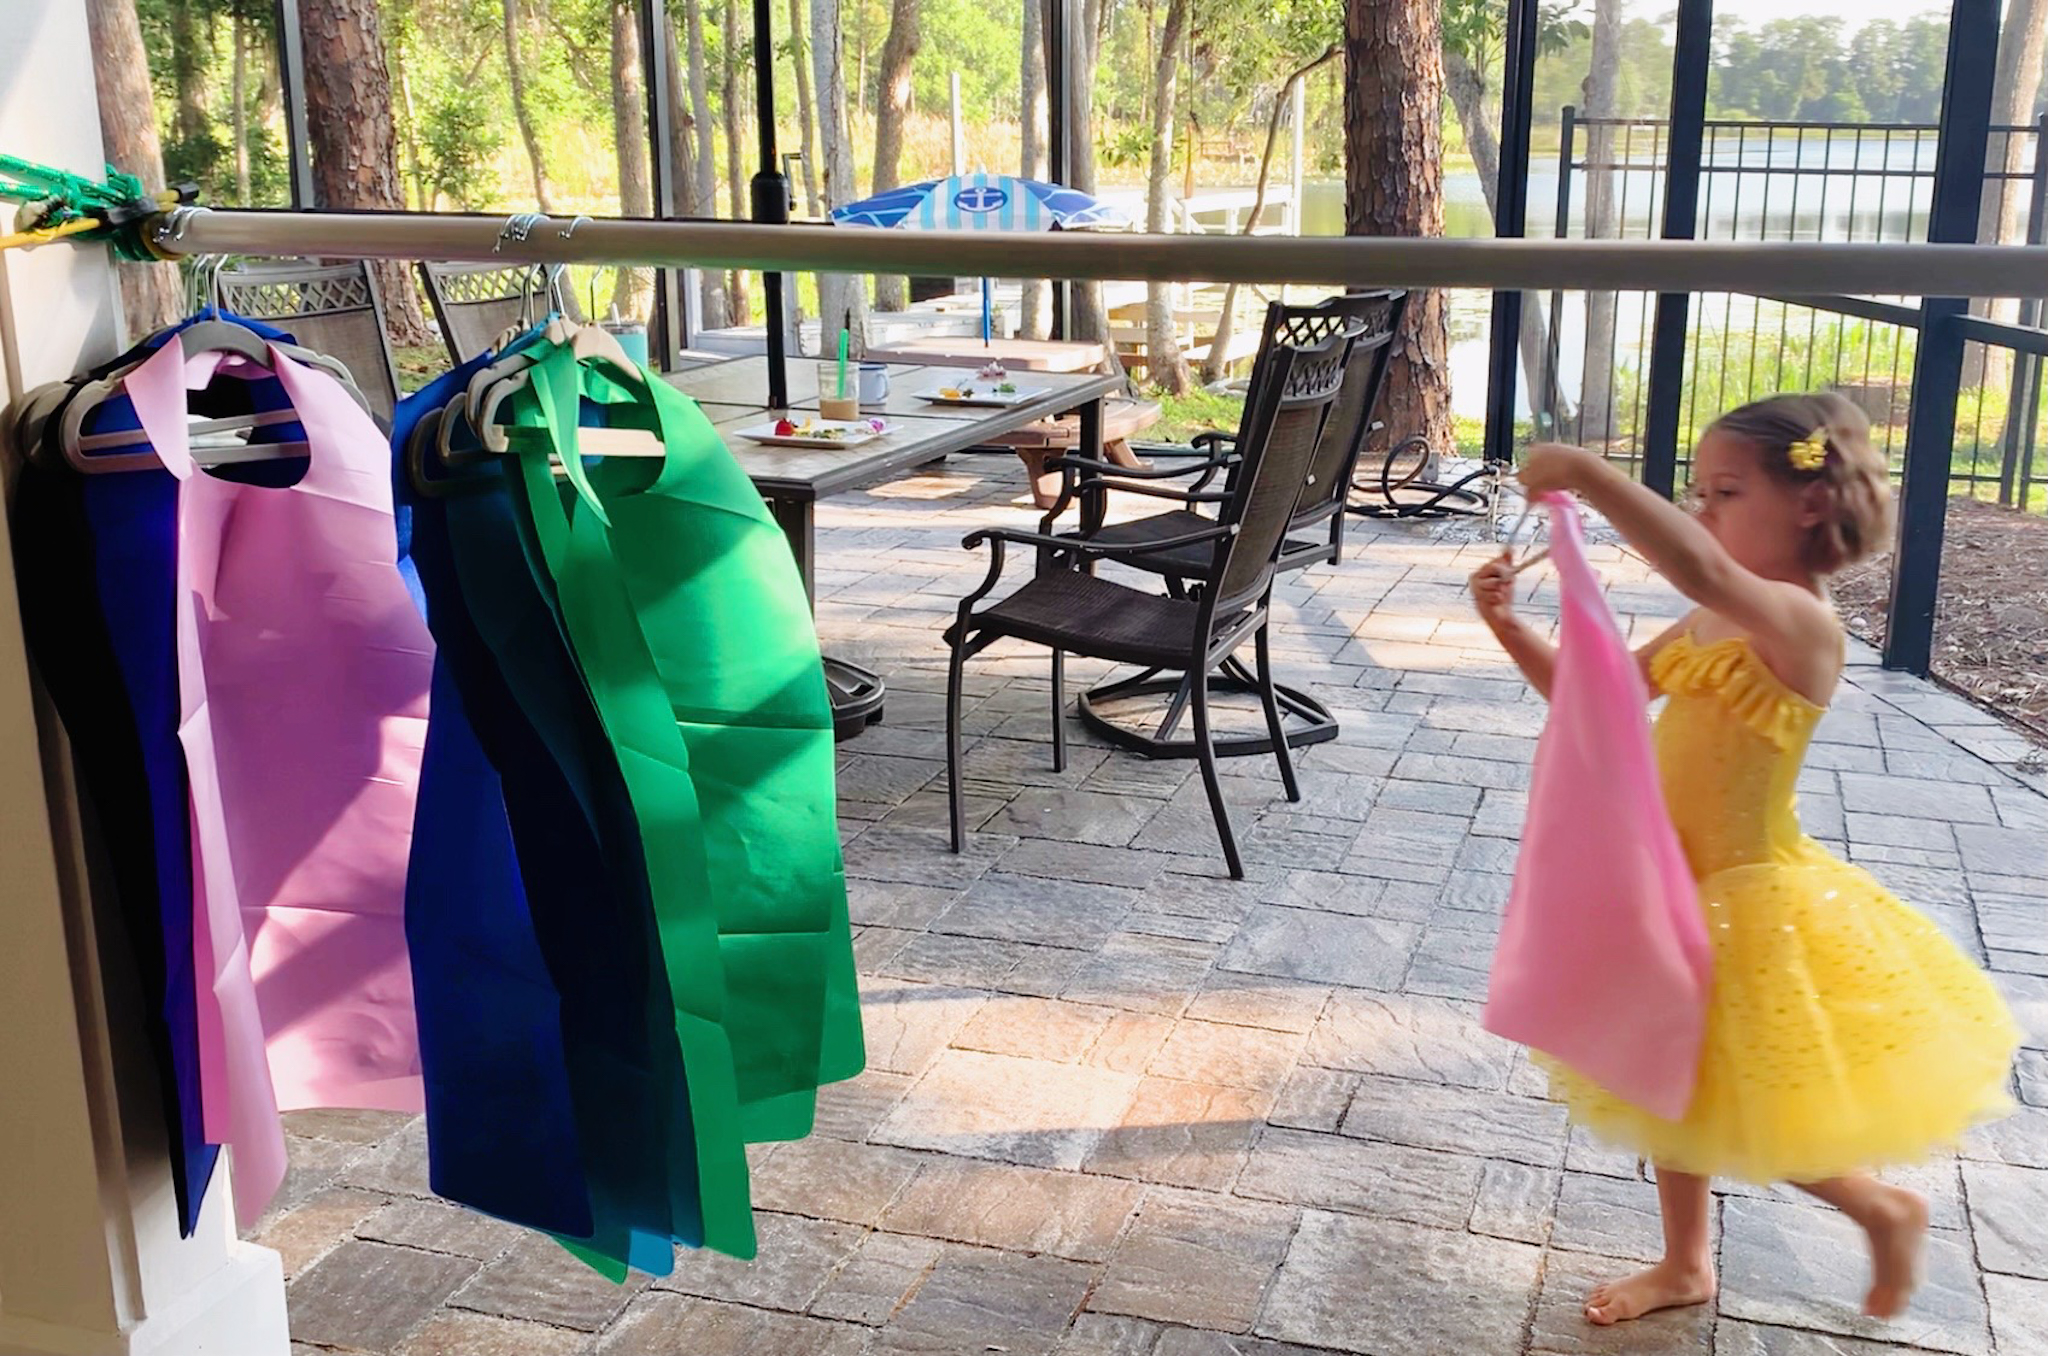
Station 2: Royal Garb
Now, it was time to dress the part of princesses and knights!
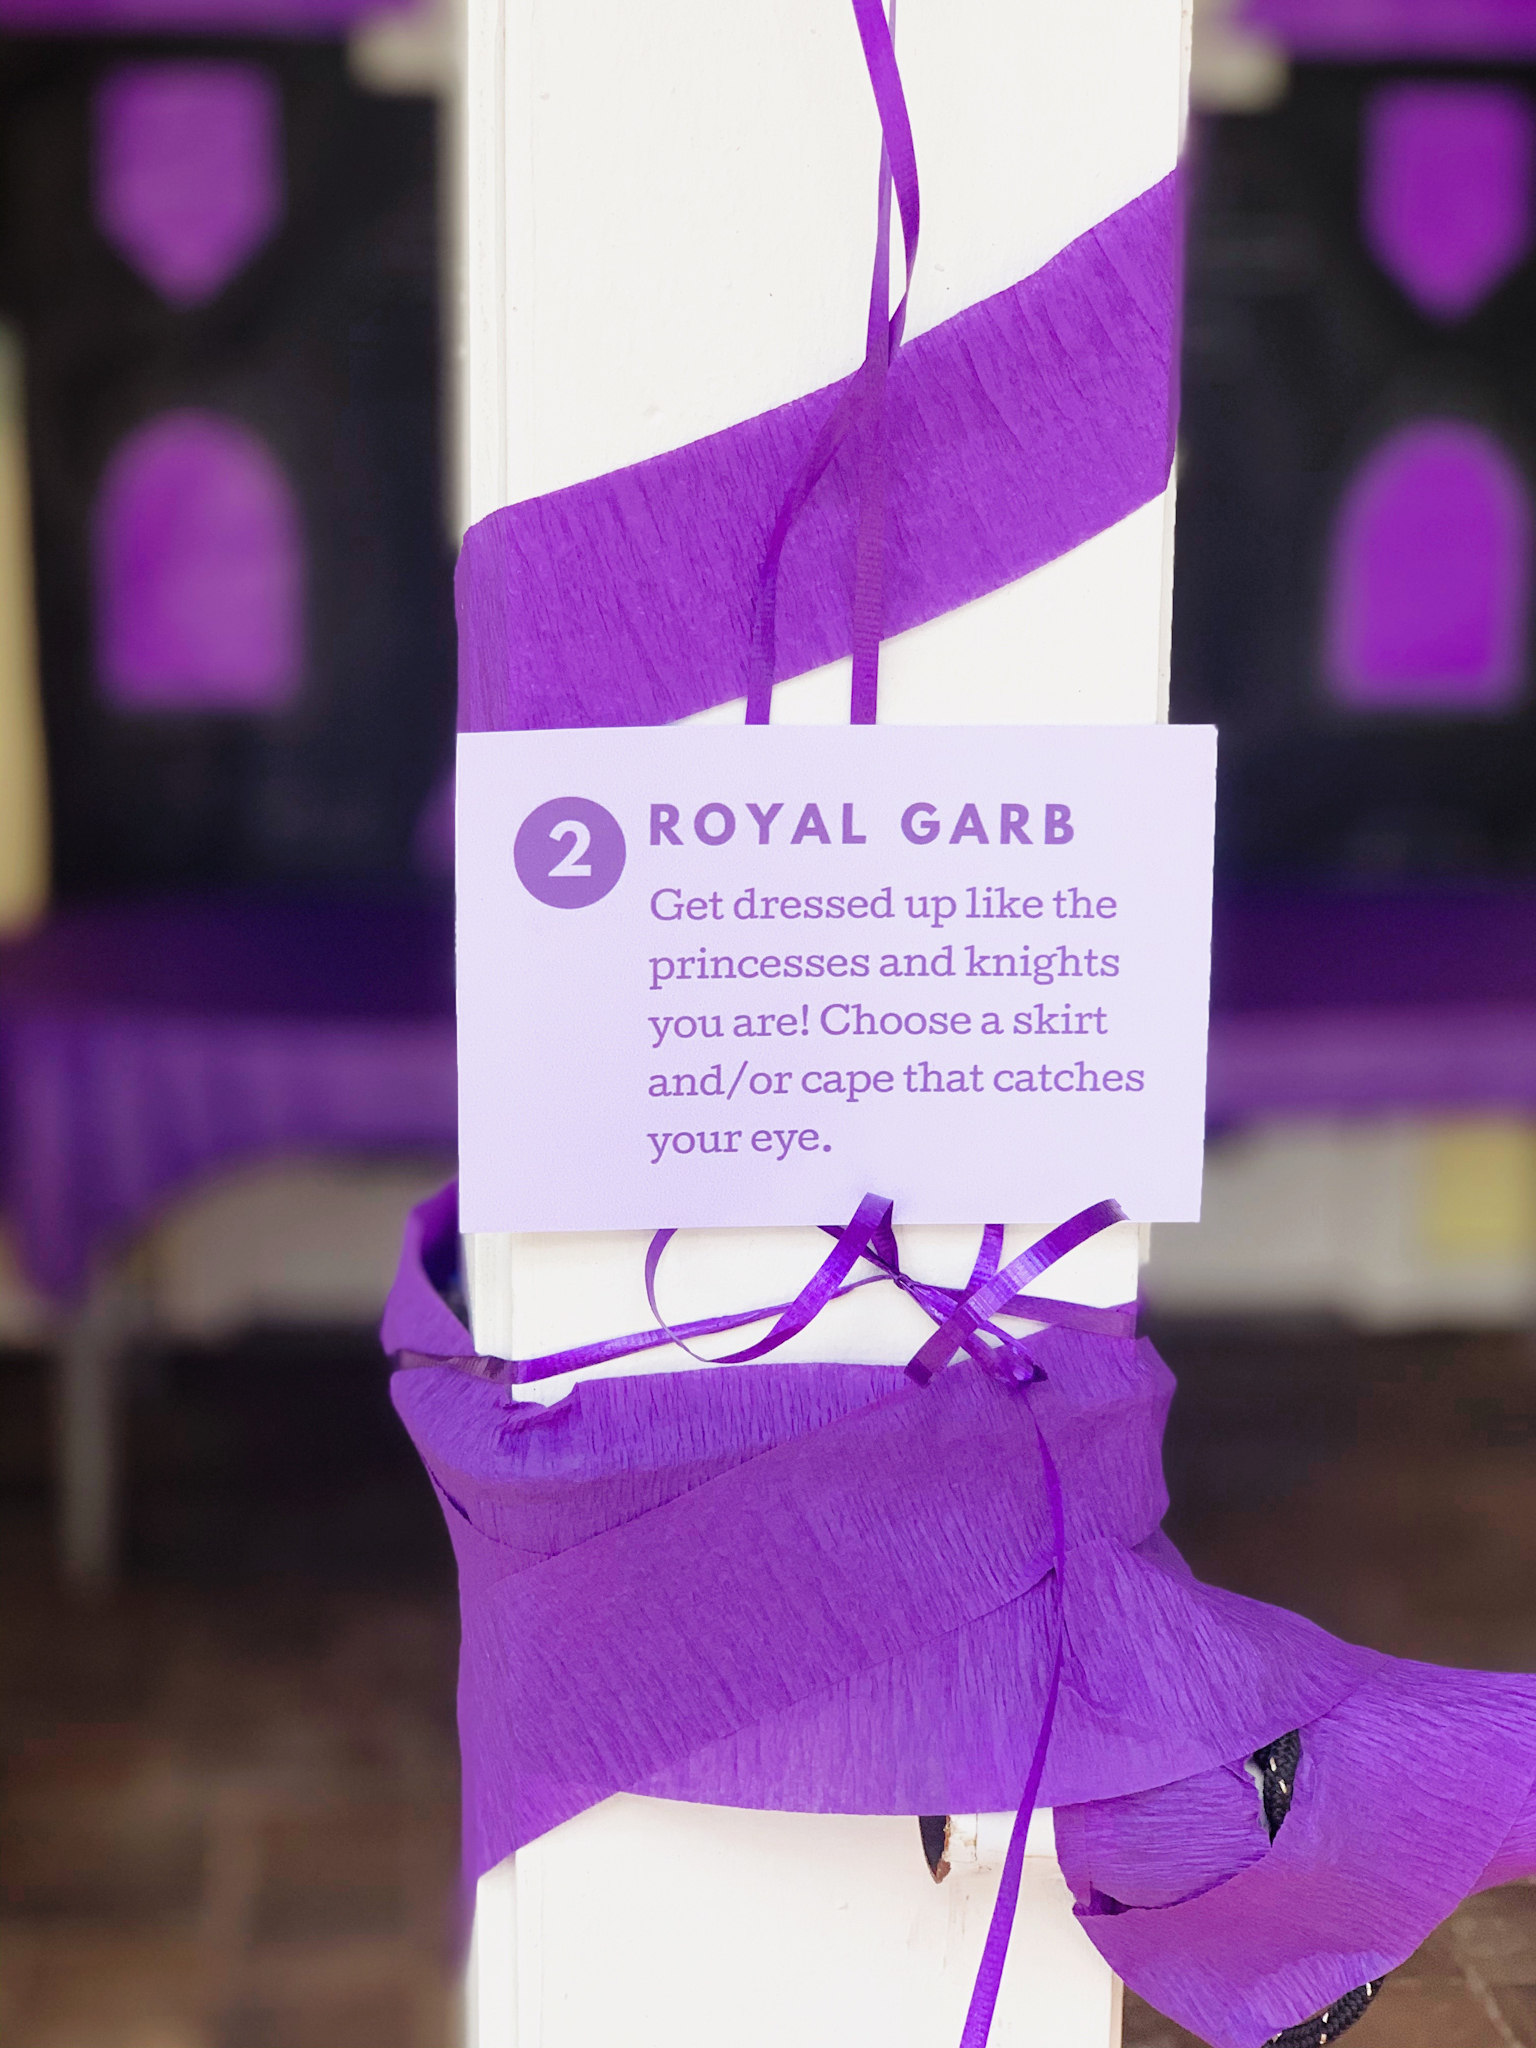
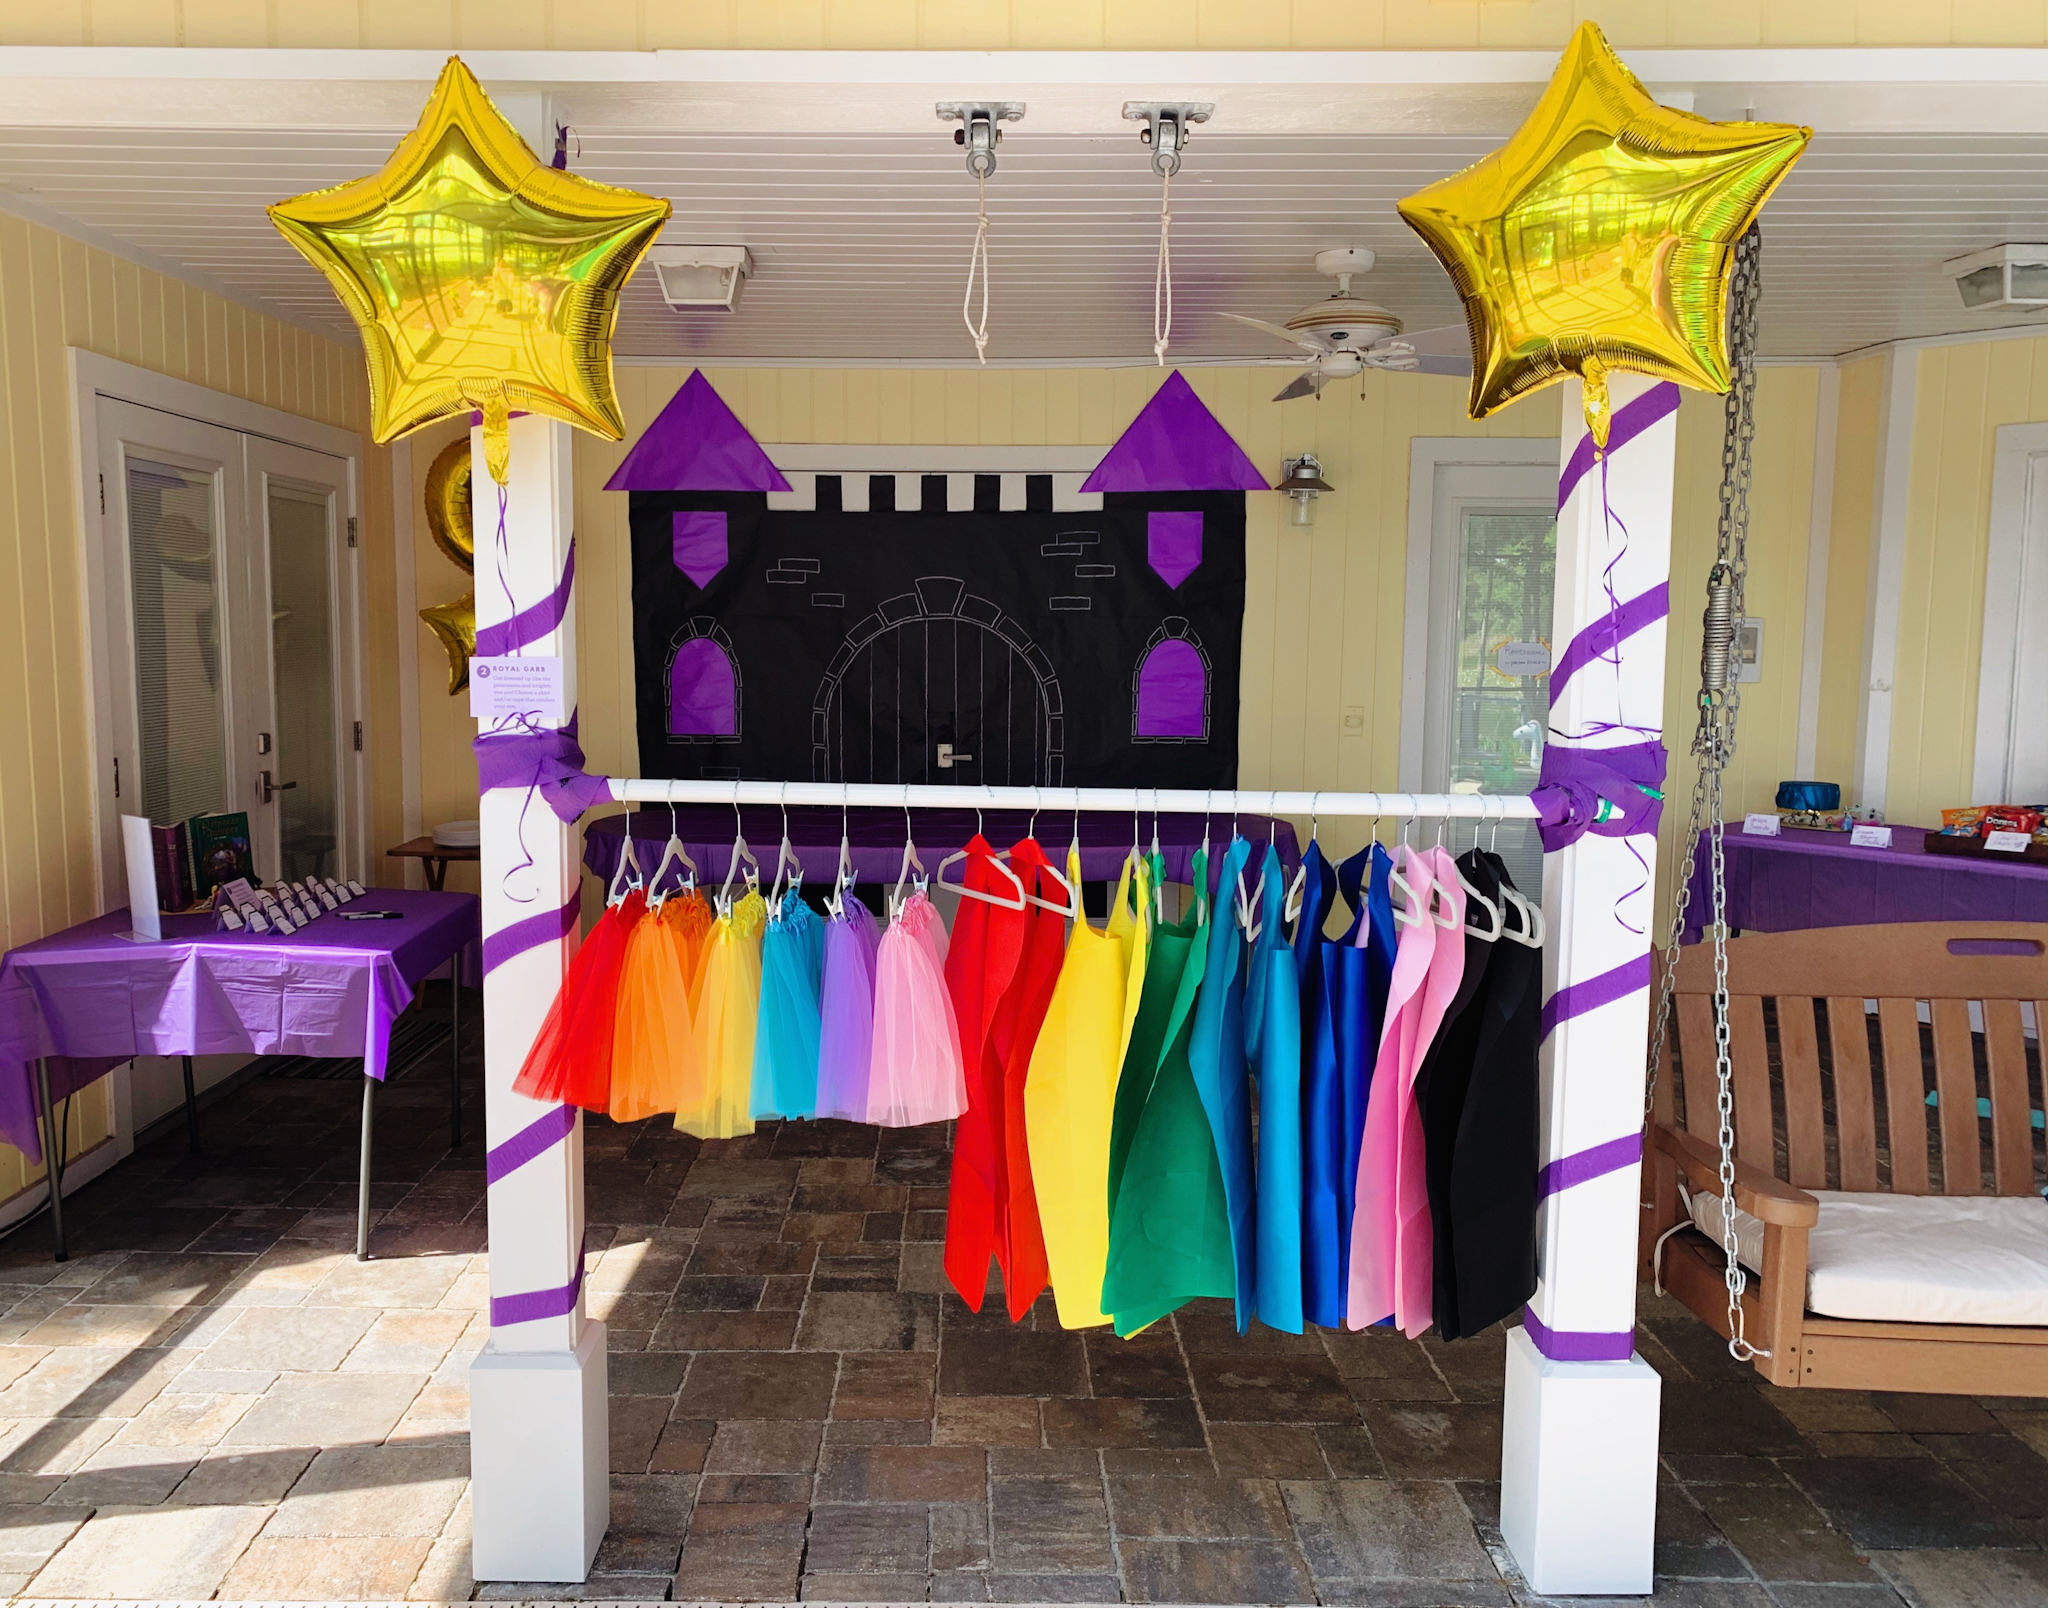
Each child could choose a cape in their favorite color, and the girls could choose a tutu skirt, as well. And it was such fun to see the kids’ eyes light up as they transformed into royalty before our very eyes!
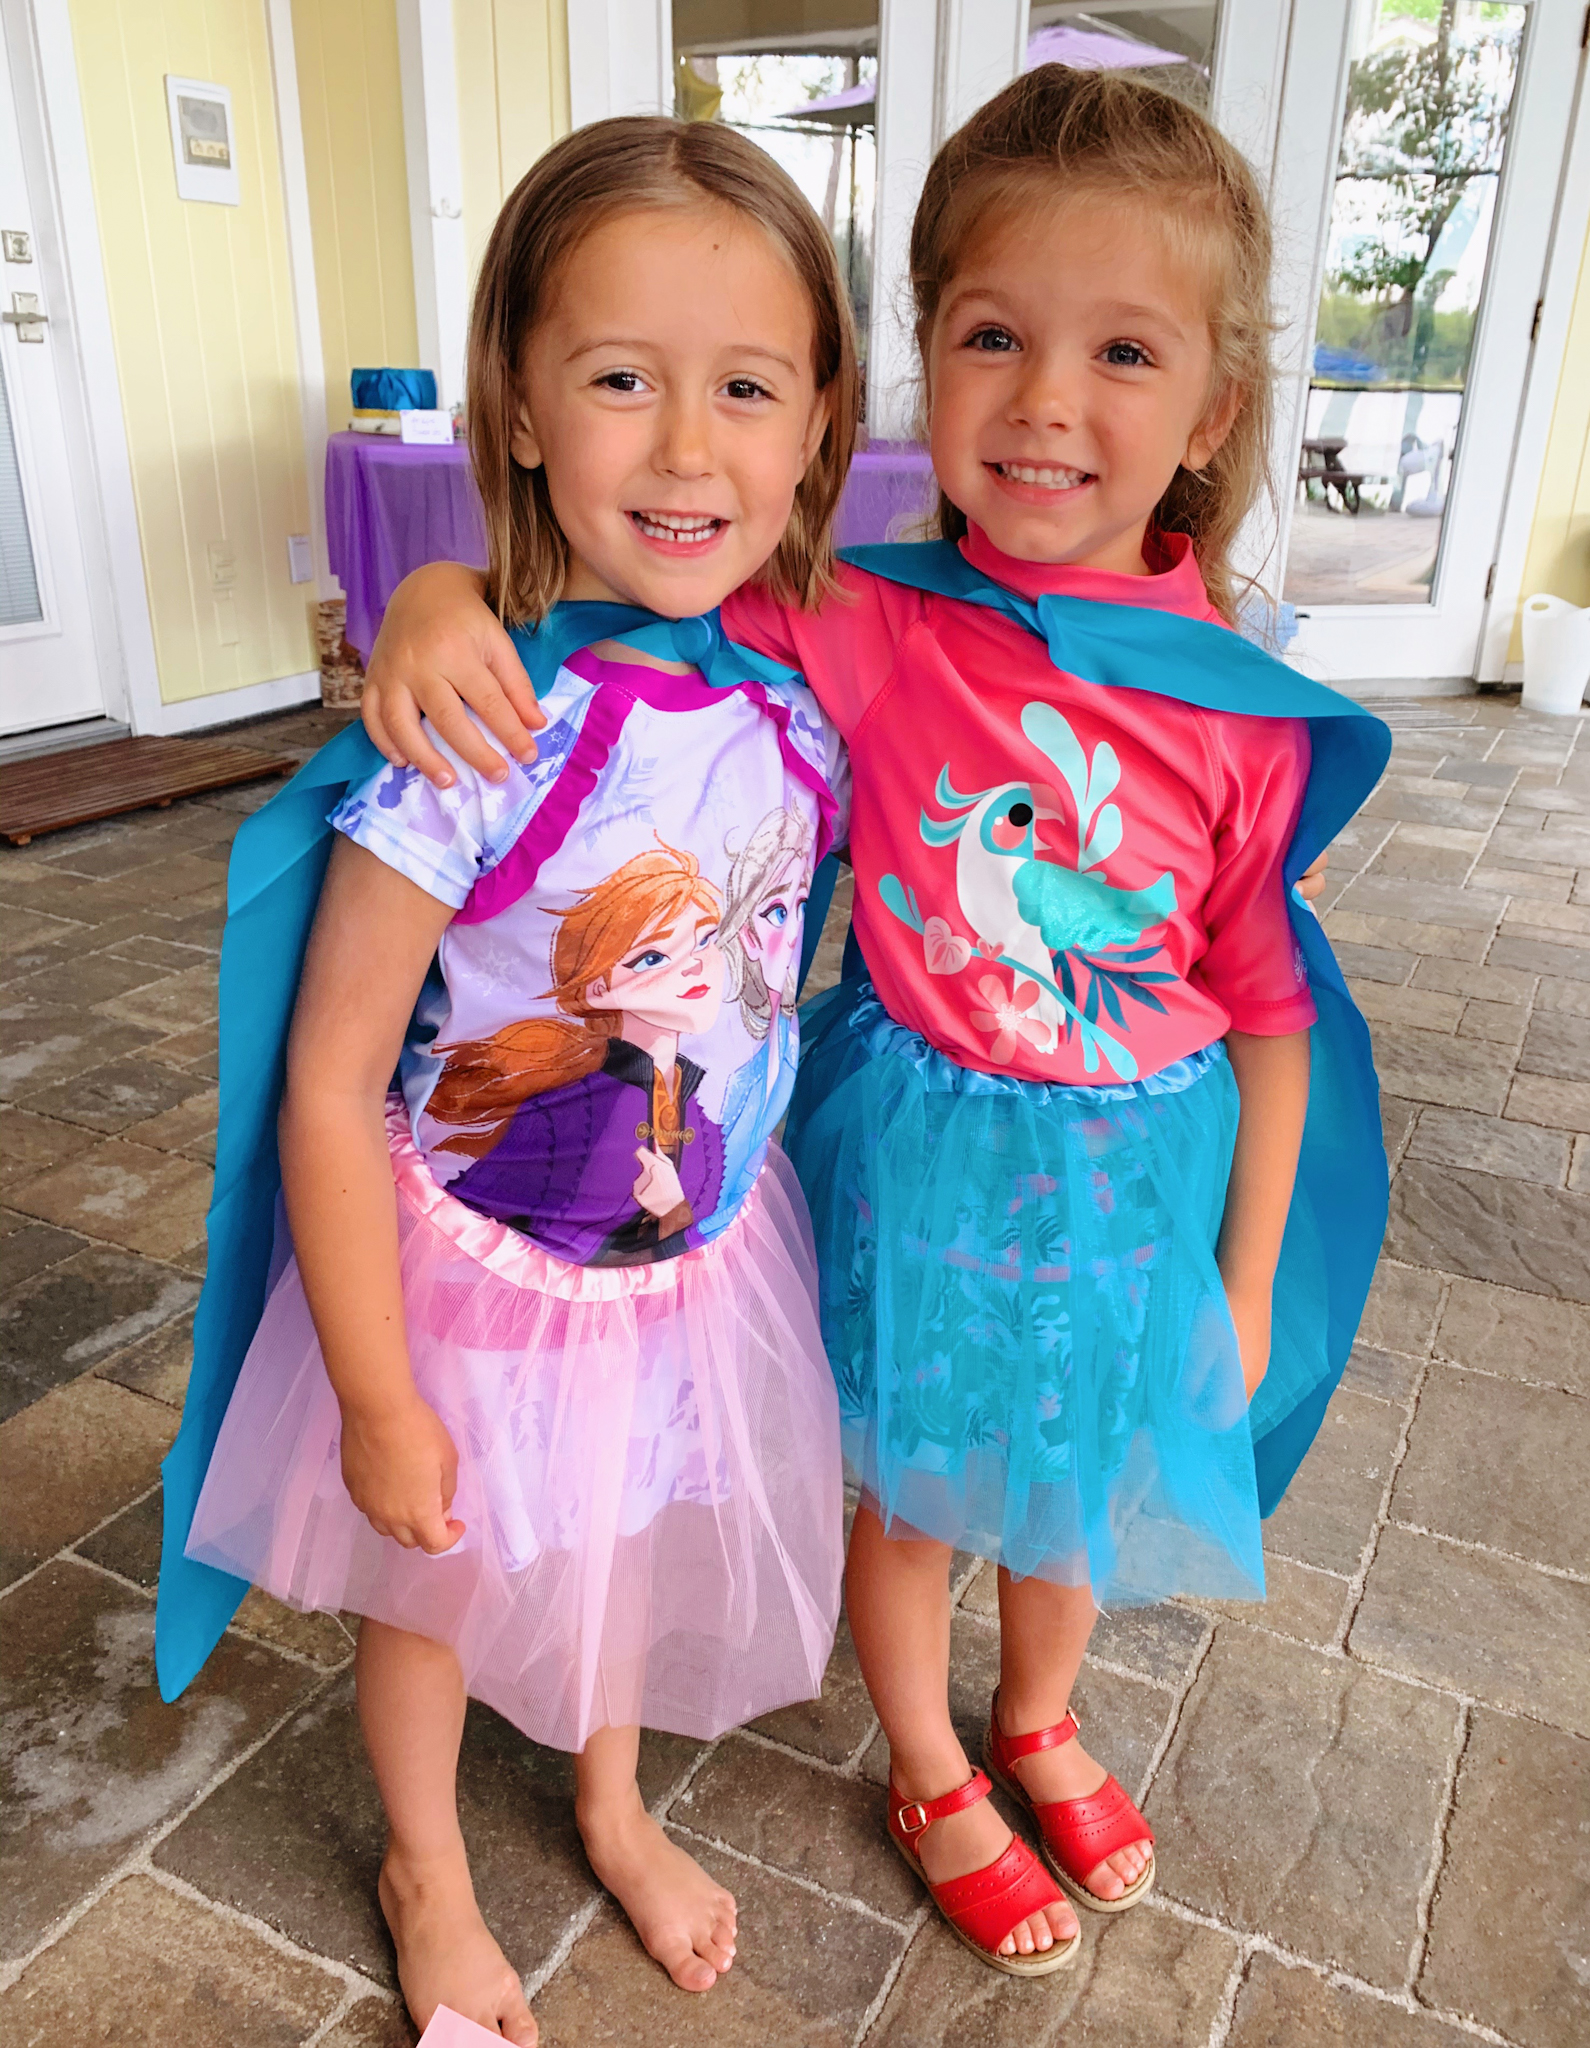
We purchased the capes and skirts in bulk from Amazon, and I have to say, I was super impressed with their quality (especially the capes) and how well they’ve held up with lots of play since party day.
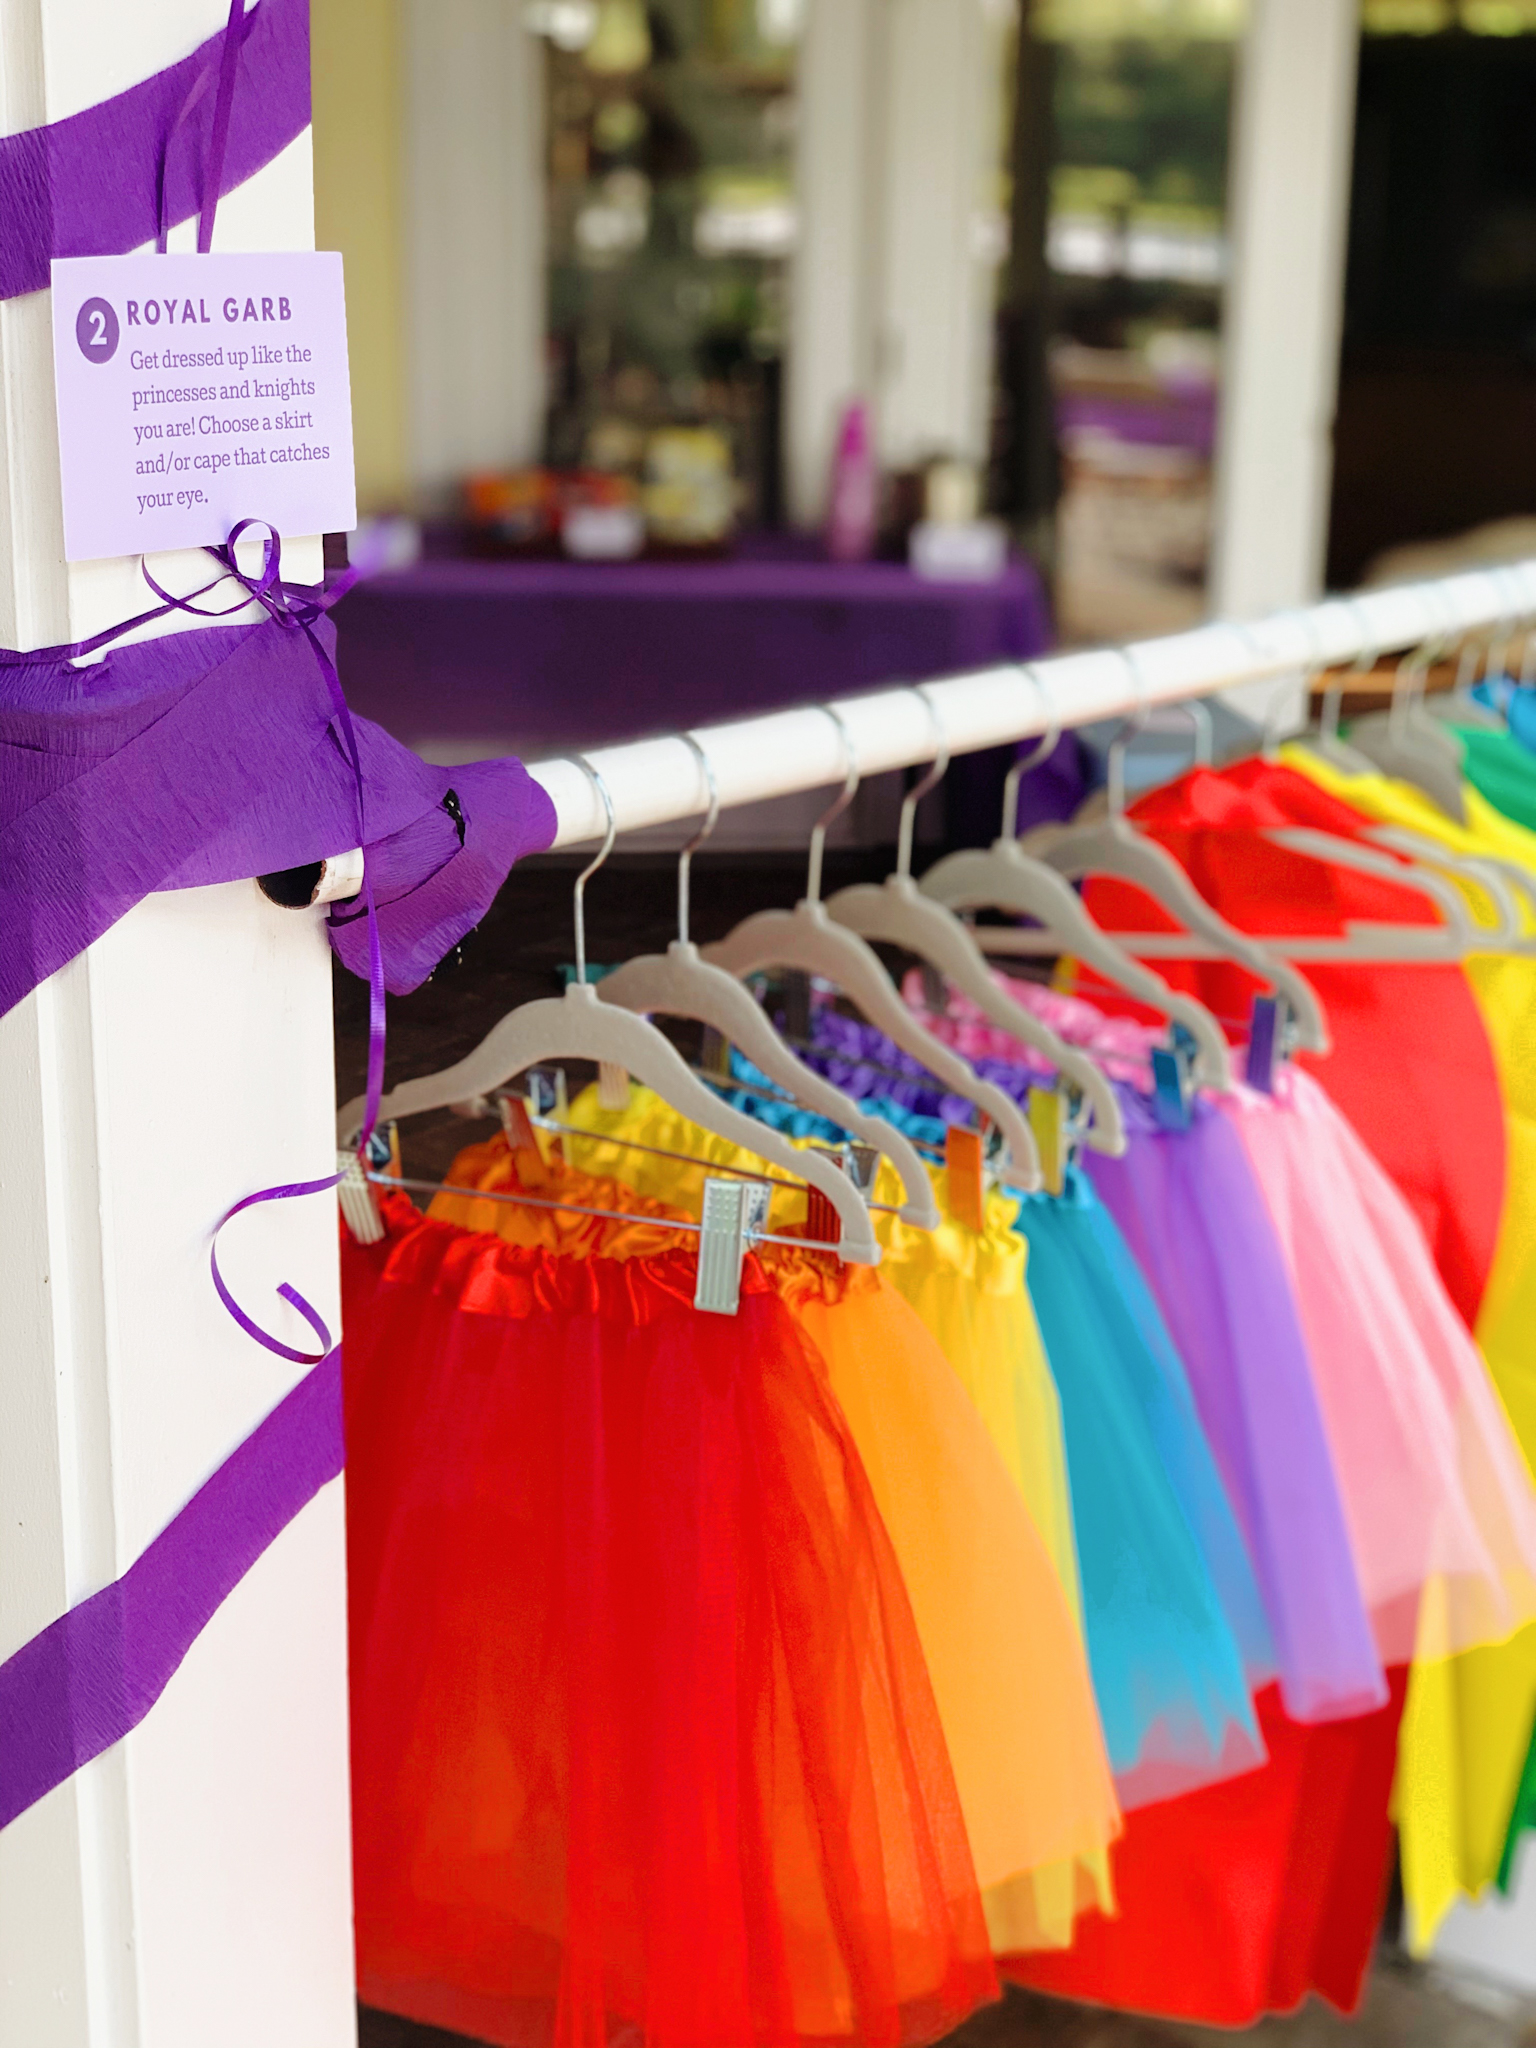
To help create an appealing display, Mark strung up a rod at child-height using bungee cords that we strategically masked with streamers from the dollar store, and we borrowed felt hangers from the girls’ closets on which to hang the royal garb.
Juniper is a pro at arranging things in rainbow-order, and took great pride in setting up this station all by herself!
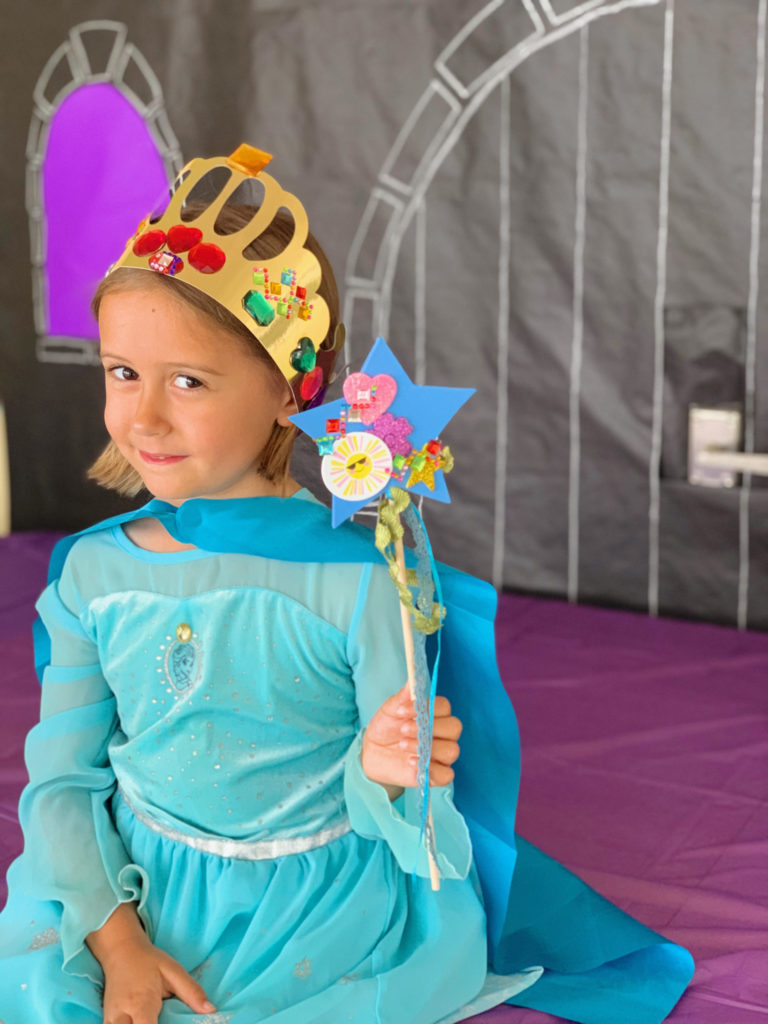
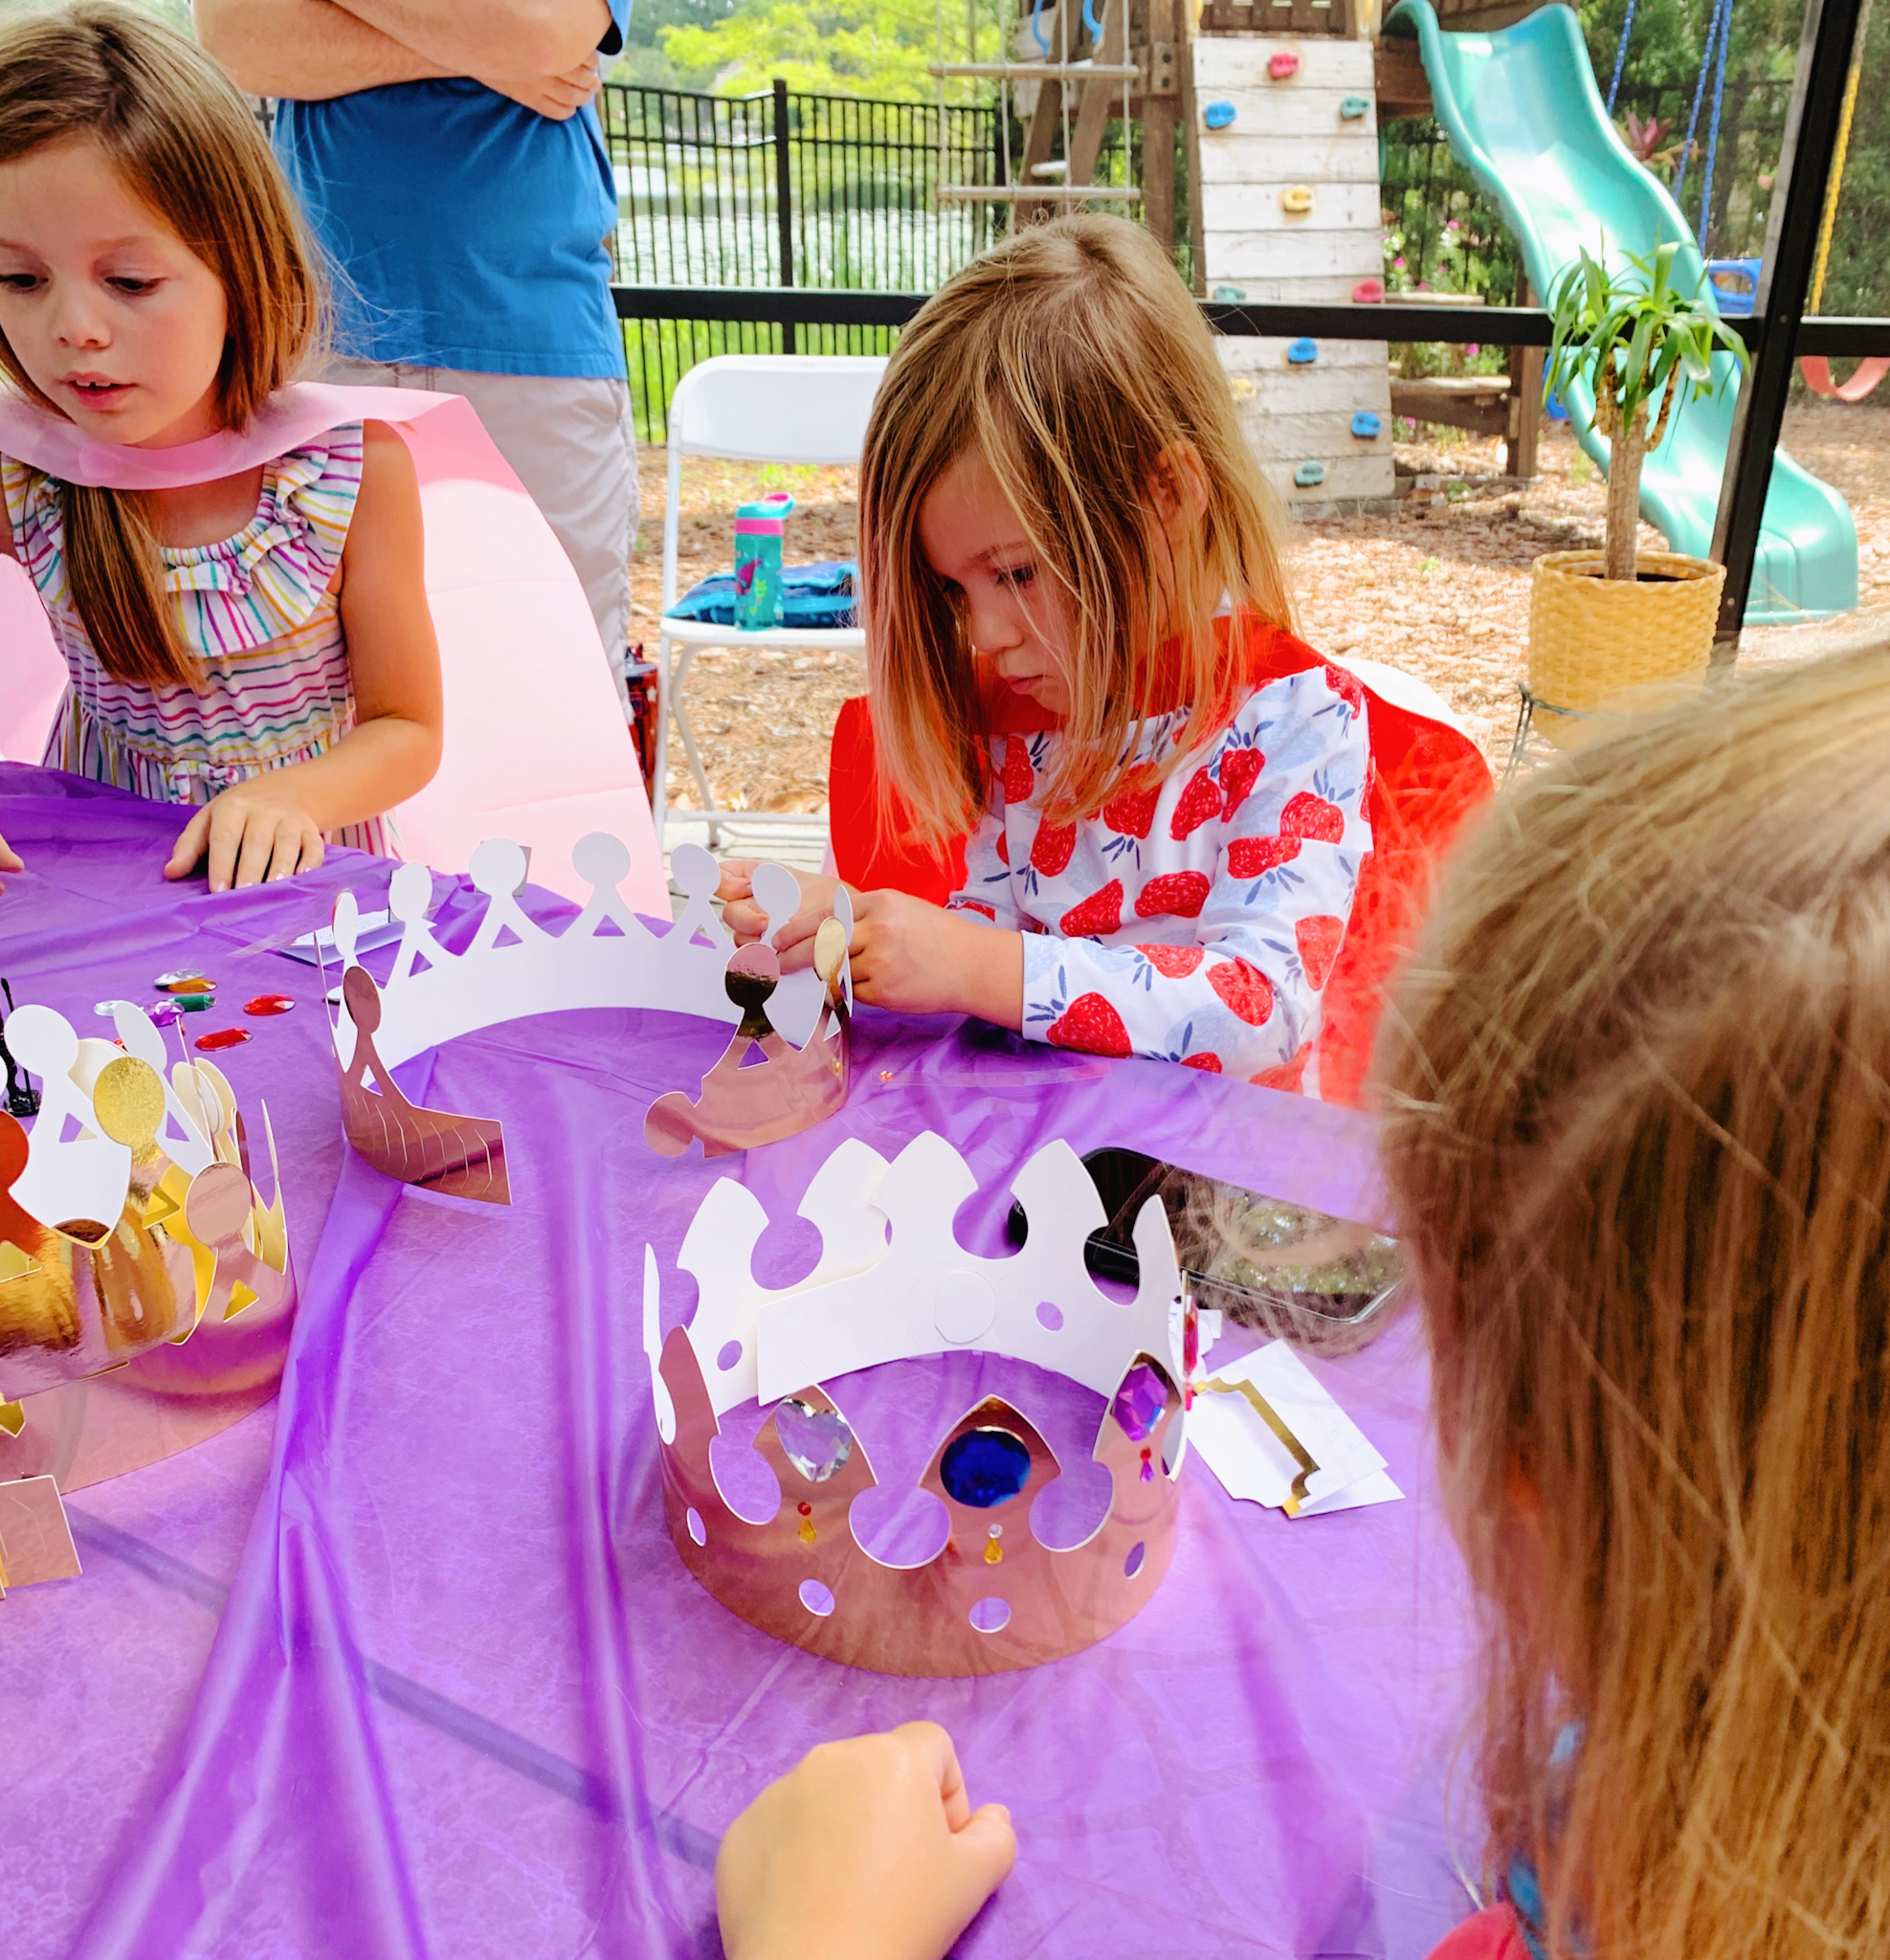
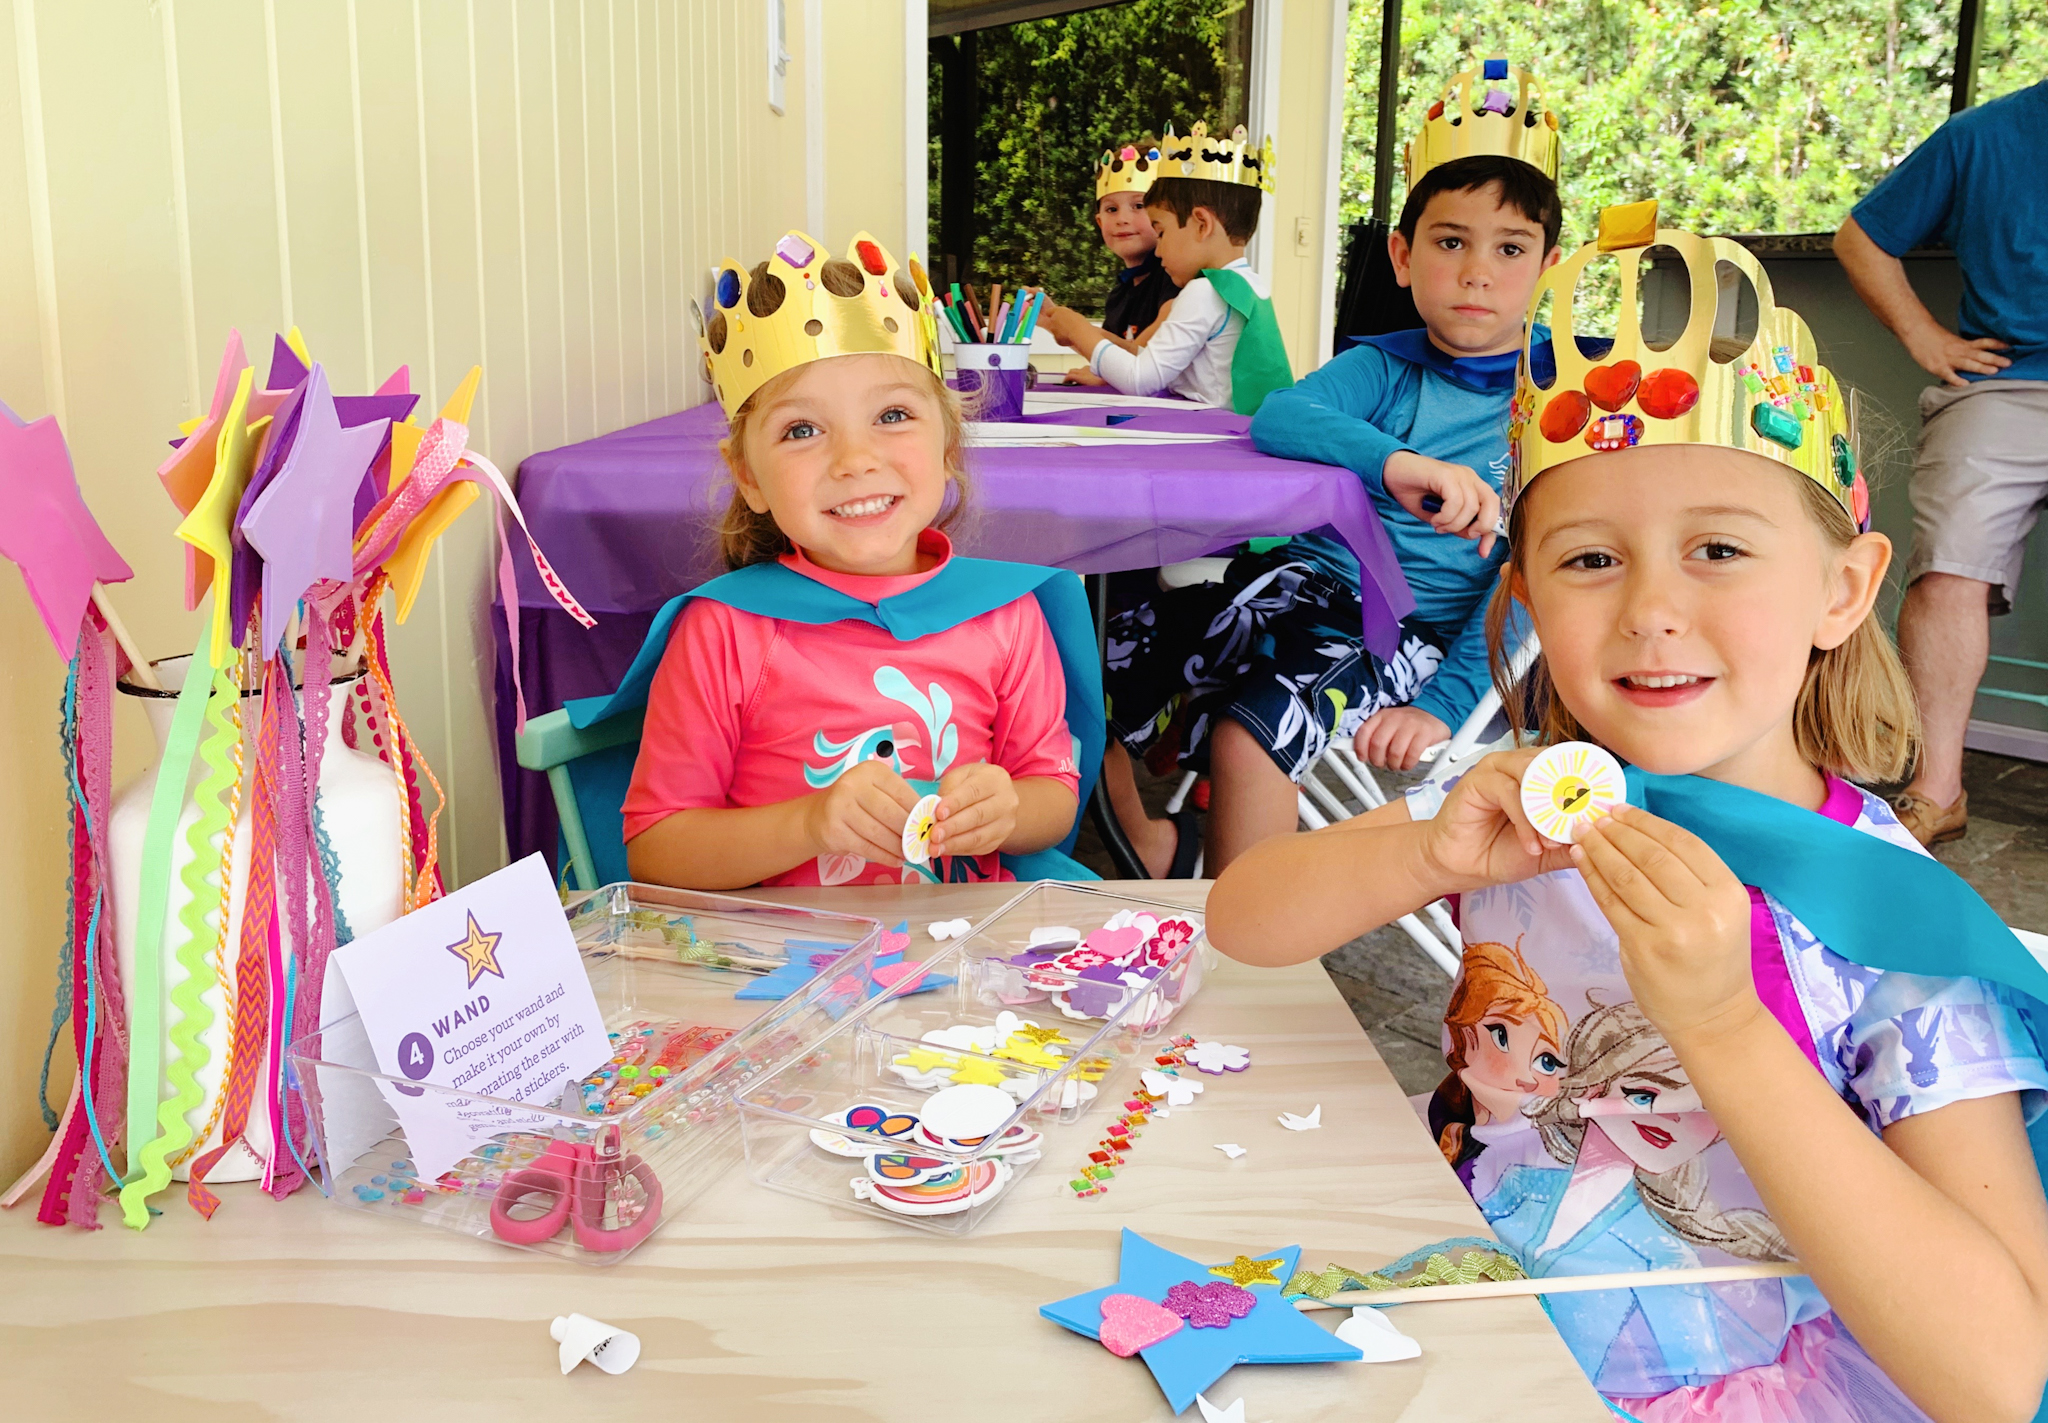
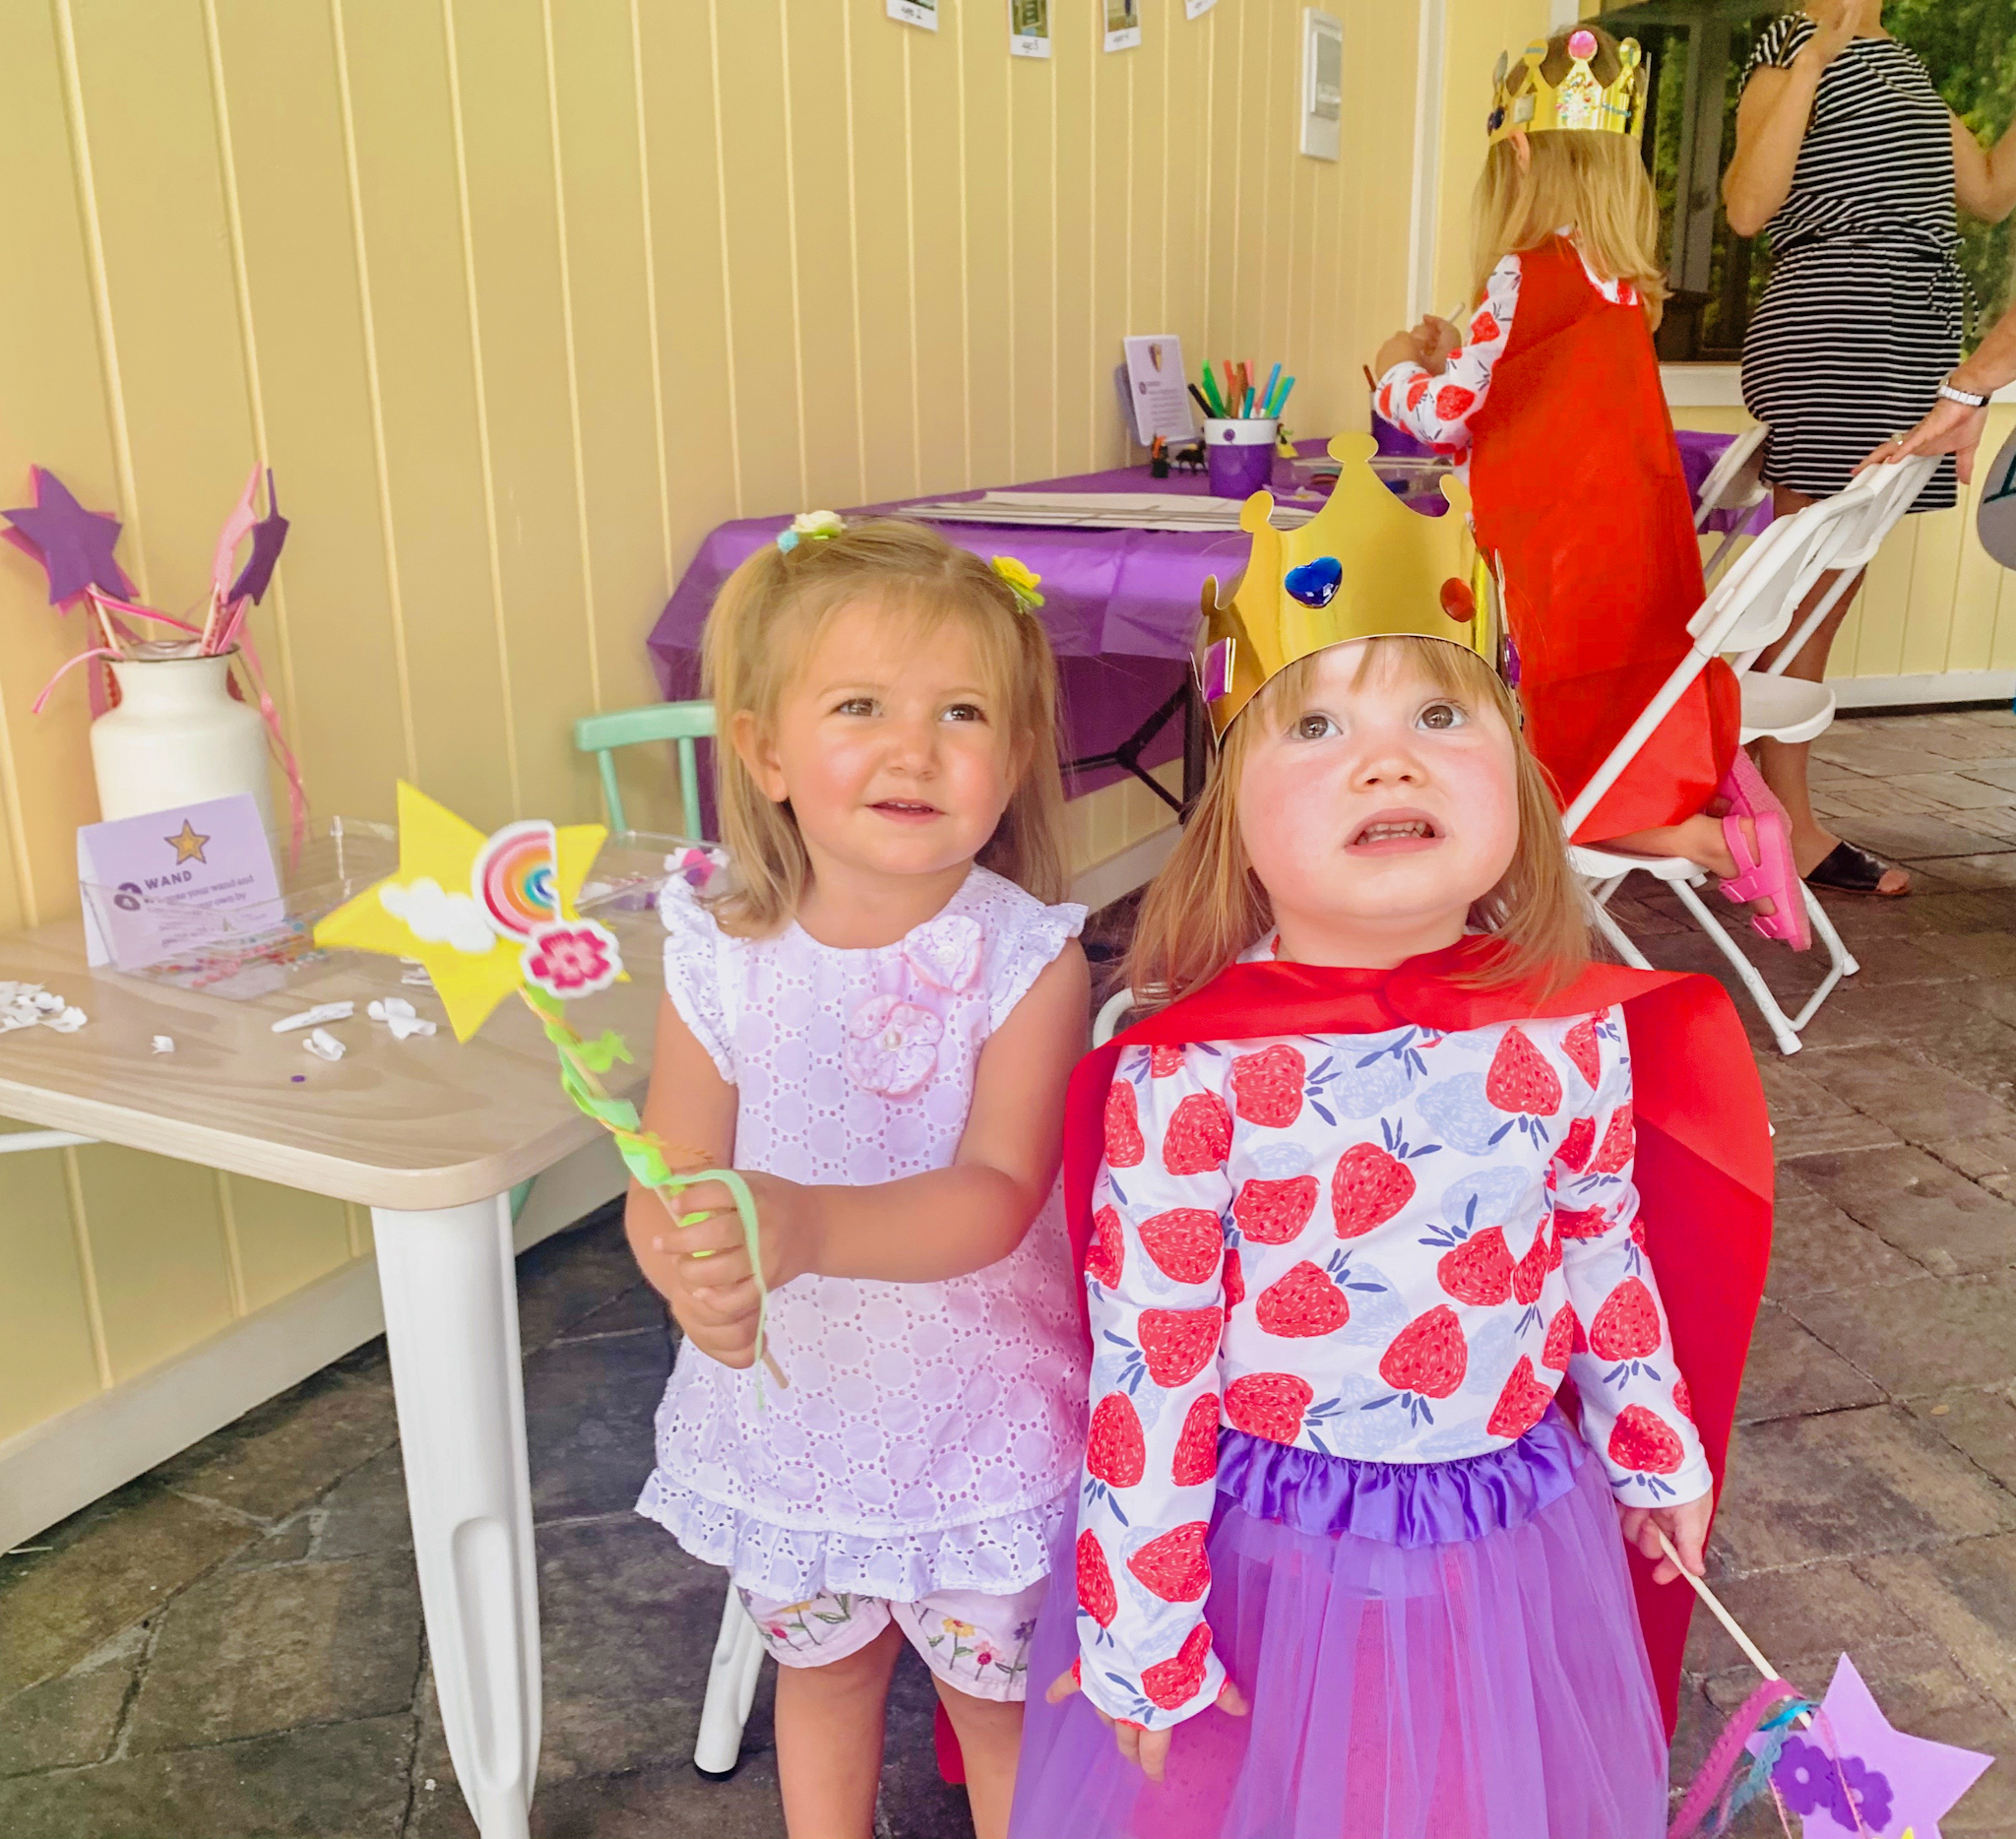
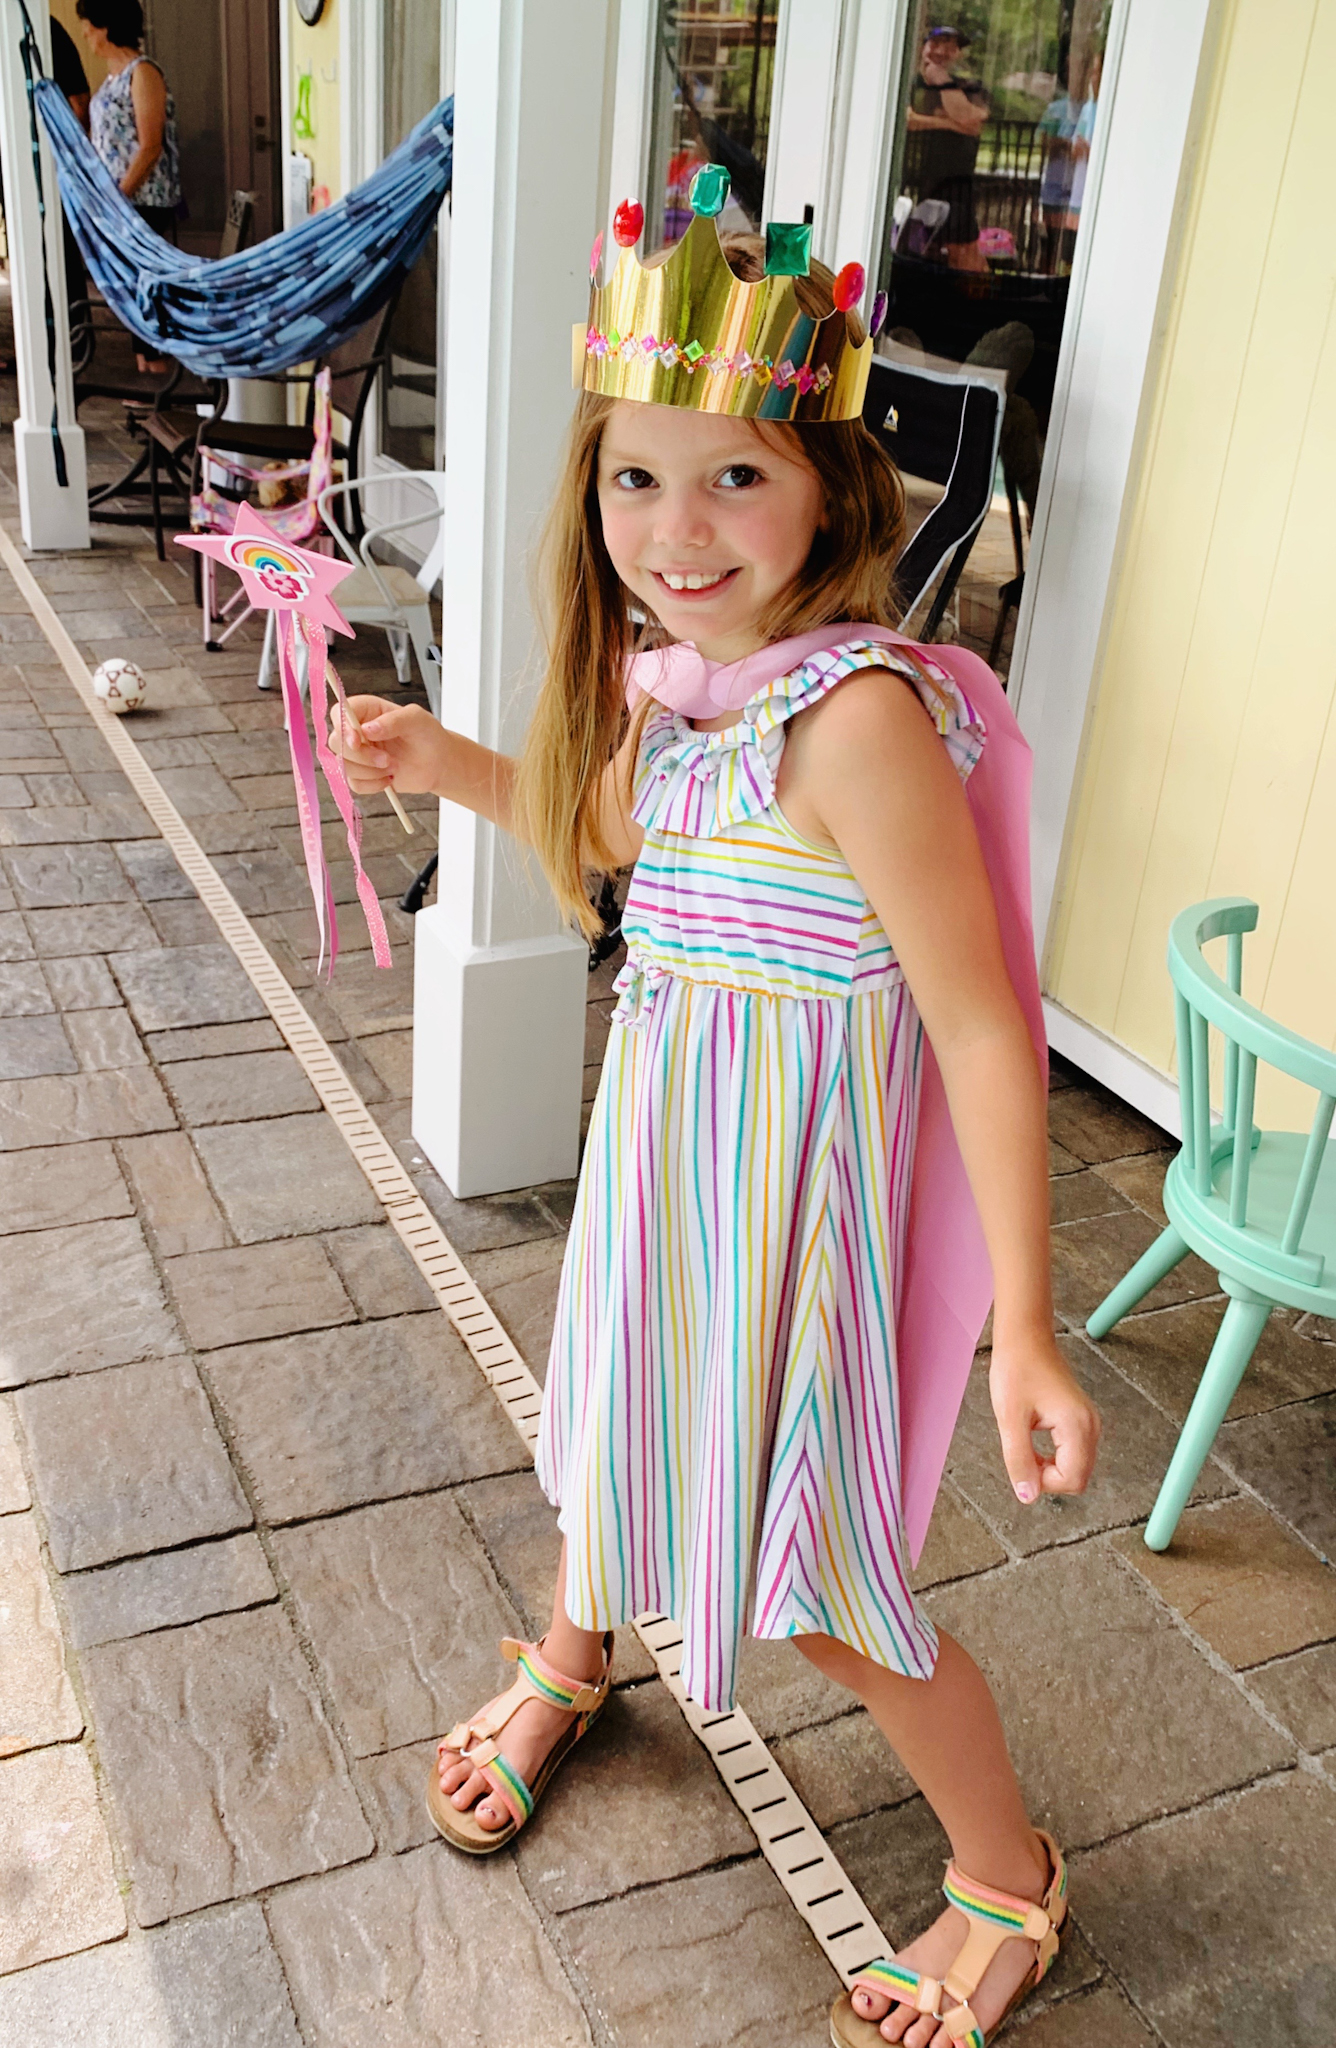
Station 3: Crown Decorating
Next, our princesses and knights sat down at station 3 to choose a gold paper crown and make it their own by bedazzling it with jewels and gems!
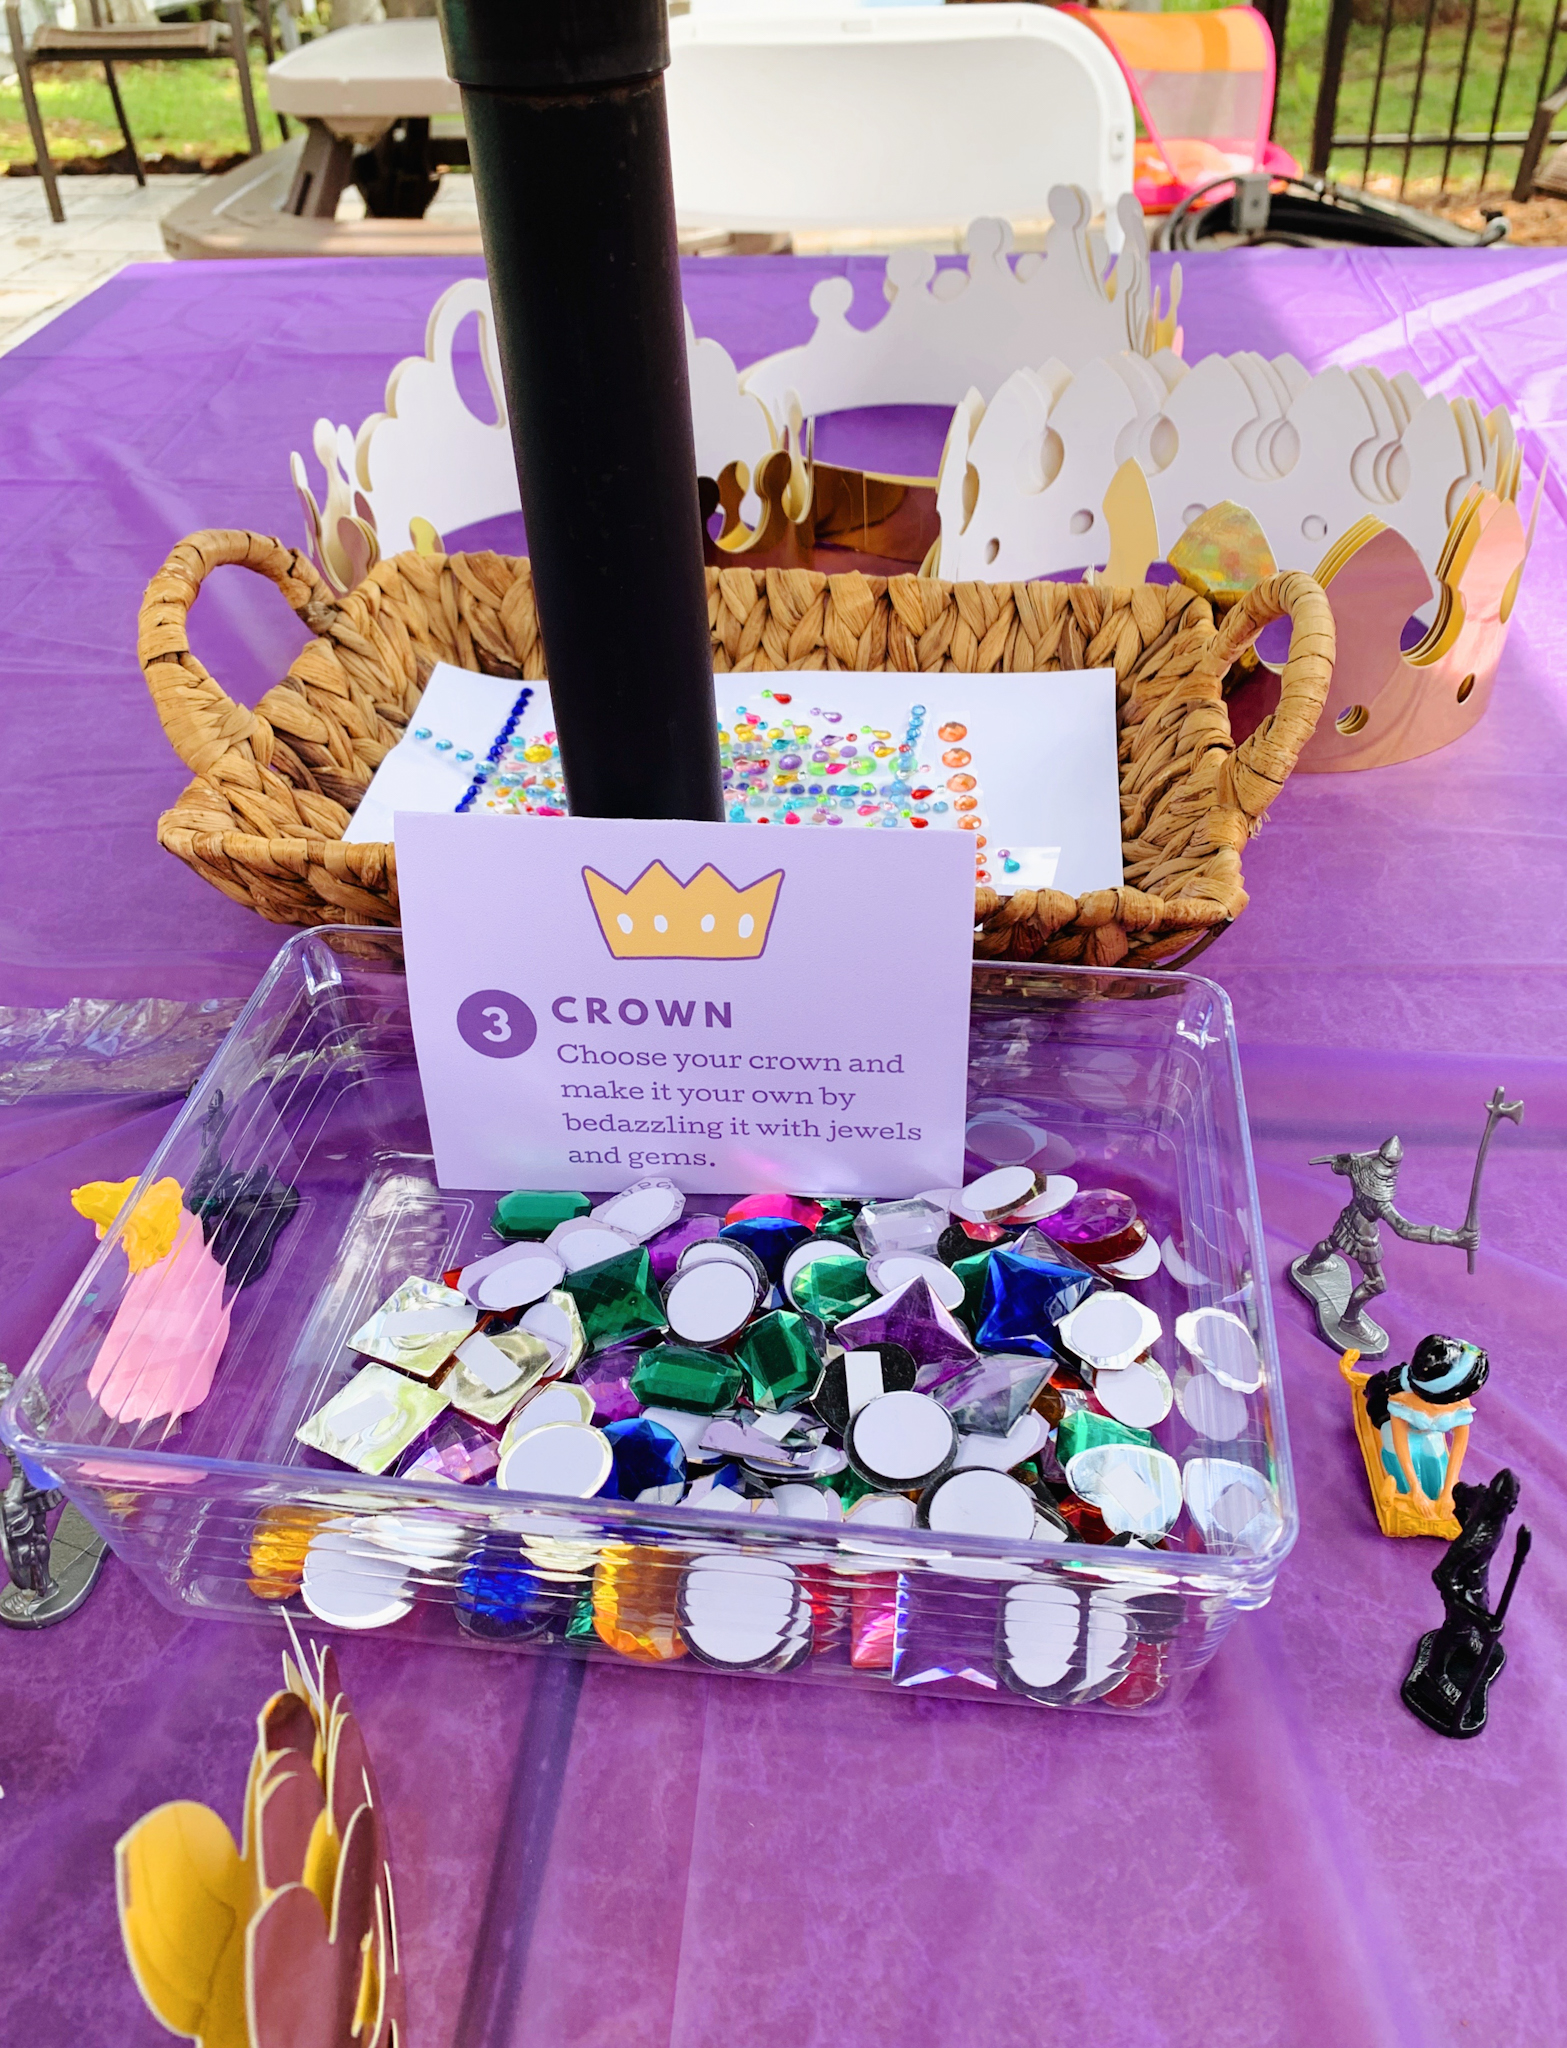
Heads-up: the big jewels we purchased had a small strip of paper on the back that needed to be peeled off to reveal the sticky tape, which proved to be tough for our younger squires and dames. And for that reason I was glad to have some sticker gems that you simply peeled off of a sheet of a clear paper. Plus, we had kings and queens on stand-by to help with paper-peeling.
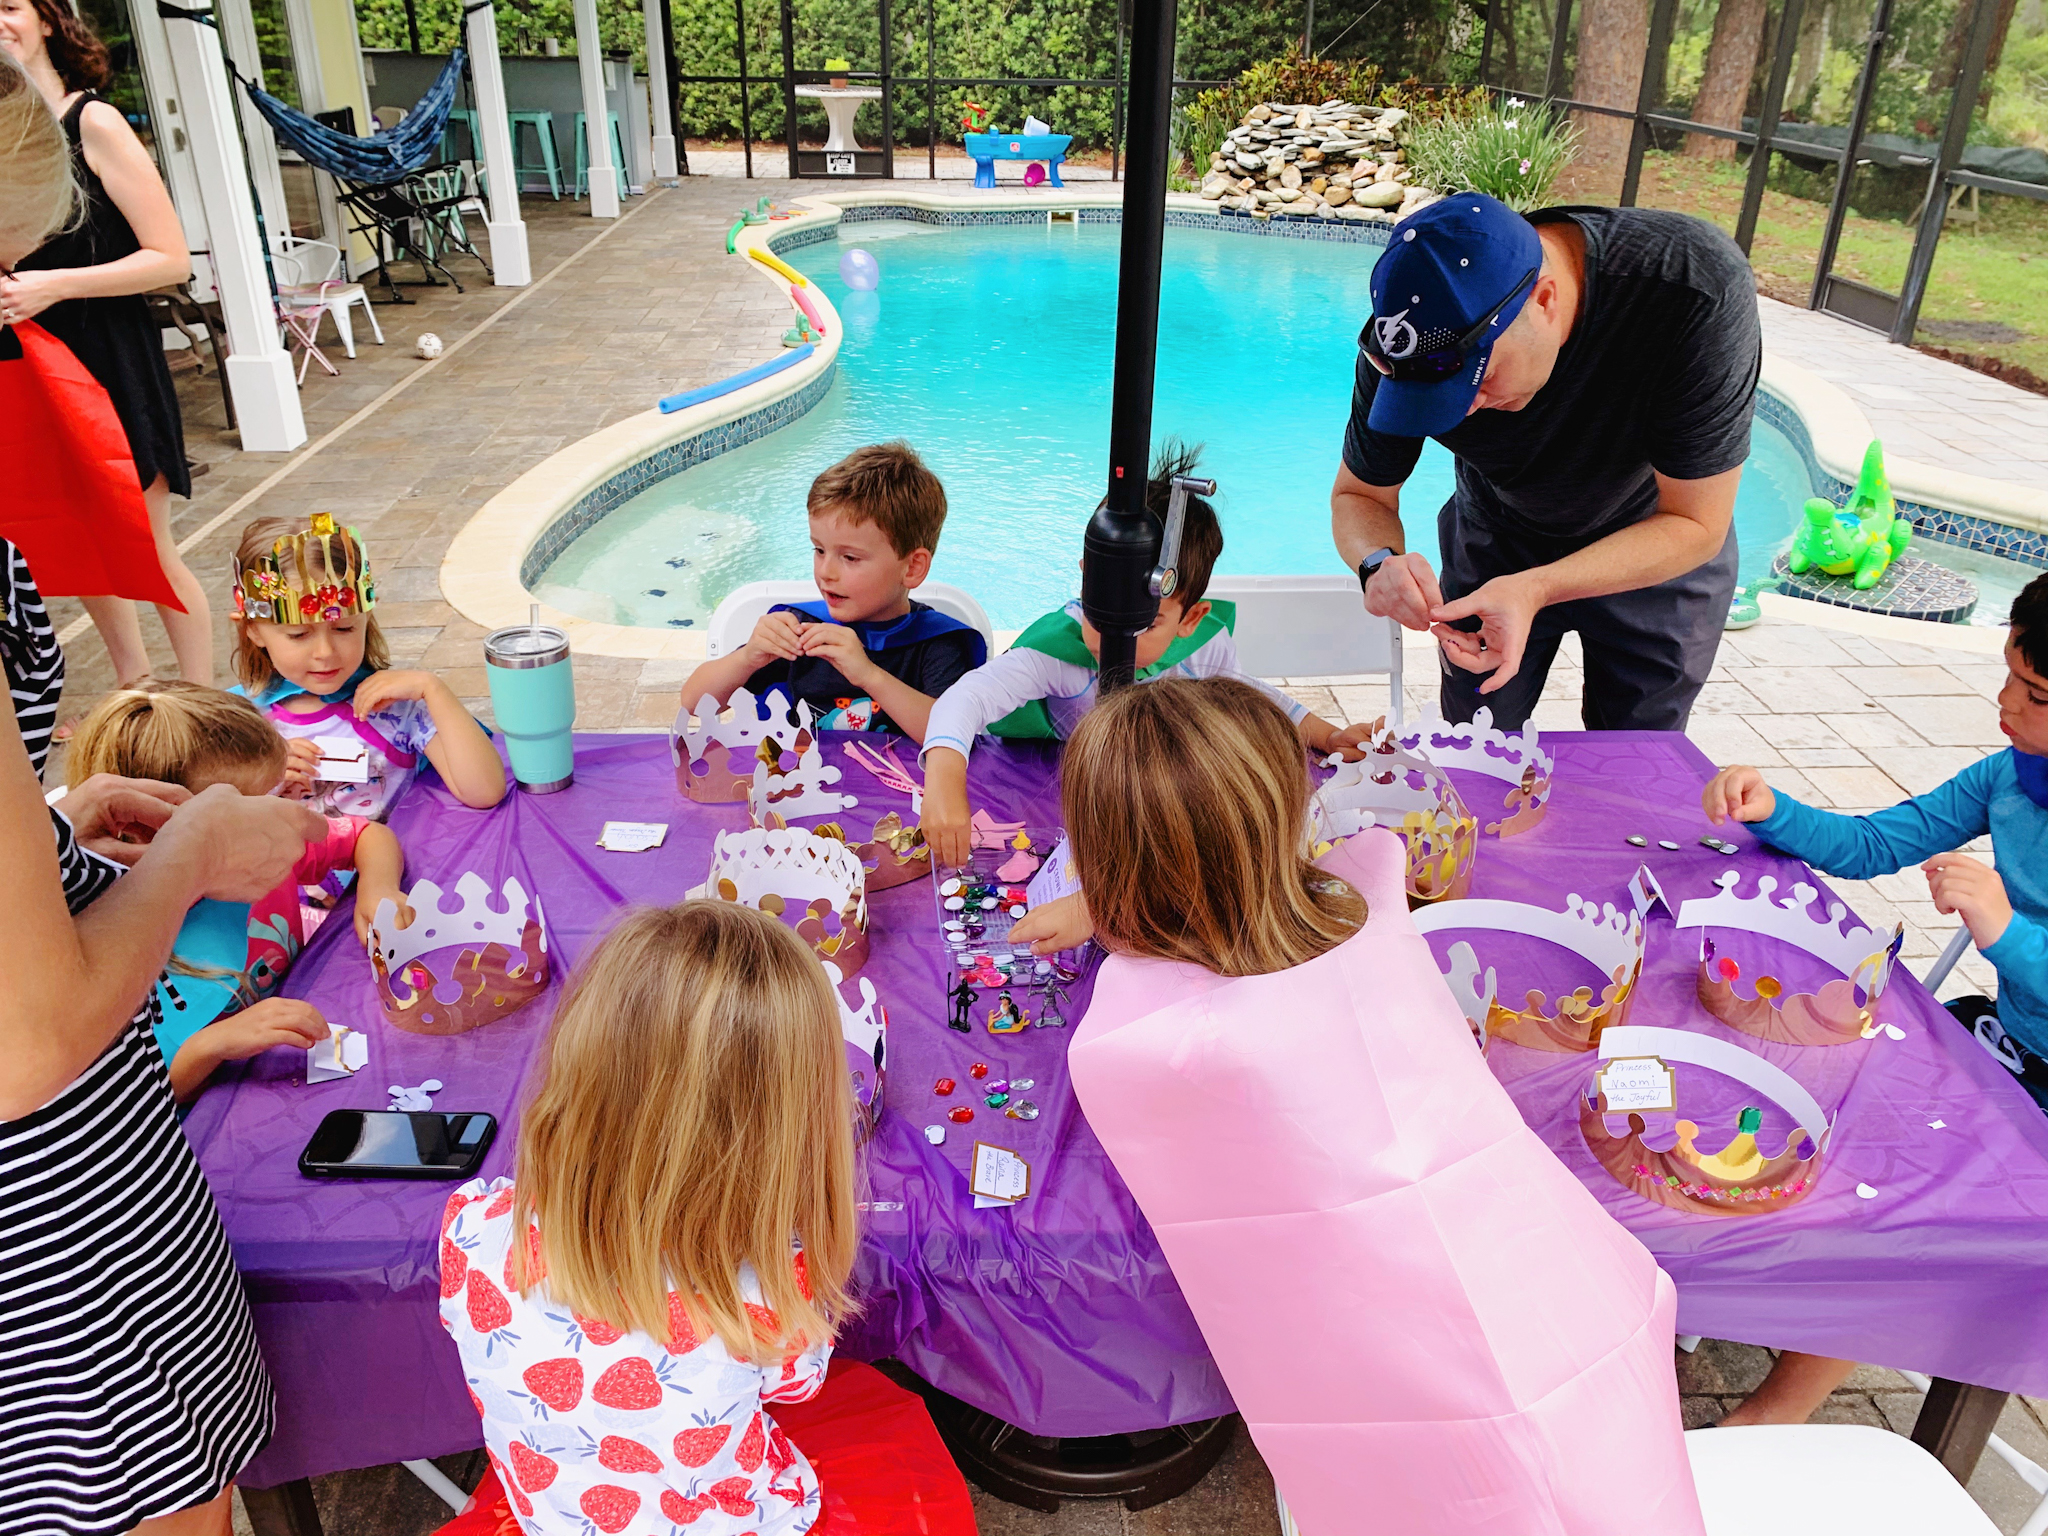
Princess Raina the Brave was in her happy place, bedazzling her crown with brilliant bling!
Once our princesses and knights were crowned, it was time for a group photo, and it was so sweet to see them fully embracing their roles. Dragons don’t stand a chance around royals as courageous as these!
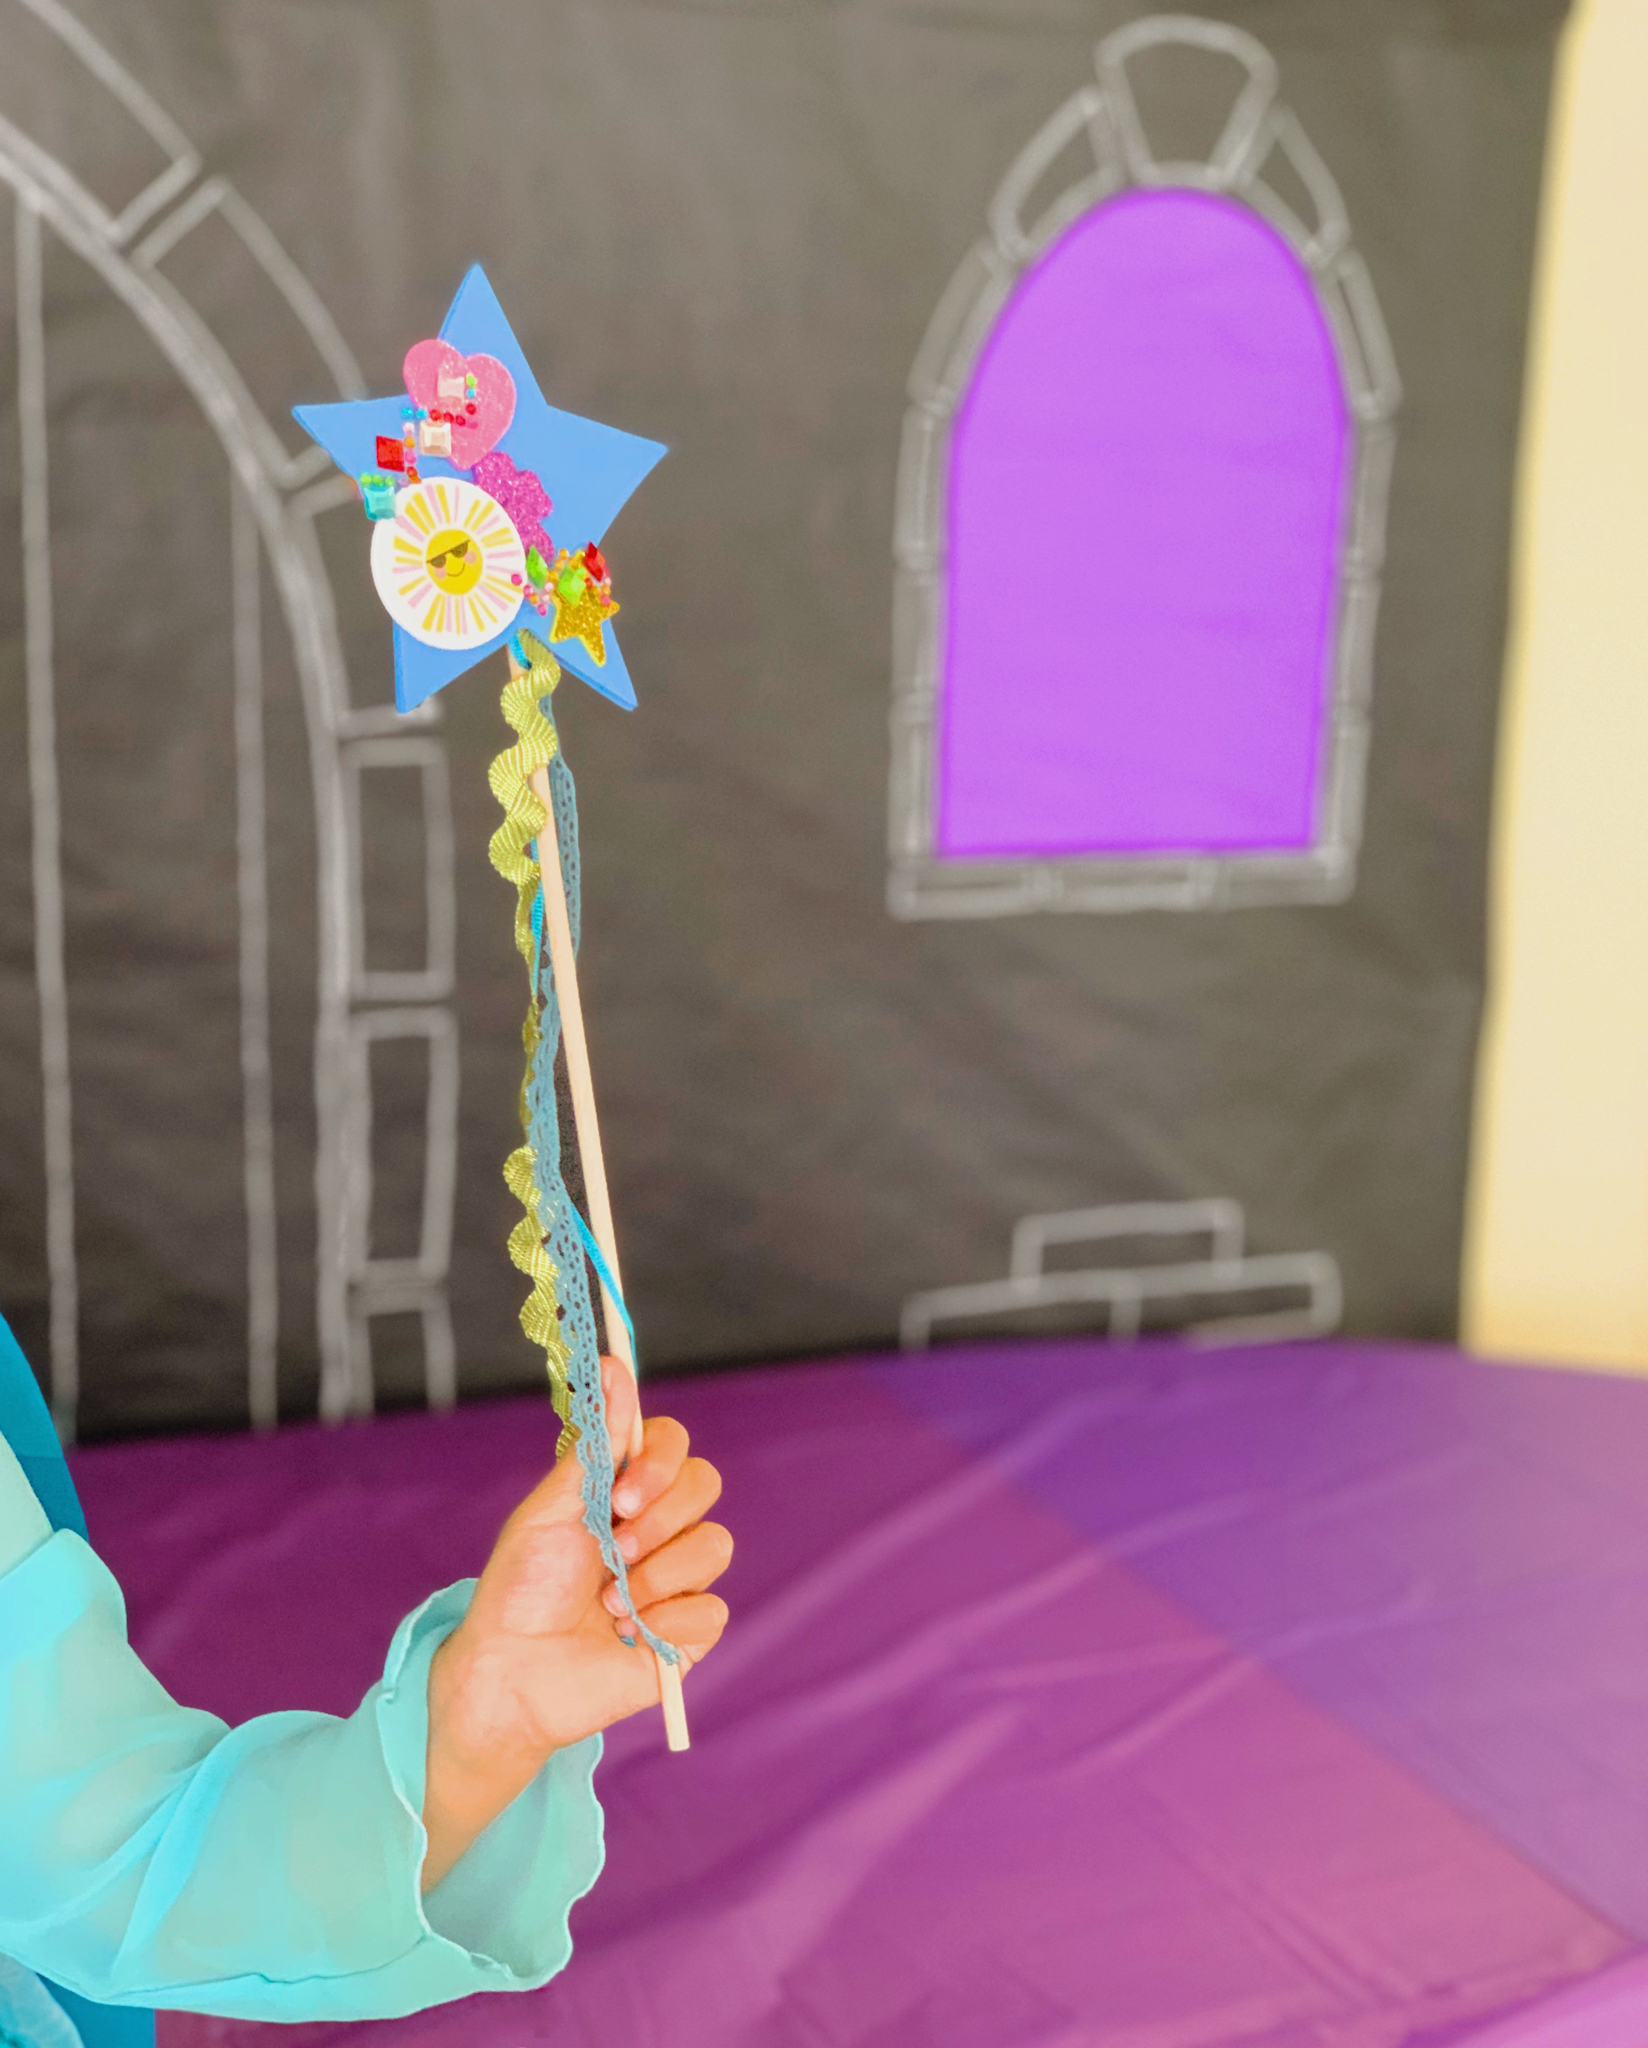
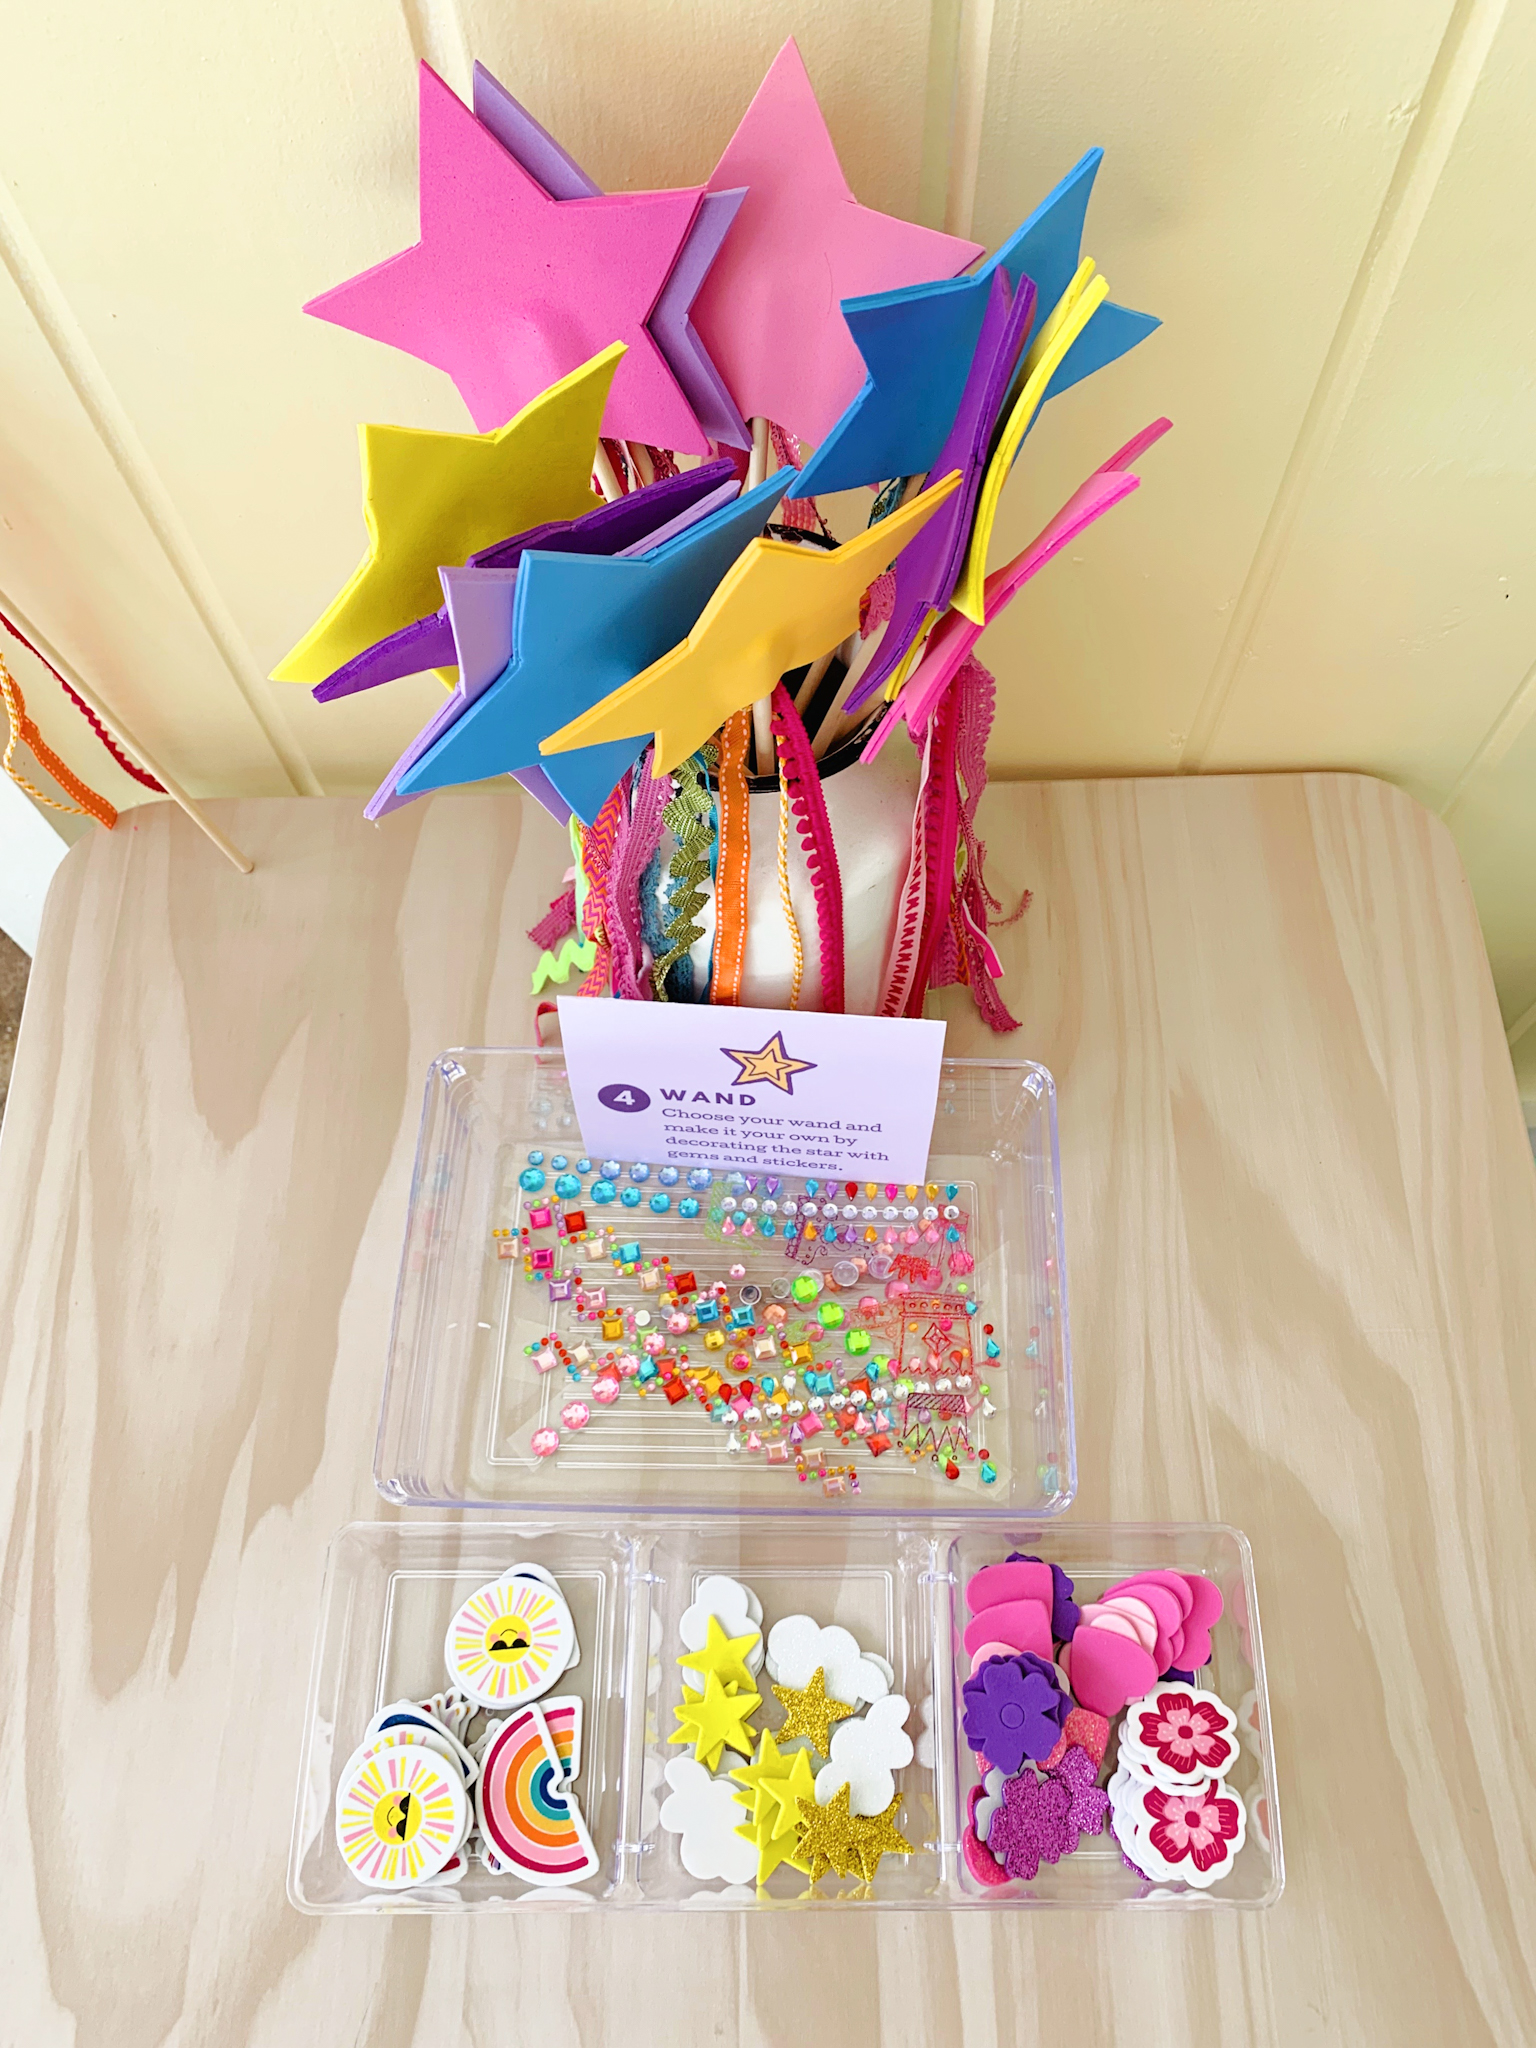
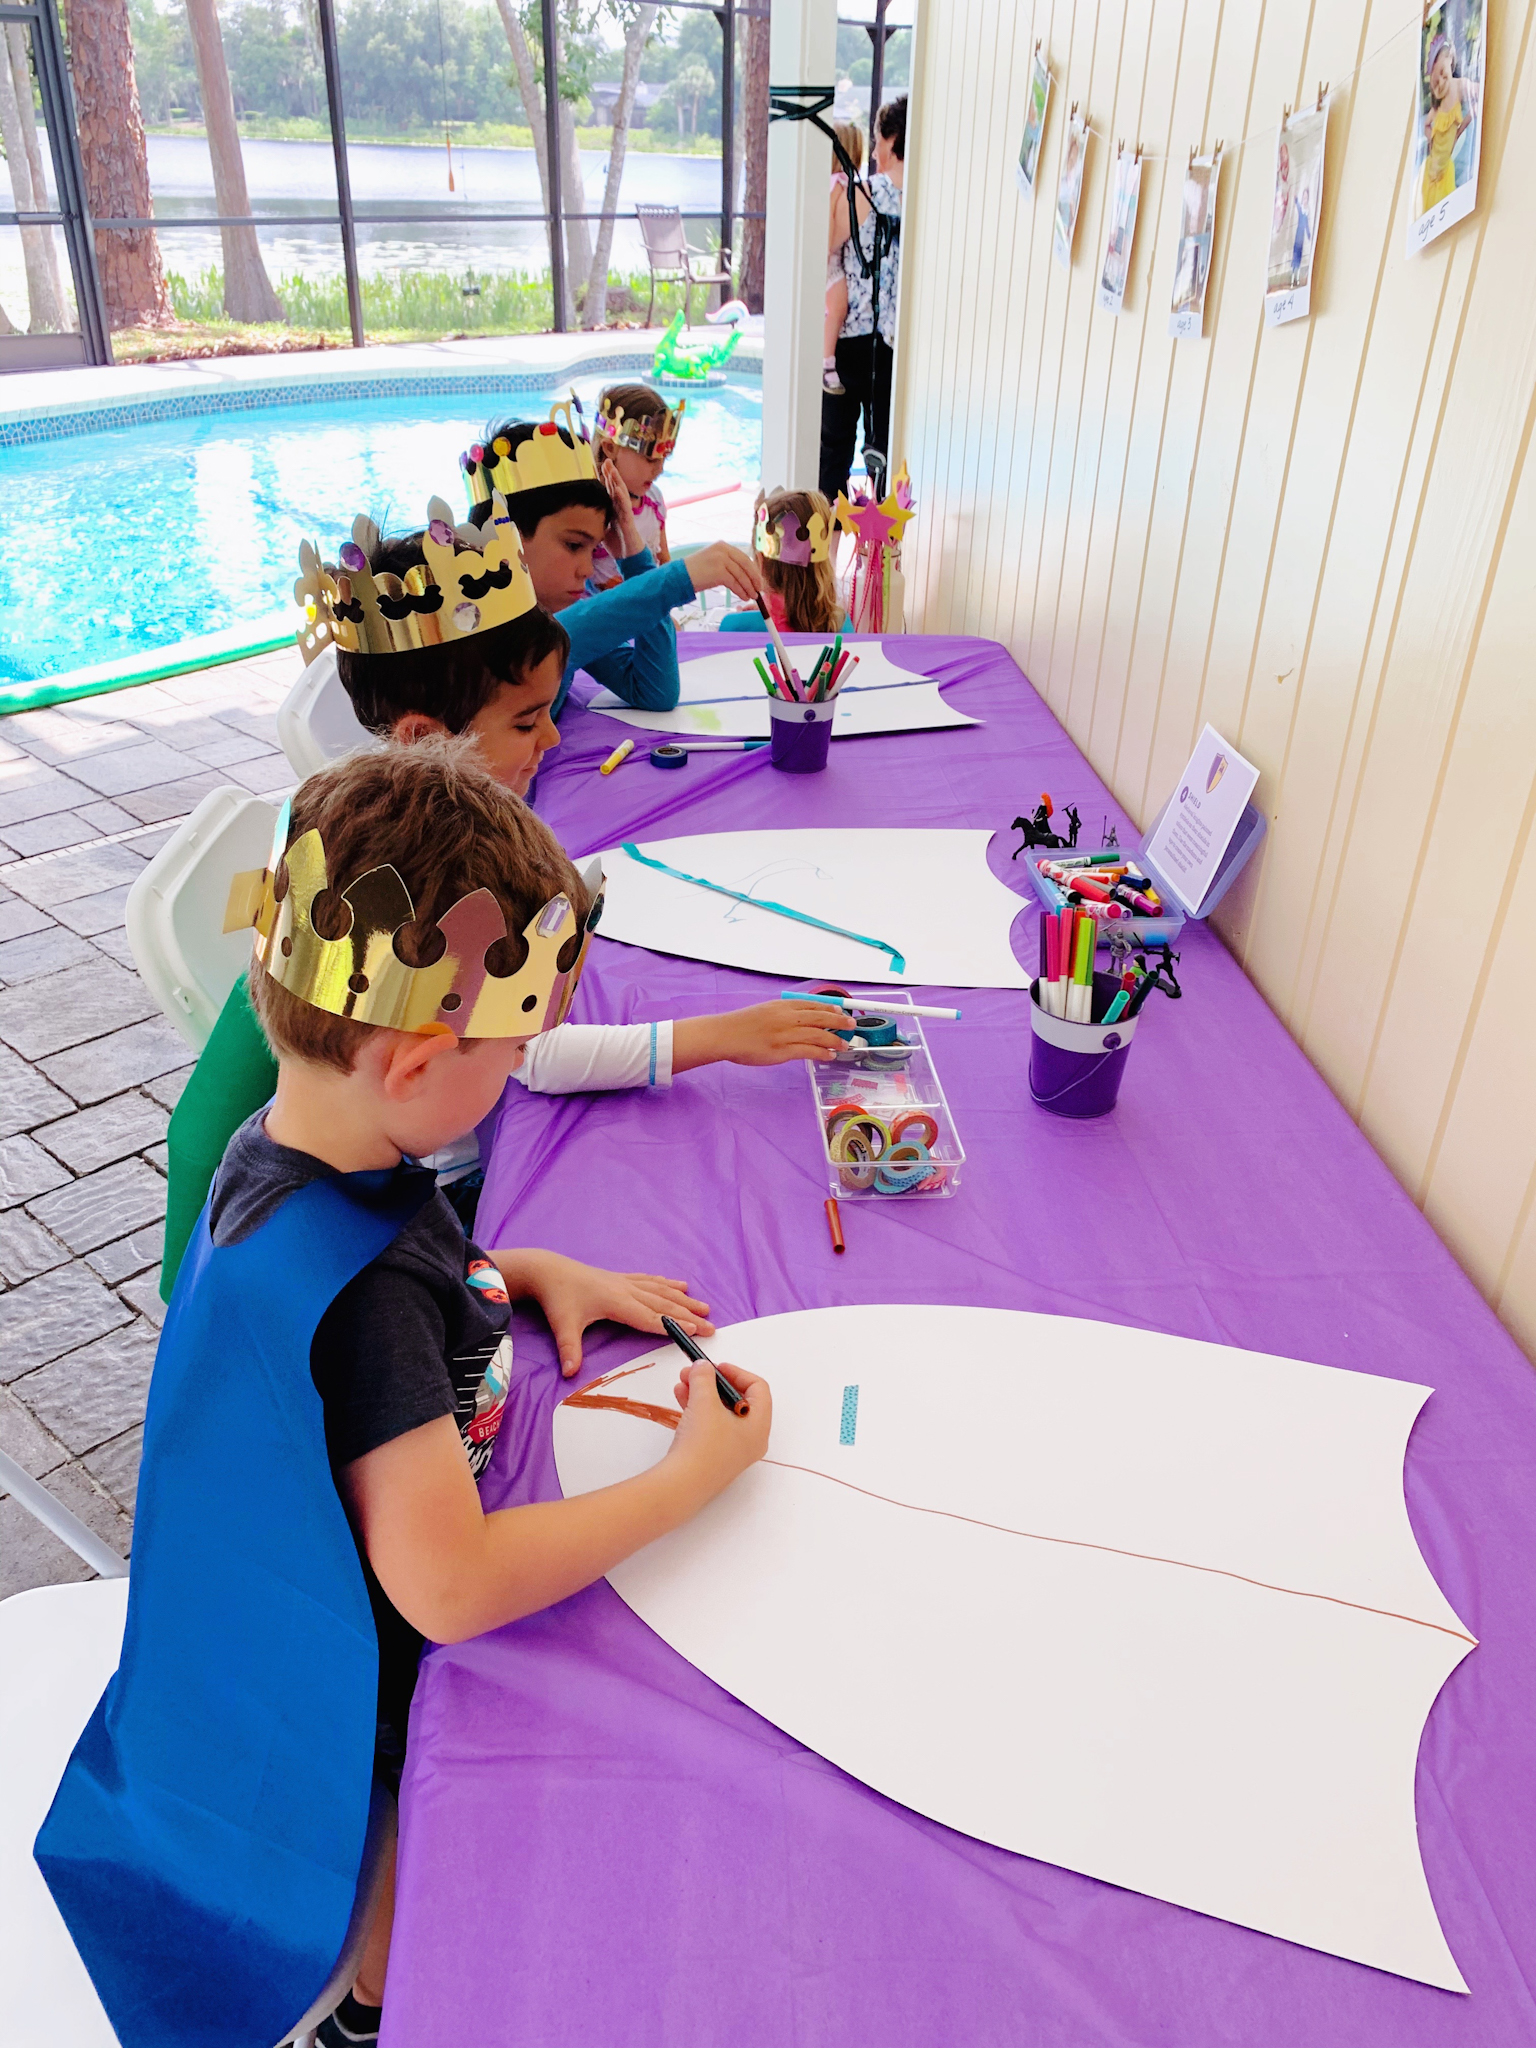
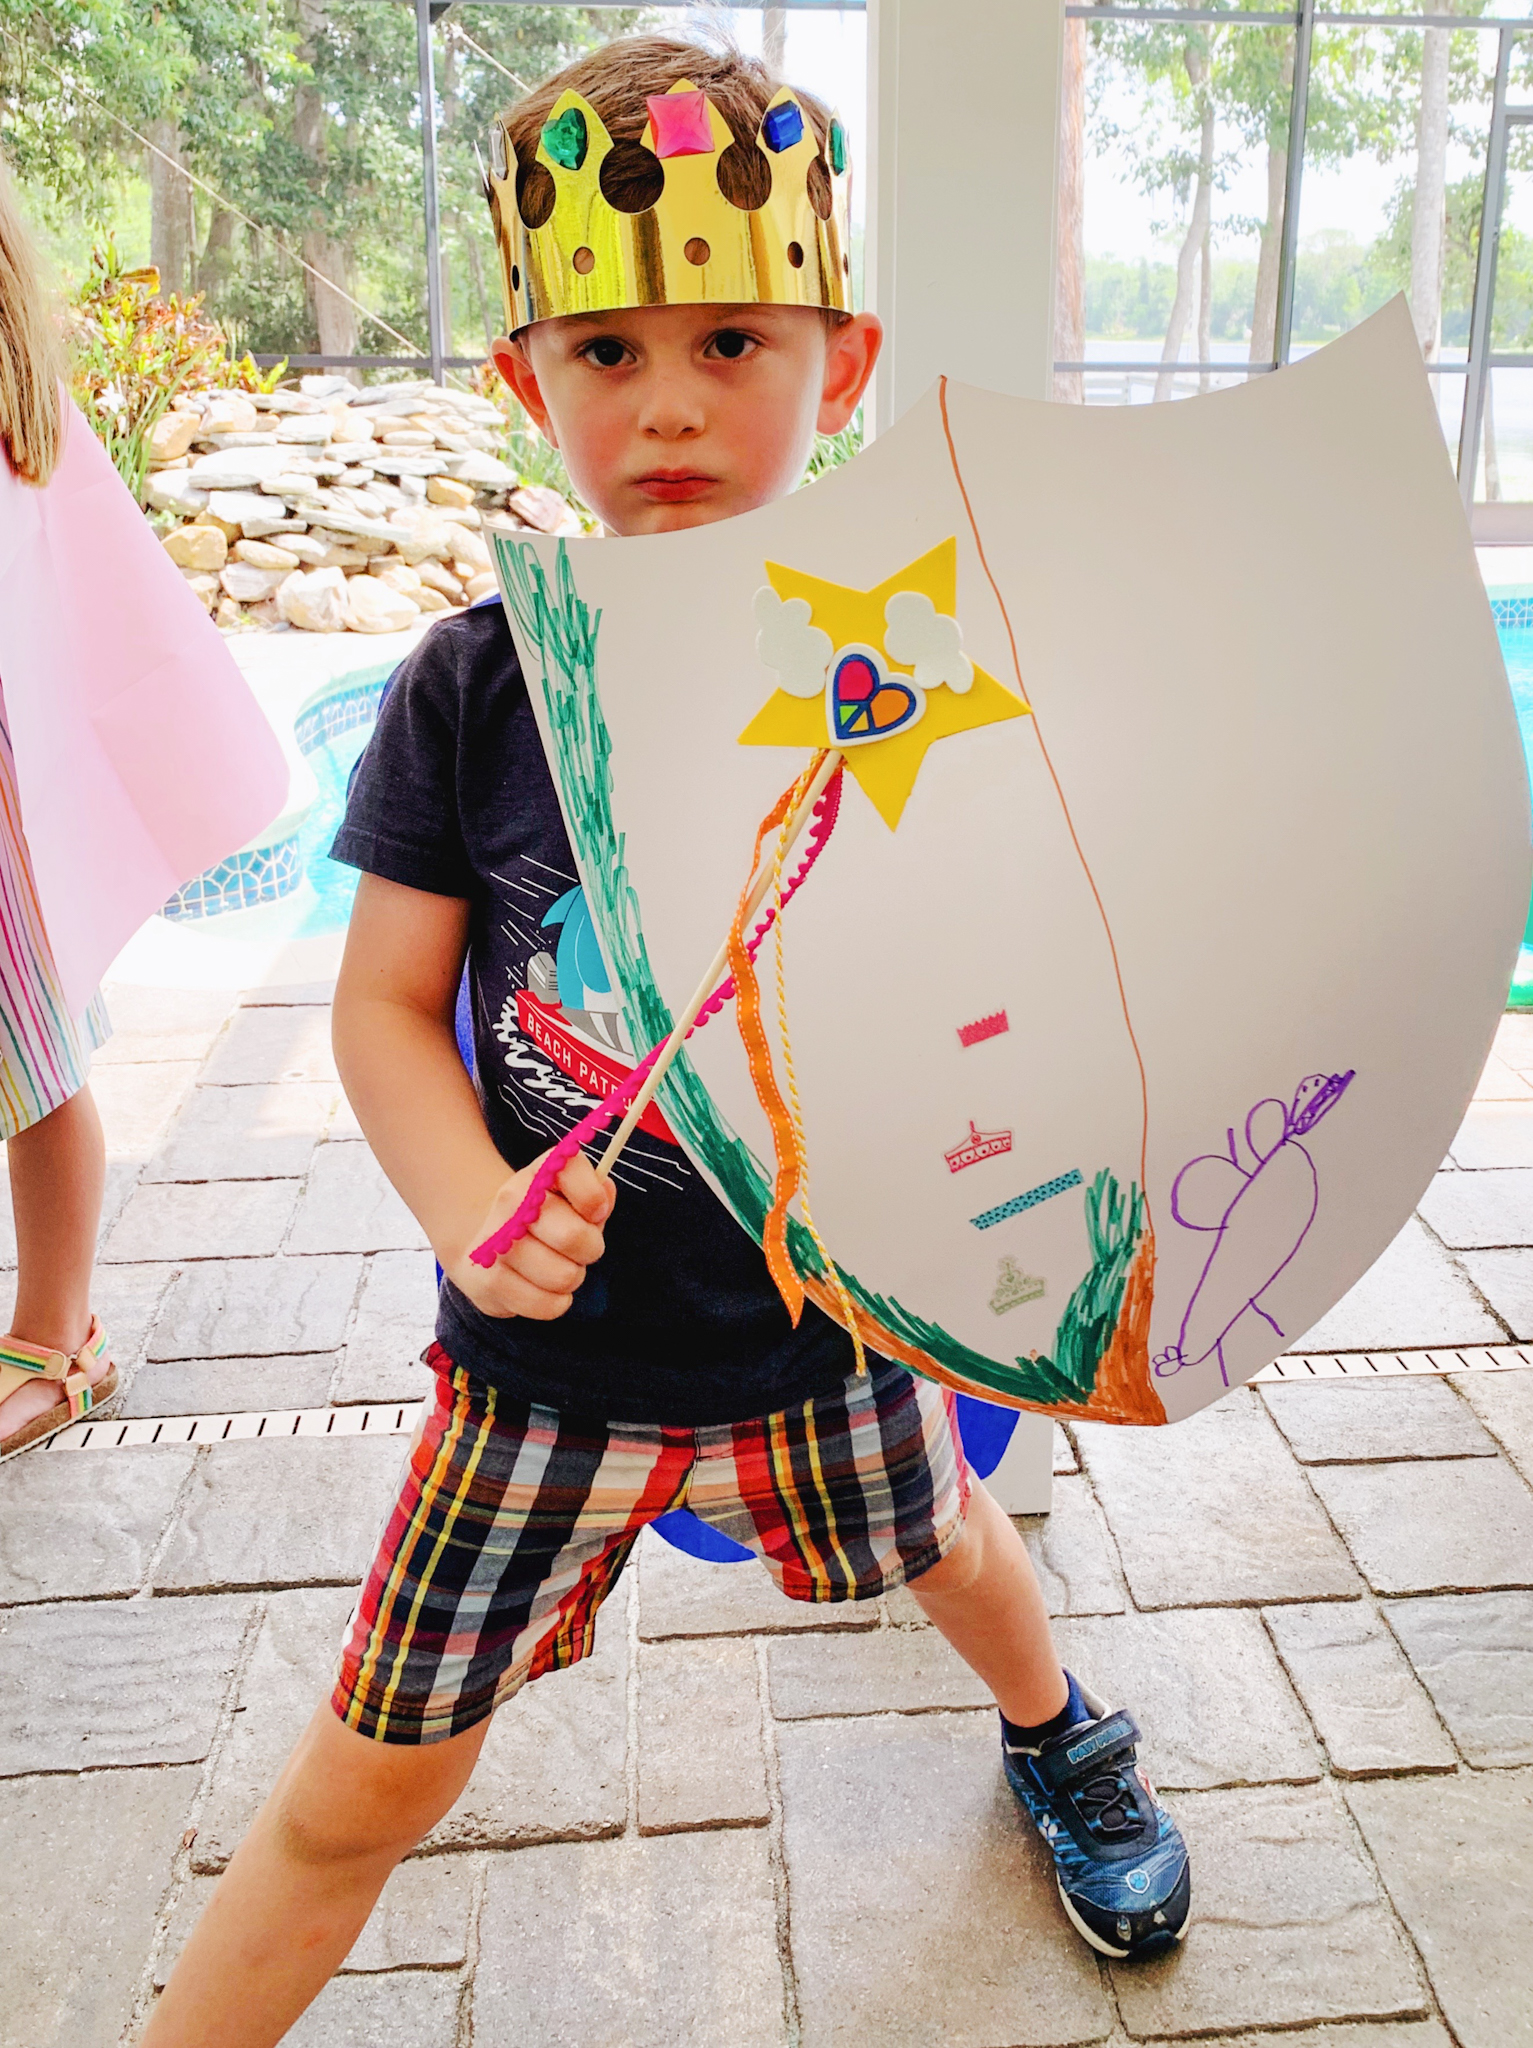
Station 4: Wands & Shields
For station 4, we gave party guests the choice of making a wand, a shield, or both!
WANDS
For our wands, I bought dowel rods, sticker foam sheets, and assorted ribbon at our local craft store and assembled the wands in advance. This proved to be a lot more labor-intensive than I anticipated (sticker-foam is no joke, y’all!), though I was really pleased with how the wands turned out!
Here was my step-by-step wand assembly-process:
1. First, I printed out a star shape I found online in a few different sizes and selected the one that felt big (but not too big, ha!). I cut it out as my stencil template.
2. Then, I traced two stars on the back of each sheet of sticker foam and cut them out.

3. Then, I selected three strands of ribbon to complement each star and cut them so they’d be about as long as the dowels.
4. I peeled the backing off of two stars, laid down my dowel and ribbon in the middle of one, added a gob of hot glue to the middle, and then placed the second star overtop, carefully matching up the stars as best I could.
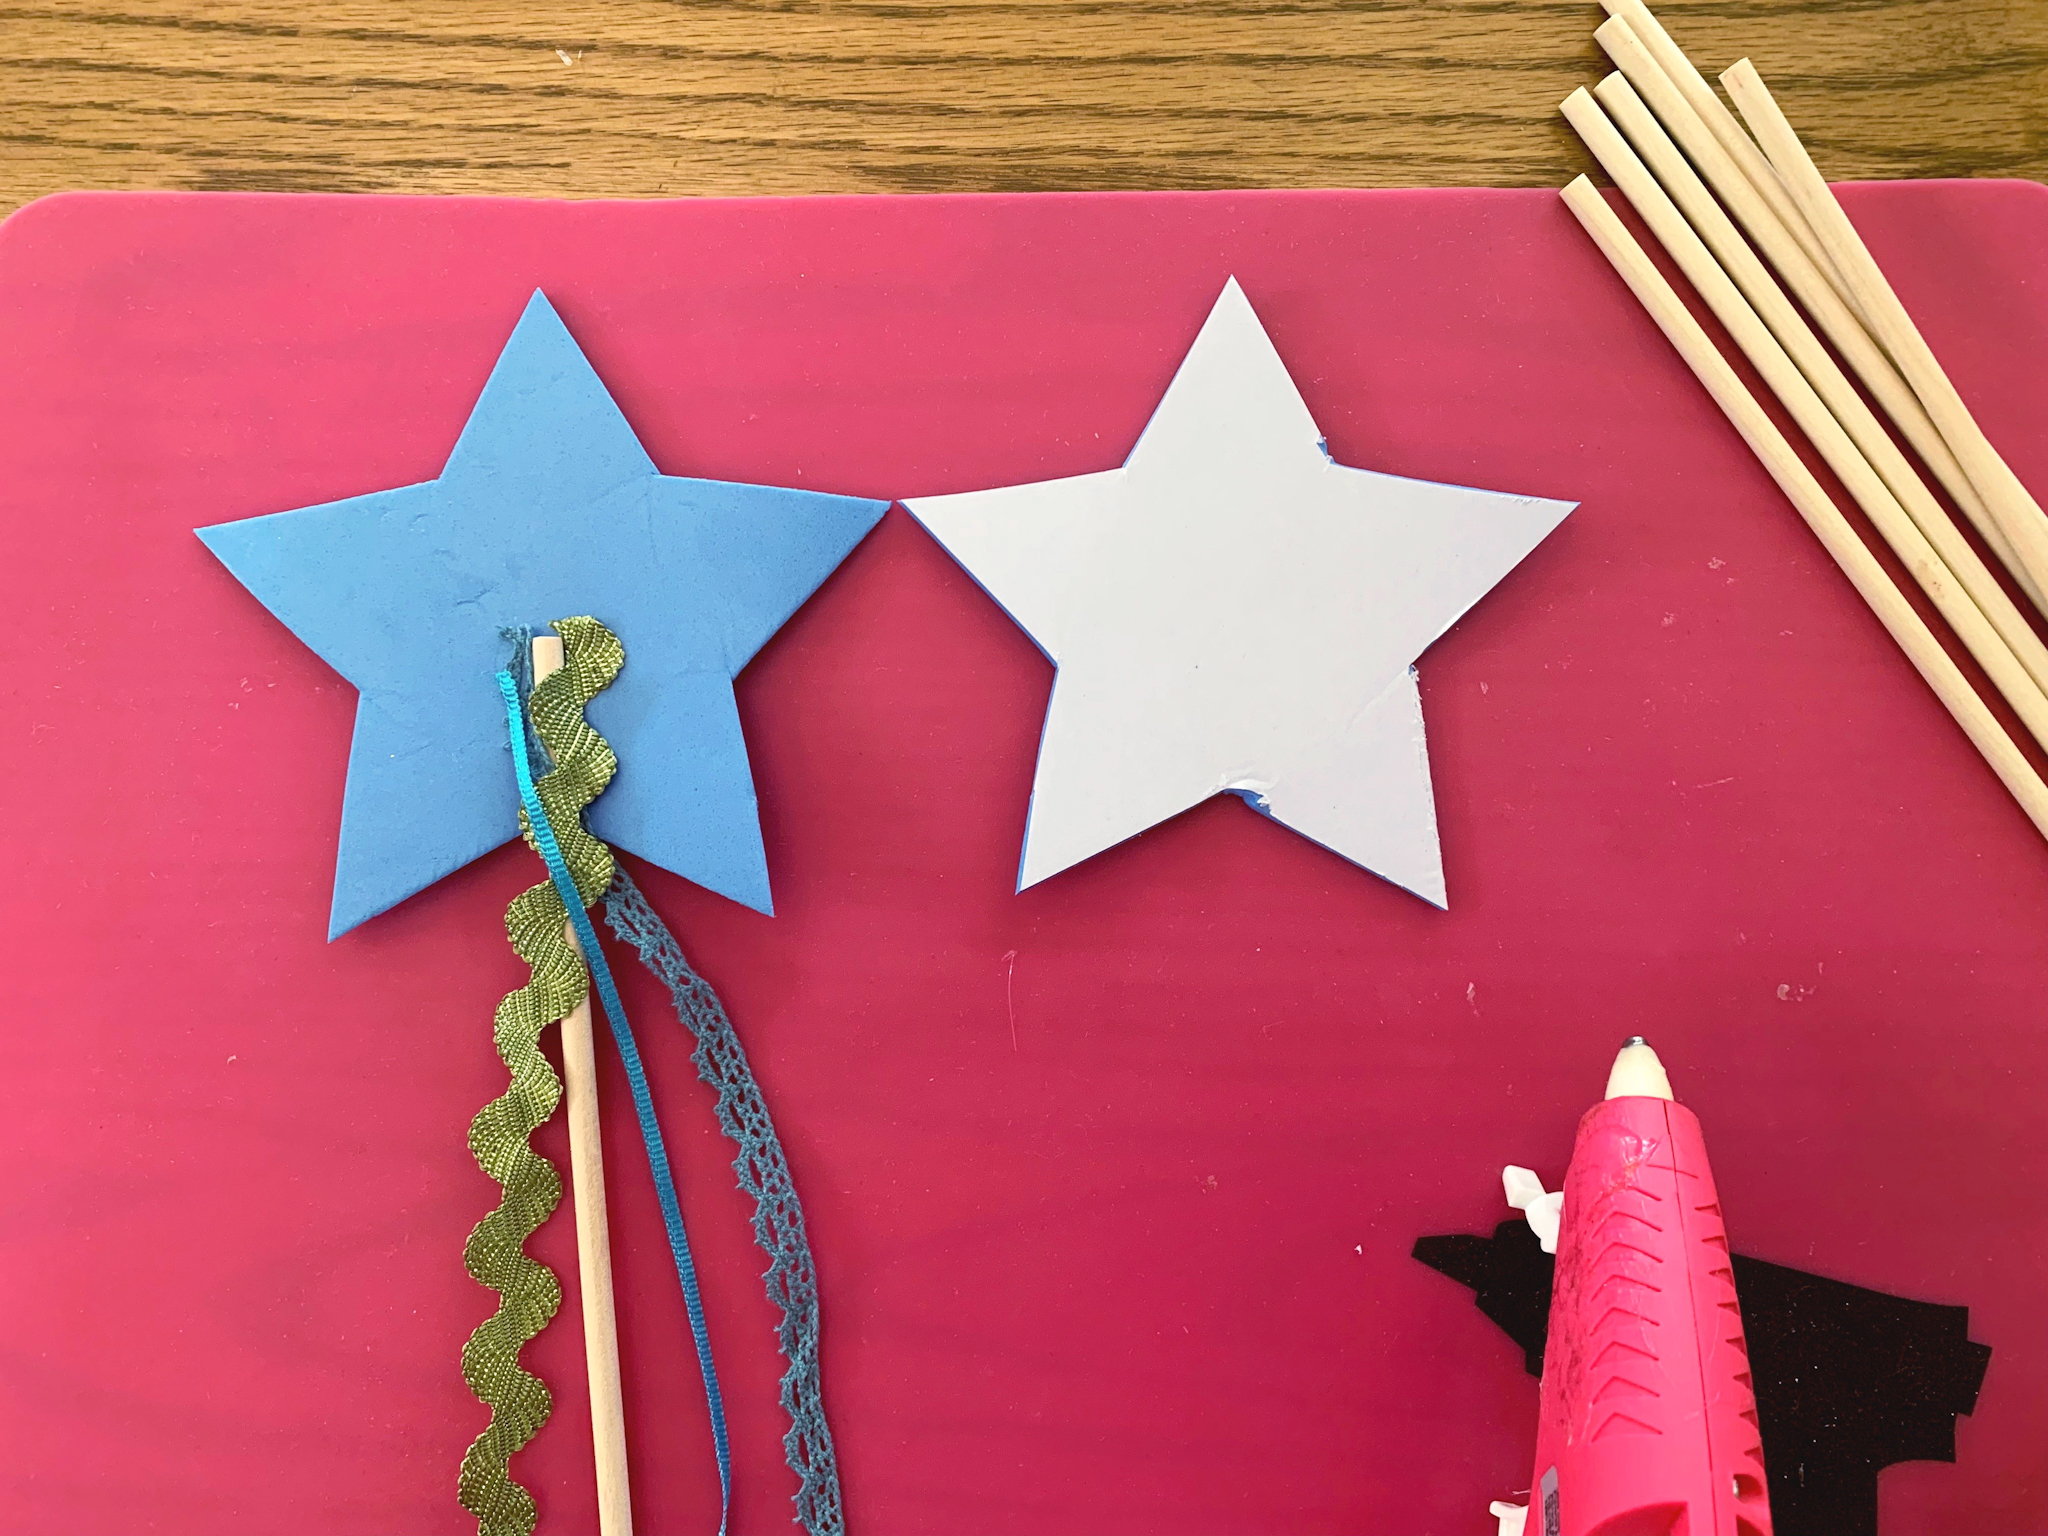
5. Using a pair of sharp scissors, I trimmed off any edges that hadn’t lined up perfectly.
6. I decorated one sample wand.
And voila!
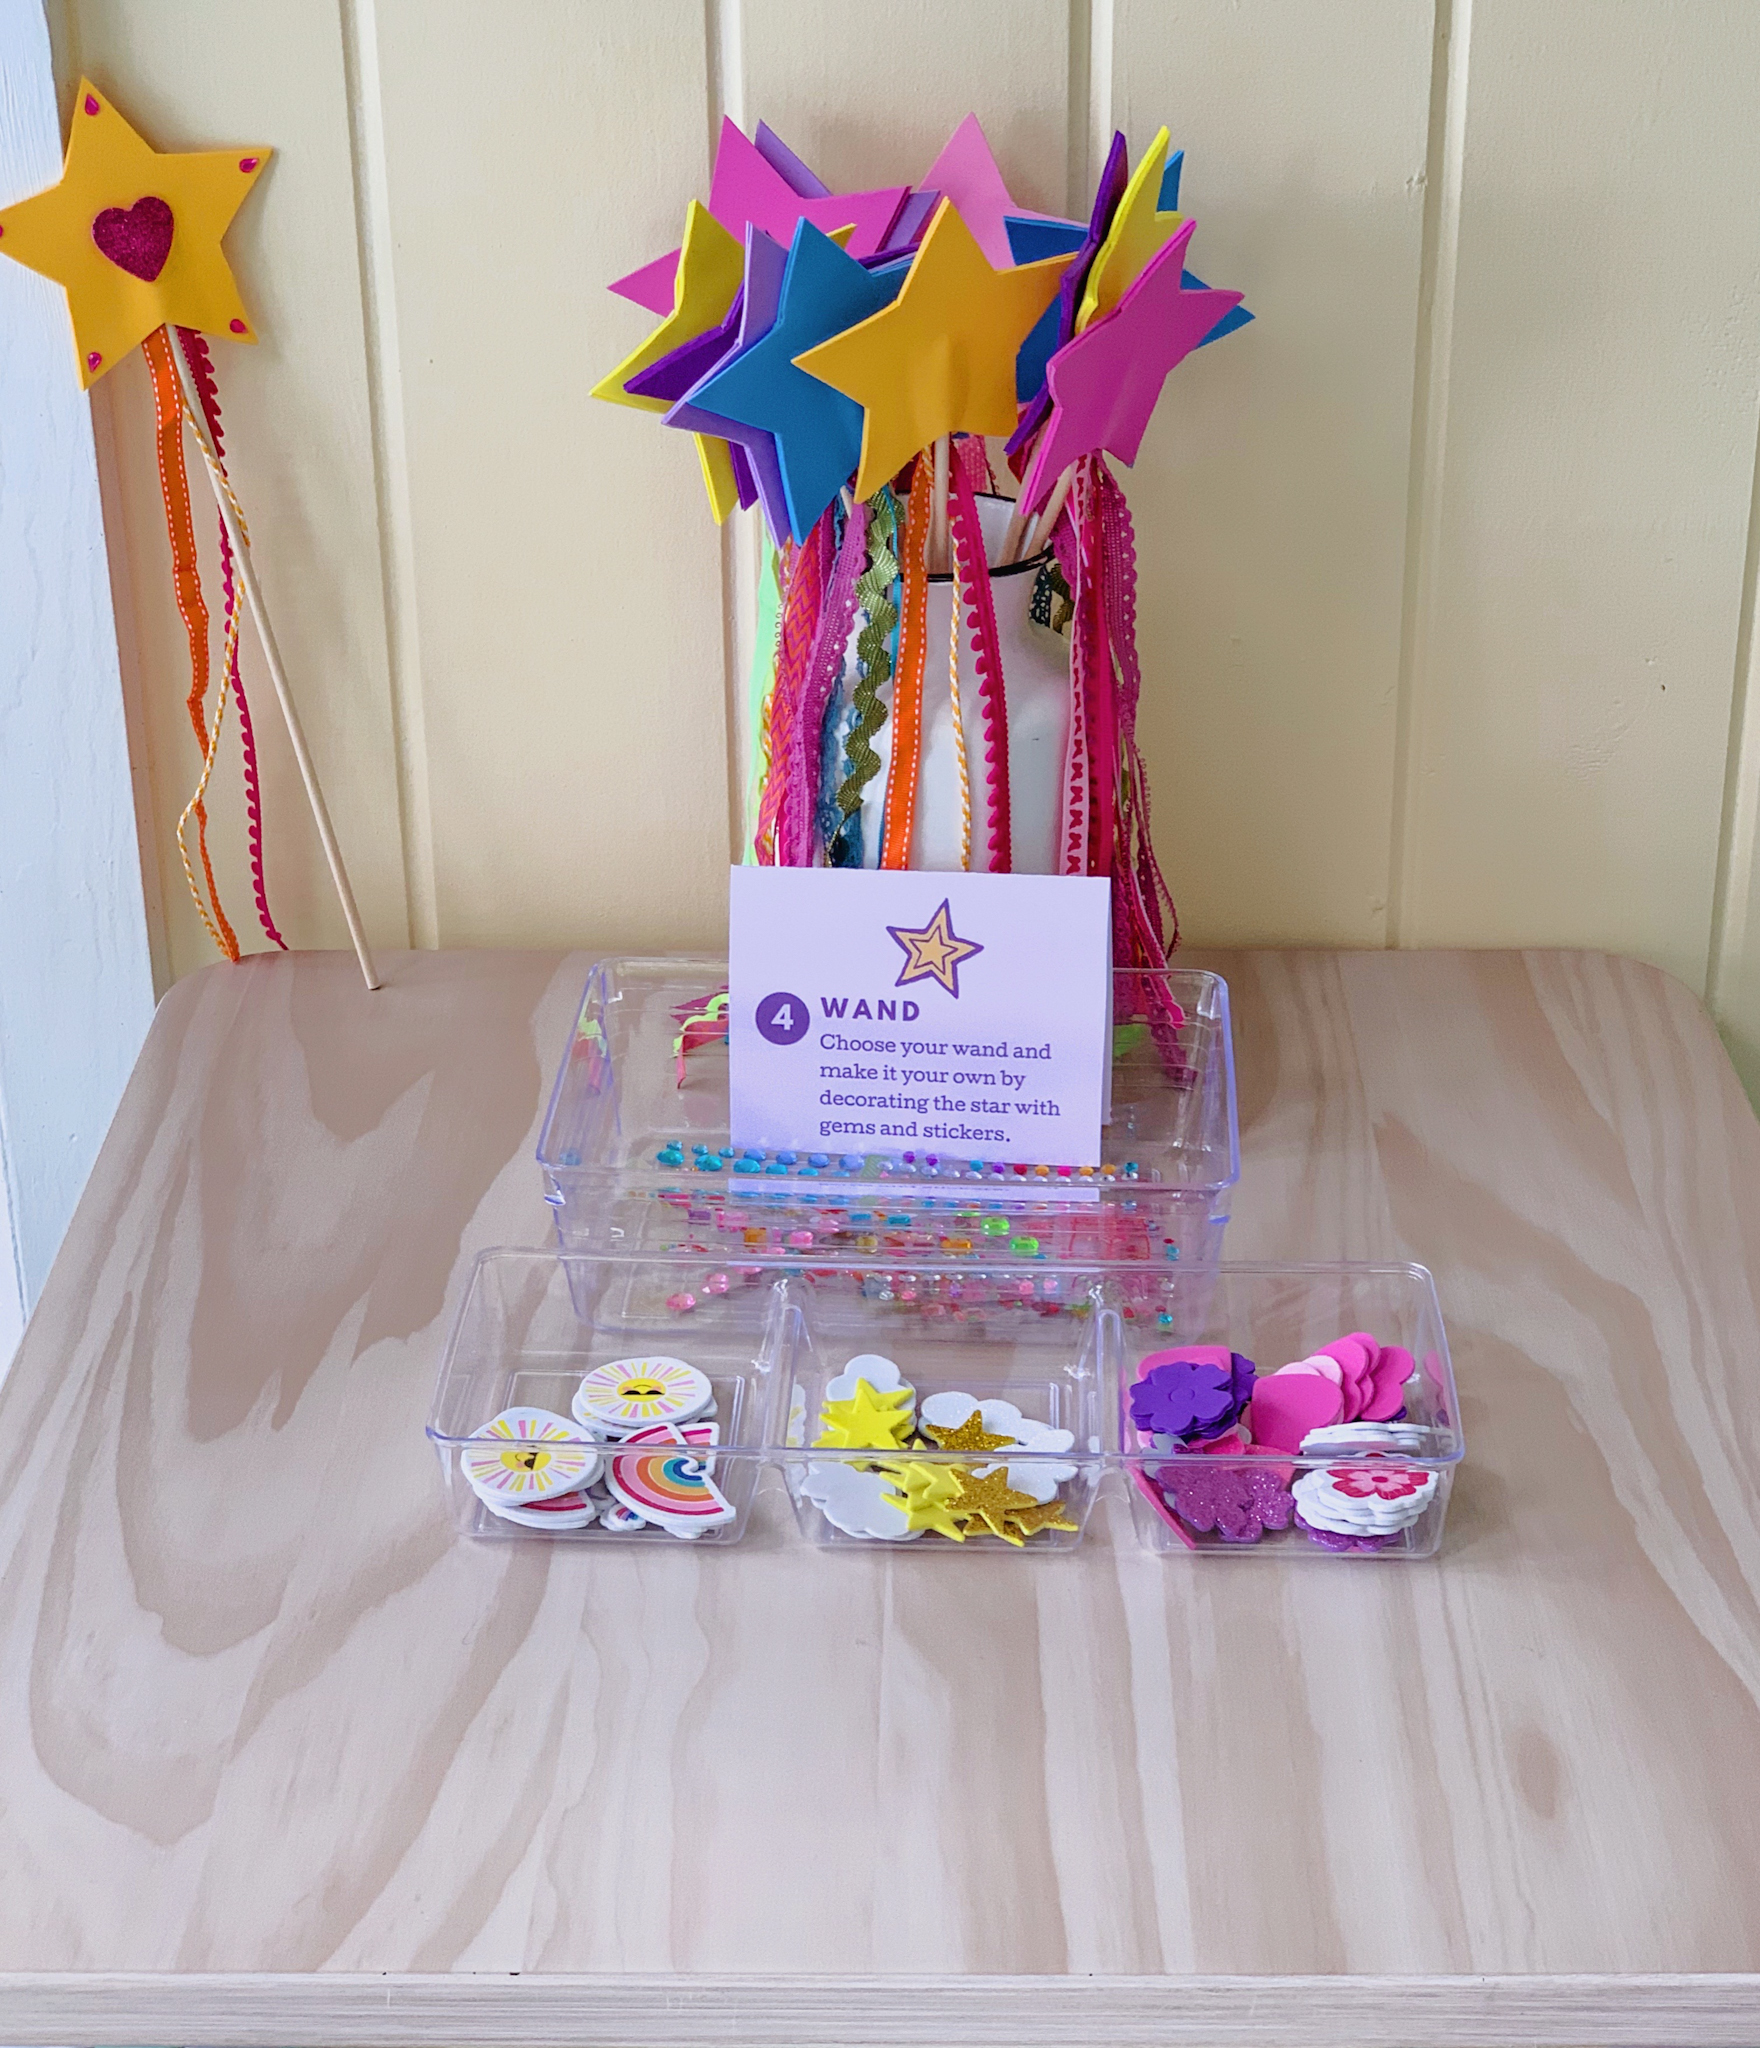
Once kiddos arrived at the wand station, they were invited to choose their wand and make it their own by embellishing the star with gems and foam stickers.
Juniper and her friend Evie had fun making matching wands!
The foam stickers were especially friendly to the tiny fingers of our littlest dames, Pepper and Lila.
Presenting, Princess Naomi the Joyful!
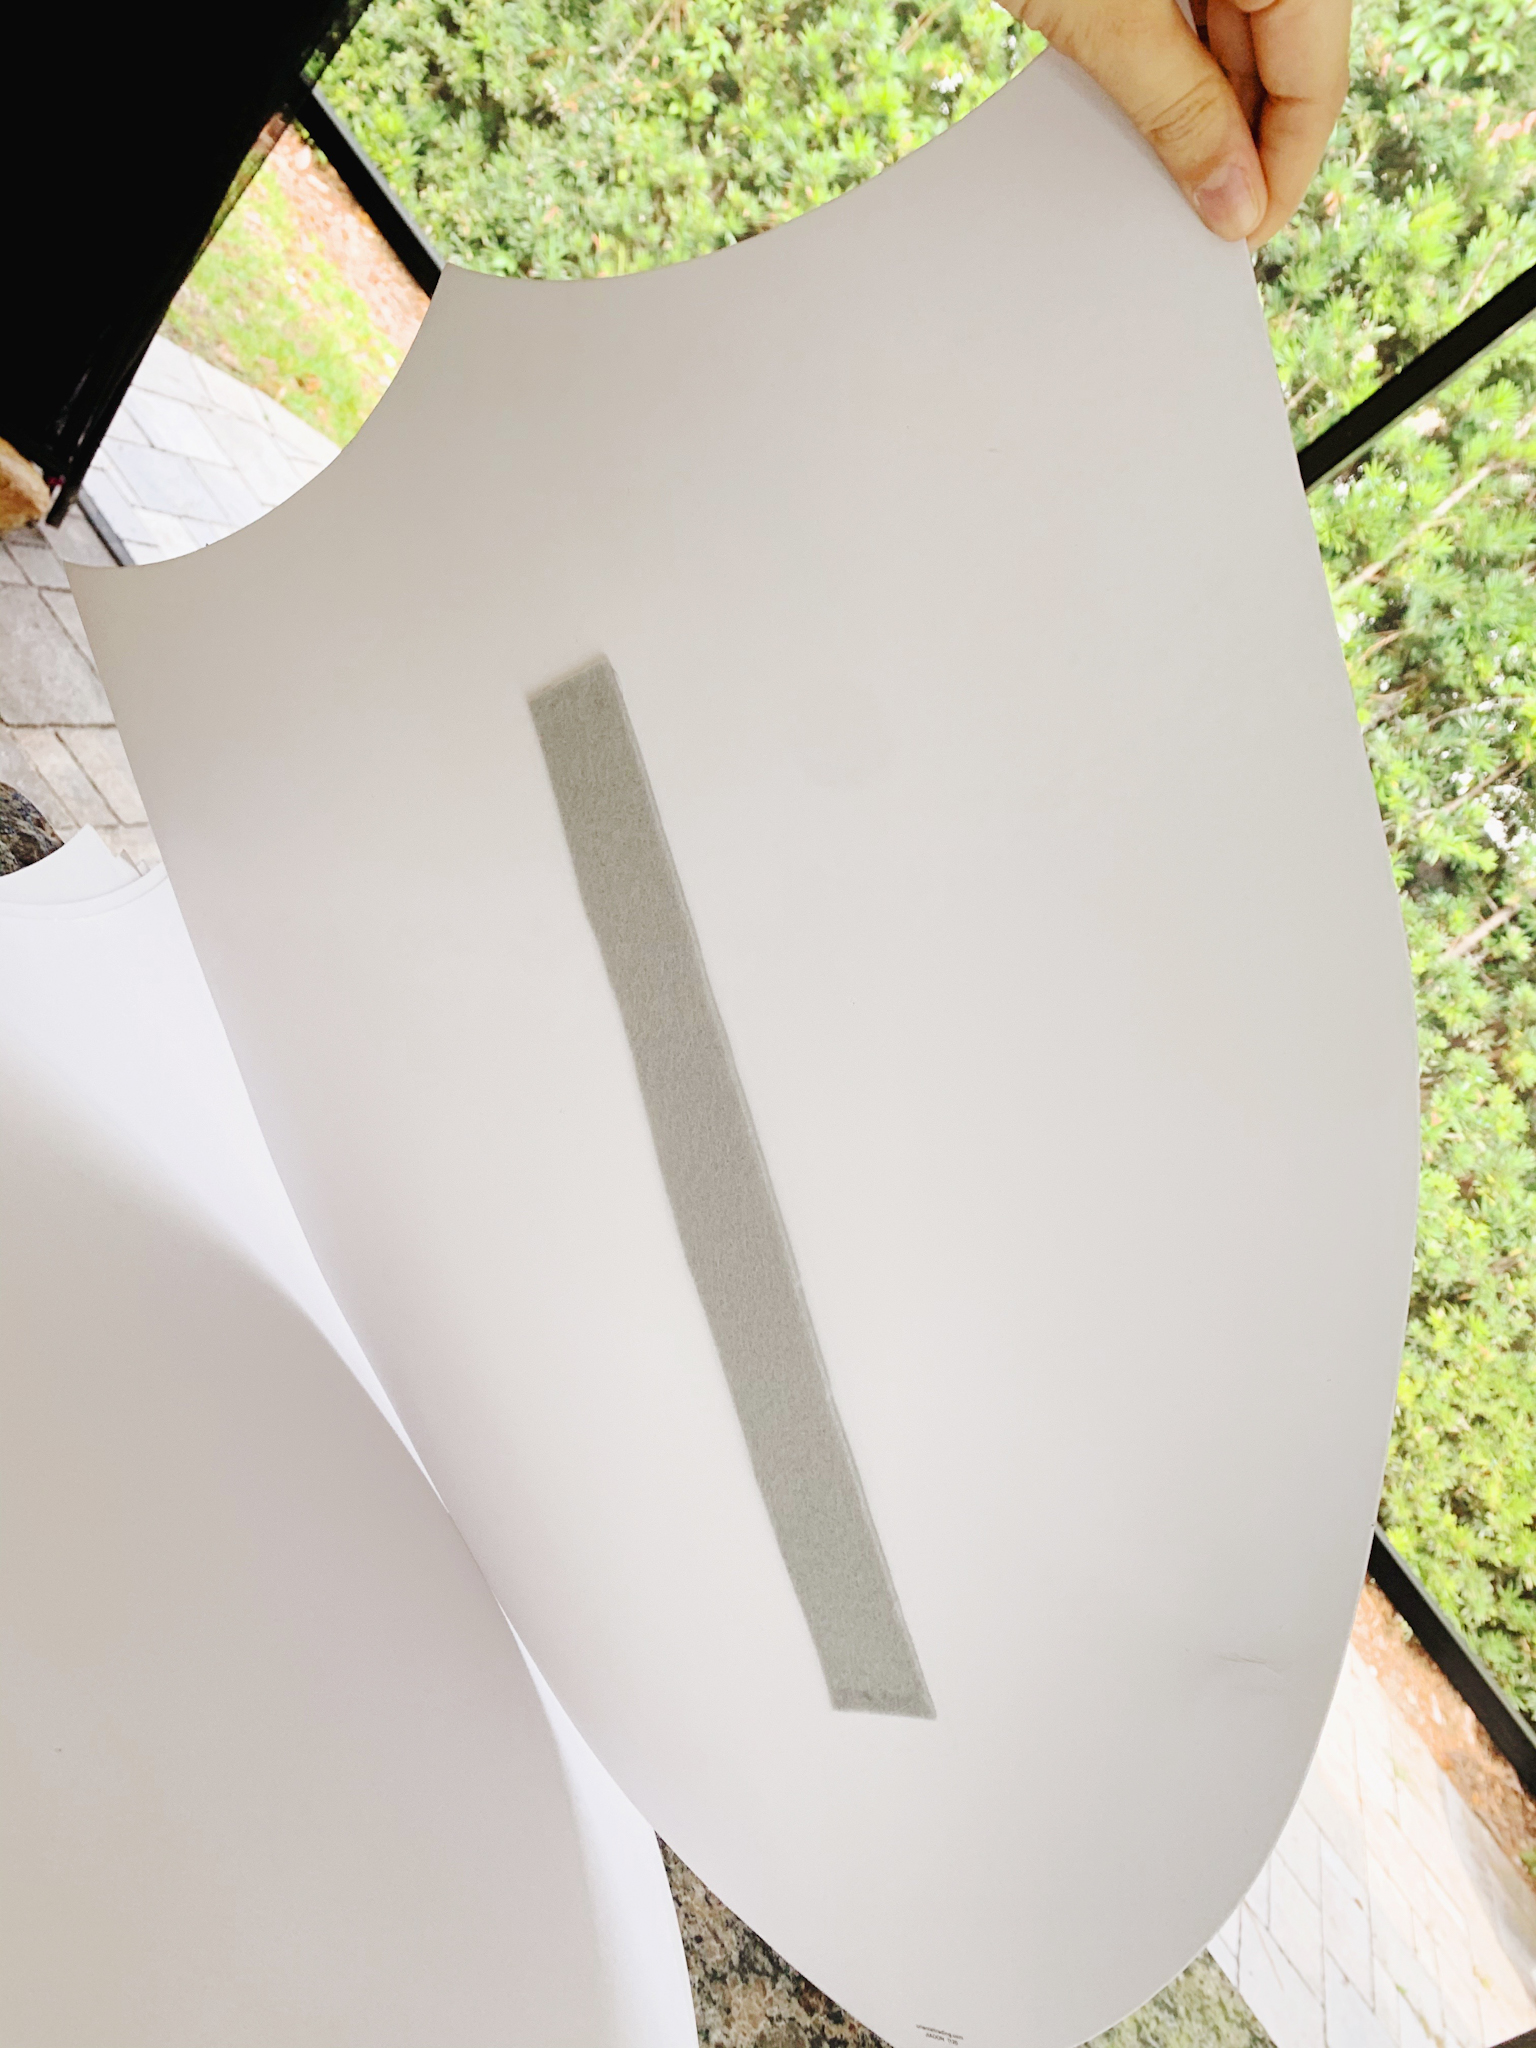
SHIELDS
At our shield station, kids were greeted with following sign:
Medieval knights painted symbols on their shields in colors that were meaningful to them. Use the markers and tape to create your own personalized shield.
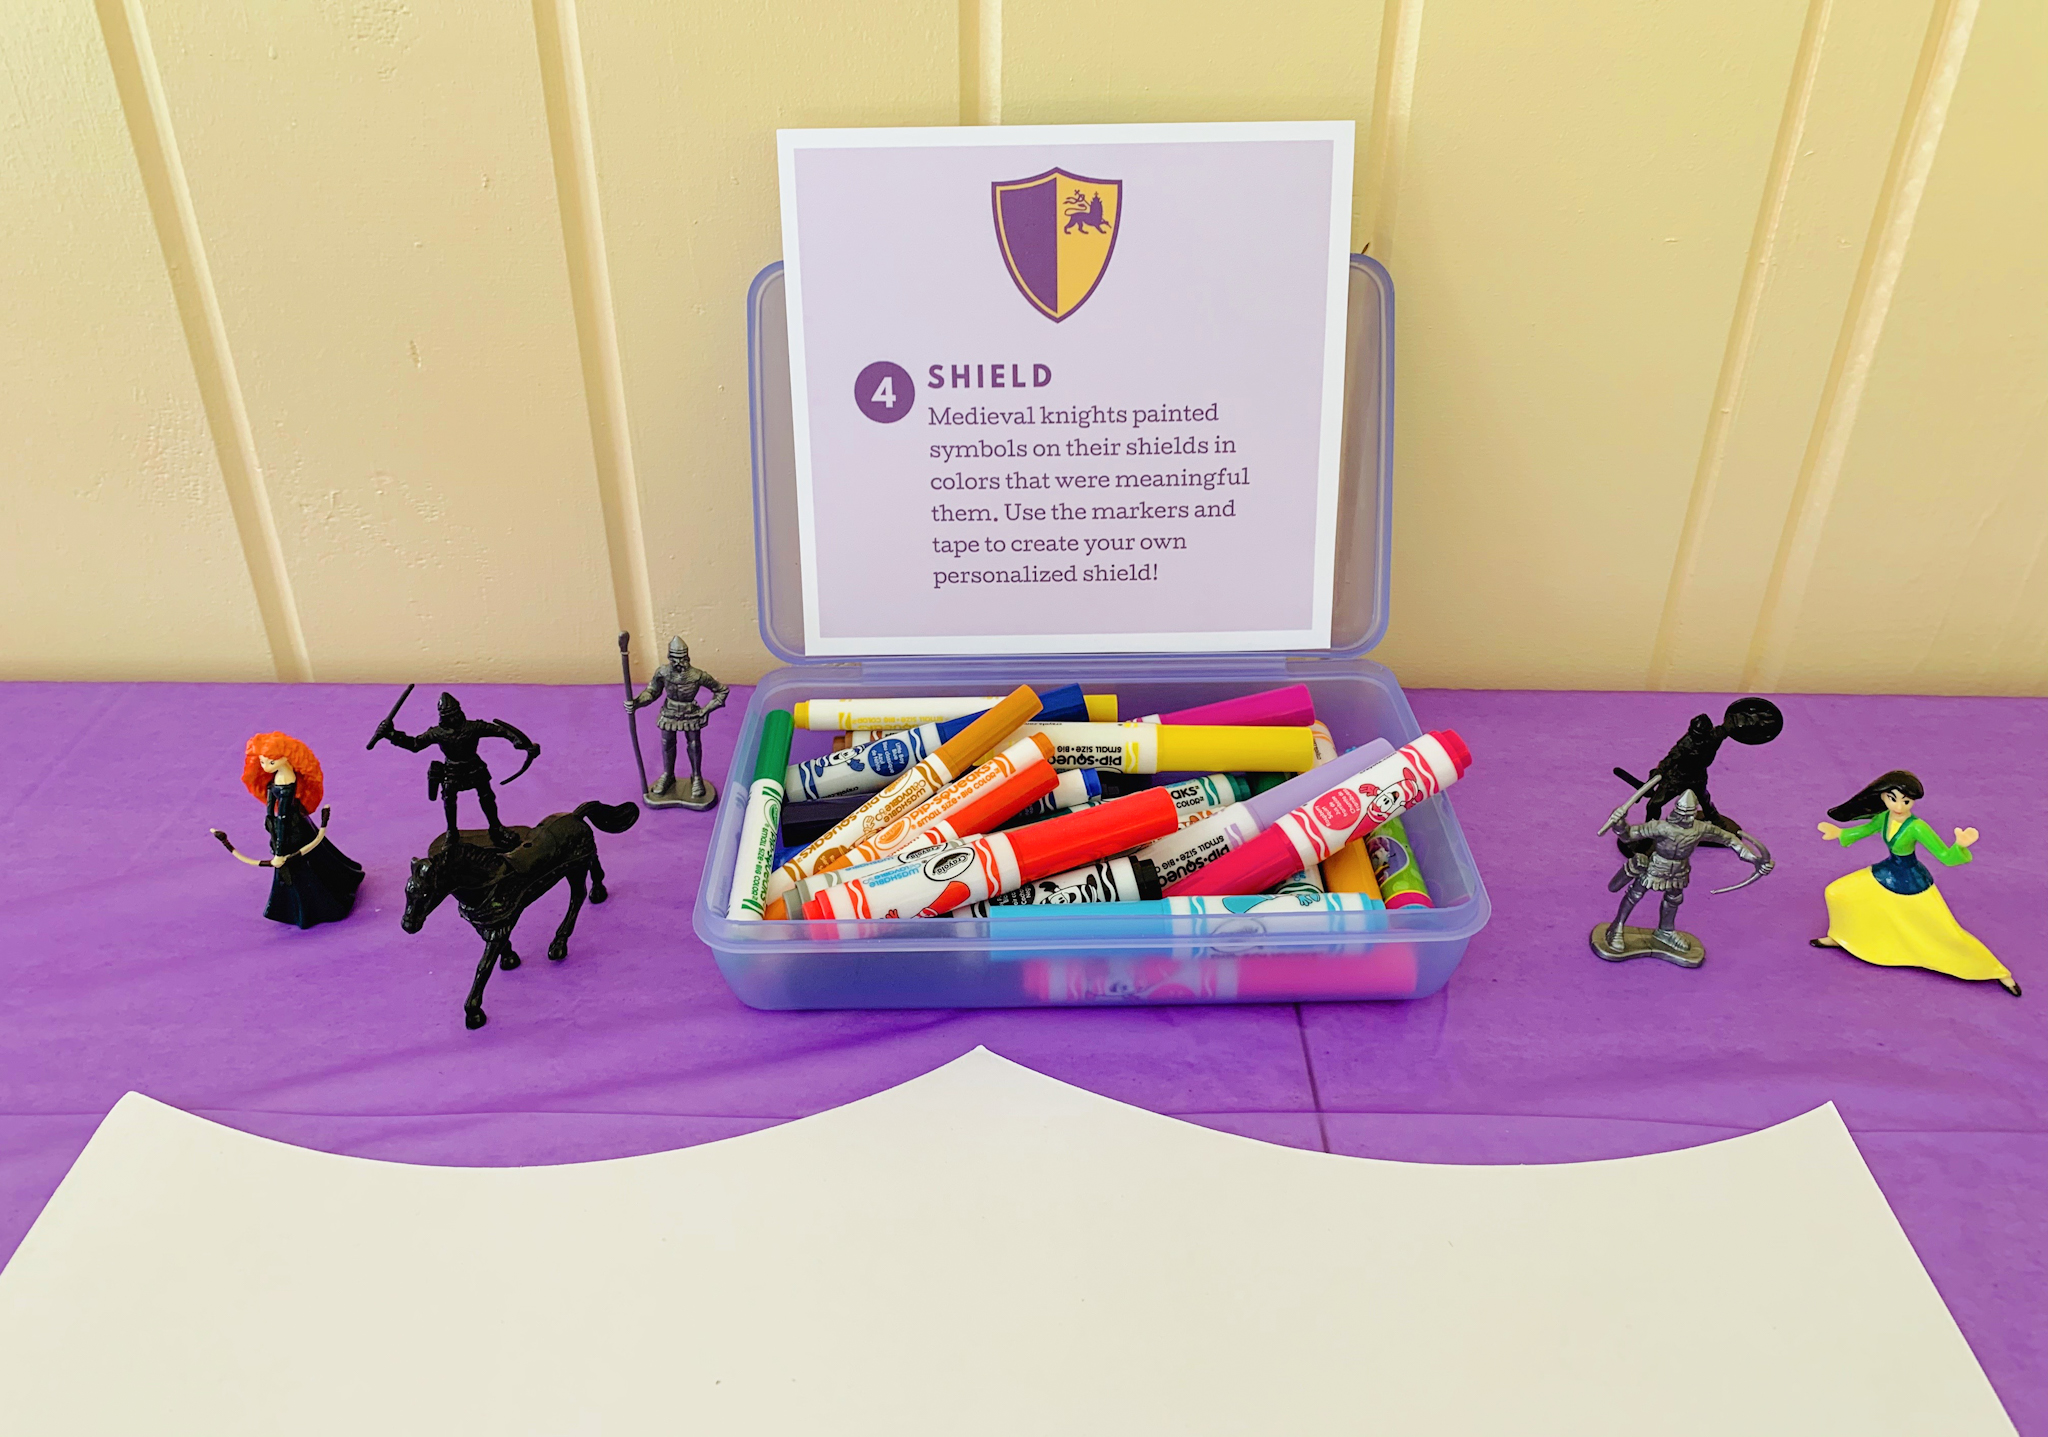
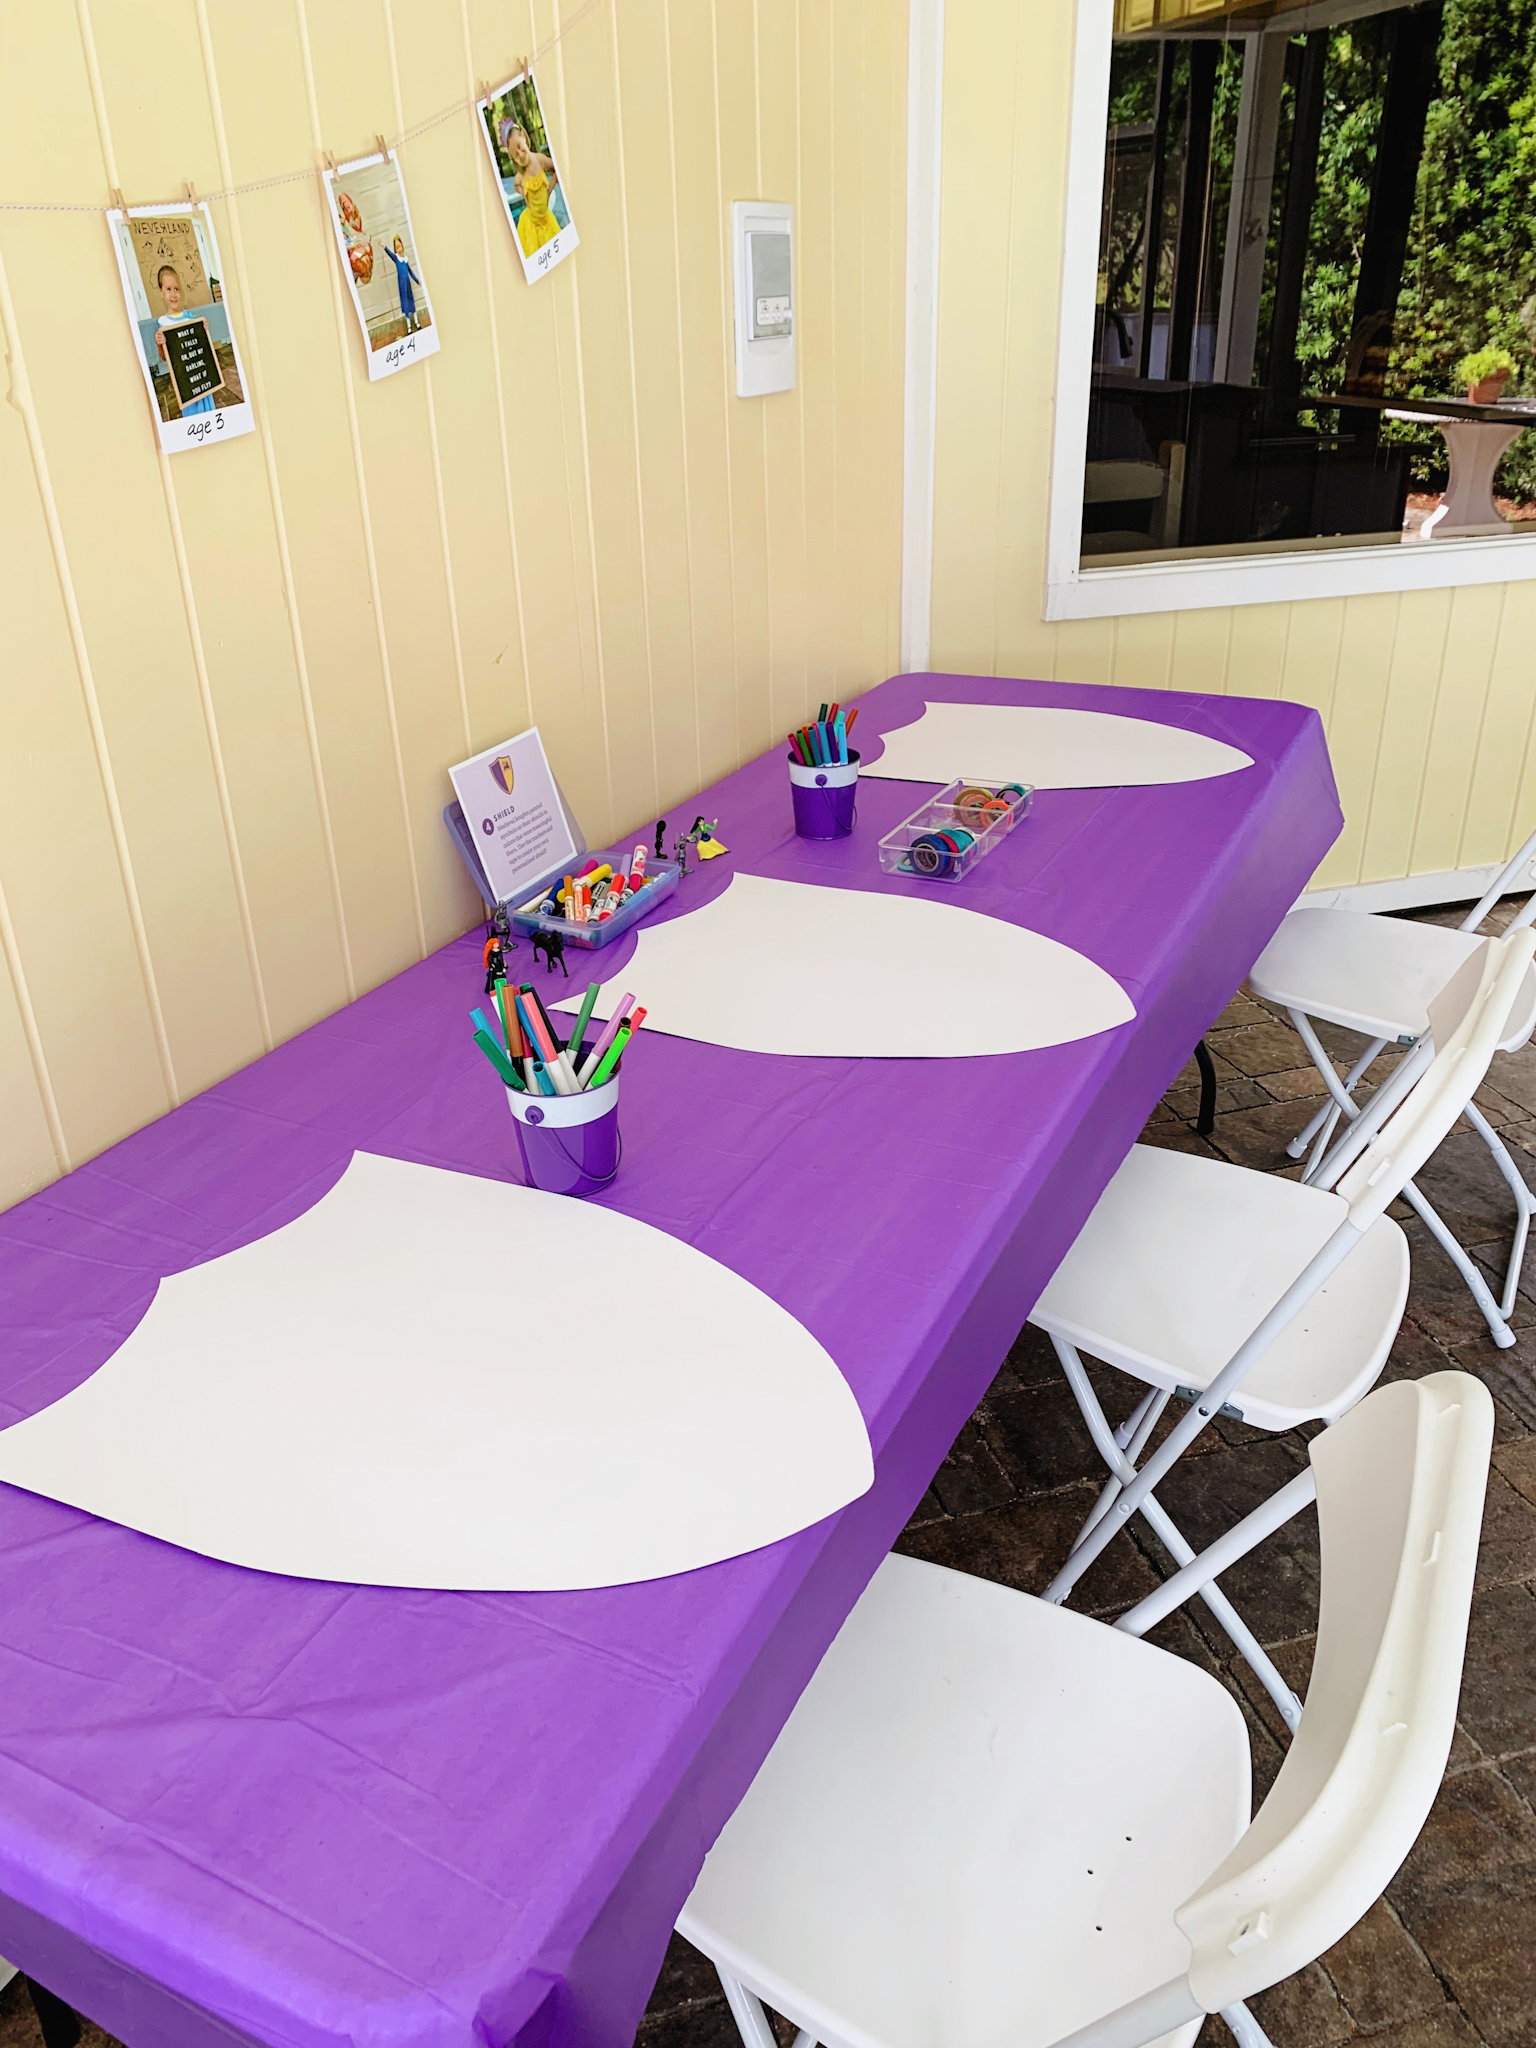
My massive collection of washi tape proved useful for creating a grid or stripes on the shields a la a medieval coat of arms. (I knew I was hoarding washi tape for a good reason…ha!) And then the kids could add drawings and designs using Crayola markers.

The shields were an Amazon purchase, and they’re essentially just poster-board cut-outs that you could easily D.I.Y. At Keely’s suggestion, I hot-glued strips of felt to the back as a more durable alternative to the paper strips they came with.
Knights, preparing for battle!
Sir Evan the Great!
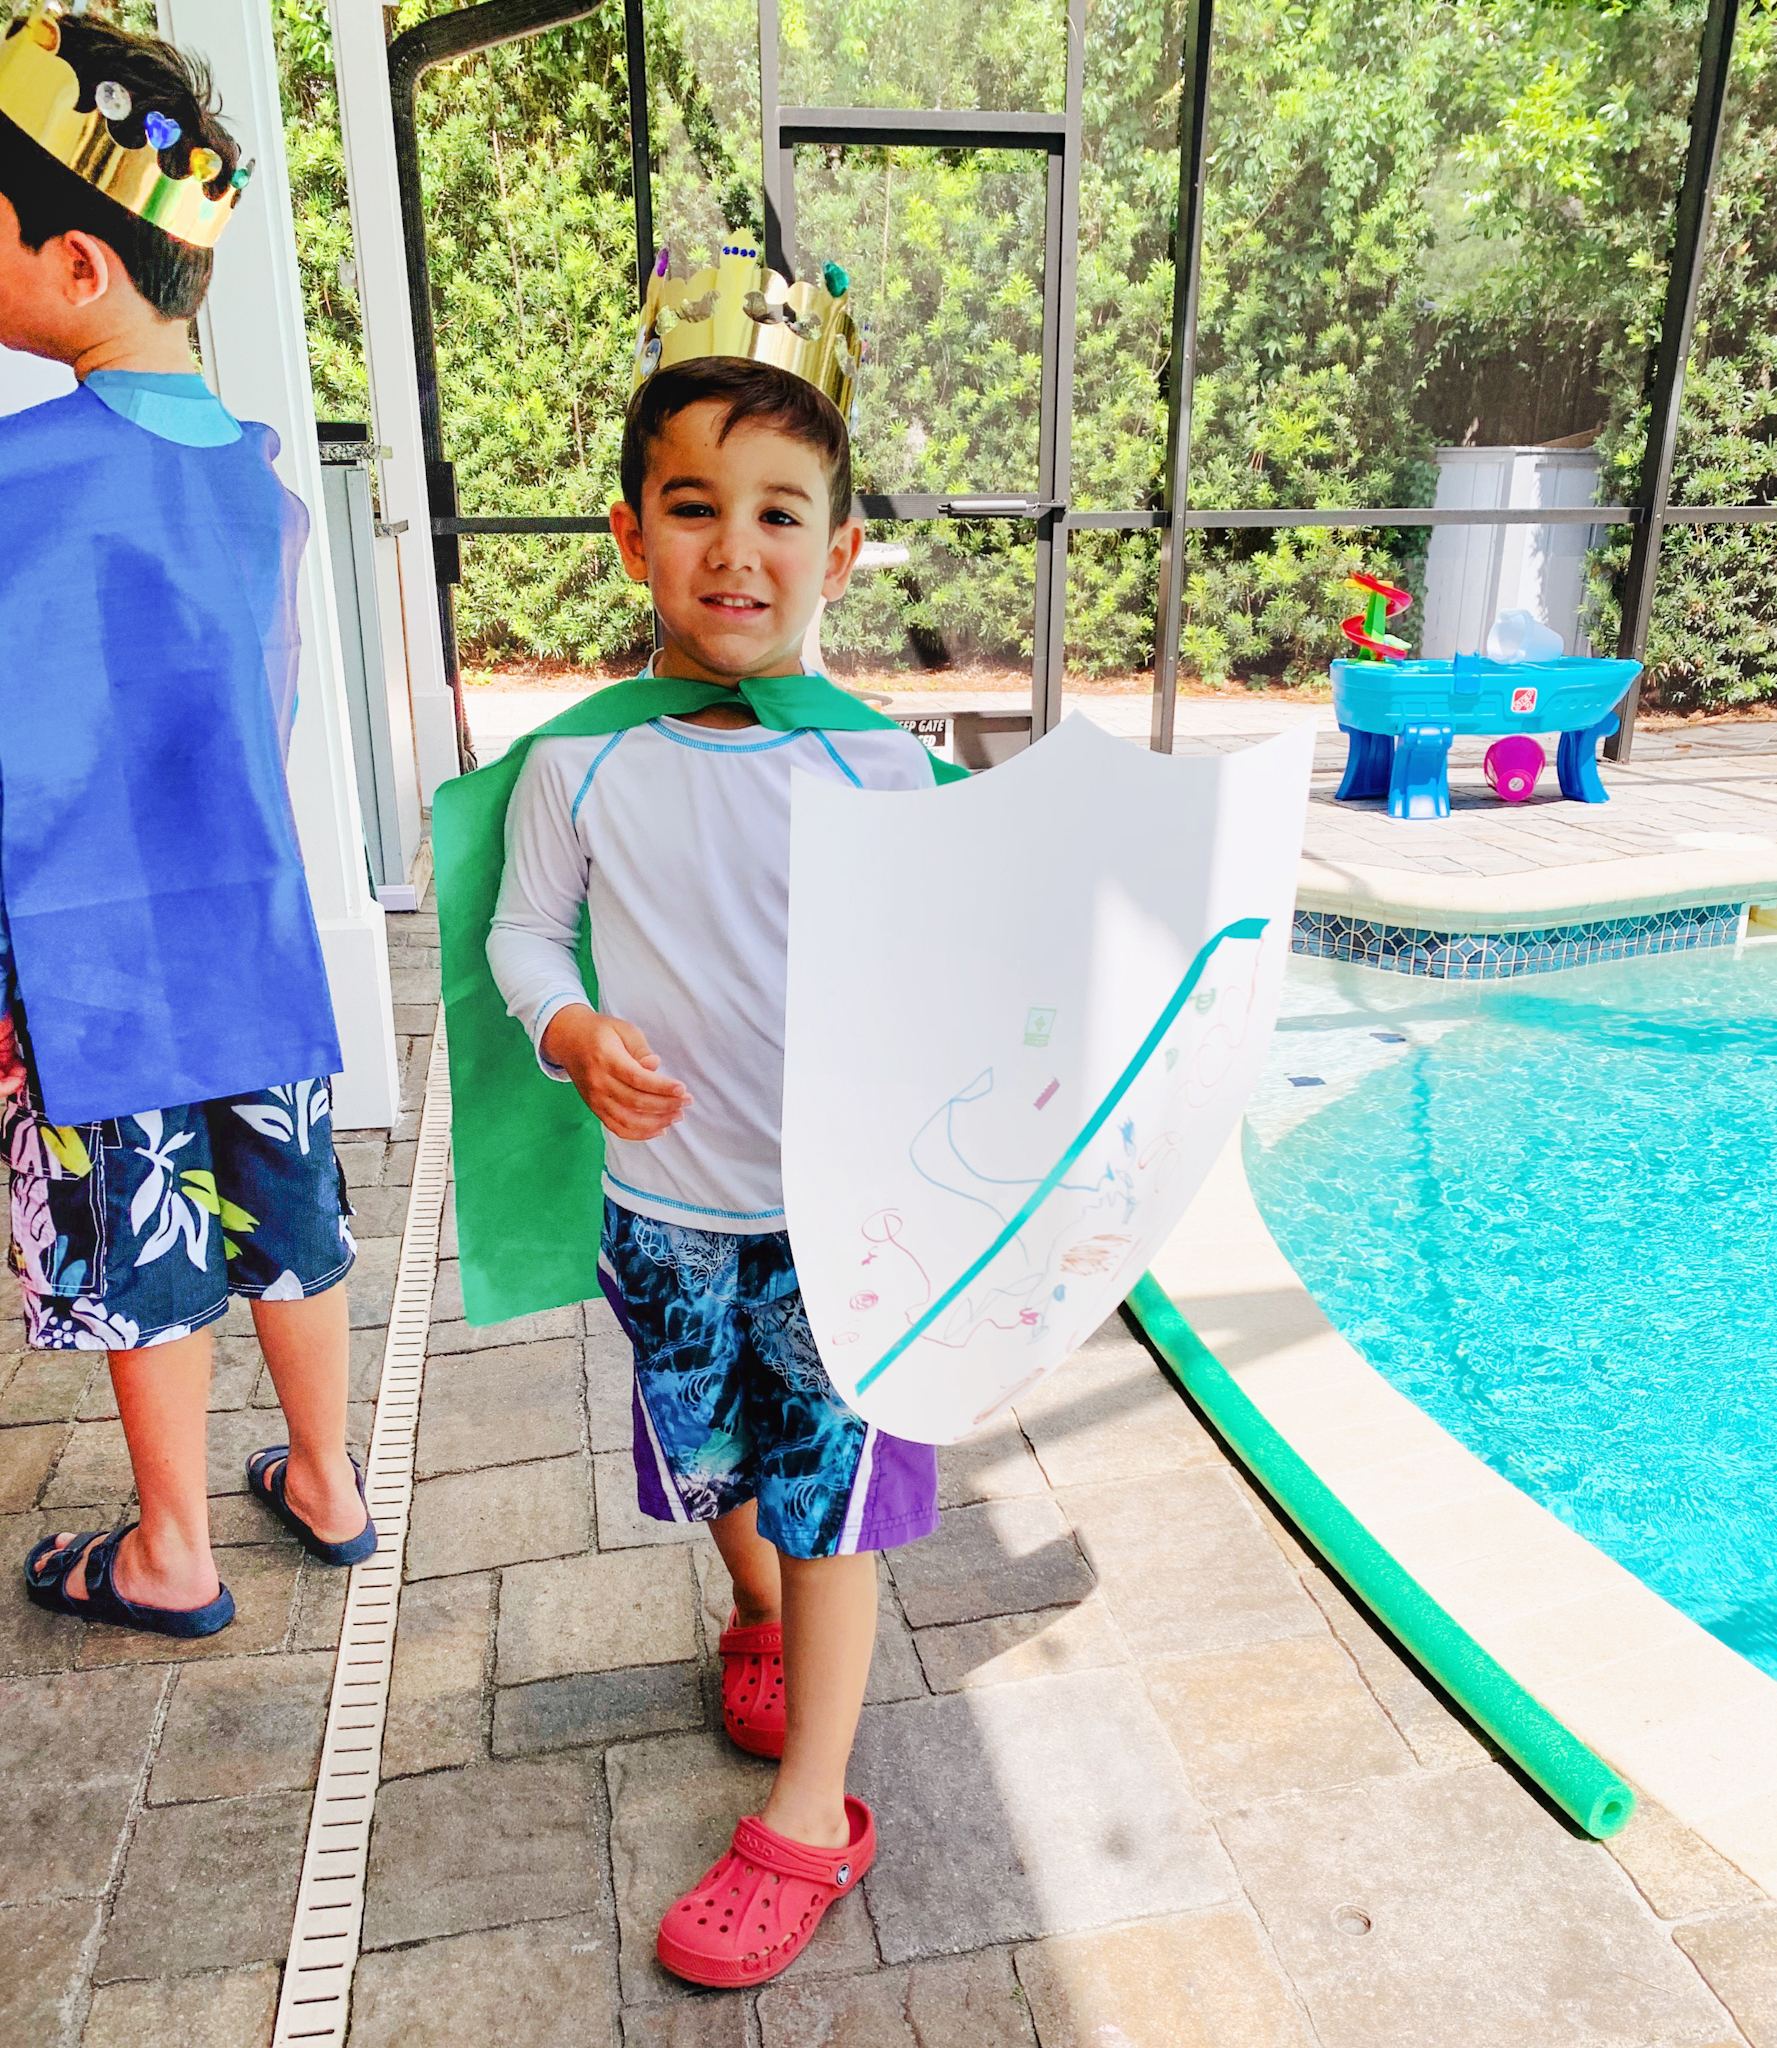
Sir Isaiah the Dragon Tamer!
Now with their decorated wands and shields, our princesses and knights were almost ready to slay some pool dragons… but first, sustenance!
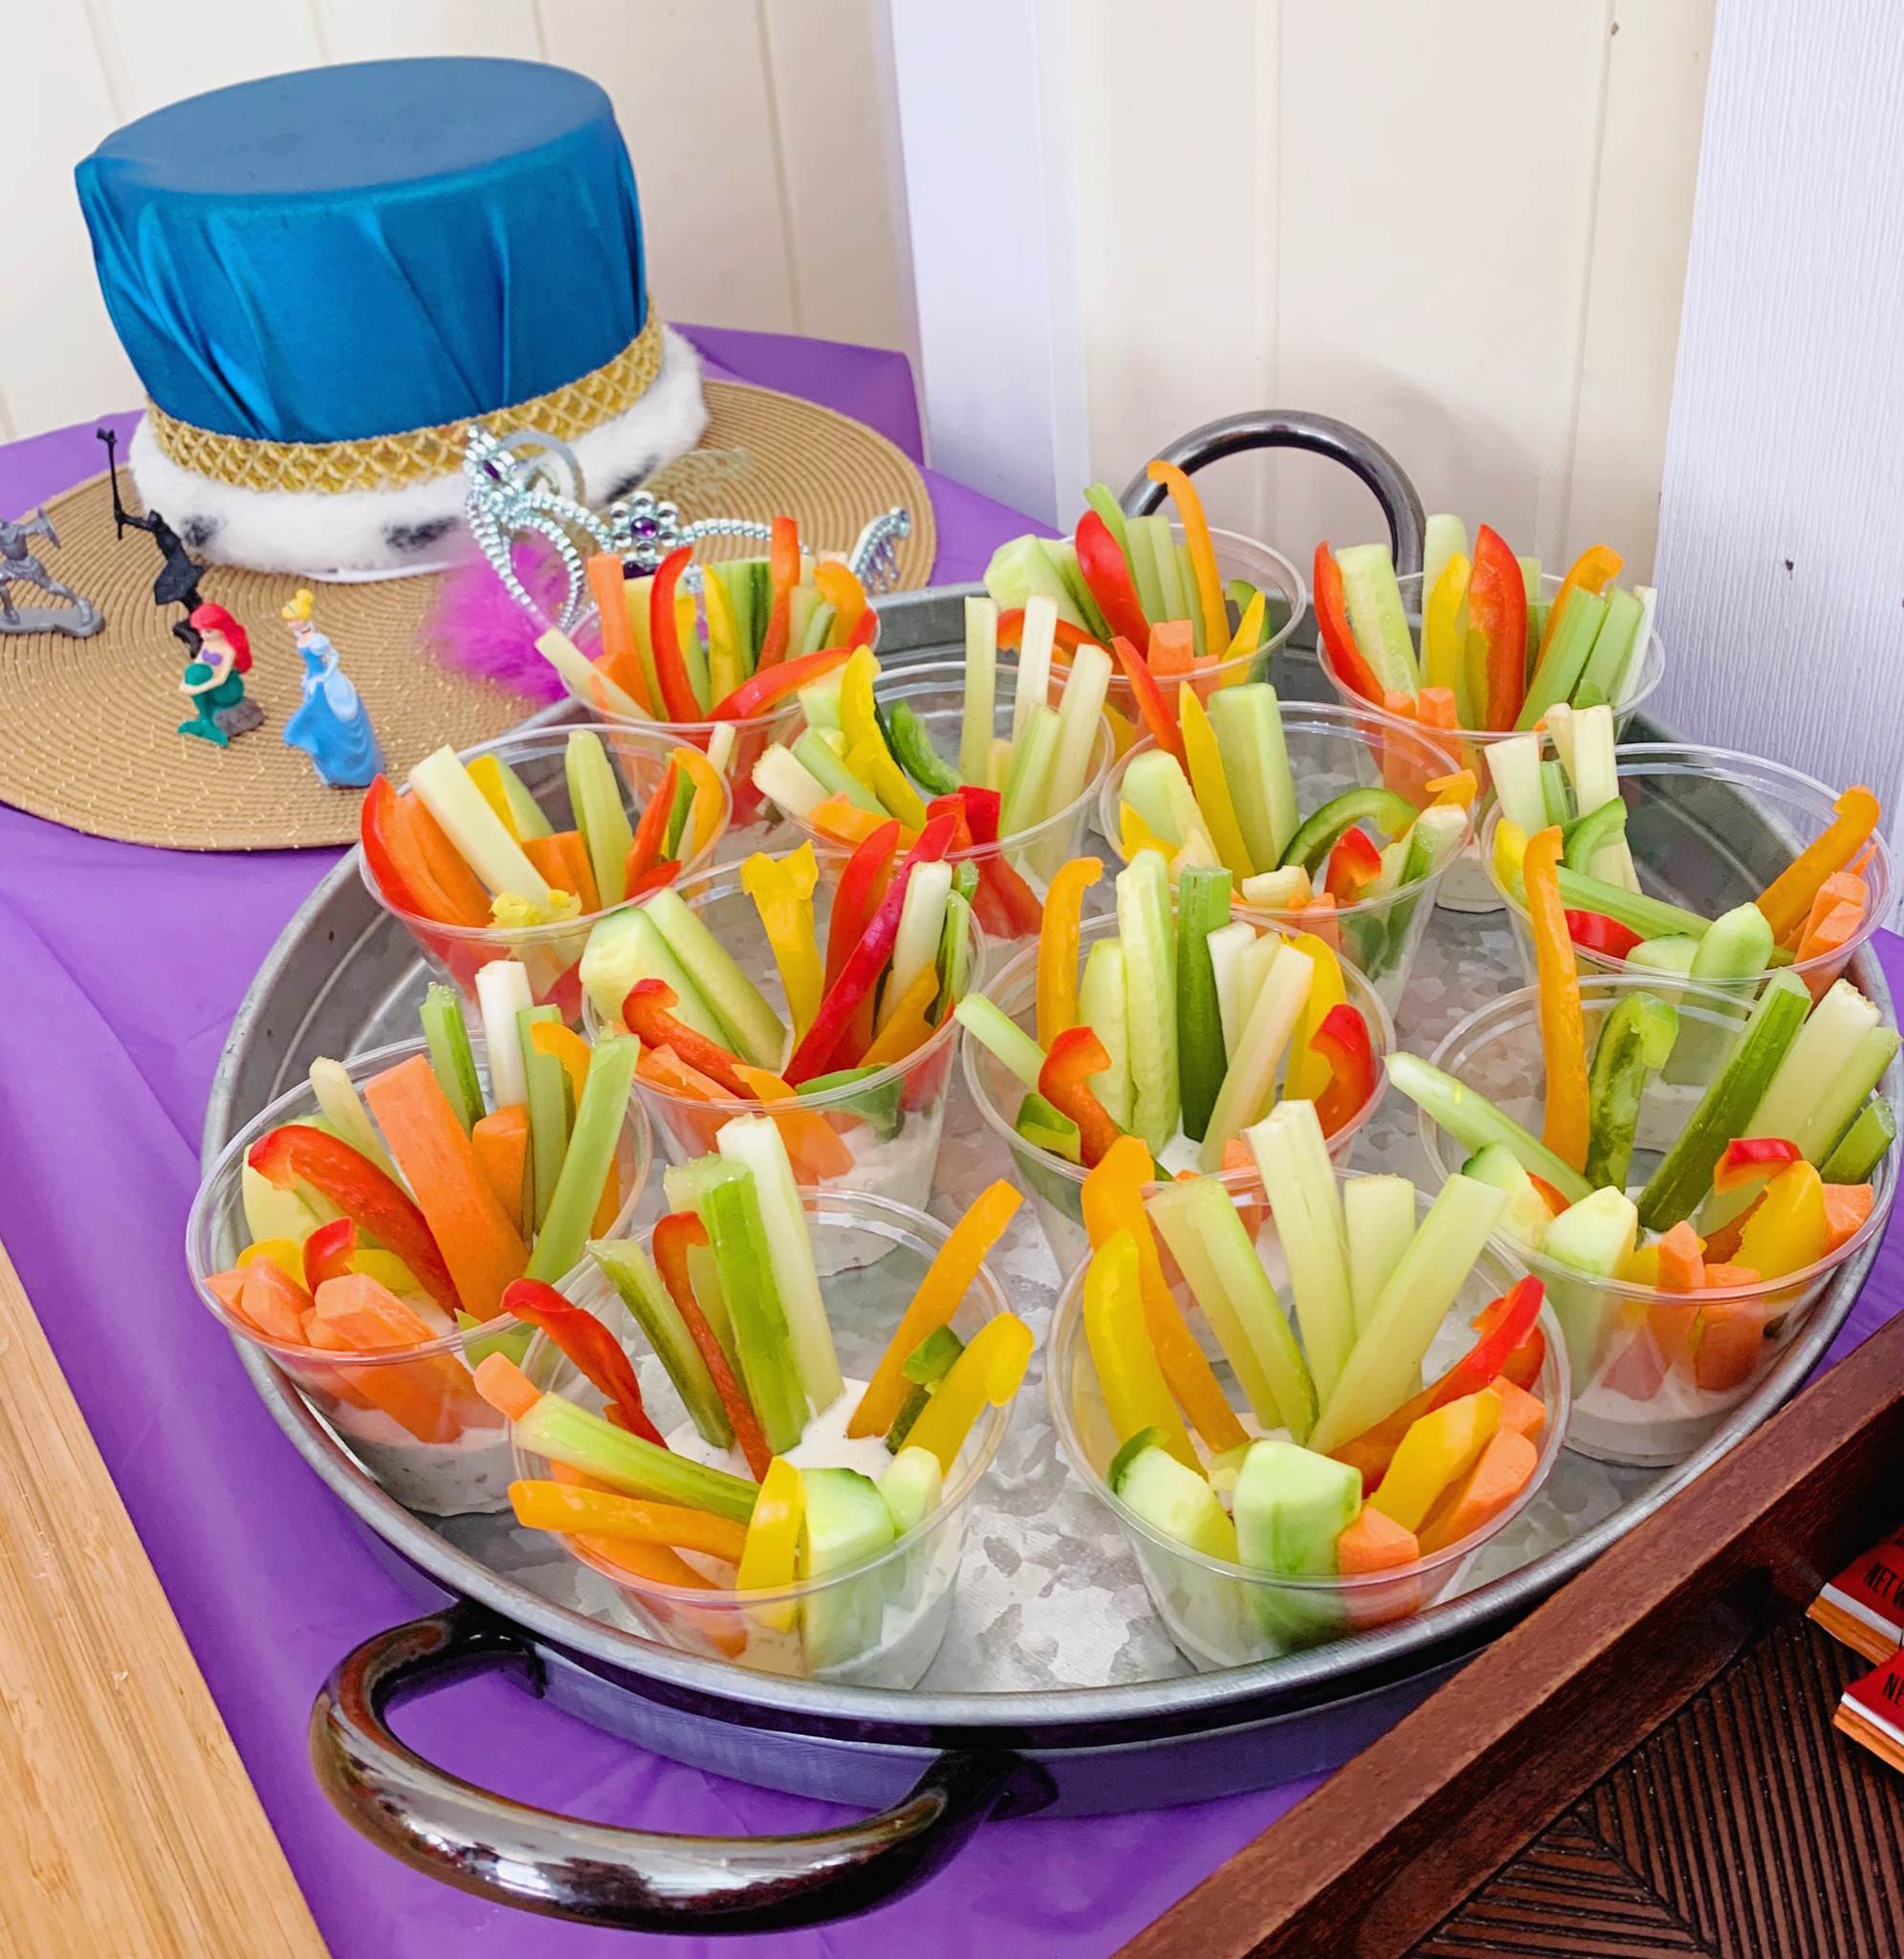
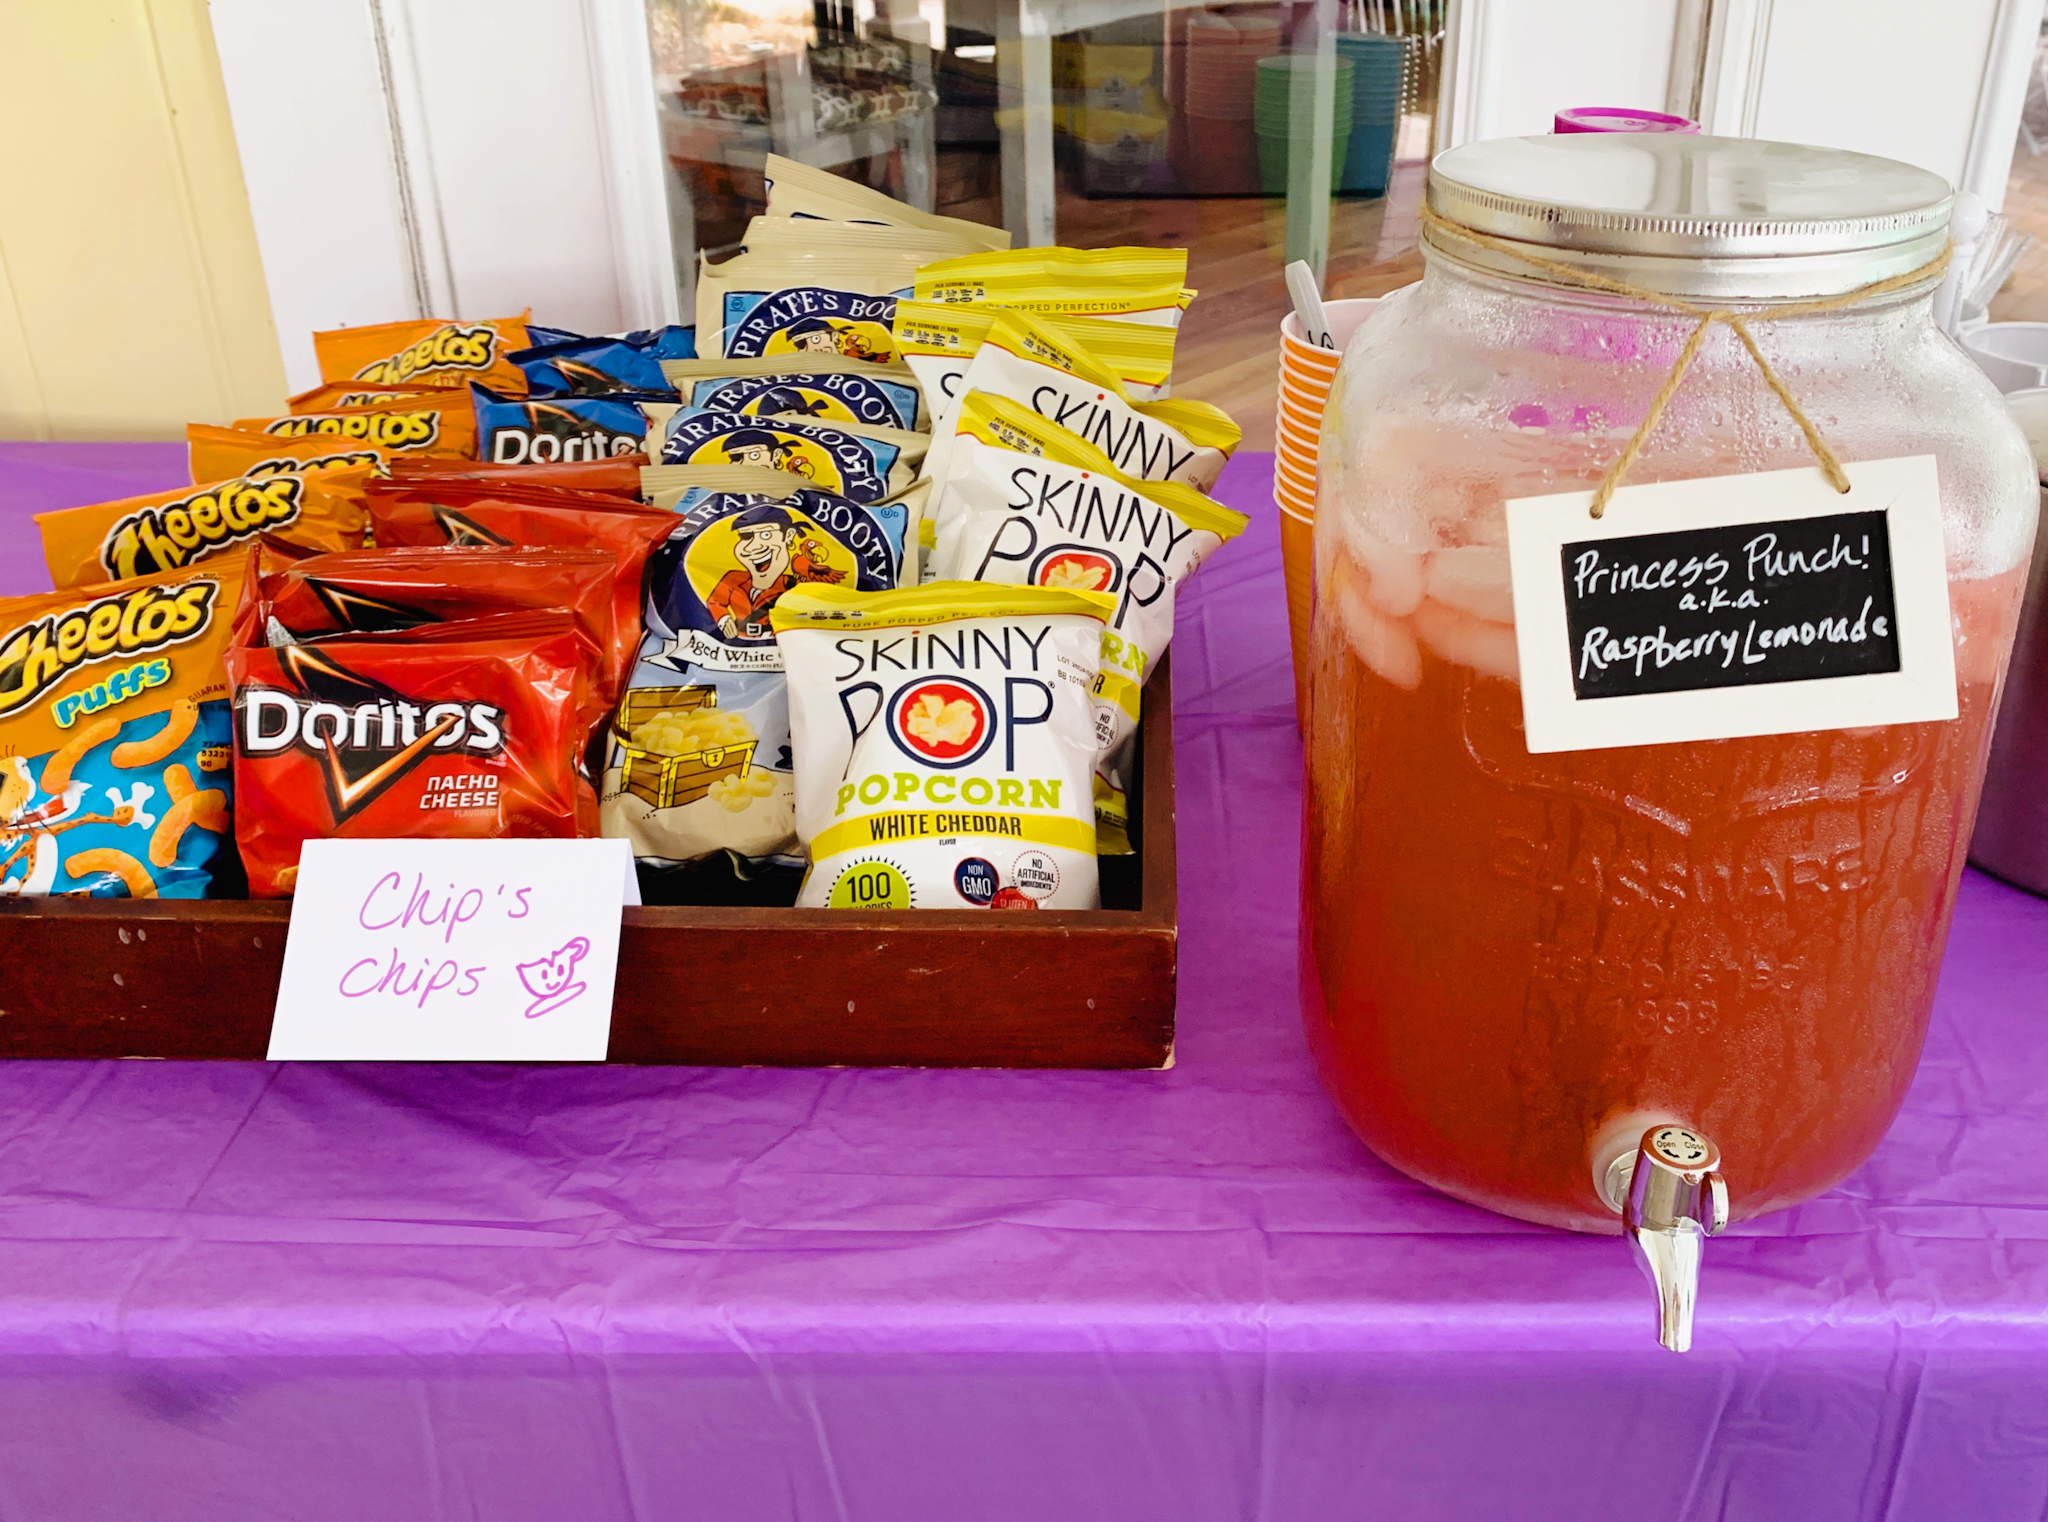
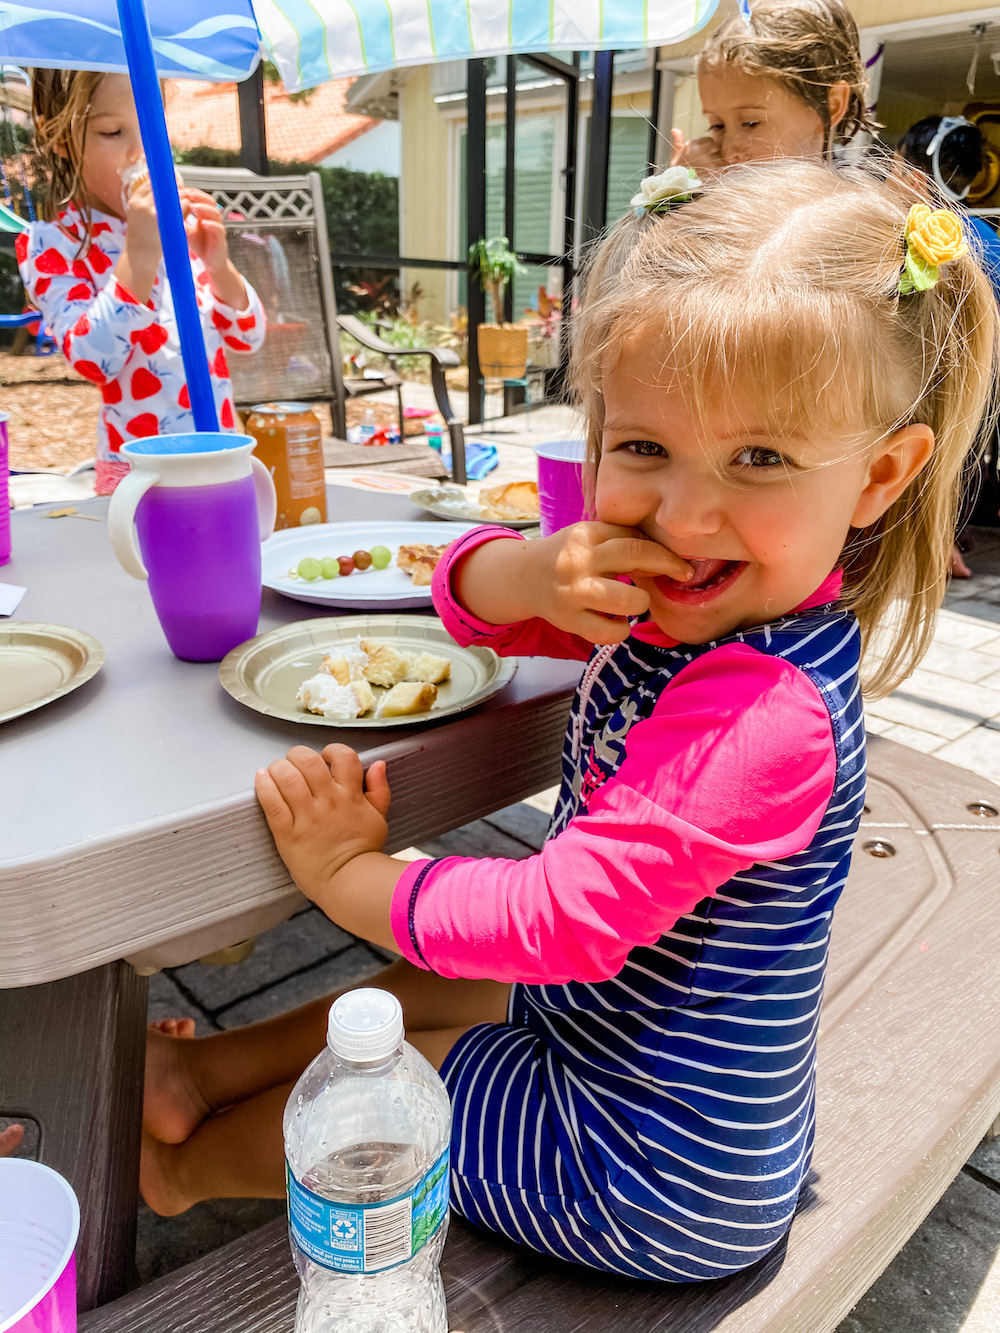
A Royal Lunch Feast
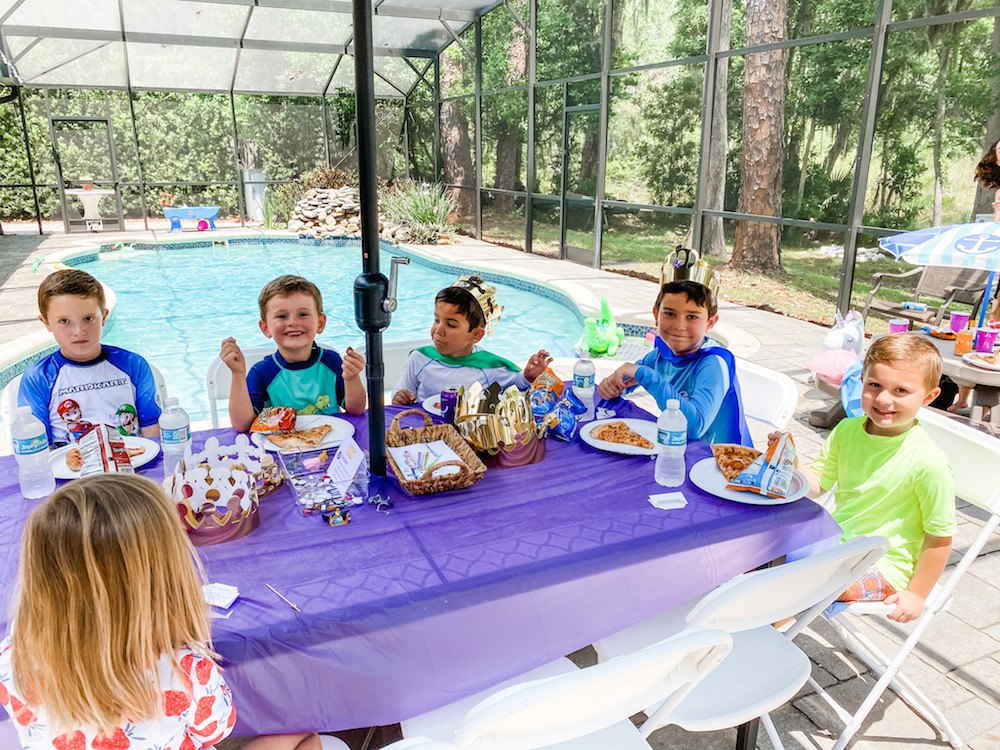
The kids were good and hungry after their journey through the four activity stations, and so after a prayer of thanksgiving, we let them dive in to a royal feast of pizza with sides & drinks in line with our royally fun theme.
We served:
- grape swords
- dragon-slaying sticks (sliced veggies in a cup of ranch dip)
- “Chip’s” chips
- princess punch
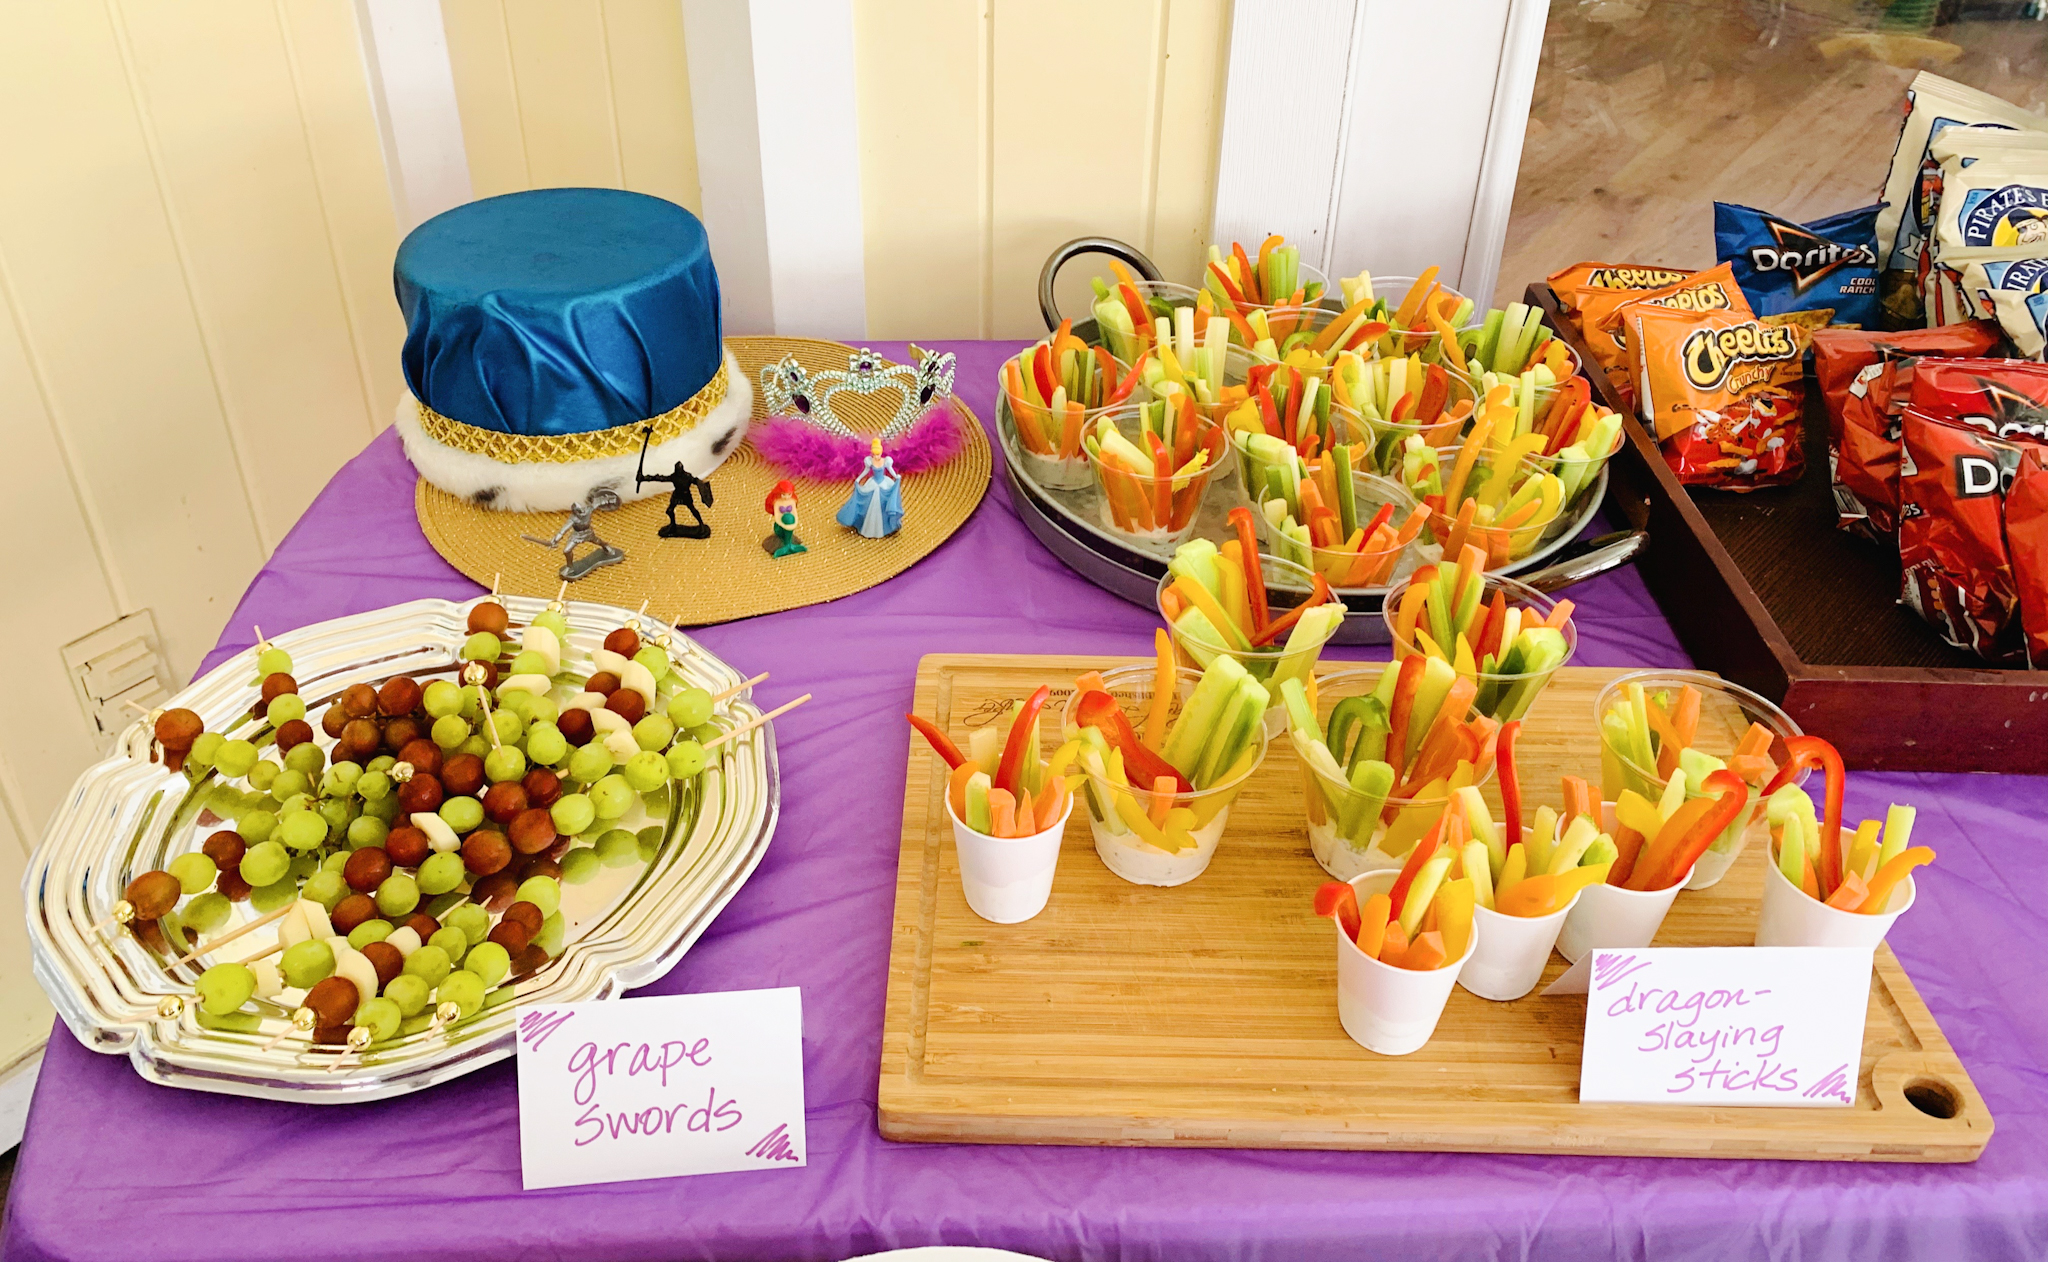
I’m a big fan of “using what you’ve got” when it comes to party decor, and everything in this little vignette below were items we had on hand except for the knight figurines, which were an Amazon purchase. (And yes, in this faraway kingdom, medieval knights and Disney princesses reign together!)
Station 5: Pool Adventures
With revived strength after devouring their royal lunch feast, our princesses and knights were ready for some pool adventures!
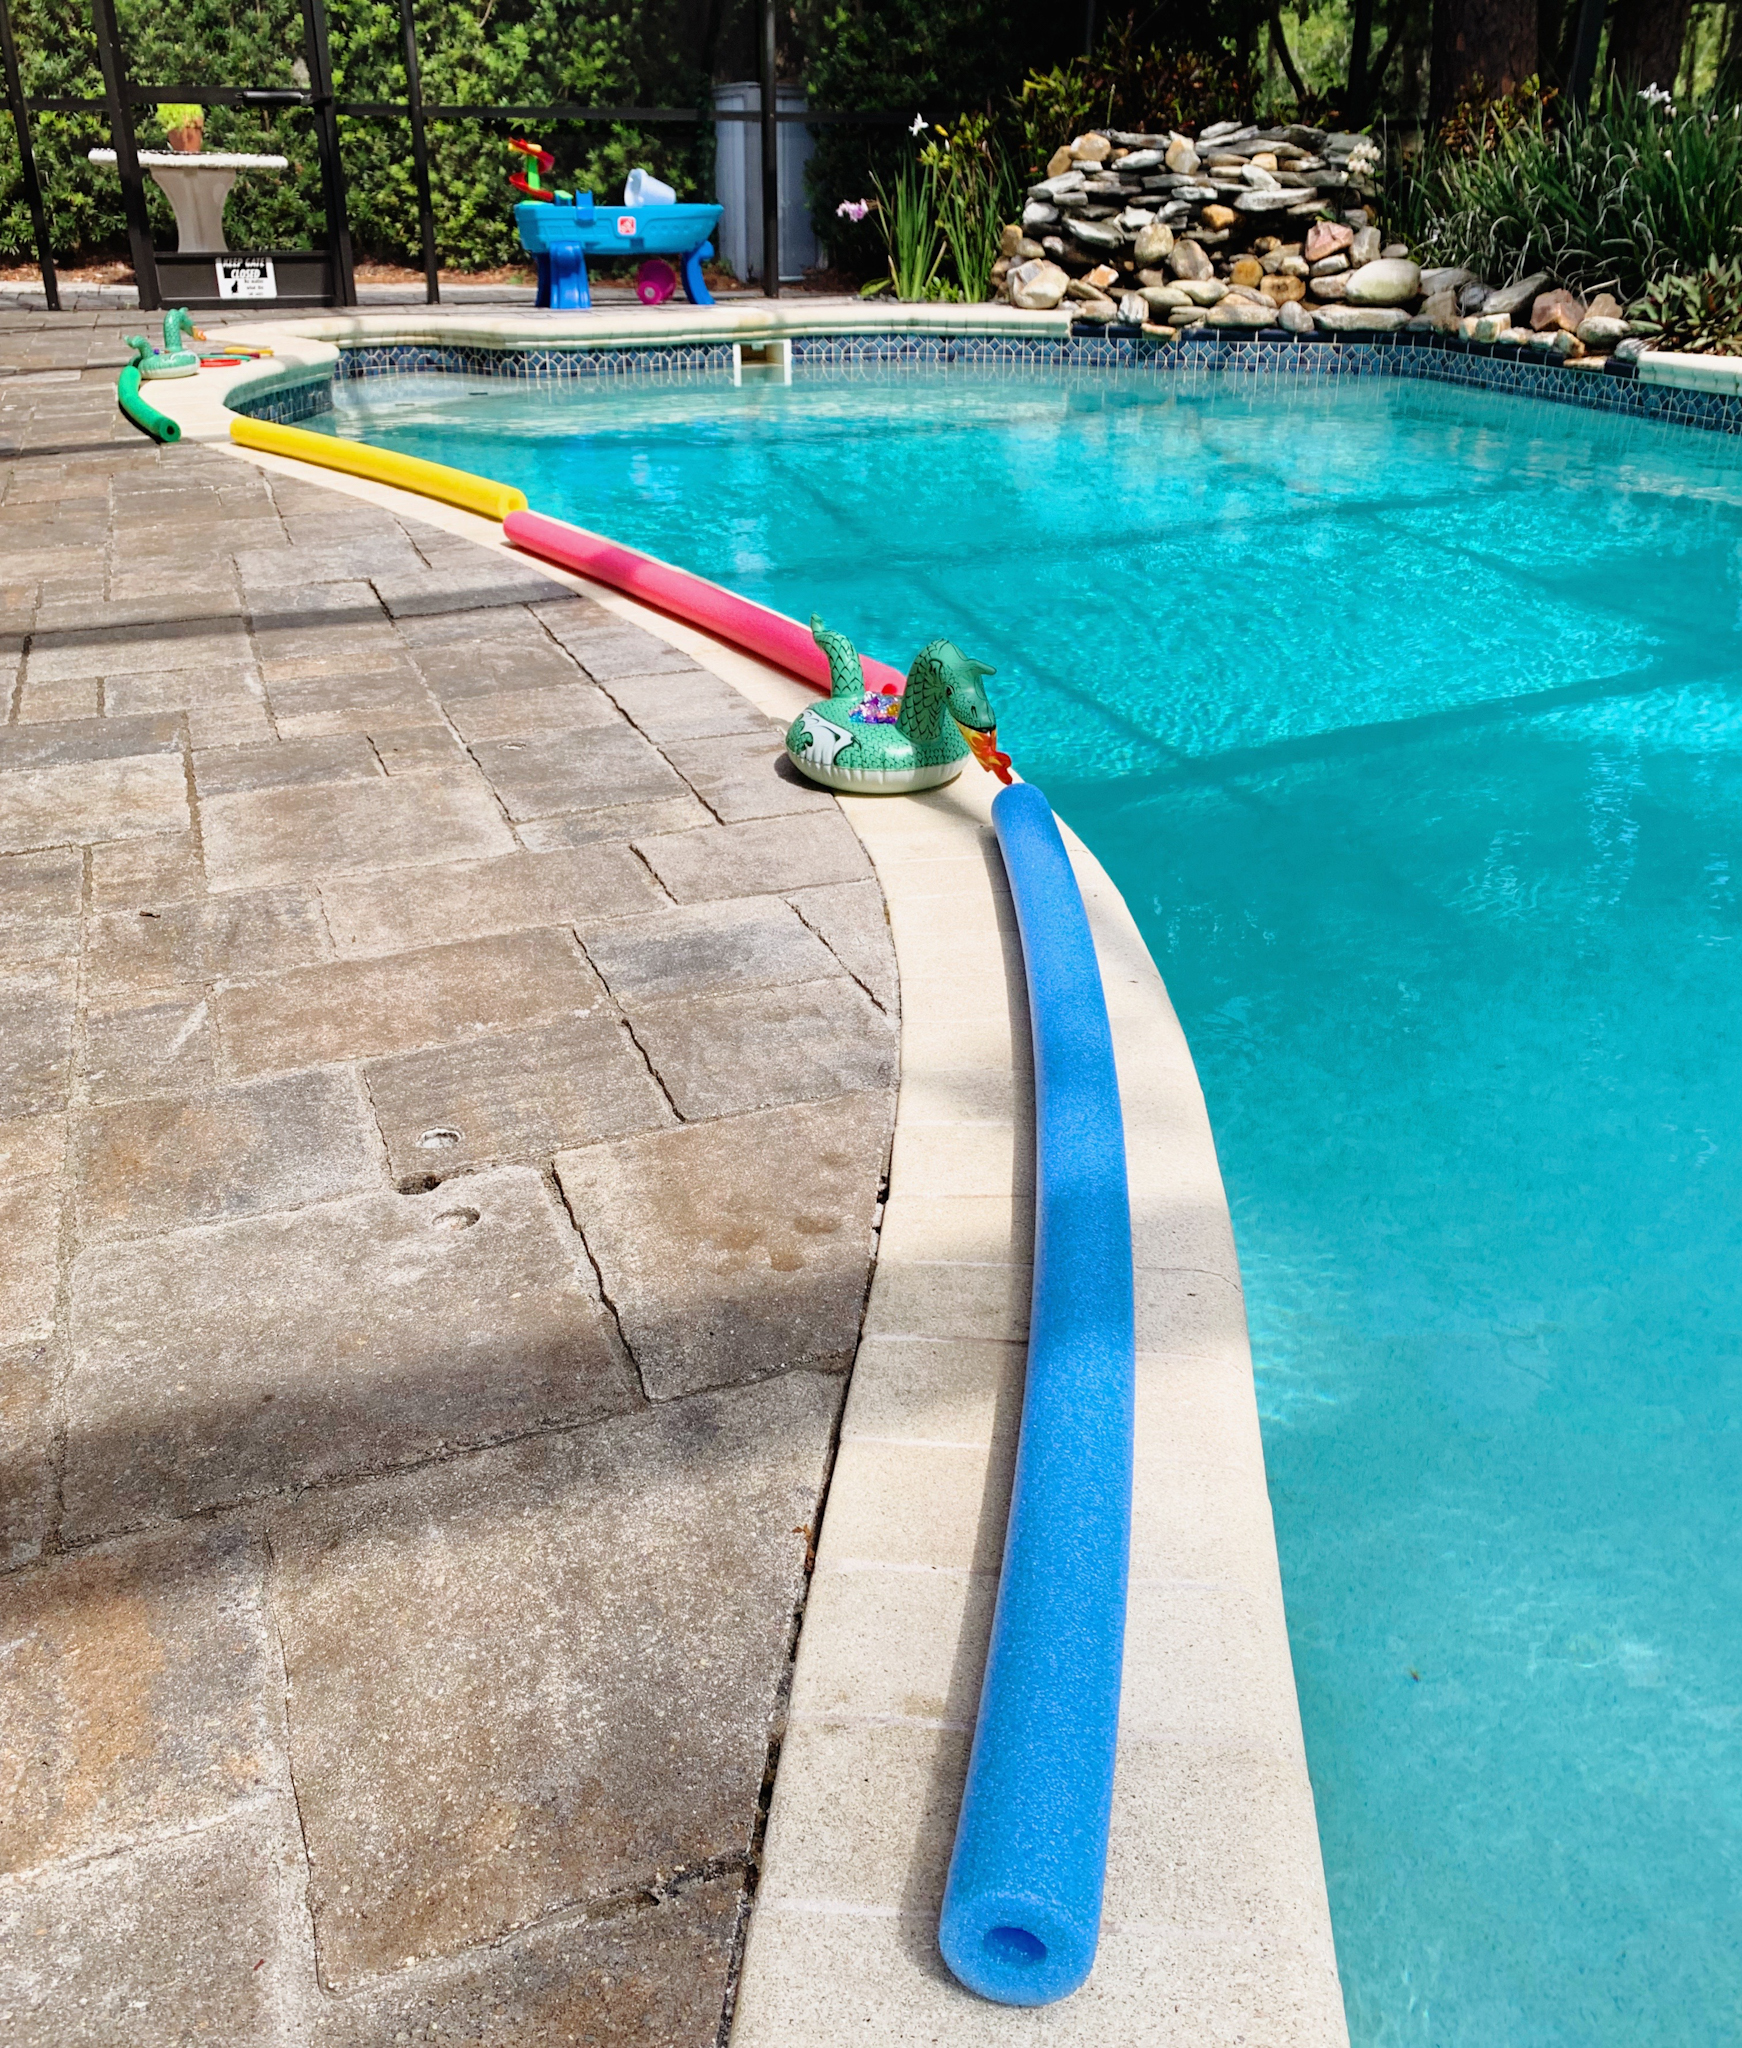
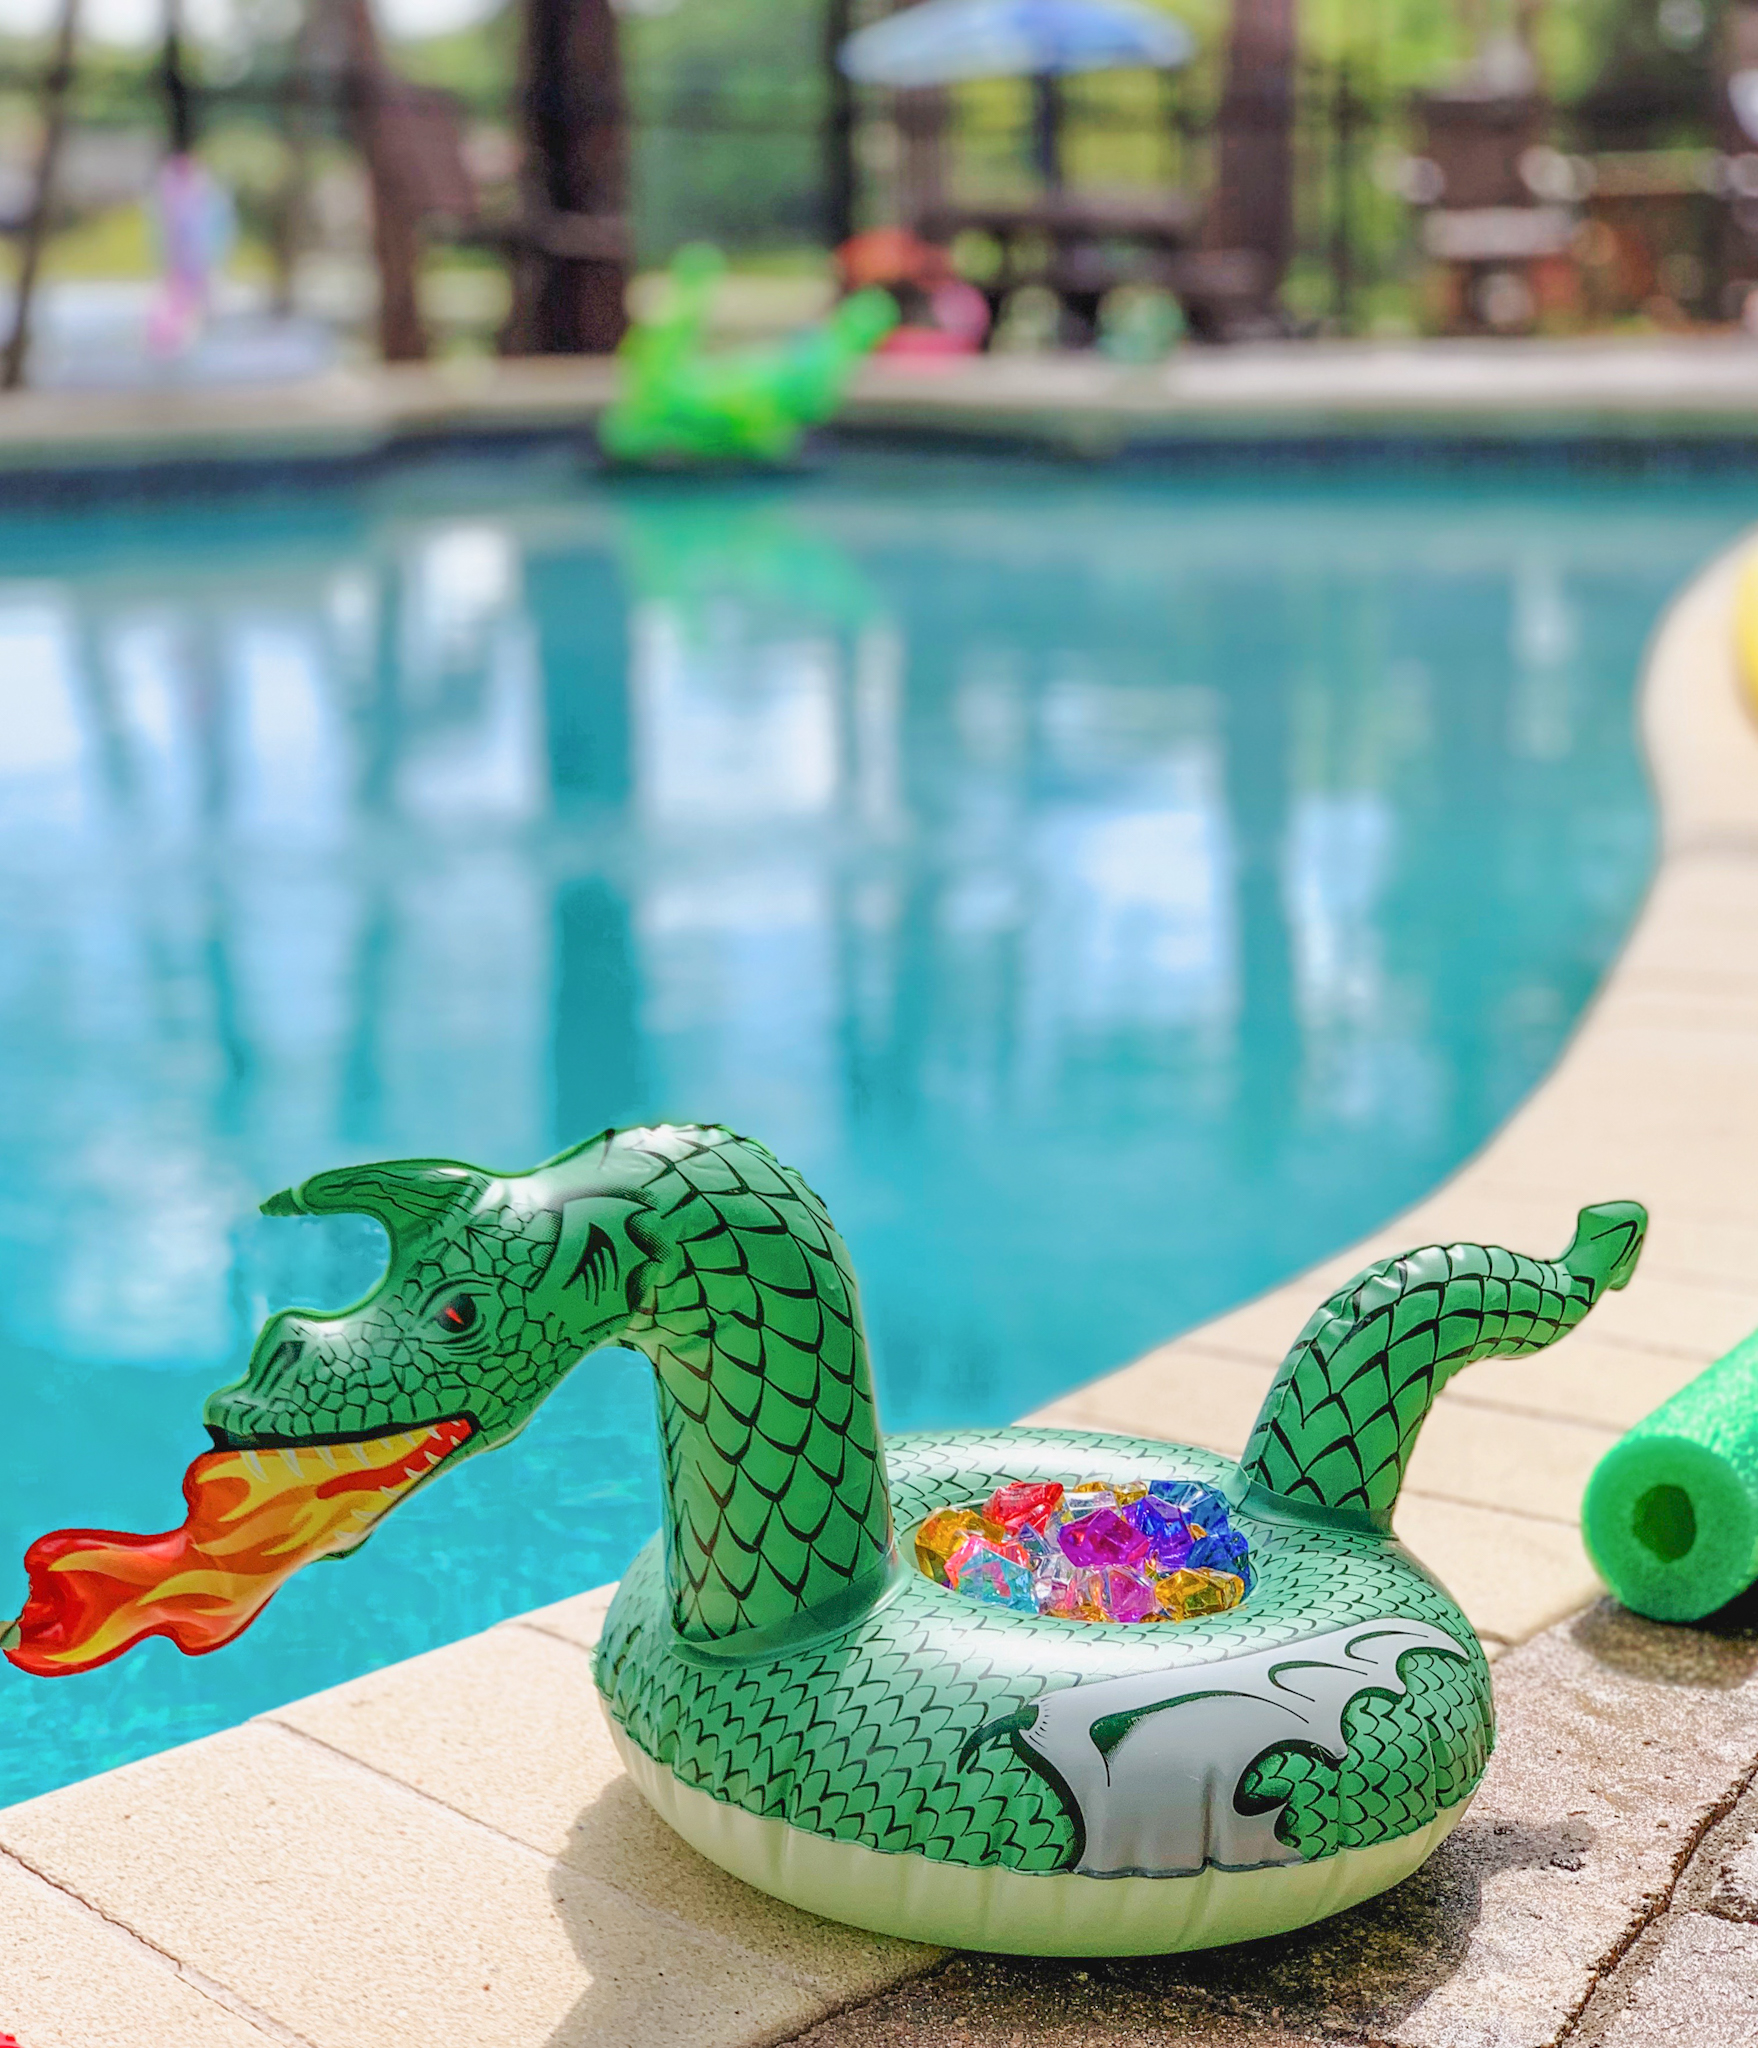
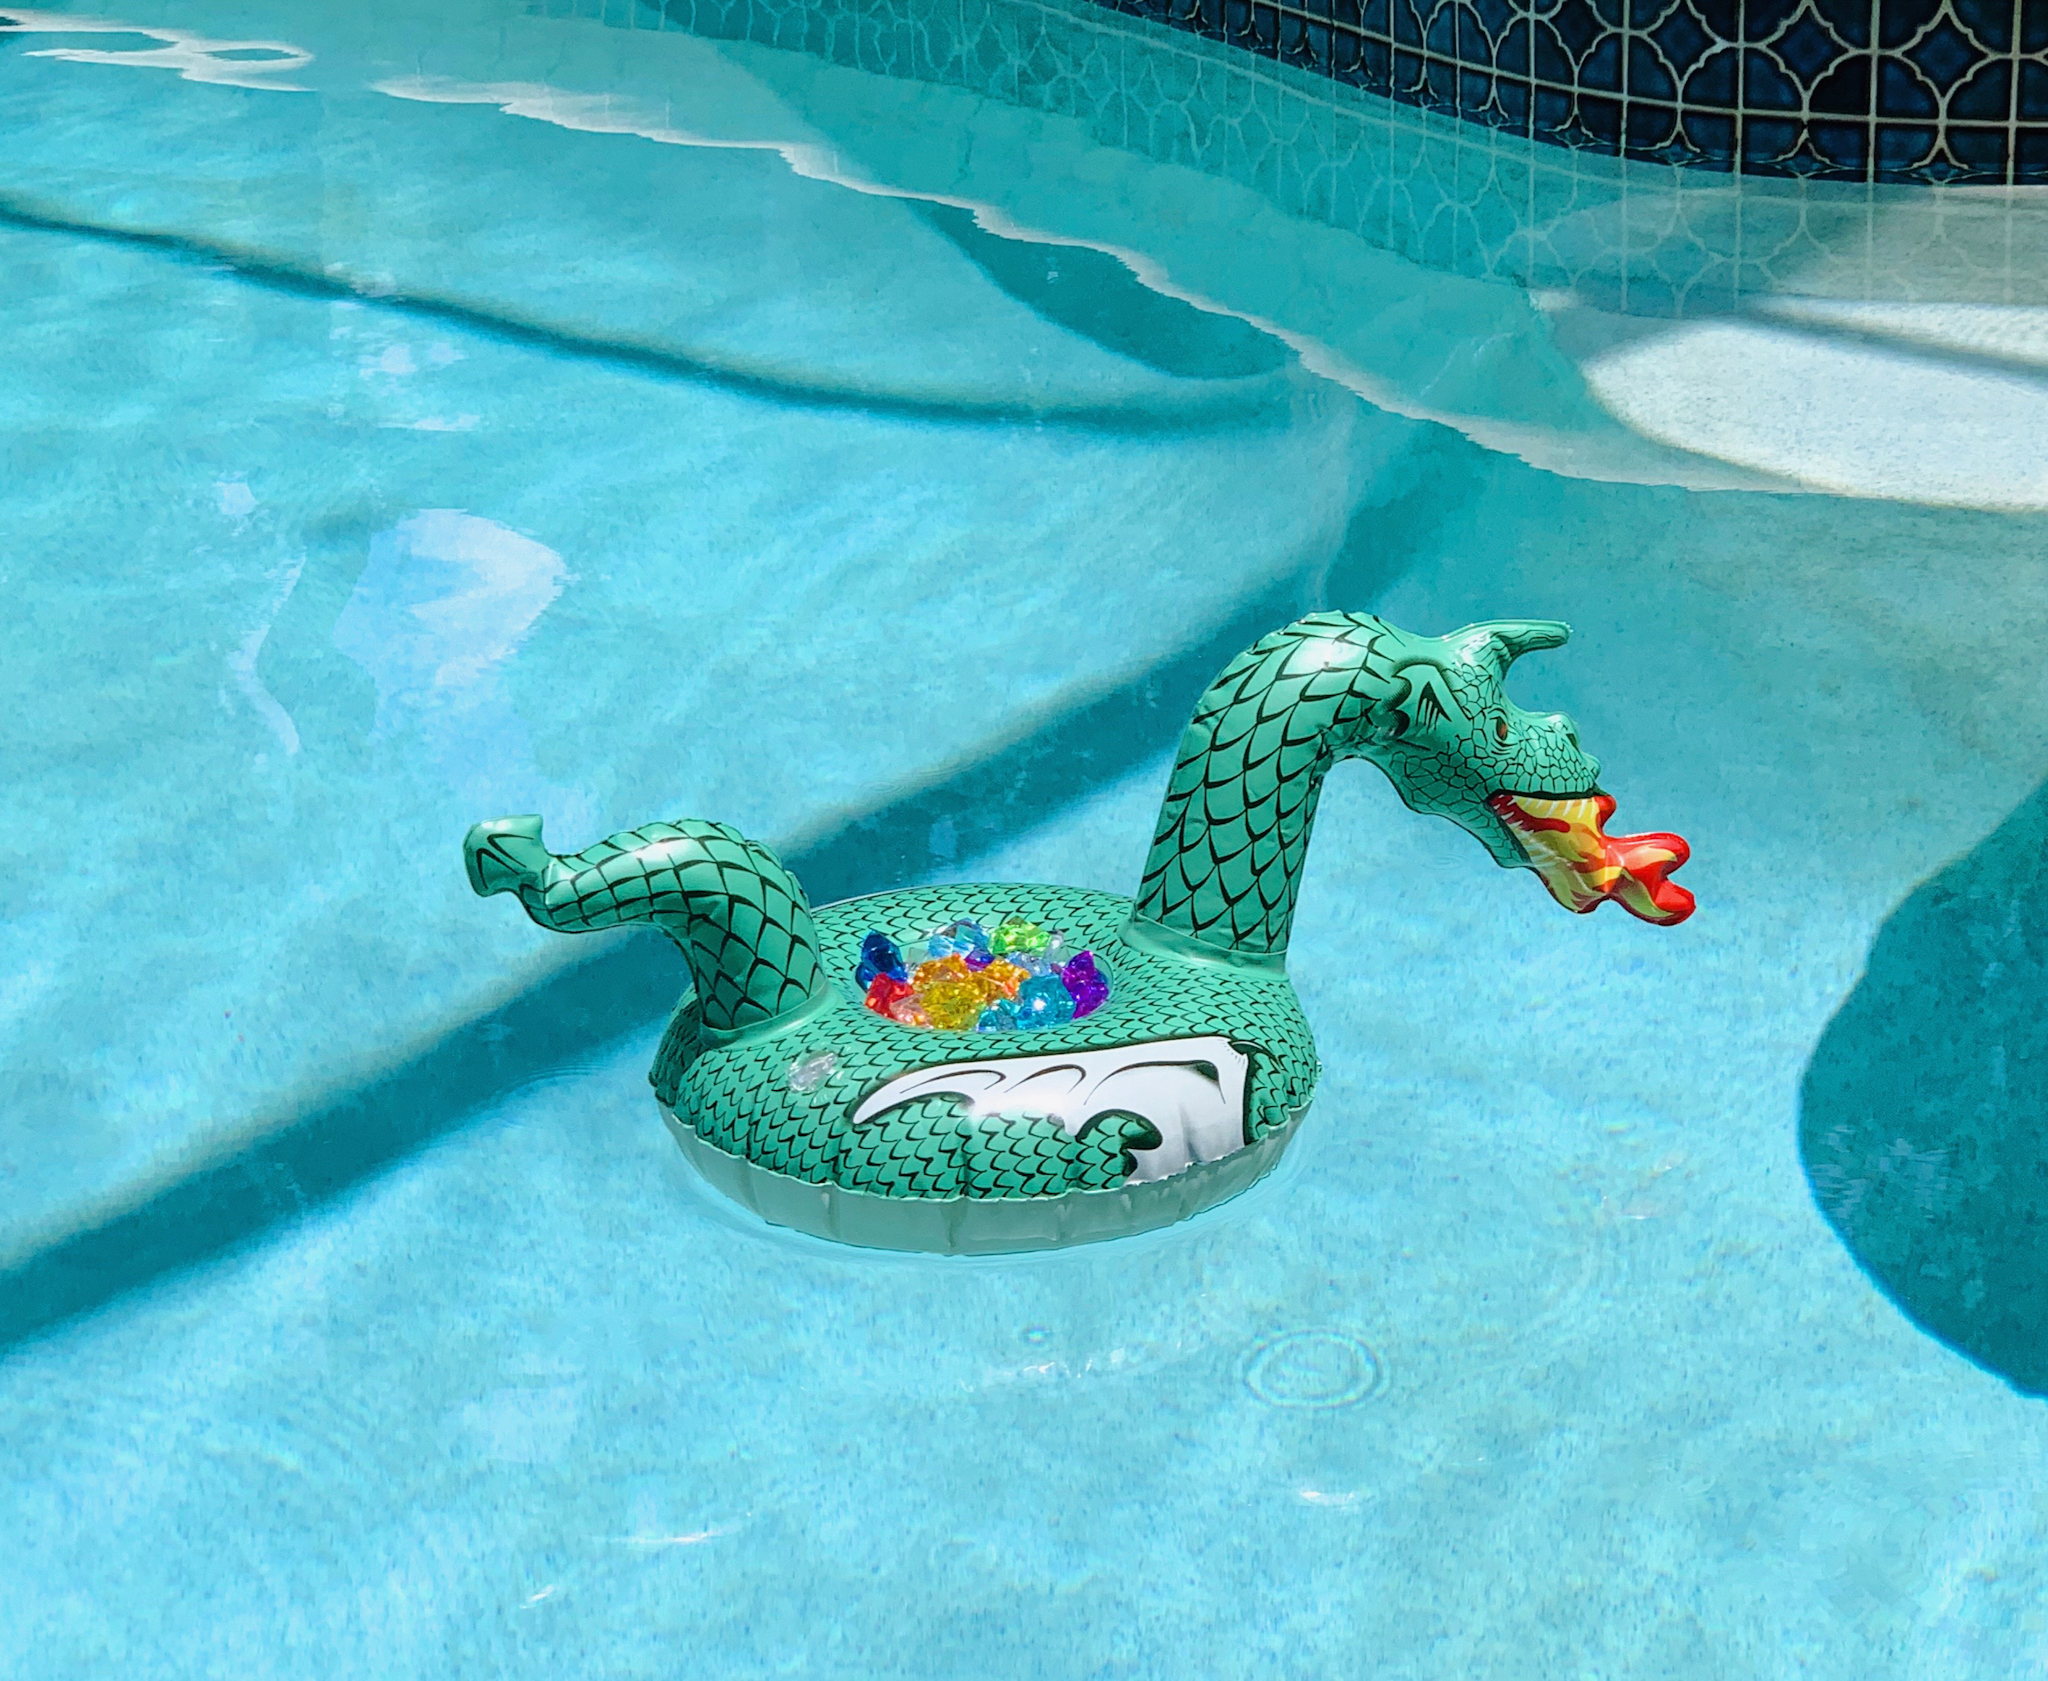
Using the pool noodle “swords” we had laid on the edge of the pool, they were tasked with the mission to slay the “dragons” and recover the royal gemstones…and they took this mission to heart!
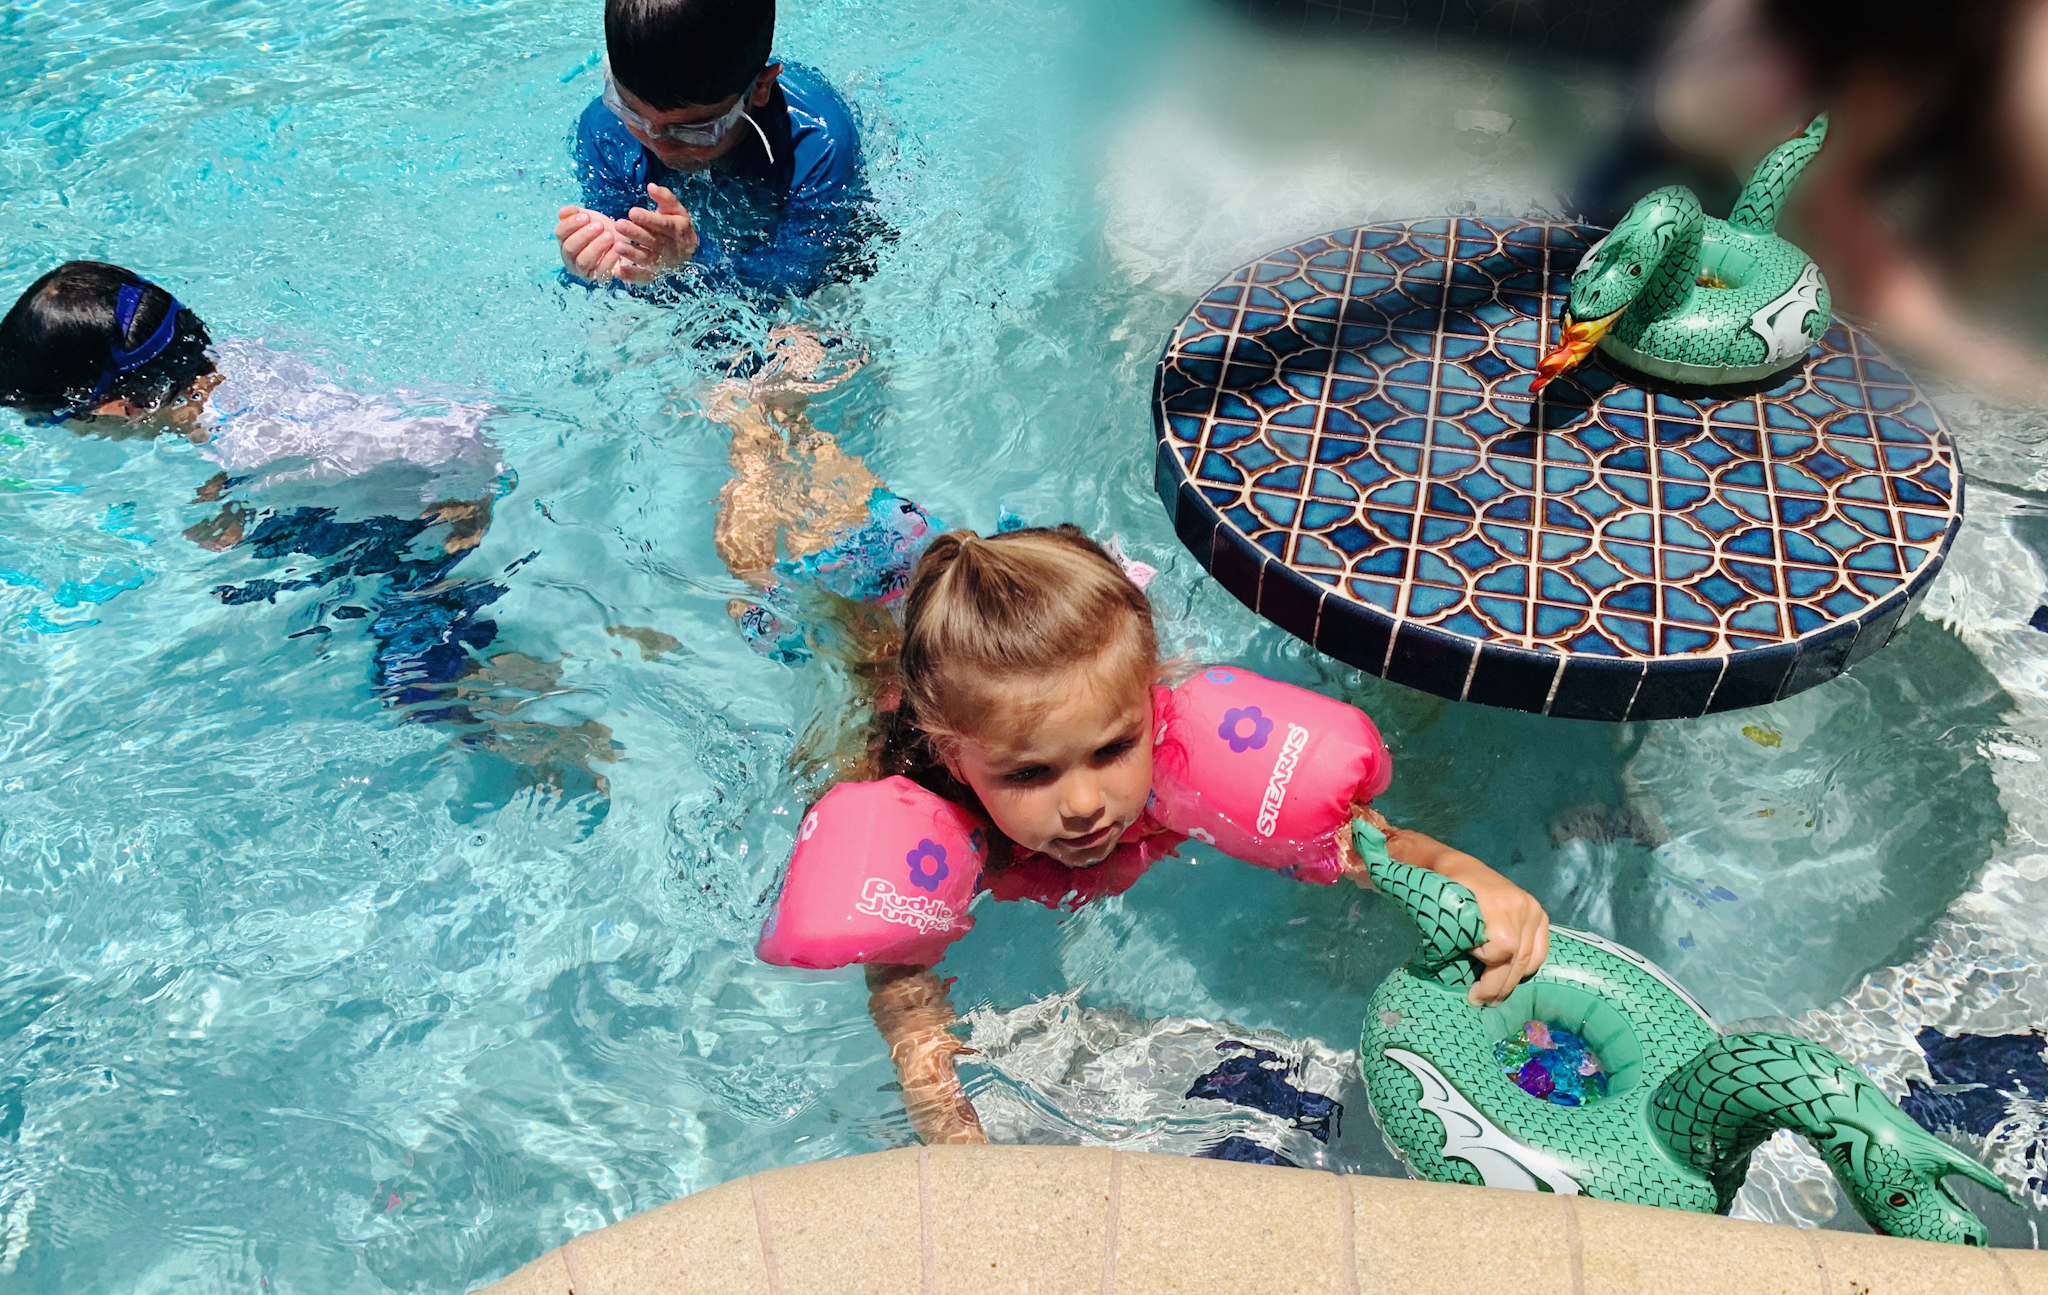
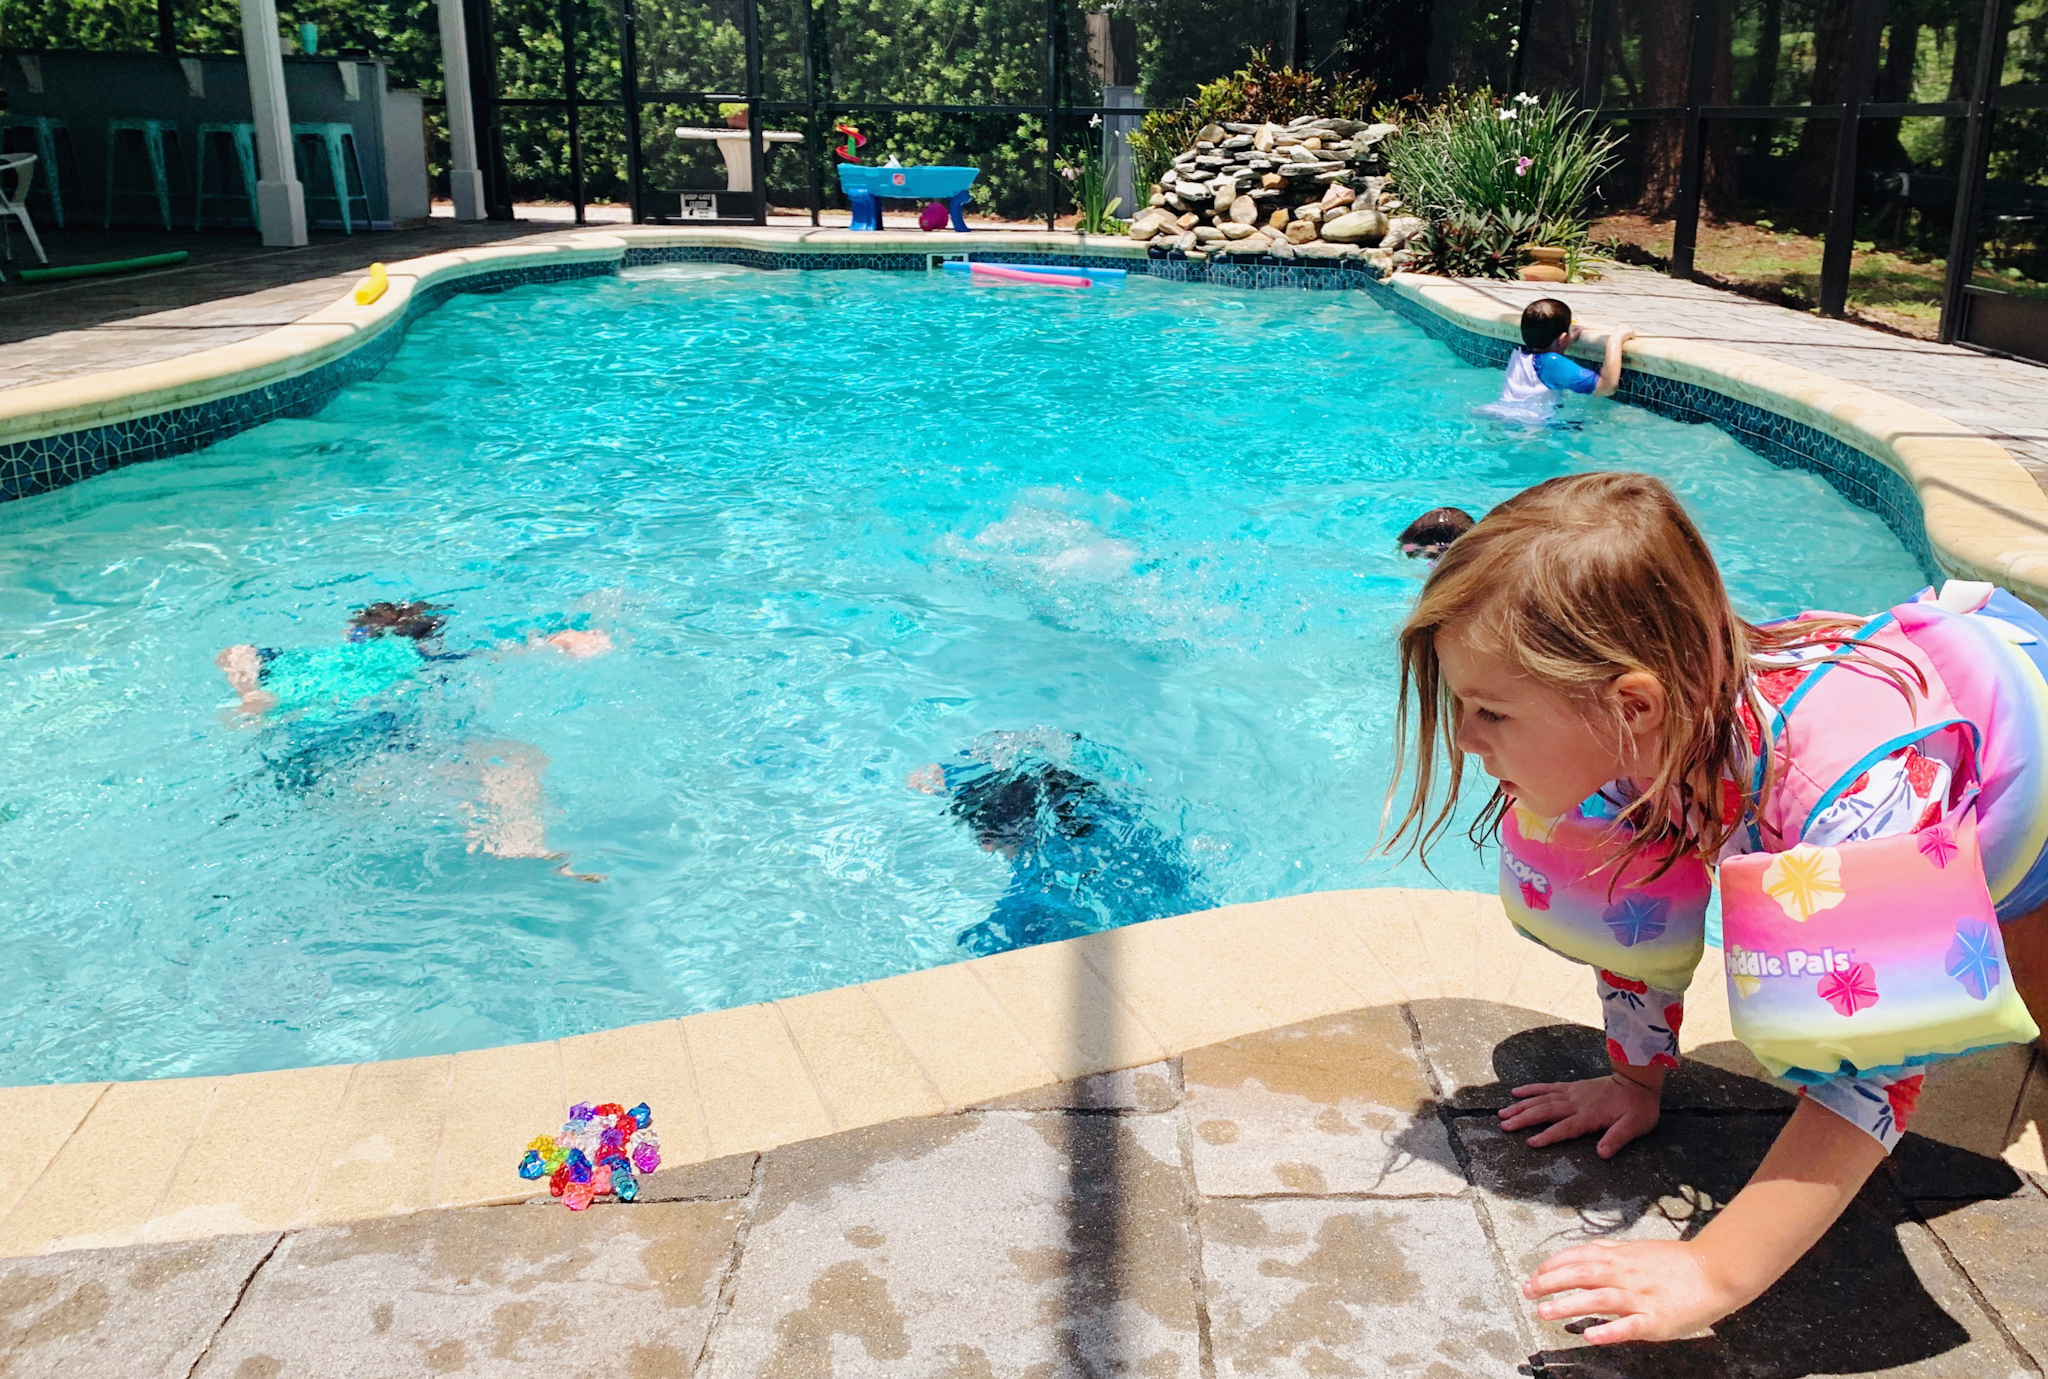
The kids all had a blast diving for gems in “the castle moat” and playing with the mini inflatable dragons, which Amazon sells as cup holders, but I dare say they make for fabulous gem holders, as well.
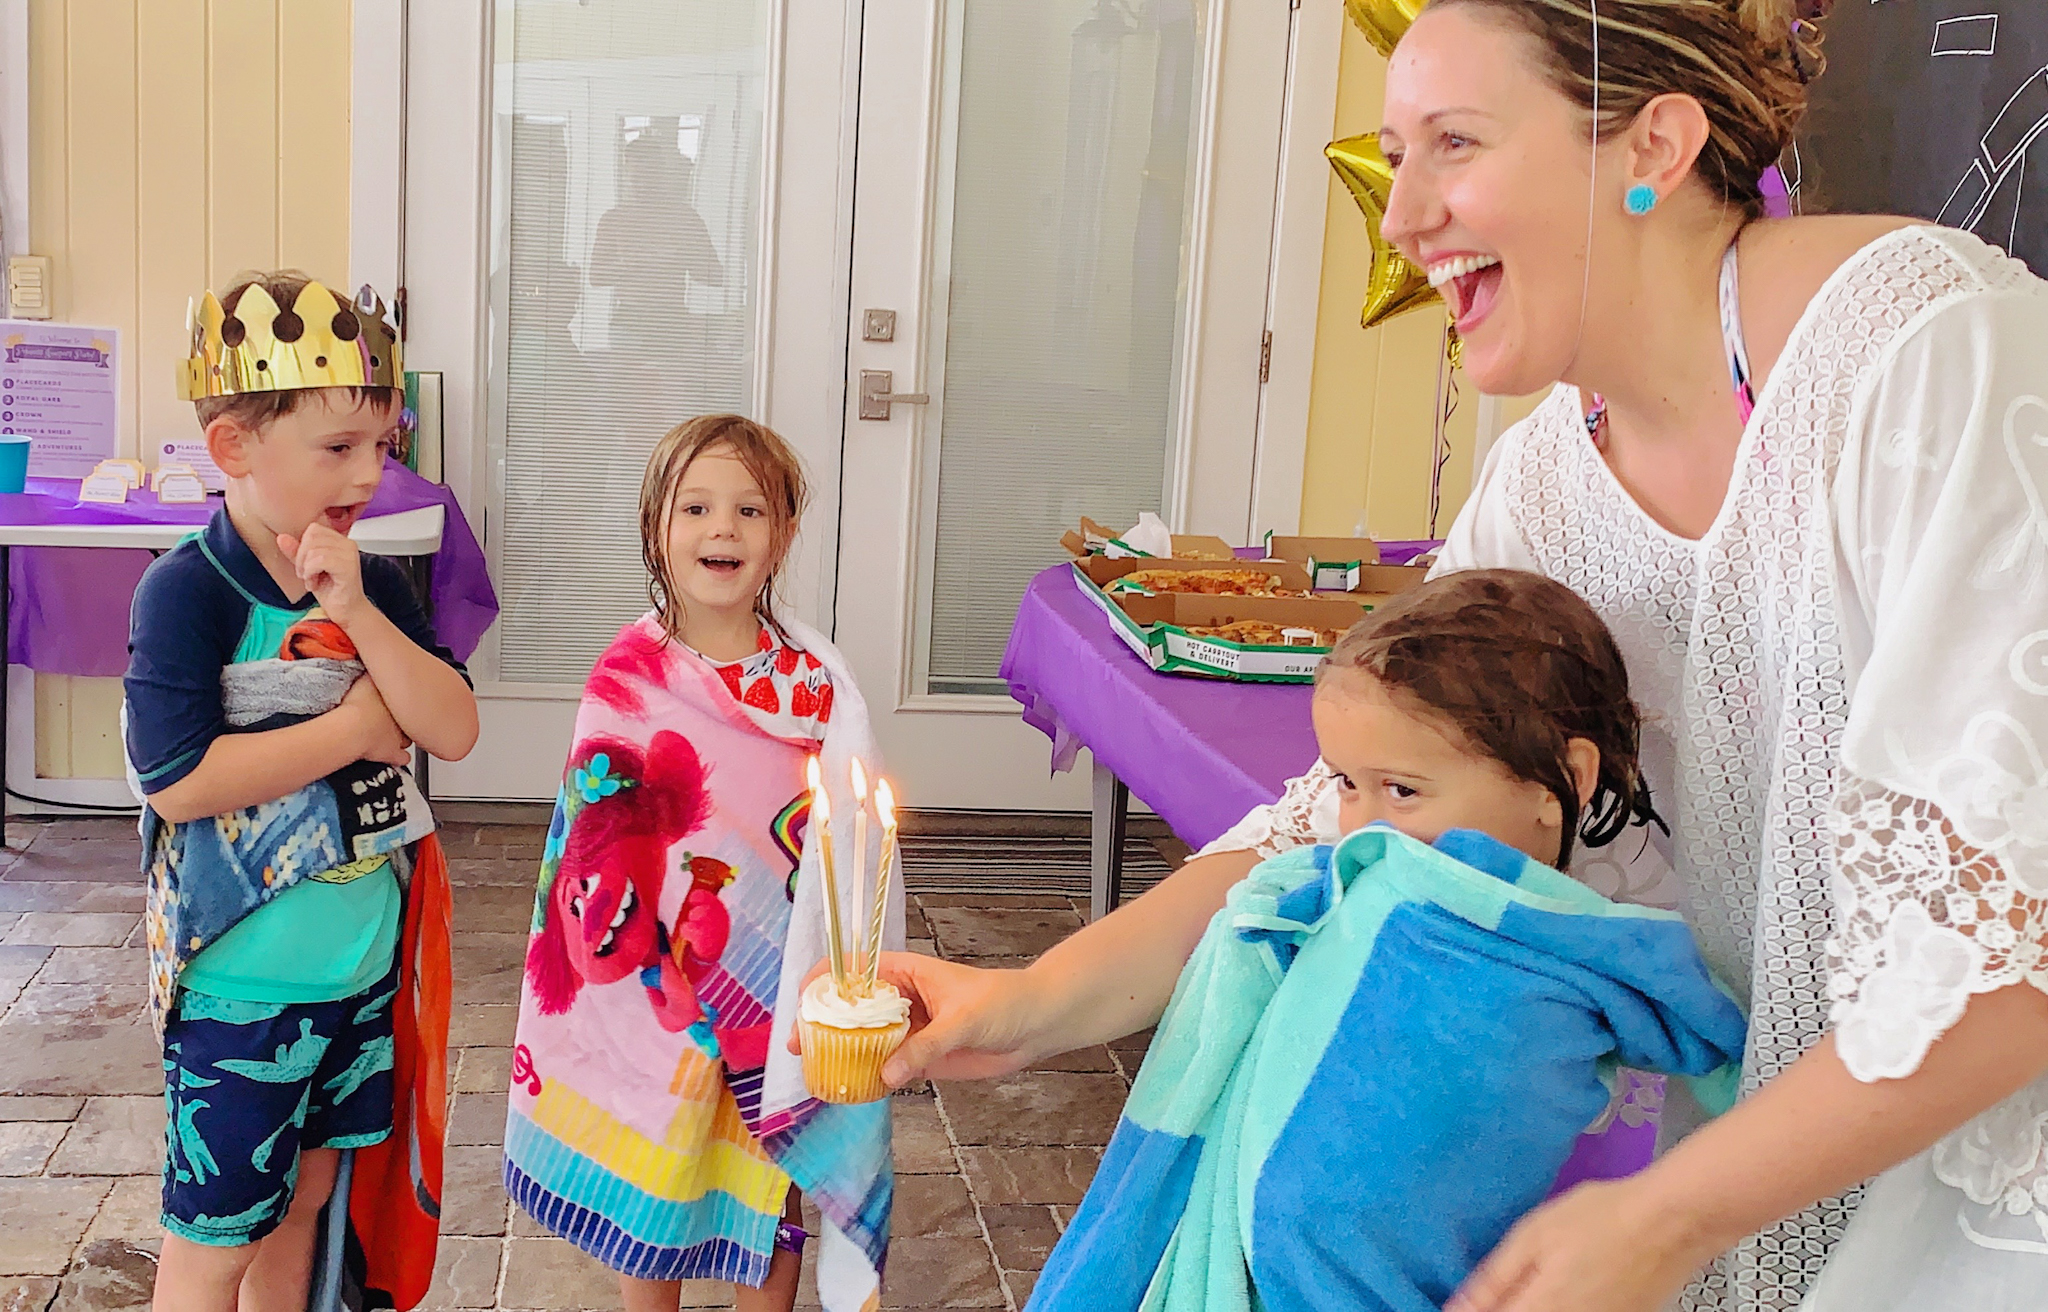
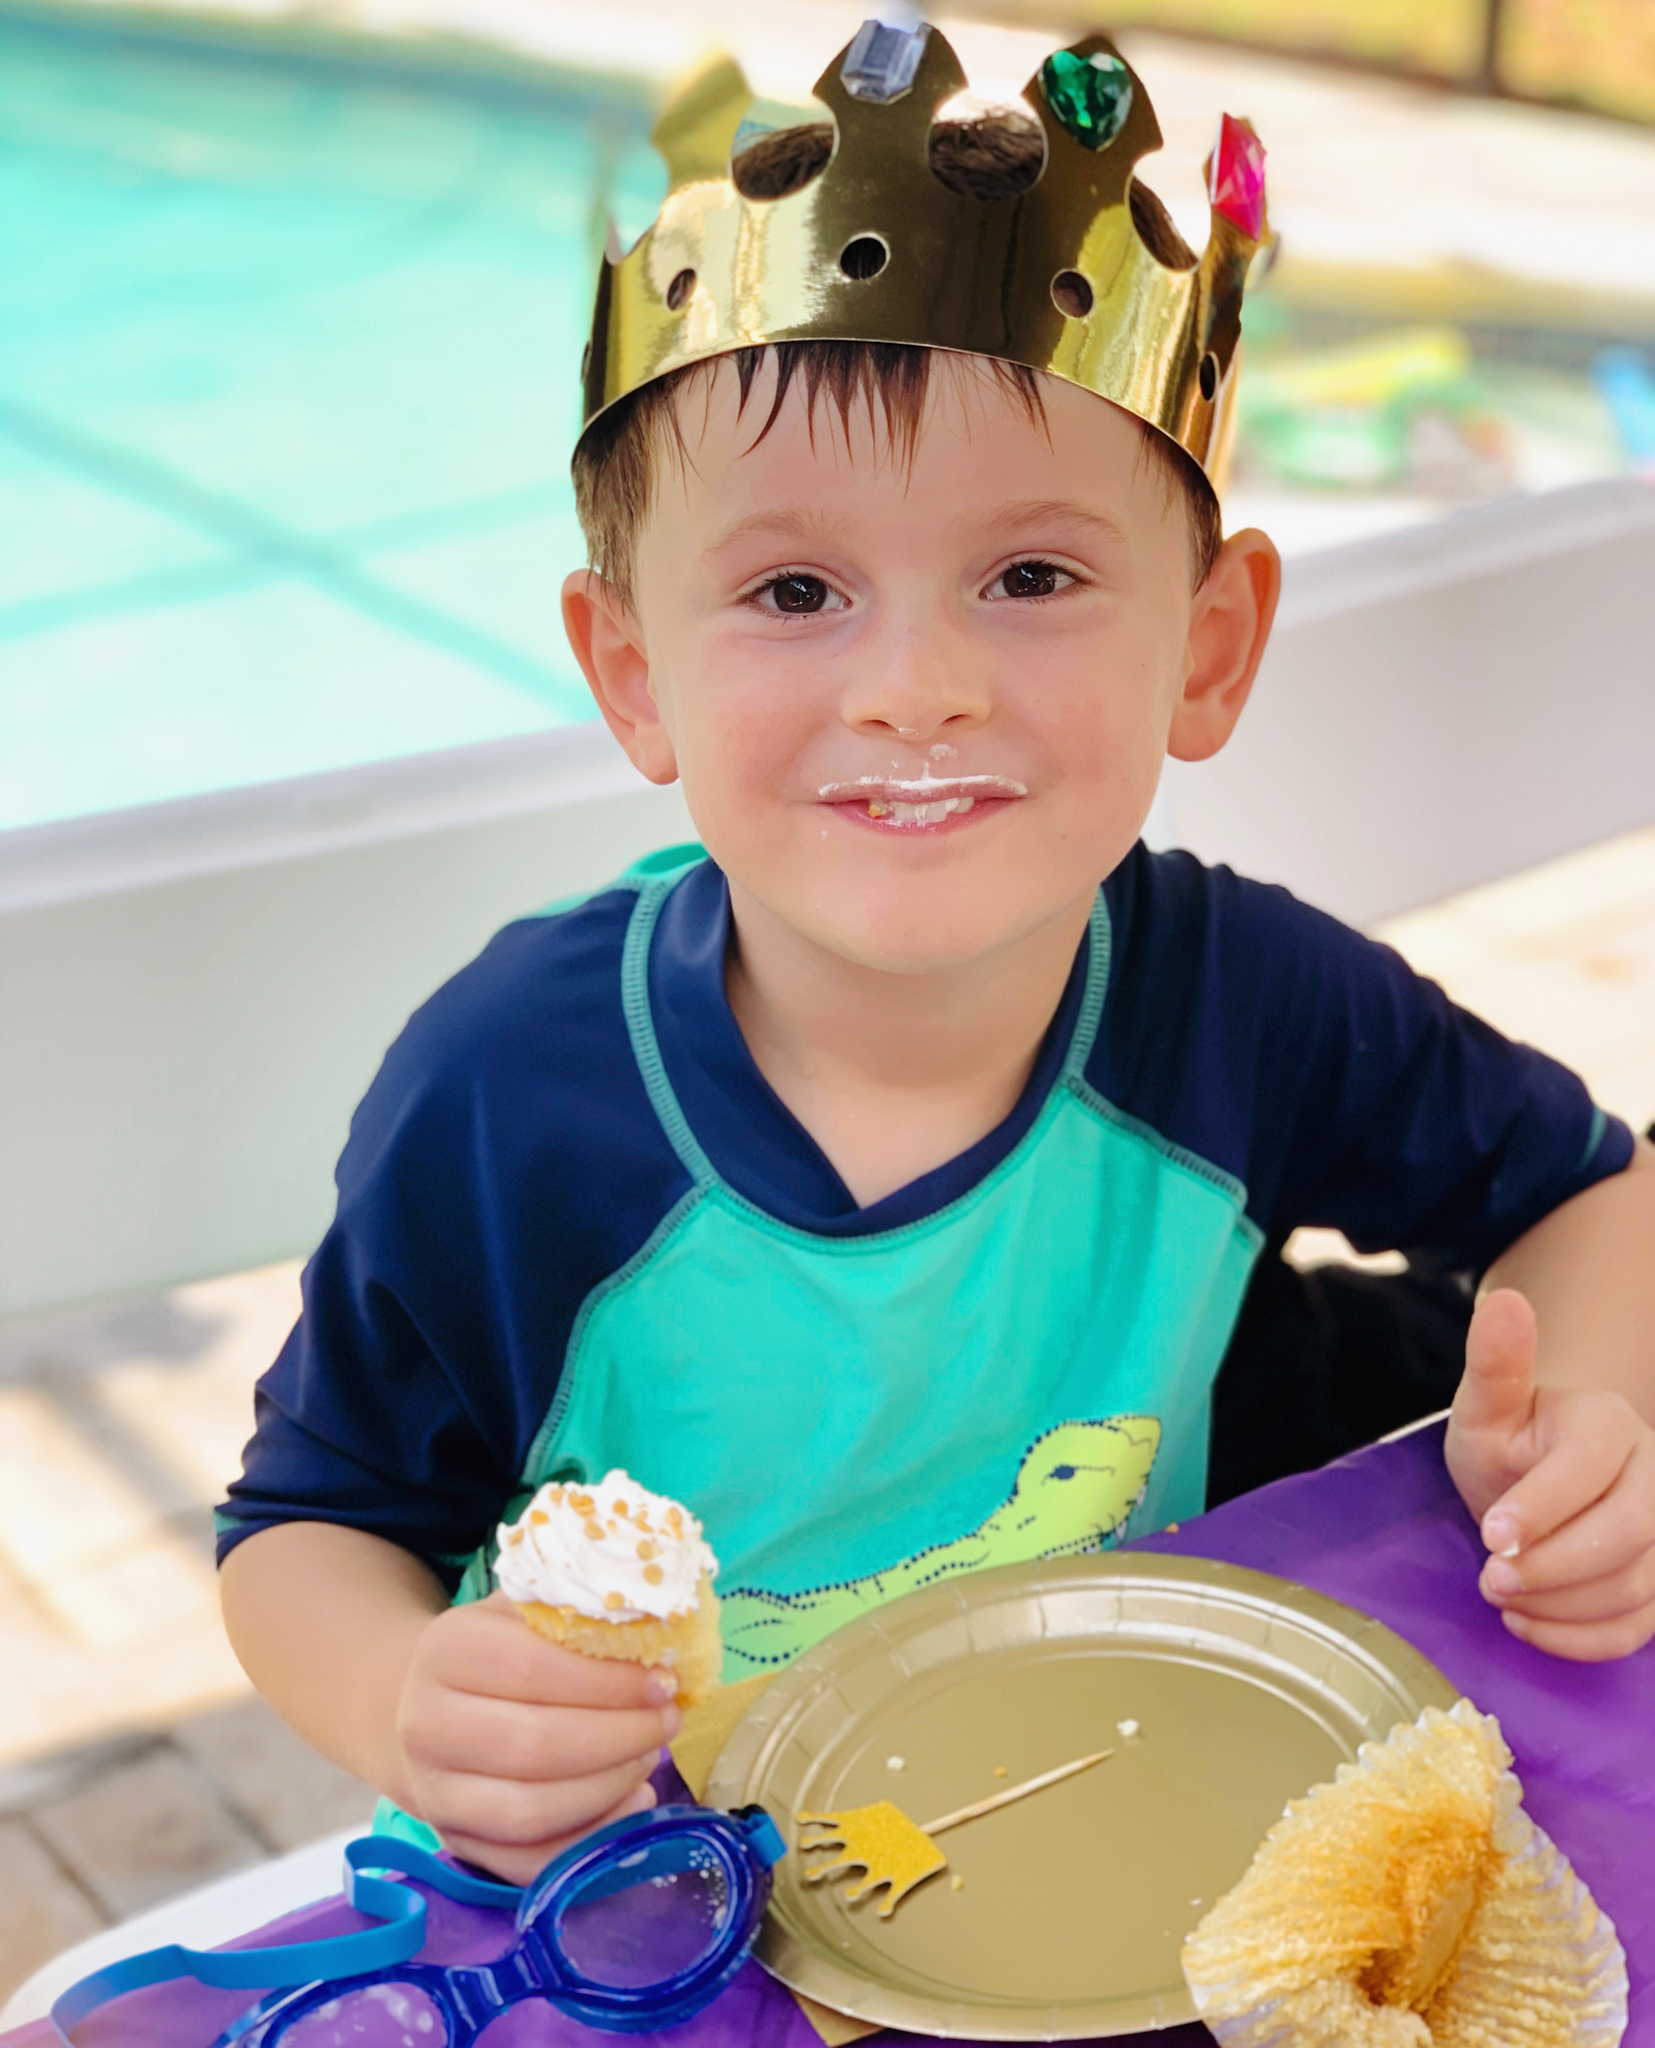
Cupcakes with Gold Crown-Toppers
The only way to peel our adventurers away from their dragon-slaying endeavors was to announce that we were about to sing “Happy Birthday to Juniper” and serve…cupcakes!
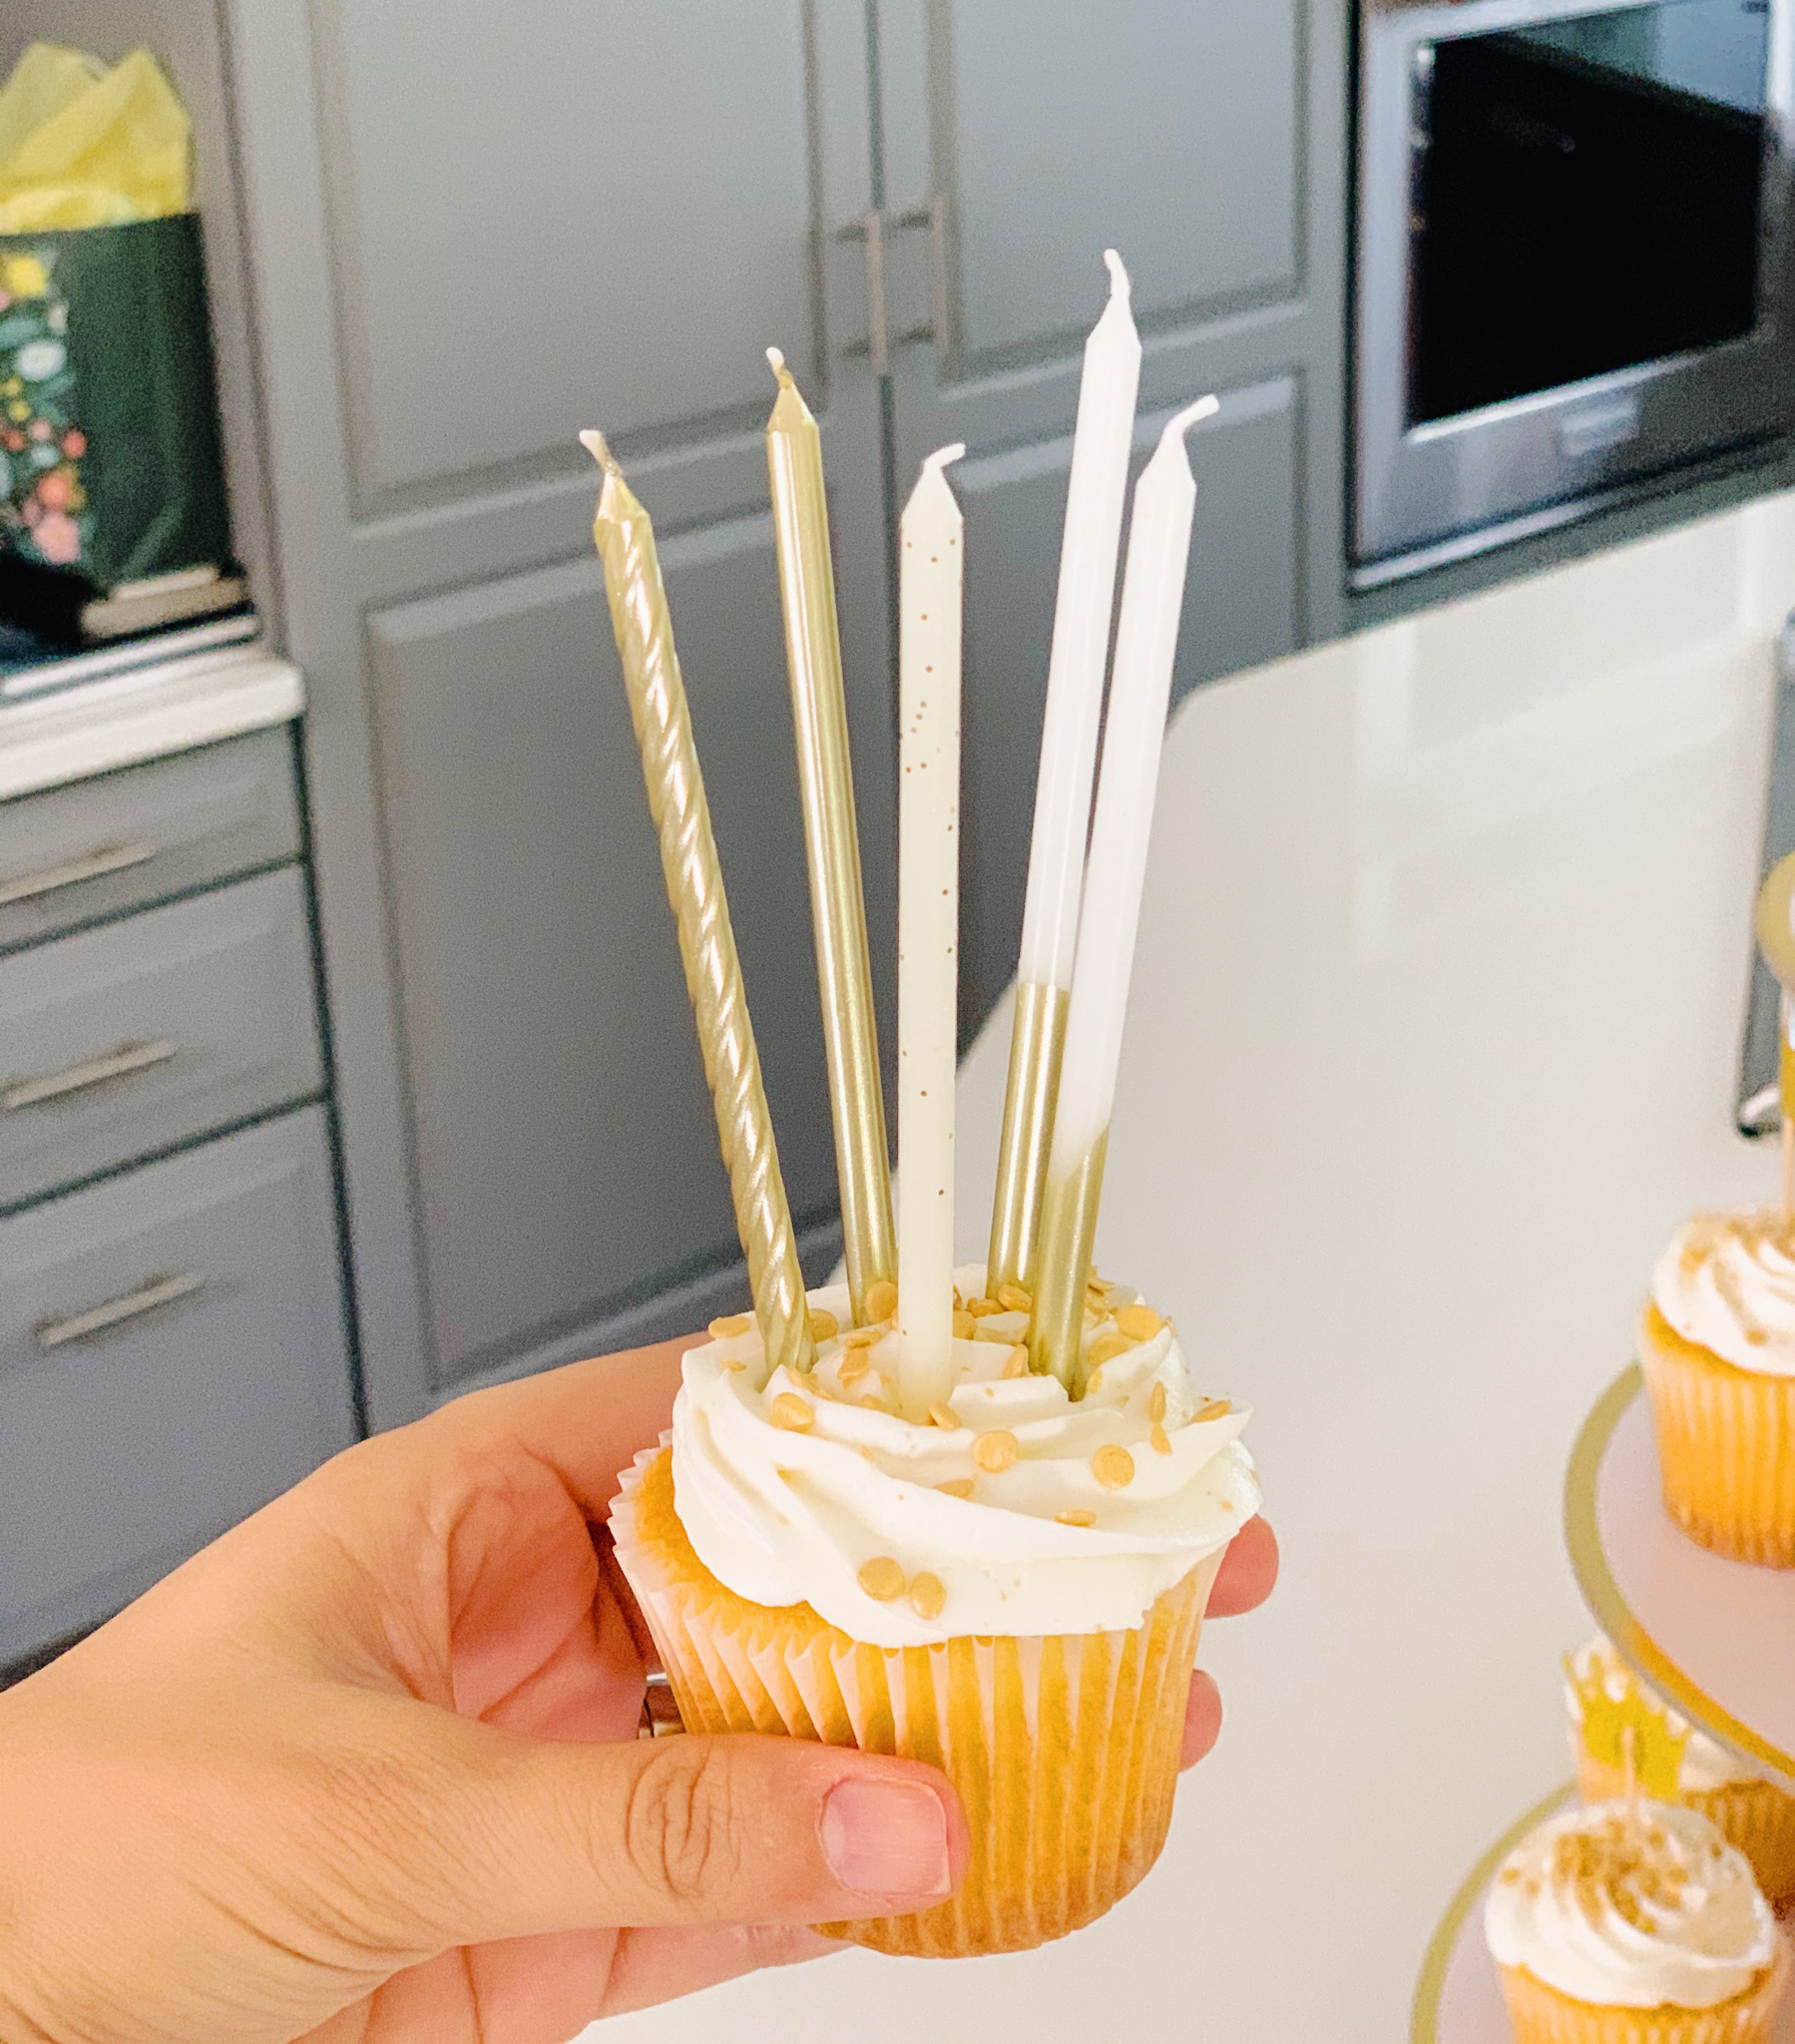
Our local Publix bakery makes a mean cupcake, so we ordered a few dozen vanilla cupcakes with butter cream frosting and gold dot sprinkles, and I dressed them up with some glittery gold crown toppers fit for a queen!
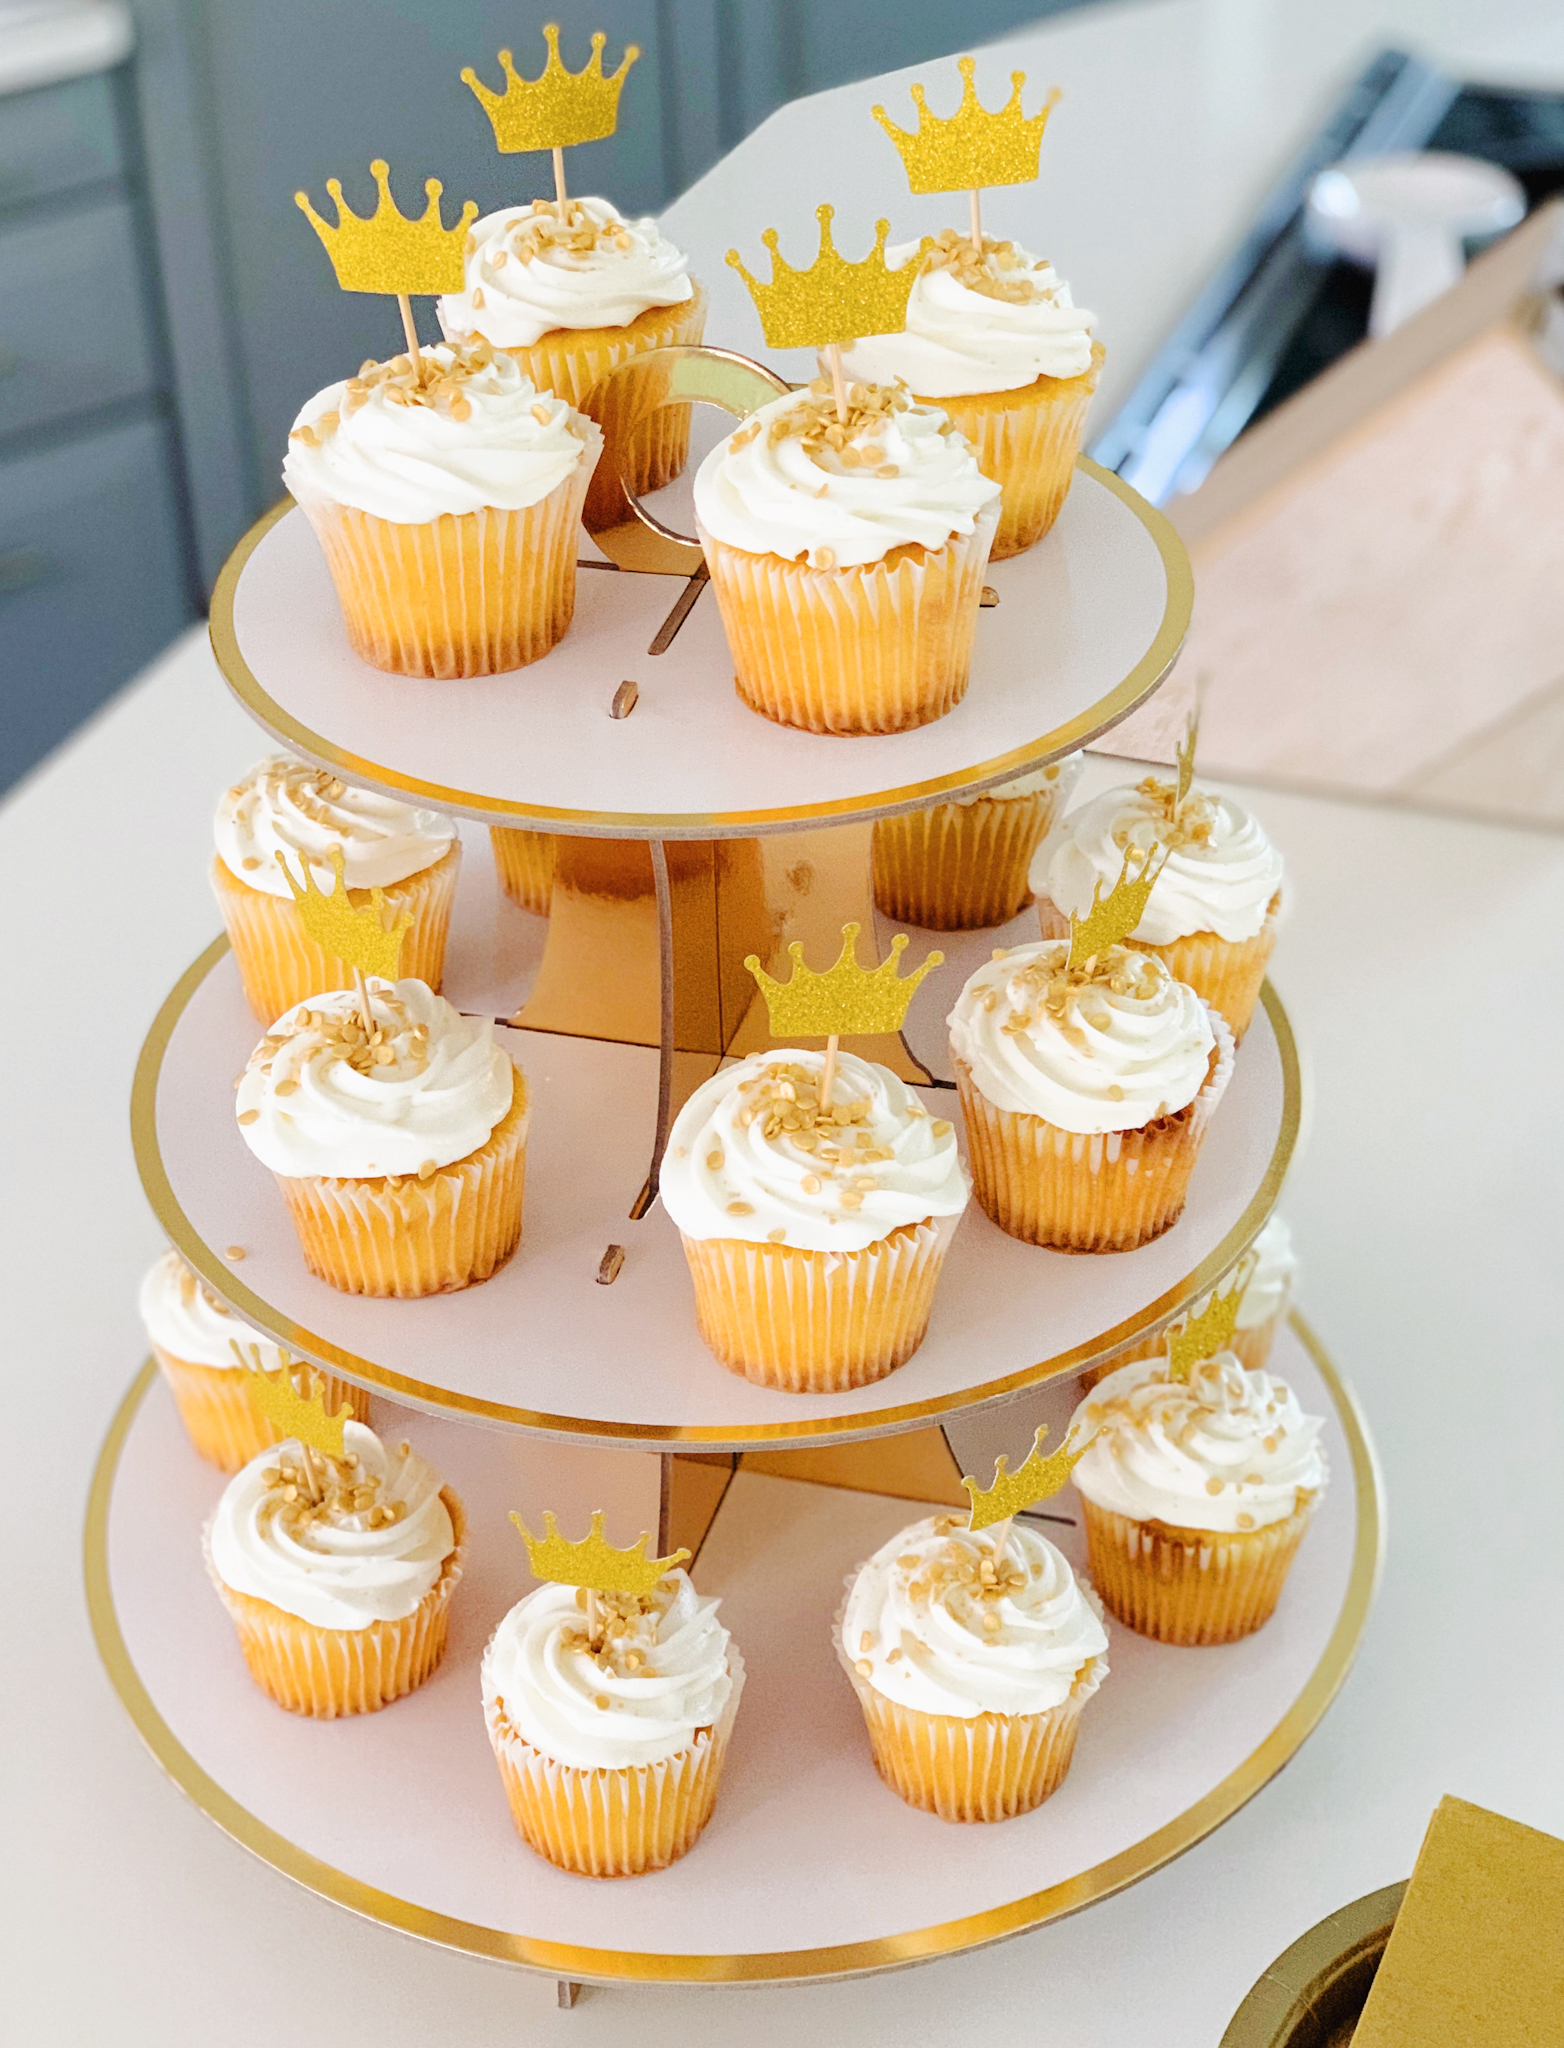
Also, I was stoked to find this 3-tiered cupcake stand at Target for only–wait for it–$5.00. It’s made of cardboard, but looks fancy schmancy, and breaks down flat for easy storage. Love!
5 candles for our 5-year-old!
We sang “Happy Birthday” to Princess Juniper…

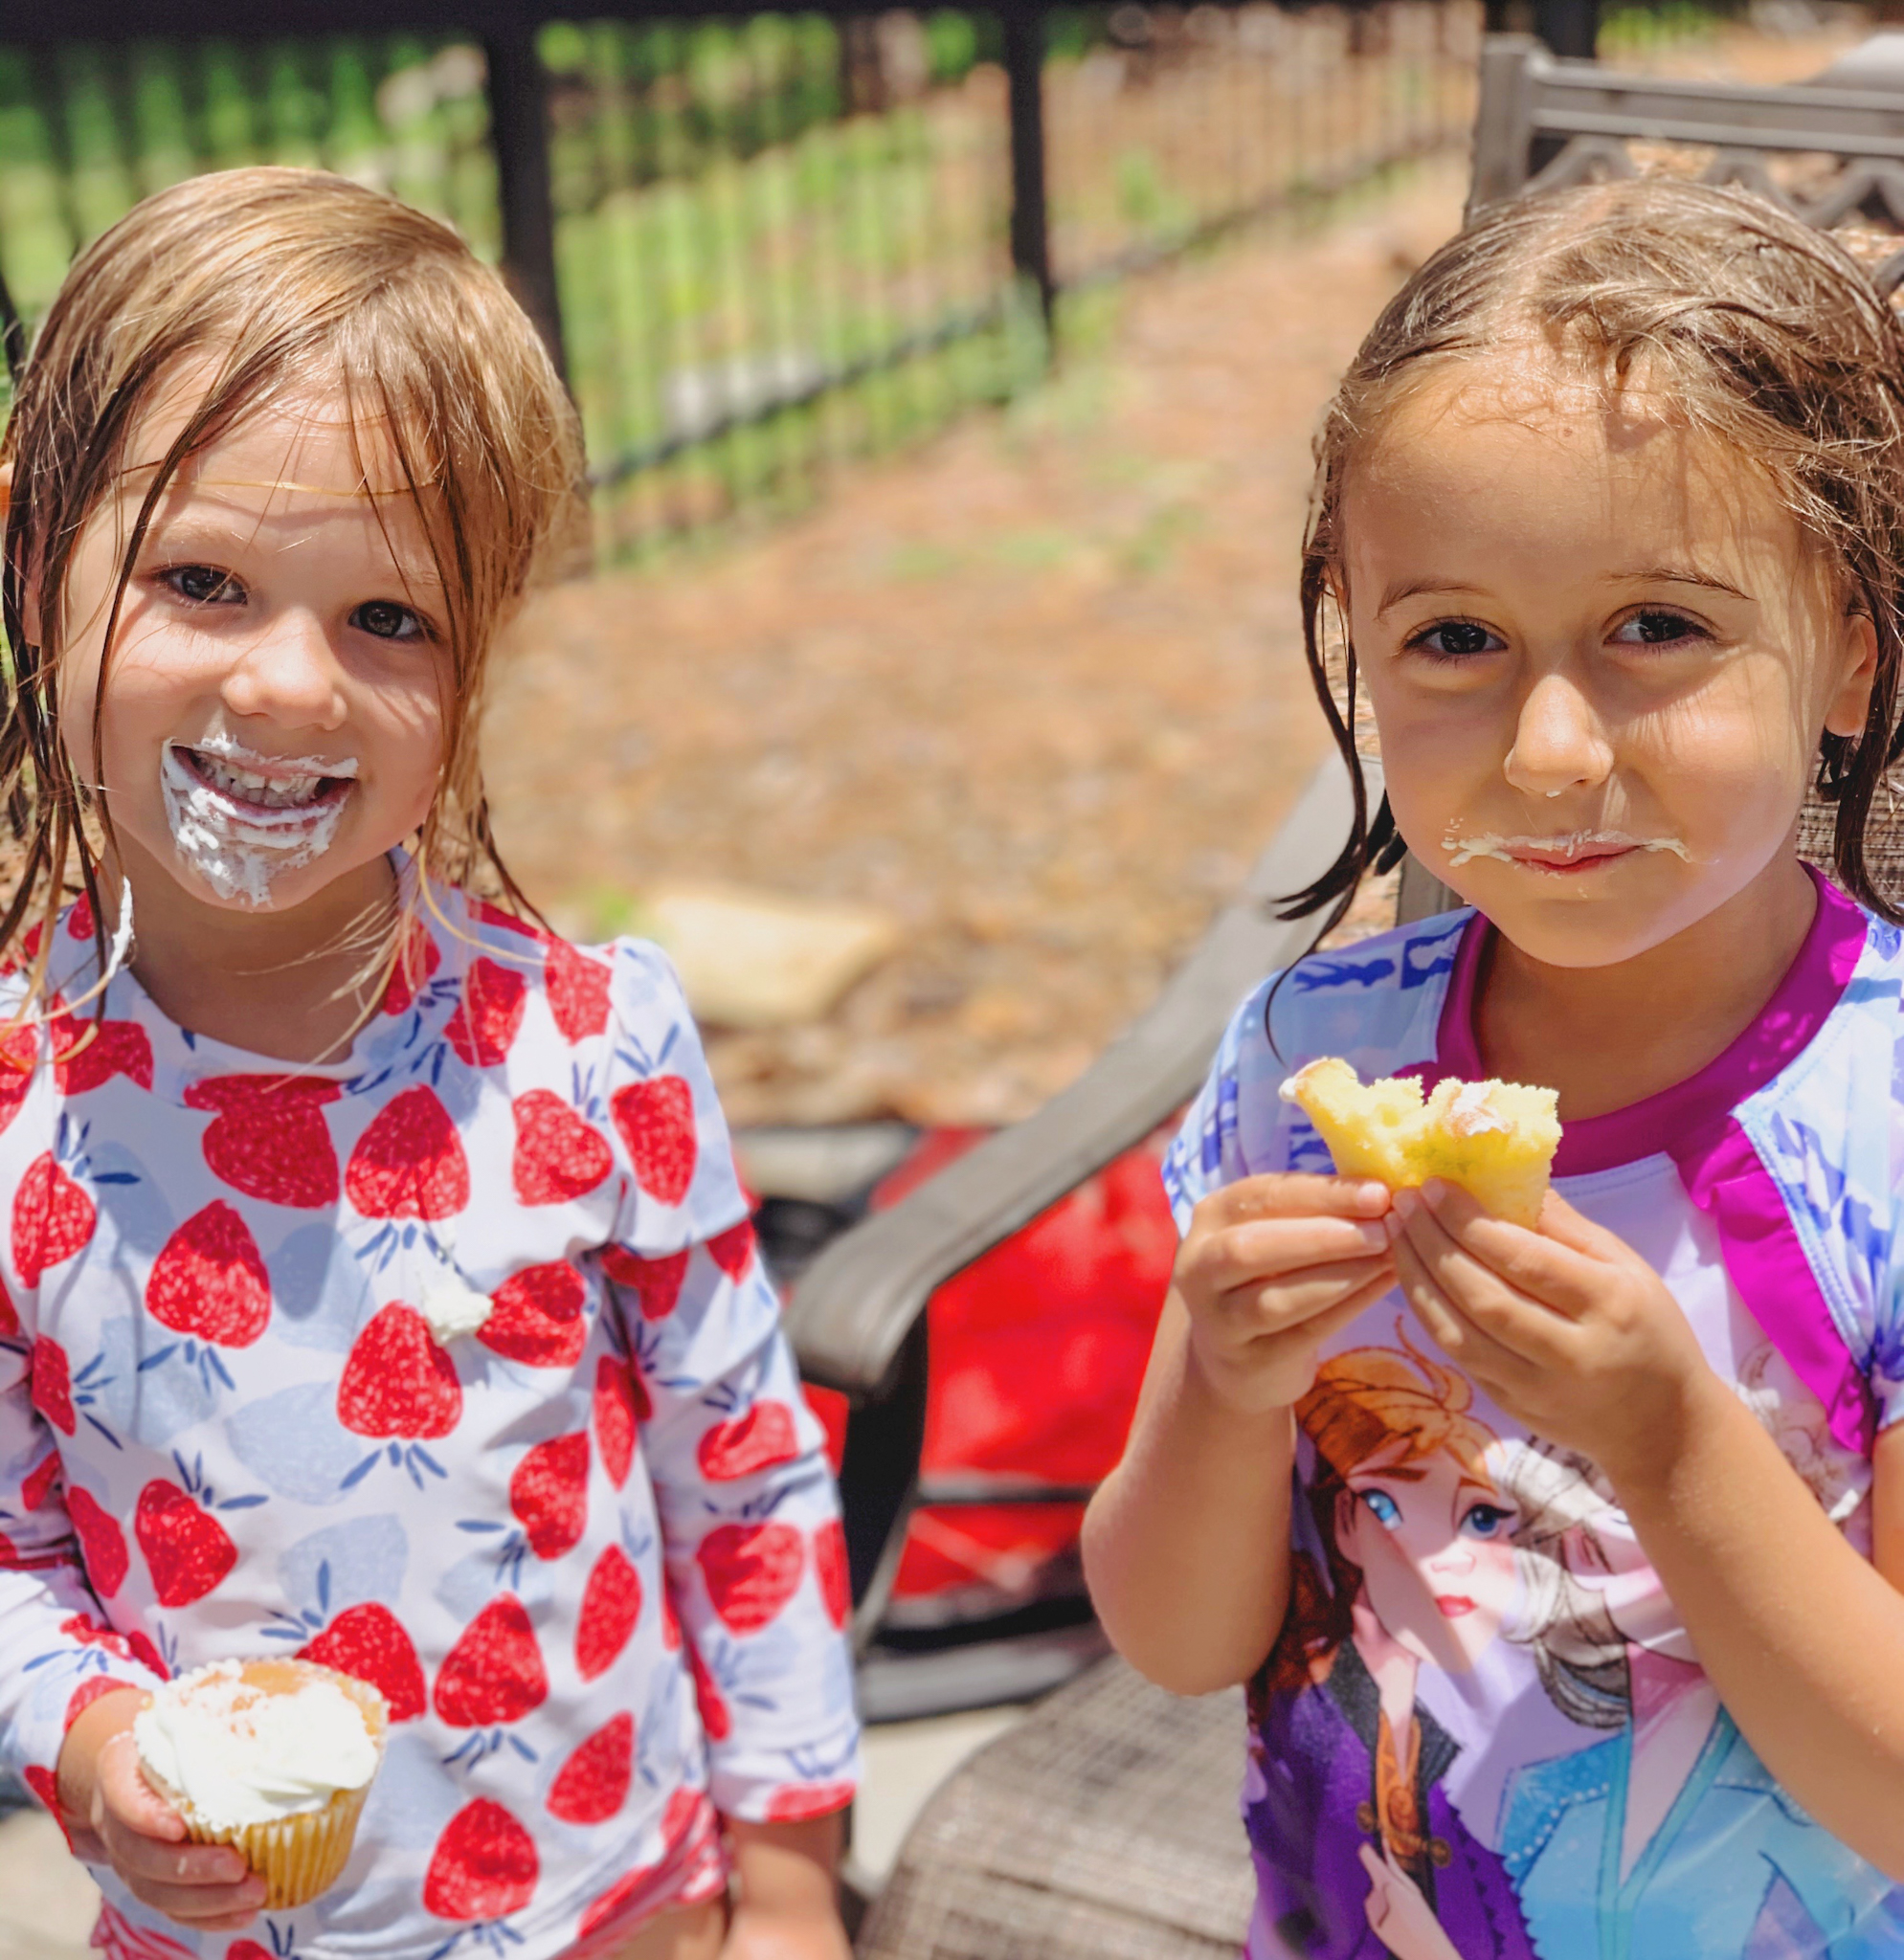
…and then the cupcakes “magically” disappeared!
Pepper approves of this sweet treat.
These smiles say it all!
Order of Events
For those of you planning your own “Princess & Knights” party, I thought it might be helpful to see a breakdown of our activities by time.
I used to be a high school English & theatre teacher, and so I feel most prepared when I draft a detailed schedule in advance even if we don’t stick to it to a T.
11:00 a.m. – 11:45 a.m. (45 minutes): Guests dive in to the first four stations of Princess & Knight activities:
-
- 1. PLACECARDS: Choose your official princess or knight name.
- 2. ROYAL GARB: Choose your skirt and/or cape.
- 3. CROWN: Bedazzle your crown with jewels & gems.
- 4. WAND & SHIELD: Decorate your wand and/or shield.
11:45 a.m. – 12:15 p.m. (30 minutes): Group photo, prayer, then a royal lunch feast!
12:15 p.m. – 1:00 p.m. (45 minutes): Pool time!
-
- 5. POOL ADVENTURES: Use the pool noodle swords to slay the pool dragons and recover the royal gemstones… and have fun!
1:00 p.m. – 1:30 p.m. (30 minutes): Sing happy birthday and enjoy cupcakes before bidding one another farewell.
To Close
Juniper had such a wonderful experience in pre-K this past school year, and we so enjoyed getting to host her friends and their siblings at our “castle” for her golden birthday!
This party theme worked well for big sibs and littles and everyone in between, and I’d be so quick to recommend it to anyone with a brave princess or invincible knight of their own. It’ll be a truly magical time for all.
Happy Golden Birthday, Princess Juniper the Great!

Where to next?
For your convenience, I’ve compiled all the Amazon links of party supplies from this post in a handy collection on my Amazon storefront, which you can peruse HERE.
And here are some of my other popular birthday party posts to continue the creative inspiration:
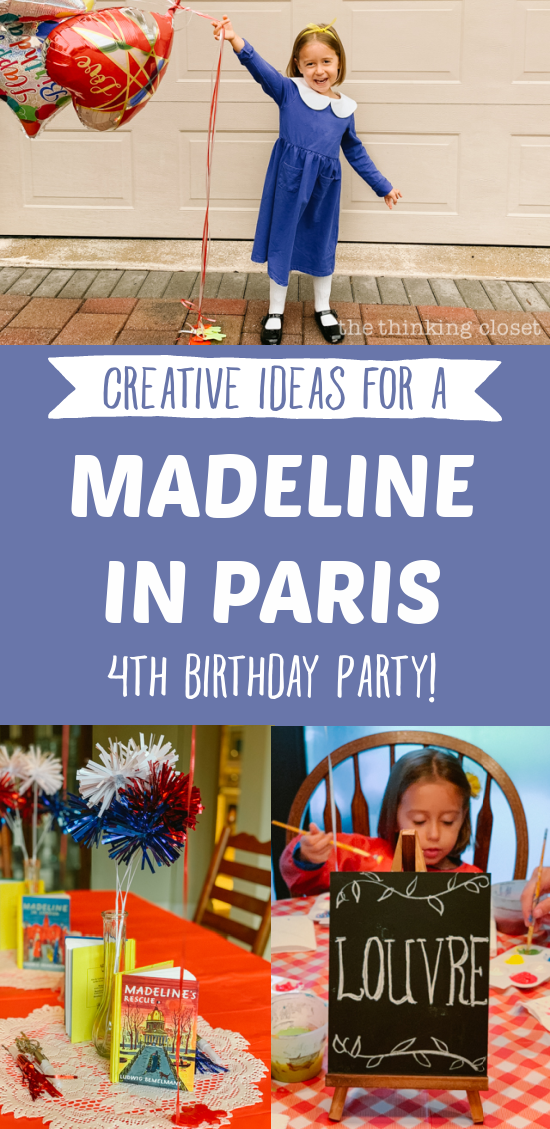
Click HERE or the image below to journey over to Juniper’s “Madeline in Paris” Themed 4th Birthday Party, inspired by the classic Madeline children’s books!
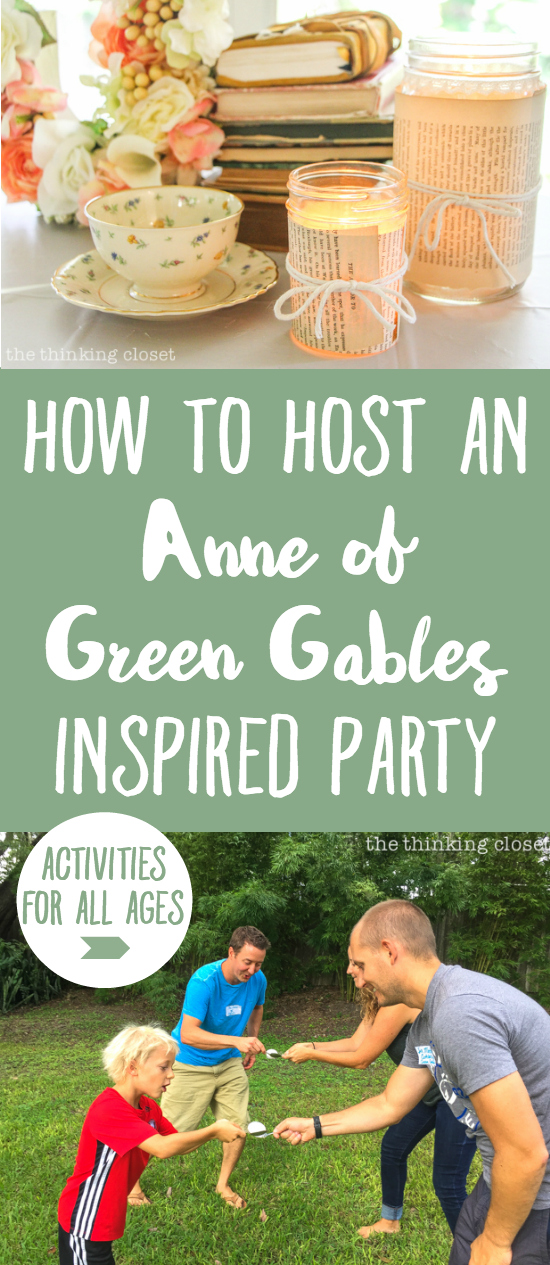
For another story-themed celebration, check out our “Anne of Green Gables” Inspired Birthday Party by clicking HERE or the image below.
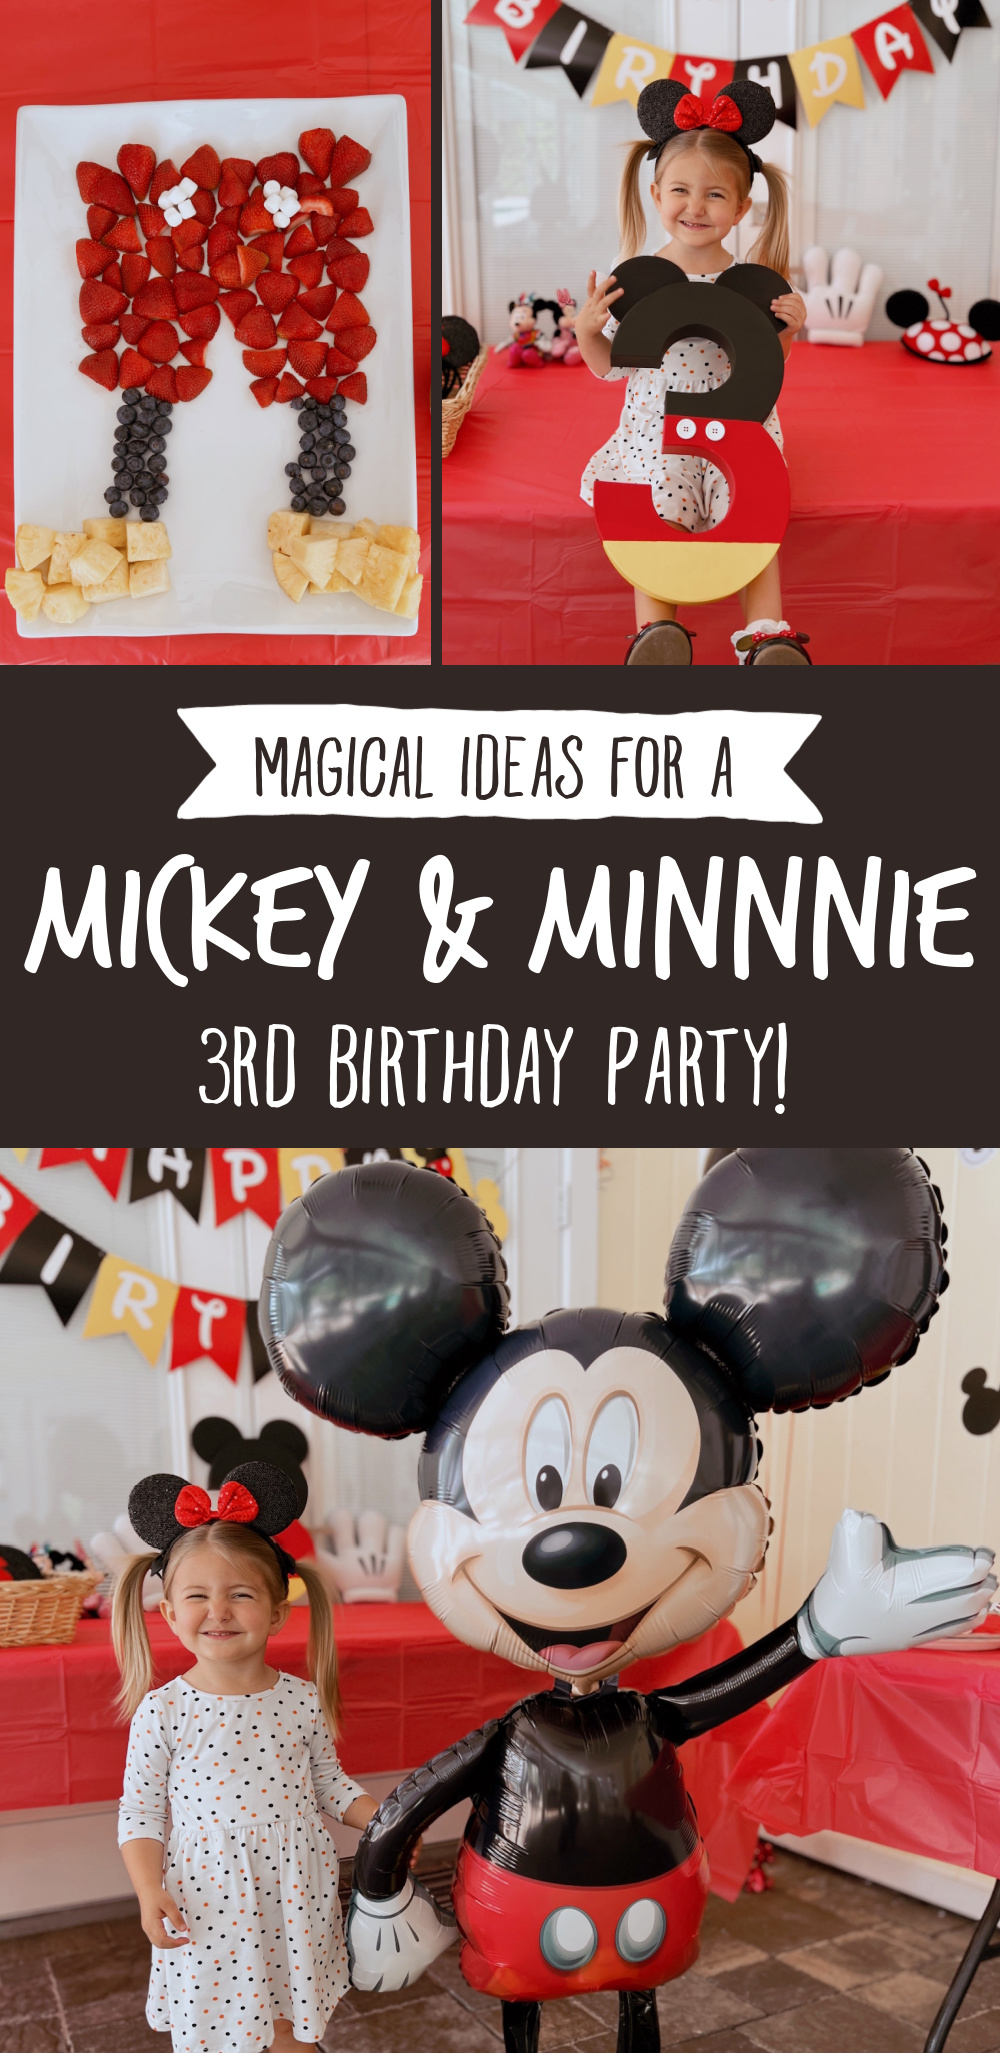
For Pepper’s 3rd birthday, we had a magical “Mickey & Minnie Mouse” party for Pepper. Click HERE or the image below for all the mouse-spiration.
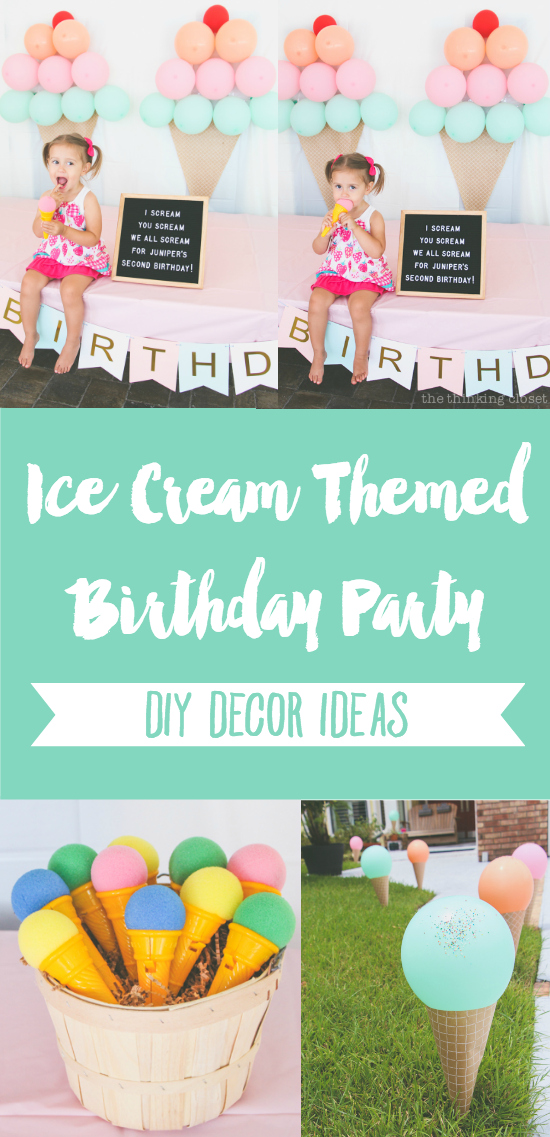
Then, I recommend stopping by Juniper’s 2nd Birthday Party, which was Ice Cream Themed! Click HERE or the image below to treat yo’self.
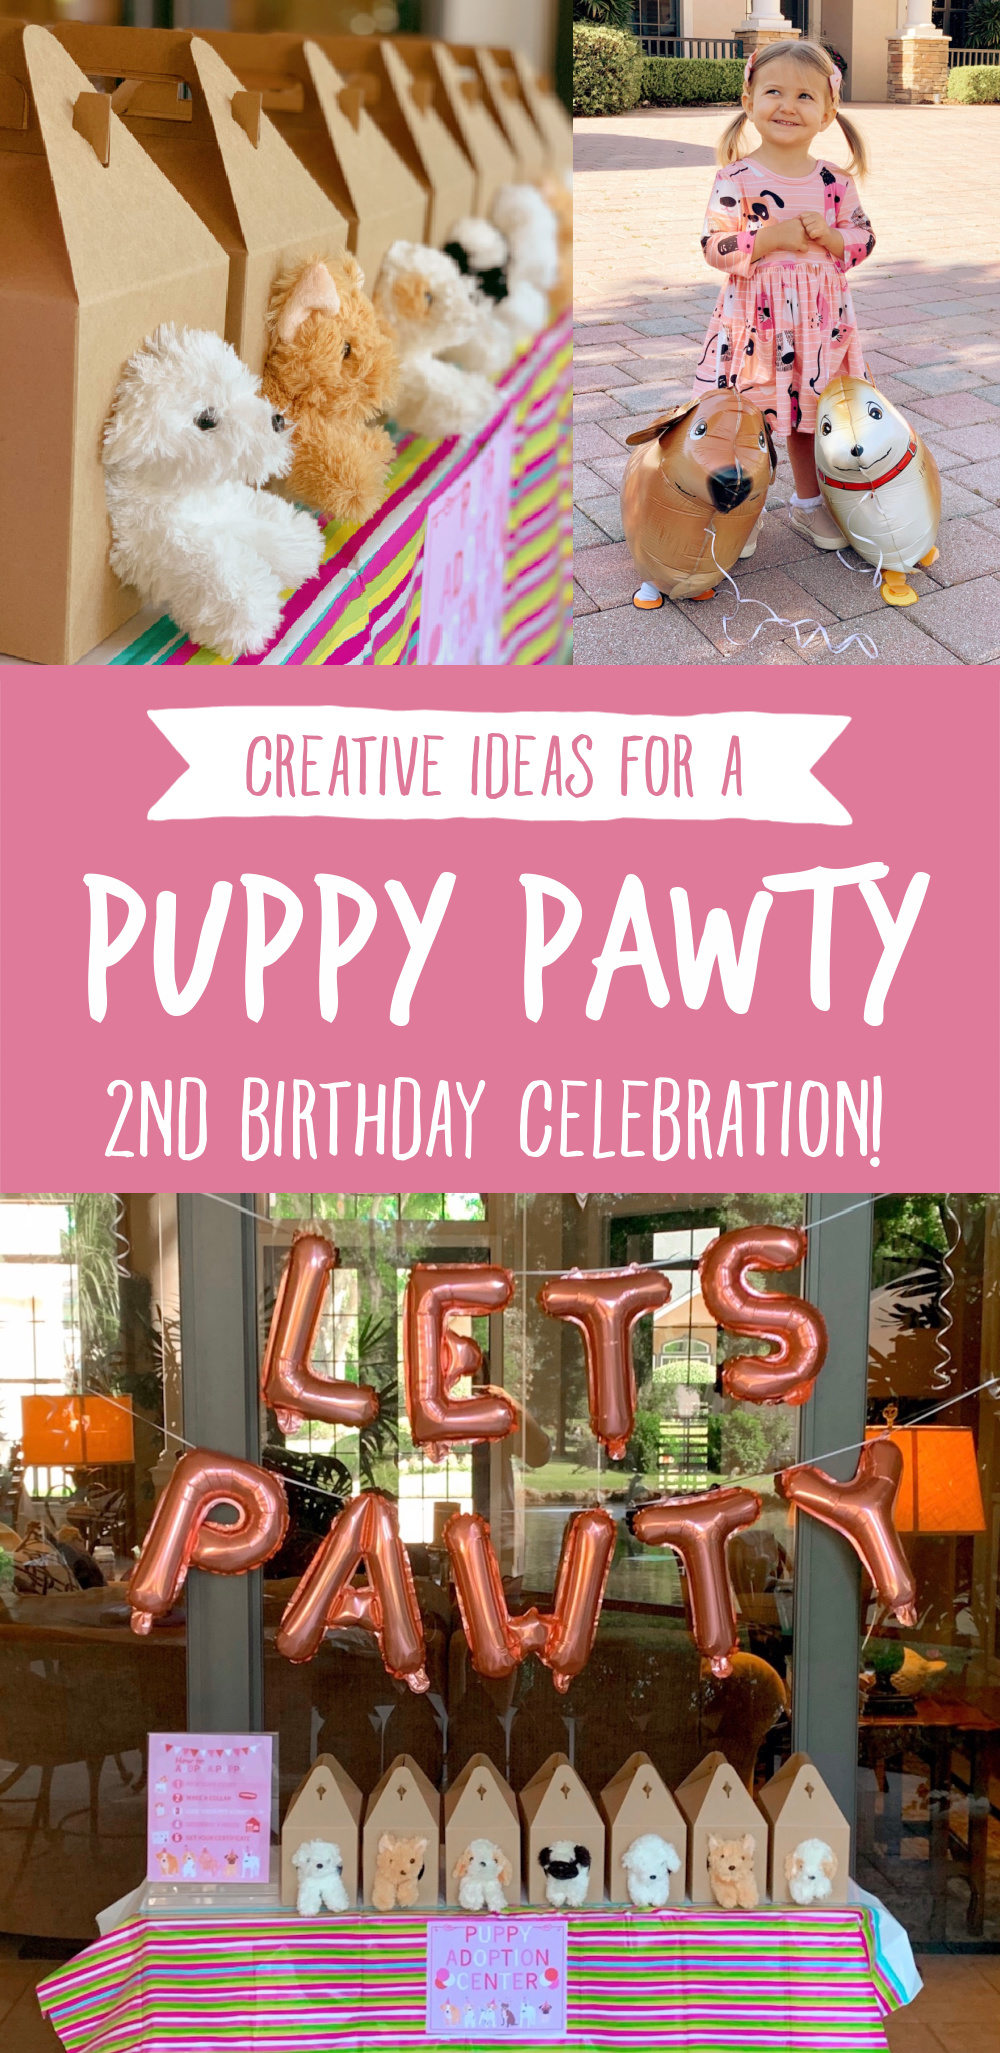
For Pepper’s 2nd birthday, we had a Puppy Paw-ty that was dog-gone fun. Check out the paw-ty details by clicking HERE or the image below.
And for a floral-tastic time, join us for Juniper’s Blooming 1st Birthday Bash by clicking HERE or the image below.

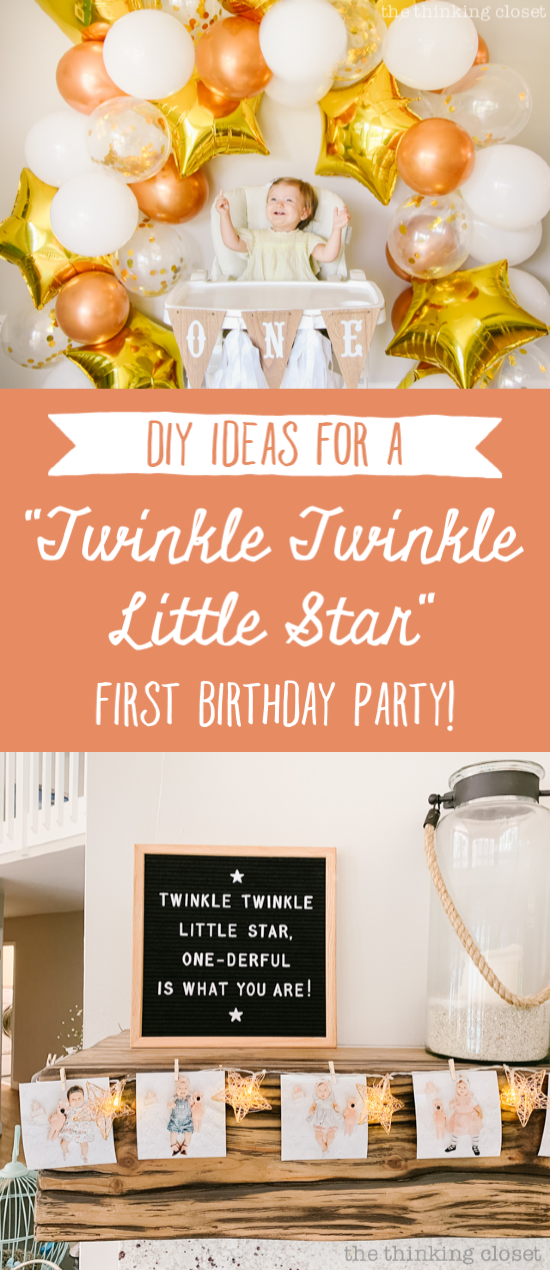
For Pepper’s 1st birthday, we hosted a “Twinkle Twinkle Little Star” party for Pepper. Click HERE or the image below to check it out.
*Full Disclosure: This post contains affiliate links, meaning that if you make a purchase after clicking through, The Thinking Closet may receive a small commission at no extra cost to you. Thanks for helping to support this site!
One Comment