
Pregnancy Timeline Photo Banner
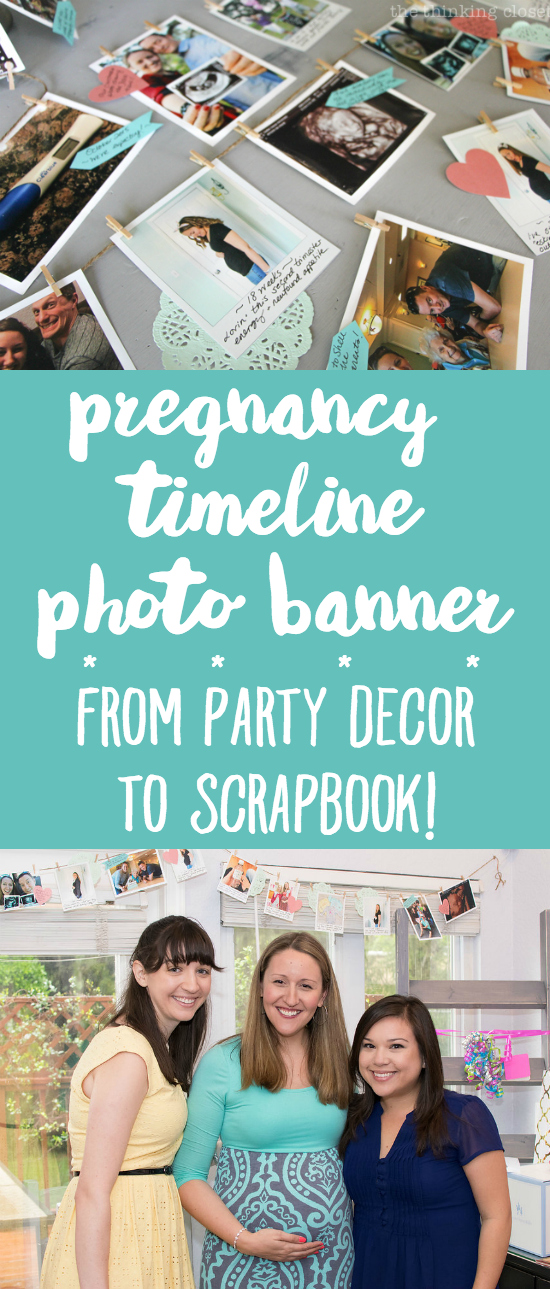
Friends: I think I have created the Clark Kent and Superman of craft projects.
A single creation with two unique identities.
One that soars high.
The other bookish in nature.
Are you thoroughly intrigued? Allow me to explain….
A Photo Banner Project
You see, once plans for our Orlando baby shower were underway, I was inspired to create a festive banner for the event. And as I brainstormed how I might pull it off, I made two bold resolutions:
- This banner would have more than one hay day. (Time-saver.)
- I would create the banner using supplies I already had on hand. (Money-saver.)
And thus, the idea for my Pregnancy Timeline Photo Banner was born! #punintended
1. Time-saver: Here’s how the project possesses two unique identities. The banner would soar high at my baby shower, Superman-style, documenting the highlights and milestones from our pregnancy thus far. And after it serving its purpose as a banner, I would be able to pop the banner elements into a baby scrapbook, bookish Clark-Kent-style. (Ahhhhh. I love a good metaphor.)
2. Money-saver: And I’m proud to report that with the exception of the photos, which cost less than $10, this was a stash-buster through and through. No last-minute runs to the craft store necessary.
My hope is that by walking you through a quick tutorial, dear reader, you’ll see how easy it was to pull off. And in turn, you’ll be inspired to create your own dual-identity craft project.
Let’s dive in, shall we?
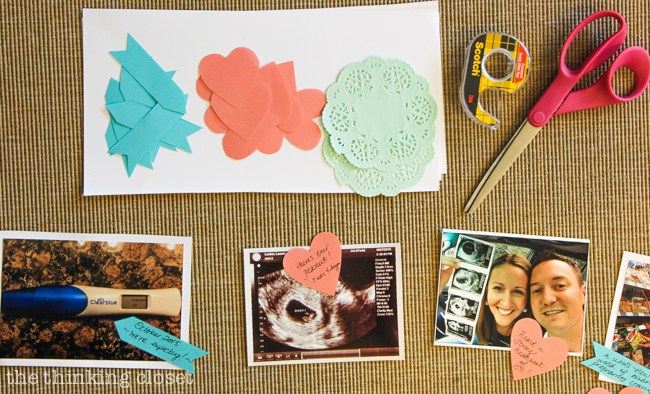
Supplies
Here’s what I used to create my Pregnancy Timeline Photo Banner:

- photos (printed for less than $10 at C.V.S.)
- white cardstock
- aqua & pink paper
- *mint doilies
- double-sided tape
- scissors
- Sharpie
- twine
- mini-clothespins
The supplies wouldn’t cost you much to purchase, but I highly recommend raiding your craft stash to see what you might be able to use first. I find that my creativity reaches new heights when I’m working with limited resources.
Tutorial
Procrastinators, be encouraged: I was able to pull this project off the night before our baby shower. So, you can really keep things simple in execution. Here’s the step-by-step tutorial.
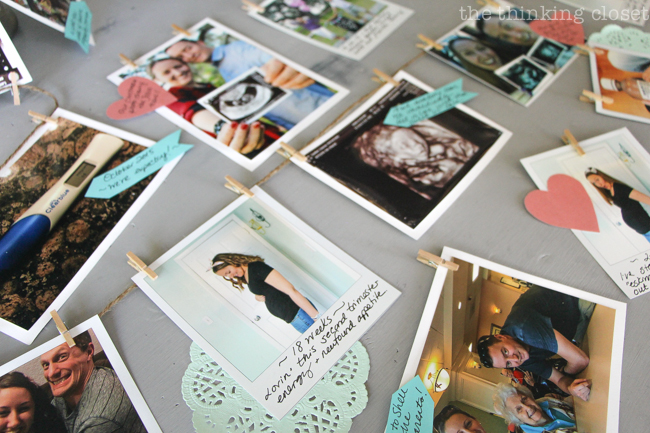
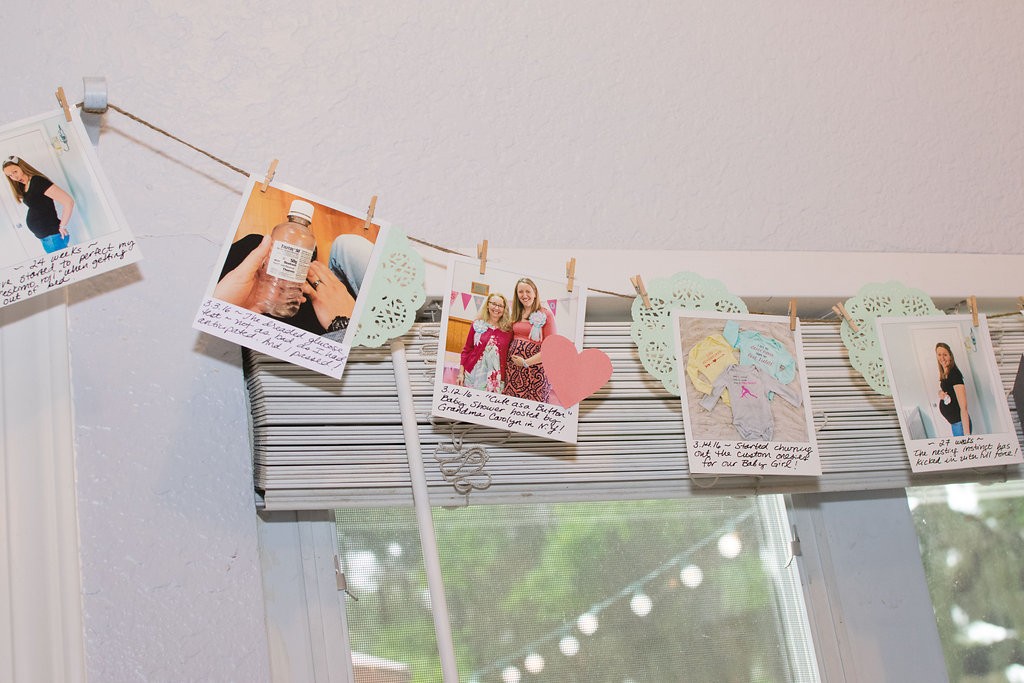
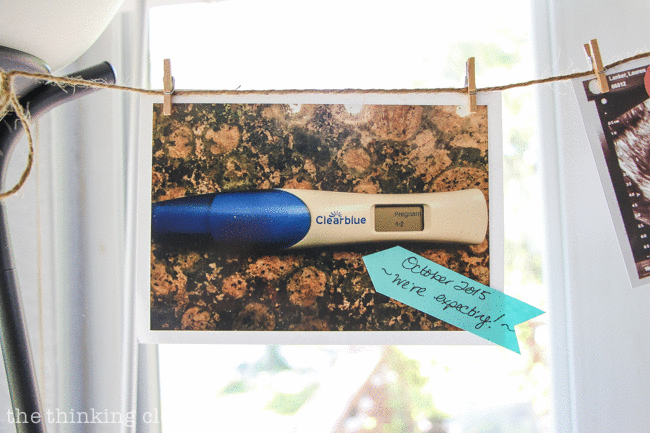
Step 1. Print your milestone photos.
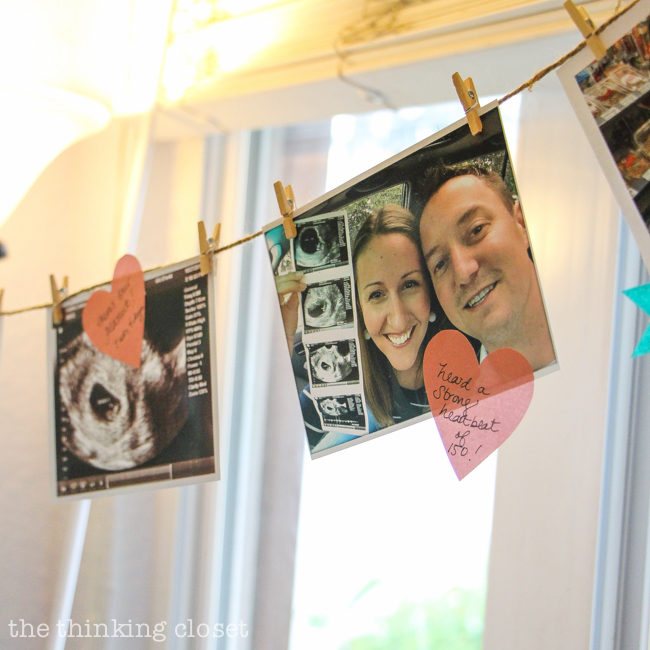
I explored the camera rolls on our cell phones as well as our DSLR, pulling out key photos of pregnancy “milestones” to highlight on the banner—everything from sonograms to our gender reveal to bump shots.
For the square-cropped Instagram photos, I gave them my classic “Polaroid border” treatment, referring to the hack I developed in my Instagram Photo Banner Tutorial from a few years ago.
You see, I love the look of Polaroid images, but I upturn my nose at the price-tag Polaroid film boasts! So, I figured out a way to give Instagram photos a Polaroid border and just print them on regular photo paper. Here’s the quick n’ dirty run-down:
- Take screenshots of your Instagram photos or upload square-cropped photos.
- Open them up individually in PicMonkey and give them a Polaroid border. Re-save the images.
- Open up the “Design Canvas” in PicMonkey, sized at 5″ x 7″. (Or in this case, I opted for 4″ x 6″ to save money.)
- Place two Polaroid images per 5″ x 7″ canvas (or 2000 pixels x 1428), allowing a small gap in between the images as well as a small border on each end. See image below for an example.
- Print your 5″ x 7″ photos at your local photo printing center or from your home photo printer. And smile how much money you just saved!

Once I had completed my basic editing, I uploaded all of my photos to CVS Photo’s website and used their one-hour-photo printing service. With a coupon code I found with a quick Google search, the photos cost me less than $10. And this was the only cost of the entire project. Hip hip hooray!
Step 2. Add a cardstock backdrop to 4″ x 6″ photos.
I loved the white border of the faux-Polaroids so much, I decided to give all of the images a white border using white cardstock. I find it really helps the images stand out!

Step 3. Cut out your caption shapes.
Since not all of my images had a nice thick bottom border for captions, I decided to cut out some colorful shapes on which I could write captions. So, I created some aqua arrows and pink hearts using printer paper I had on hand.
I also raided my Journaling Bible craft supply for some mint doilies that would add a nice feminine touch to some of the faux-Polaroid images.
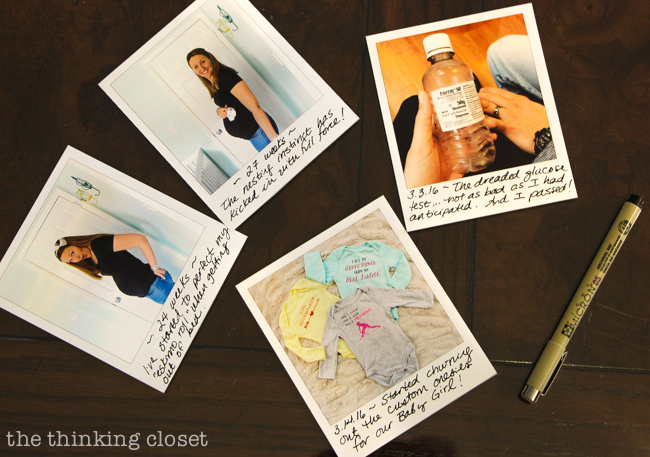
Step 4. Organize your images chronologically, and write your captions.
Then, I arranged the images in chronological order from that first positive pregnancy test to our recent 28 week ultrasound, grabbed my black Micron pen, and set to work writing cute captions to highlight each milestone. I used double-sided tape for adhering the paper captions to the images, making my best effort to “change it up” in terms of placement.
TIP: Even a “permanent” Micron pen can smear on glossy photo paper, so I recommend using a permanent Sharpie when writing on photos.
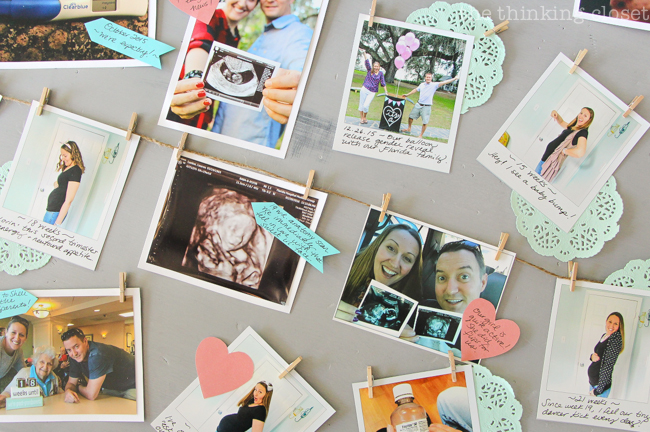
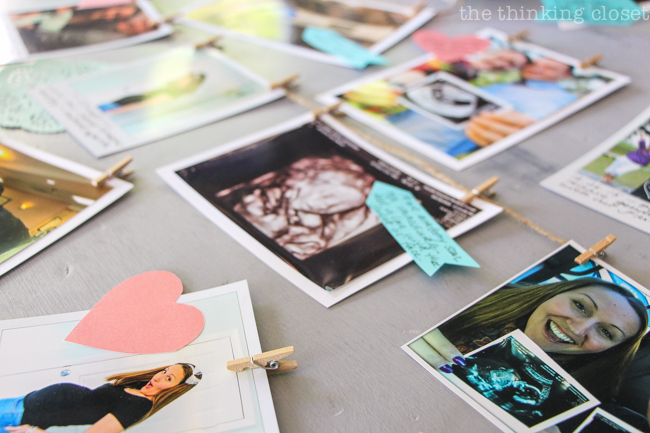
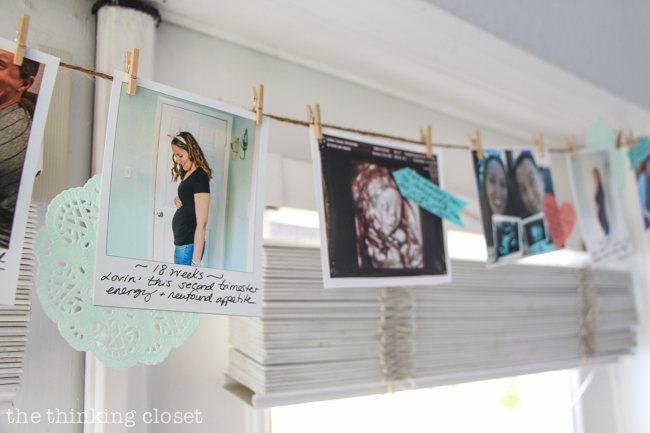
Step 5. Hang your photos on twine using mini-clothespins.
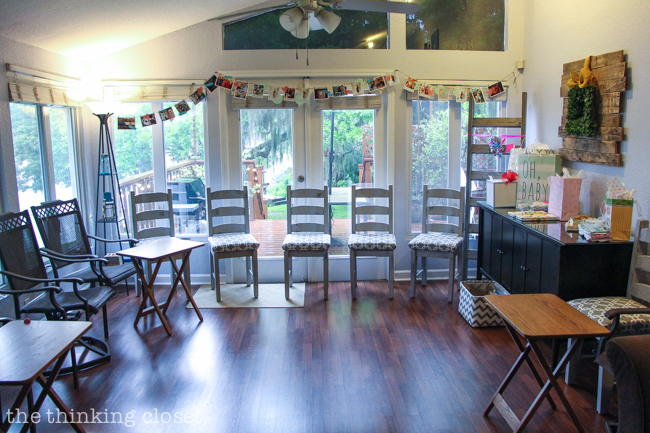
I strung a piece of twine across the living room and used some mini-clothespins to hang the photos straight across the line. They fit just perfectly in the space.
I love the rustic look of the clothespins as well as how easy it will be to take down the images after the fact when it comes time to build the scrapbook…or rather, when Superman seamlessly changes into Clark Kent!
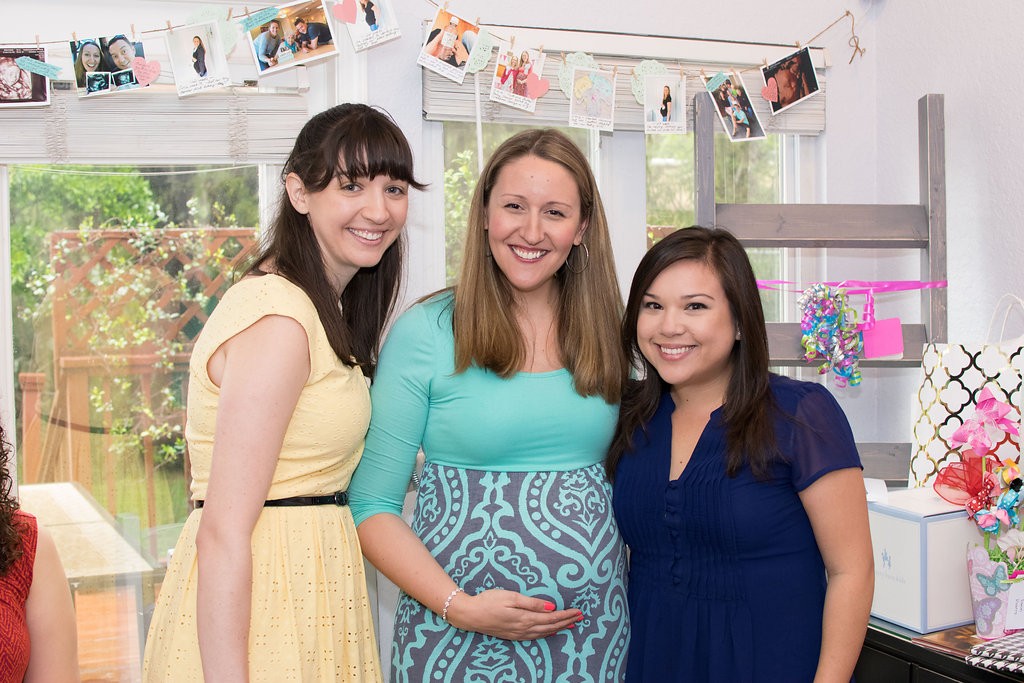
The Banner in Action!
Although my Orlando “Bring a Book” Baby Shower was hosted by my sweet in-laws and friend Darling, we held the event at our home since it was the most central for guests (and fun for us!). Click HERE to check out the blog post containing all the juicy details about the event.
And here are just a few sneak peek snapshots of the event, so you can see the banner in action!
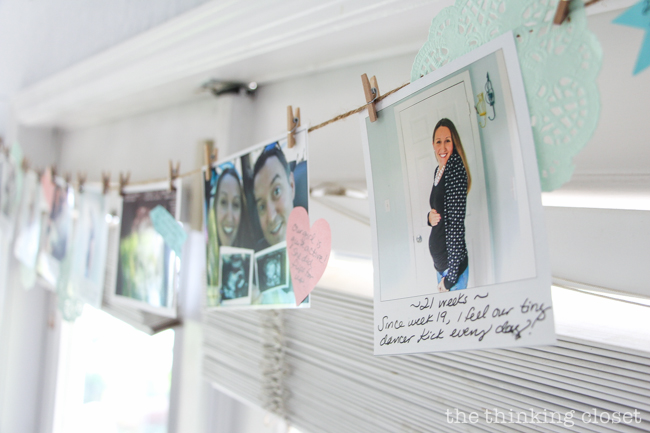
Here it is cascading across the far end of our living room before guests arrived…
…and here it is again during the shower when I opened gifts!
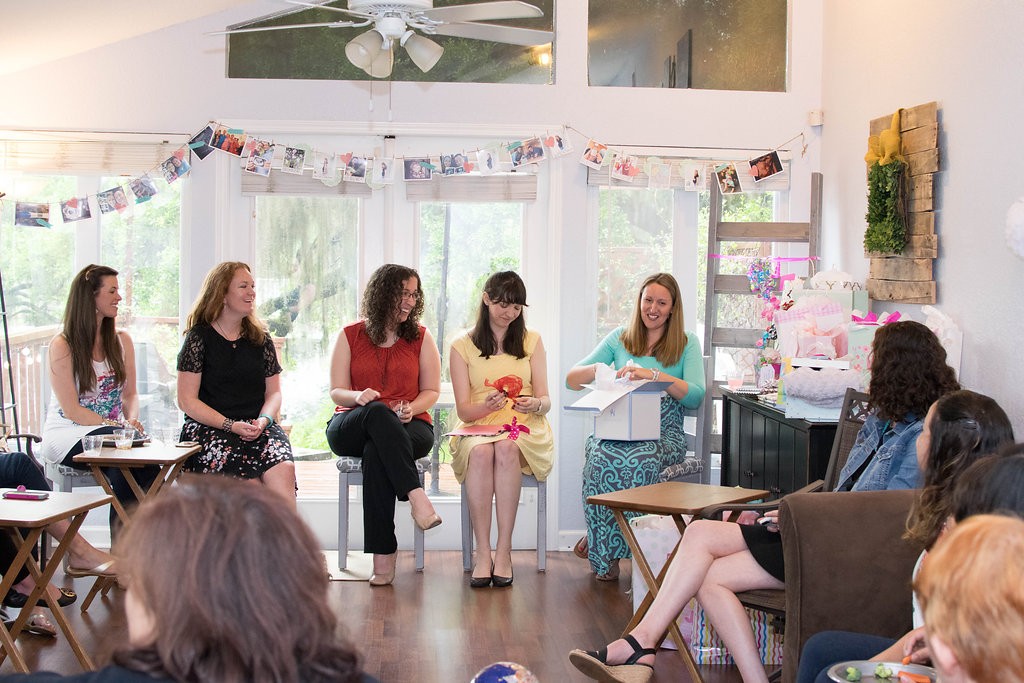
Throughout the shower, I spied guests pausing to read their way across the timeline. It proved to be a really special way to invite our friends and family to share in our pregnancy journey.
I actually have one more baby shower event coming up for which I plan to use the banner (adding on to it as we hit more milestones). But it’s such a relief to know that our Baby Girl will have a scrapbook with photo documentation of her time in the womb and all the ways we prepared for her arrival.
And of course, I couldn’t resist the opportunity to create a GIF! That way, you get to spy each and every photo on the banner, dear reader! “Be our guest, be our guest….”
The Tip of the Iceburg
DIY party decor has become a true passion of mine. There’s just something about handmade decor that adds warmth to a home, doncha think?
Here are some other ways I’ve cut expenses (and fostered creativity), by creating my own party elements:
- DIY Photo Booth Props
- Photo Backdrops: $10 Dollar Store Backdrop & Shabby Chic Fabric Photo Backdrop
- Hashtag Confetti
- Instagram Photo Banner
- Burlap Chair Signs for the Bride & Groom
But these projects are just scratching the surface where money-saving is concerned. In fact…
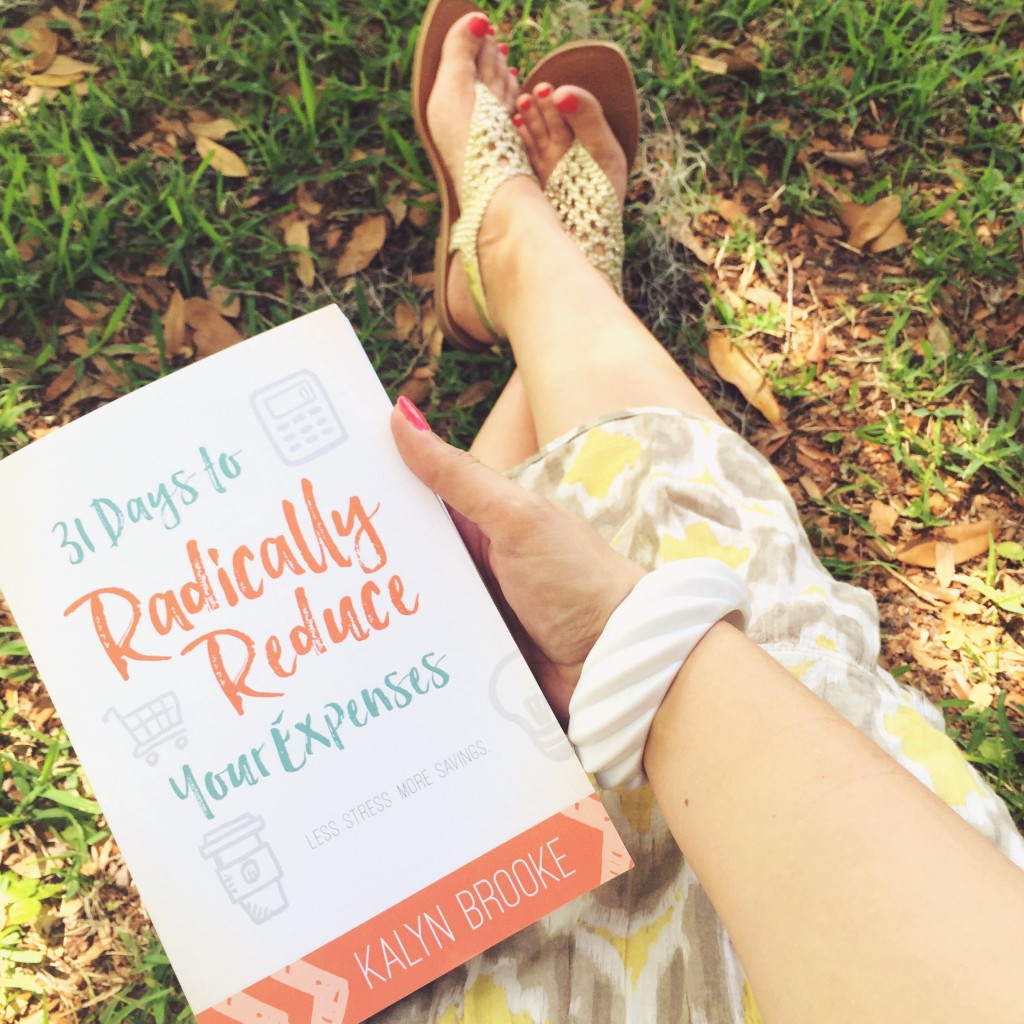
…I can finally shout it from the rooftops of blogland that my friend Kalyn Brooke from Creative Savings has written a 275-page book called, 31 Days to Radically Reduce Your Expenses. And it launches on Amazon today!
As an avid follower of her blog, I knew Kalyn would jam-pack these pages with practical, actionable money-saving tips because that’s just her way (and she did not disappoint). Each copy of her book comes with access to 9 printable worksheets to help you apply what you’re learning in a practical way.
But what really blew me away was the heart that she poured into each chapter be it on eating out for less or cutting holiday spending. Honestly, with my type A personality, I could easily turn expense-reducing into another thing to be stressed about. But Kalyn’s balanced perspective and authentic storytelling transformed my potential stress into sheer motivation.
Things like making your own party banners or getting phone data refunds or knowing retail sale schedules may not seem like game-changers on their own, but as Kalyn says,
“It starts with plugging up those tiny cracks—our monthly expenses—that if left unattended, can turn into some pretty big leaks.”
And Kalyn is such a worthy guide to lead us through 31 chapters with 31 do-able ways to make radical changes to our finances. In each chapter, she brings us back to remembering the why behind saving money—what it’s all for—and I know that reading this book, you will feel empowered as I have to take intentional steps toward reducing expenses in order to invest in what matters most.
Nab Your Copy
31 Days to Radically Reduce Your Expenses is available in both Kindle & paperback formats. But both versions are guaranteed to ignite an expense-reducing revolution in your life.
To close, I want to share with you one of my favorite quotes of Kalyn’s—one that I underlined and starred from her intro:
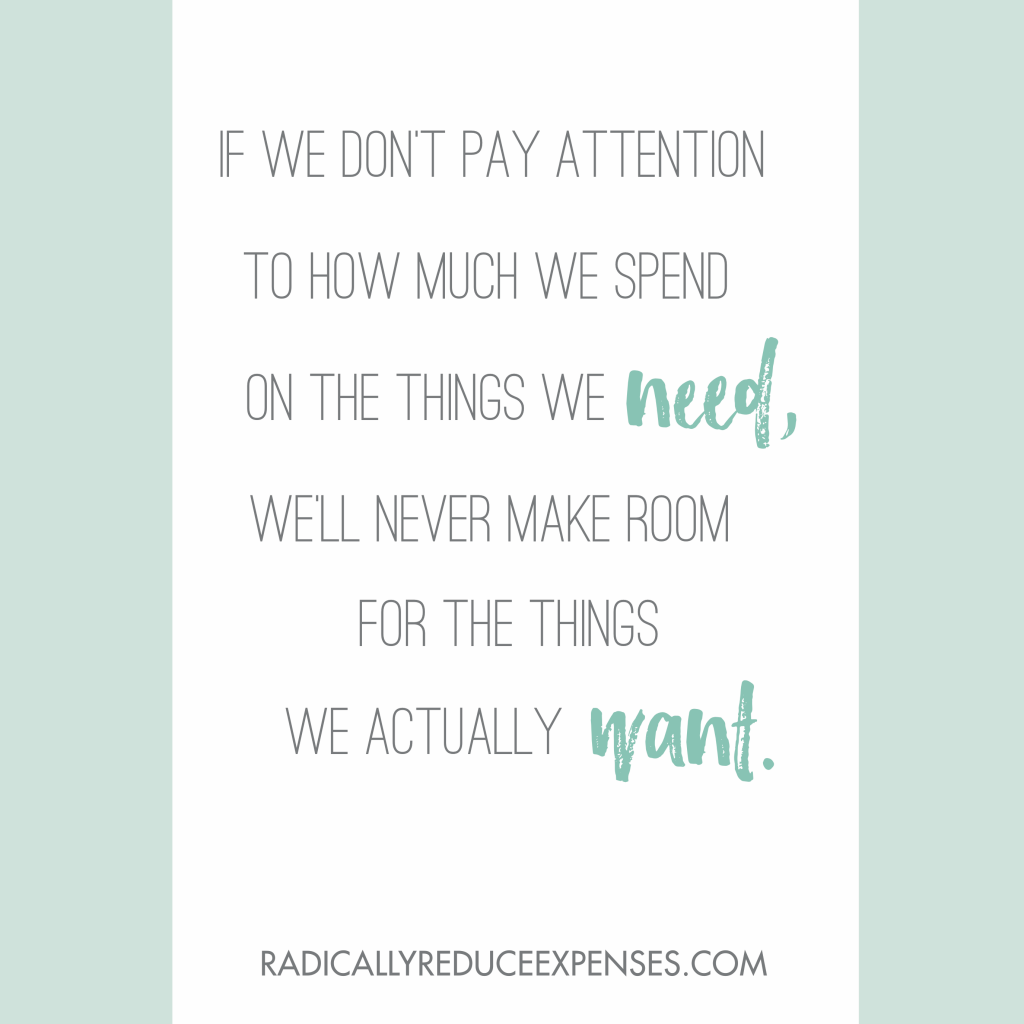
Amen, sister!
Here’s to reordering our finances in order to pursue what matters most.
Want More Baby Shower Inspiration?
Here’s a collection of blog posts related to all-things-baby-shower!
- Balloon Release Gender Reveal
- Pregnancy Timeline Photo Banner (you’re here!)
- “Cute as a Button” Baby Shower
- “Bring a Book” Baby Shower
- A Charming Mint & Gray Baby Shower
- How to Throw a Virtual Baby Shower
*Full Disclosure: This post contains affiliate links, meaning that if you make a purchase after clicking through, The Thinking Closet may receive a small commission at no extra cost to you. Thanks for helping to support this site!
![]()
Such a fun idea! Congrats…you are so especially cute pregnant! 🙂
A woman after my own heart! I love this idea. Parties, especially showers, are so much more special when they are personalized and this is such a great way to do it. It works as a great conversation starter as well while telling the guest of honor’s story. Awesome! I’ve done that before with some of my fav shower games but I love the idea of doing it with decor. I’m pinning this one.
You look so happy in all these photos, I’m so excited for you and Mark. I actually gave my sister something similar for her new room at university – just some twine, clothespins, and a few fun photos and printables, and she was able to decorate her space without needing to make any holes in the wall bigger than a pushpin! It’s amazing what you can come up with when you’re forced to think inside some set parameters!
Sending you a huge hug dear friend! <3
Thank you so much for the shoutout, Lauren! You have been such a supportive friend and mentor during this self-publishing journey, and I’m so glad we had that fateful meeting at the mini Florida blogging meet-up. *hugs*
I can’t get over how adorable this timeline banner turned out—it was a huge hit at your shower. I loved being able to see the progress you’ve made over the past few months with baby, and know you must be anxious to meet your little girl….I am too! 🙂
I love this idea Lauren! It’s so beautiful and personal! I’m in the throes of putting together my baby’s scrapbook and I wish I had little banner pieces like this to put in it!! So excited for you 🙂 You will be a great mommy!
This is an amazing tutorial, as usual! Such a lovely timeline idea! I know it brightened your space at the shower and on-going in your home, and will be such a special remembrance of this wonderful time in your lives.
I love this idea. While I’ll never be having a baby, it could work for many other things: graduations, retirements, anniversaries, etc. Brilliant.
Love the idea and I’m so happy for you and your hubby, Lauren. I can tell you that having a daughter is a truly special blessing. I have a son and a daughter and share a special bond with both, but I have to say, the bond and relationship with my daughter is very different and rewarding. Can you please share what the caption reads on the ultrasound phone of your “Tiny Dancer’s” face? That photo touched a spot in my heart and I admit, my curiosity is getting the best of me.