The Art of the Etched Casserole Dish: Your Questions Answered!
I’m giddy as a pig in mud when a project creates such a buzz, that it merits a follow-up post.
Ever since first publishing my Personalized Etched Glass Bakeware Tutorial, I’ve encountered a slew of “frequently asked questions” about it. I think that the strong chemicals and rubber gloves amp up the intimidation factor. It kind of feels like you’re doing a mini science experiment in your kitchen.
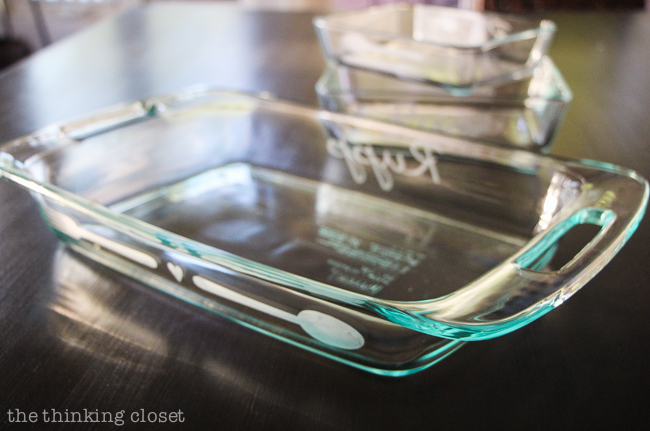
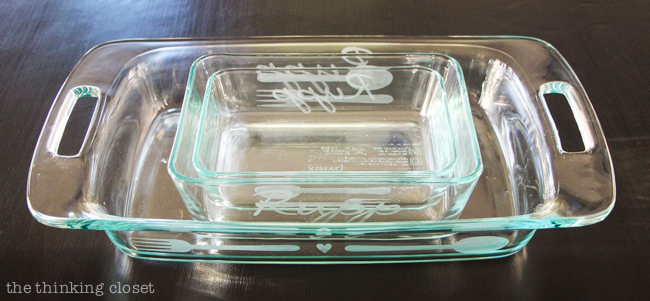
But with each glass etching project I do, I’m continually amazed at how very do-able it is to transform plain glass casserole dishes and pie plates into elegant, customized keepsakes, worthy of wedding gifts.

In fact, it was our friends Hannah and Ben’s wedding this March that inspired me to bust out my Silhouette machine and glass etching supplies yet again.
They’re both artists who I knew would appreciate a handmade touch to *a classic registry item. Ben enjoys baking, so I knew the casserole dishes would get put to good use. Plus, what better way to celebrate the forever-ness of marriage than etching their shared name into glass, which will last as long as they live. (Pyrex doesn’t mess around where durability is concerned. Gotta love it!)
So, I thought I’d dedicate today’s post to addressing those frequently asked questions about etching bakeware in hopes of easing any hesitations you might have. And then you can visit my original tutorial for the detailed step-by-step process from start to finish.
Sound like a plan, Stan? Great! Let’s dive in, shall we?
Your Questions Answered
Q: First of all, let’s get one thing straight: is etching really permanent or will it come off after washing or baking?
A: Yes! It’s permanent and dishwasher safe. Isn’t that crazy cool?
To wrap your head around this concept, don’t think of etching like adding white color atop the glass, but rather eating away at the top layers of the glass, so the design is permanently etched into the glass. It is safe to wash in the dishwasher and safe to put in the oven as long as the bakeware is intended for oven-use. I have not noticed any fading on my own etched dishes with frequent washing or baking. Nor should you!
Q: Will this work on all types of glass? Even Pyrex?
A: I have had 100% success etching on different types of Pyrex glassware as well as off-brand casserole dishes – – some that were brand new and others that had been used for years!
However, not all types of glass will be receptive to etching cream. It has to do with how the glass is manufactured. Typically, the higher quality the glass, the less likely it is to etch. And I have heard that there are certain types of Pyrex that just don’t etch!
The best way to find out? Simply place a teeny tiny dot of etching cream on the bottom of your dish or glassware with a toothpick, give it 3 minutes before washing and drying it off, and see if it did it’s job.
Here’s a link to the Pyrex casserole set of 3 (with lids) that I personalized for Hannah and Ben, and it etched like a dream!
Q: Does etching cream work on ceramic?
A: Fun fact: yes!
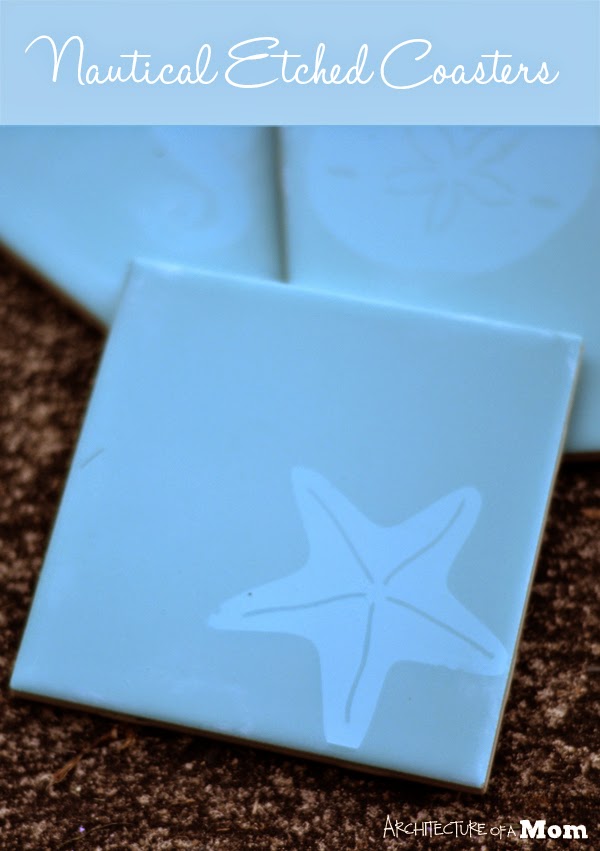
If the ceramic has a glazed surface like the tiles pictured below, the etching cream can remove the glaze to create a beautiful effect. That’s exactly what Rachel from Architecture of a Mom did with this set of Nautical Coasters.
Q: What’s the difference between stencil vinyl and stencil material? Which would work best for glass etching?
A: This is a question we get a lot in my Silhouette Challenge Facebook Group, so I wanted to settle the score once and for all.
They are both stellar materials, and both are made for stenciling, but they’re suitable to very different projects.
In short: stencil vinyl is your go-to move for glass etching. Here’s why:
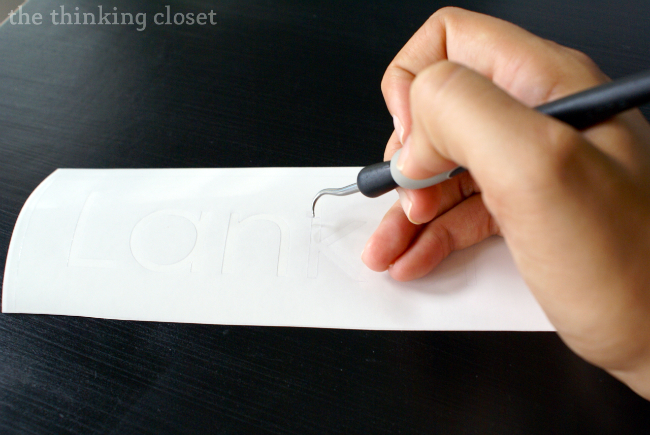
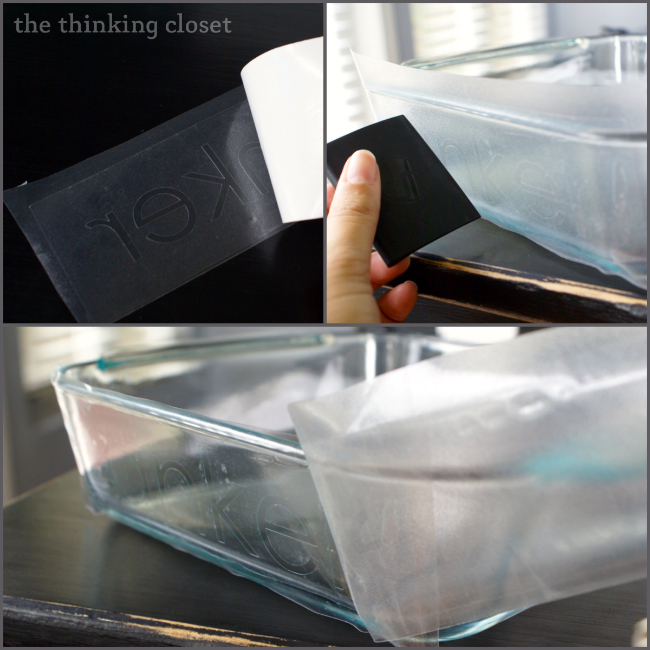
Your Silhouette machine can cut intricate designs with ease on stencil vinyl much like regular vinyl. And the stencil vinyl itself is stronger than regular vinyl, so it can better withstand liquid mediums like etching cream on glass and paint on wood. Here’s what it looks like in action during the “weeding” process:
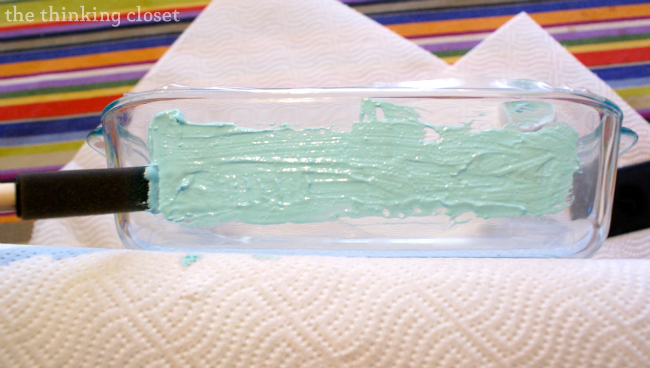
The only downsides to stencil vinyl are that it’s not re-usable and sometimes it’s hard to see if you have perfectly covered your design in etching cream because it’s clear. I like to view the stencil from the back to see that everything is covered. And the pros outweigh the cons for me.
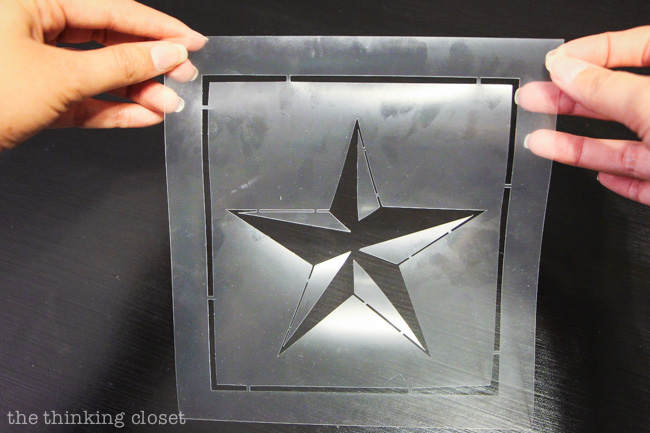
As for the stencil material, a lot of people are drawn to it because it’s re-usable. However, it is more suitable for simple, larger designs on walls or fabric that may not need crisp, sharp lines. It’s significantly thicker than vinyl (think more like the plastic stencils you buy at the craft store), and while the back of it is tacky, it’s not going to achieve the tight seal you need when it comes to glass etching.
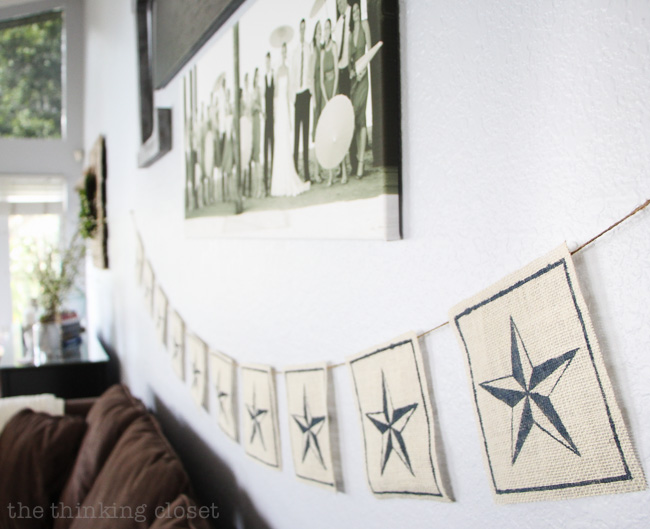
Here’s an example of the Stencil Material in action with my Nautical Star Burlap Banner.
So, while it’s not made for glass etching…it’s a great resource for other projects!
Q: What if I don’t have any stencil vinyl on hand? Will regular vinyl or contact paper work?
A: While I think stencil vinyl is the ideal medium for glass etching, it doesn’t mean other mediums won’t do the job. I have heard plenty of success stories from Silhouette users who have used both regular vinyl and contact paper to create stencils for glass etching projects.
I would just recommend being doubly sure that you have smoothed out all of the air bubbles, so there’s a tight seal against the glass. That way, you can avoid any etching cream bleeding under the edges.
Q: I have a hard time centering my design. Any tips?
A: You and me both! It’s not easy, especially when stencil vinyl seems to grasp onto the glass like its life depended on it (which it kind of does). Here are a few tips I would recommend, though:
- Create an even margin around your design in Silhouette Studio. It’s easiest to do this by adding a rectangle or circle around your design in Silhouette Studio rather than trying to cut it yourself with scissors.
- Or if you’re wanting to be extra meticulous, you could create a margin to match the surface area you’re working on, and line up the edges that way. In fact, I plan to try that with my next project!
- Only peel up one small portion of the backing so you can more easily reposition it before you’re confident about placement. Then, slowly peel away the rest and using your scraper to smooth it across as you go.
- Keep a ruler by your side to measure even distances before placing down the stencil design.
- Don’t panic if part of the stencil vinyl sticks to the glass and is off-kilter. Slowly peel it up and re-position.
- Trust your eye! Sometimes, even if my ruler measurements looks right, I go with my eye. It knows best.
- Work very slowly. Slow and steady wins the race.
Q: This etching cream is pretty heavy duty stuff, right? Is it really safe to use?
A: Yes, it is heavy-duty in that it involves acidic chemicals. And yes, following the right precautions, it can be safe to use.
Be sure to read the warnings and instructions for use on your bottle. Avoid contact with the skin, eyes, or direct inhalation. I recommend working in a well ventilated area with a fan running and taking frequent breaks. Rubber gloves are a must, and I also like to use protective eyewear and a plastic tablecloth to protect my work surface.
Safety first!
Q: Which brand of etching cream do you recommend?
I have used both Silhouette brand etching cream that comes with the starter kit as well as Armour Etch, and both worked to the same effectiveness in my opinion. They both get my endorsement!
I found Silhouette brand to be more of a thick, creamy consistency and Armour Etch to be more liquidy. Be sure to tightly cap your bottles in between use to prevent drying up or spillage.
If you recommend any other brands that you’ve used with success, please share them in the comments below!
Q: What’s the ideal length of time that the etching cream needs to sit on the glass to really work its magic?
A: There are different schools of thought on this subject, but I find that my magic number is 3 minutes. It ends up being closer to 5 minutes if you add in the time it takes to lay down the cream before starting the 3 minute timer and cleaning off the cream when the timer goes off.
Q: Uh oh! I made a mistake. How do I fix it?
A: The beauty (and curse!) of glass etching is that it’s permanent. And the etching cream starts working immediately. So once you start the etching process, there’s no going back! You can add to your design or perhaps cover up a stray mark with a new design element, but there’s no way to remove it. (Womp womp.)
Q: How can I avoid accidental etching?
A: I’m a cheapskate sometimes when it comes to stencil vinyl. I often try to save as much as I can by cutting my stencils as close to the edge as possible. But that’s not a smart move when it comes to glass etching. Why?
Well, because no matter how careful I am to pour that etching cream where it’s supposed to go, a thin stencil margin makes it all-to-easy to get some etching cream where it doesn’t belong. And that stuff is so powerful, it starts to work within a matter of seconds.
So, when in doubt, I recommend going with a thicker margin on your stencils. Or at least at a margin of painter’s tape. It’s worth it to protect the glass from unwanted etching marks.
Learn from my mistakes here, friends!
Q: But I leave plenty of margin room on my stencil and I still manage to get some etching cream on unwanted areas. What am I doing wrong?
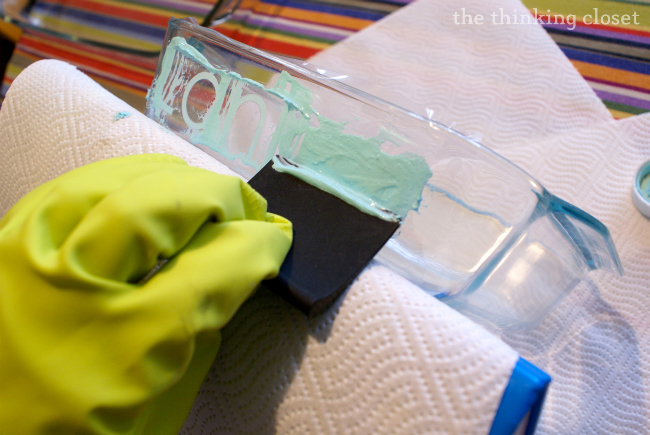
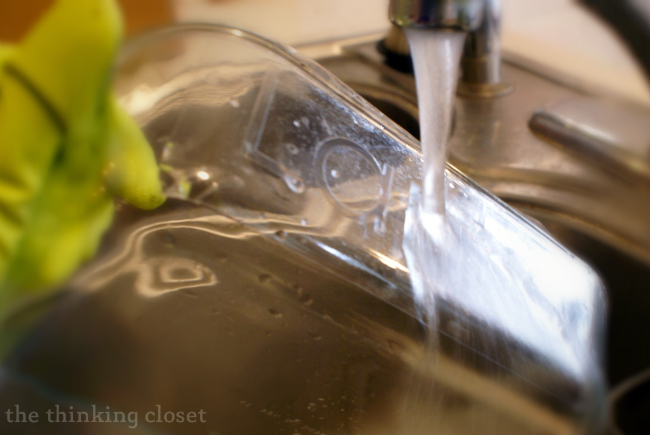
A: The time when I’m most likely to get etching cream on unwanted areas is after the etching cream has set, and it’s time to remove it. Here’s the protocol I recommend following:
- use a scraper tool or old credit card to place the excess etching cream back into the bottle to re-use
- take a manageable piece of paper towel and carefully wipe away as much of the etching cream as you can from the design. Throw away that piece of paper towel and make sure that your gloves are free of excess cream by washing them in the sink.
- bring the dish over to the sink and run it under water
- dry it with a rag, then remove the stencil
Q: If I want to etch the bottom of a dish, should I etch the side that will touch the oven rack or the side that will touch the food?
A: If possible, I recommend etching the side of the dish that will have less contact with food. Once you etch a design, the glass becomes porous and is susceptible to food staining (prime example: spaghetti sauce). I have not experienced any staining on my casserole dishes, but I have always etched on the outside surfaces, so I recommend you do the same. Just remember to flip your design horizontally (like you do with HTV) if applying to the oven-rack side of a dish.
Q: The edges of my design didn’t come out as crisp as I had hoped. What did I do wrong?
A: Chances are, there might have been some air bubbles in your stencil. Take the time to use your scraper tool or an old credit card to smooth out any air bubbles on the edges of your stencil where etching cream might try to sneak under.
Q: Some of the etching looks swirly or inconsistent in coverage. How can I avoid that?
A: That’s a common issue with designs that have larger sections of solid space to etch (less common with thin lines like fonts).
The best way to avoid it is to ensure none of your design contains sections larger than 1″ x 1″ of solid etching. Another trick is to use your foam brush to move around some of the etching cream while it’s at work to ensure more even coverage.
Q: If I’m not yet ready to jump into glass etching, but I love the look. What else can I try?
A: Frosted vinyl! It’s amazing. And really does give the appearance of etching because it’s slightly transparent with a slight shimmer to it. I dedicated an entire post to sharing 12 of my favorite frosted vinyl projects HERE.
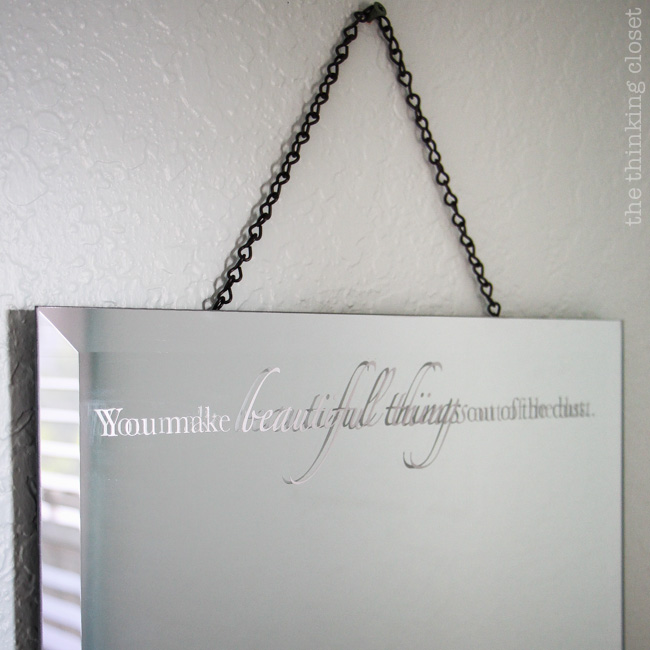
I’ve also used silver vinyl on mirror to achieve an etched glass look with my “You Make Beautiful Things Out of Dust” project. Check that out HERE.
Q: Okey, dokey. I’m ready to try my hand at a glass etching project. Can you share a recommended supply list?
A: Great! Here’s everything you’ll need to etch some Pyrex bakeware of your own!
- Pyrex Casserole Dishes: HERE’s the set I etched most recently
- Silhouette machine: I heart my Cameo
- Silhouette Studio software: free version or Designer Edition with bonus features
- free cut file I created for elegant bakeware designs
- stencil vinyl (comes with transfer paper)
- hook tool
- scraper tool or old credit card
- foam brush
- safety gear: rubber gloves, protective eyewear, plastic tablecloth to protect tabletop
- etching cream: Silhouette brand or Armour Etch
- paper towels
- ruler
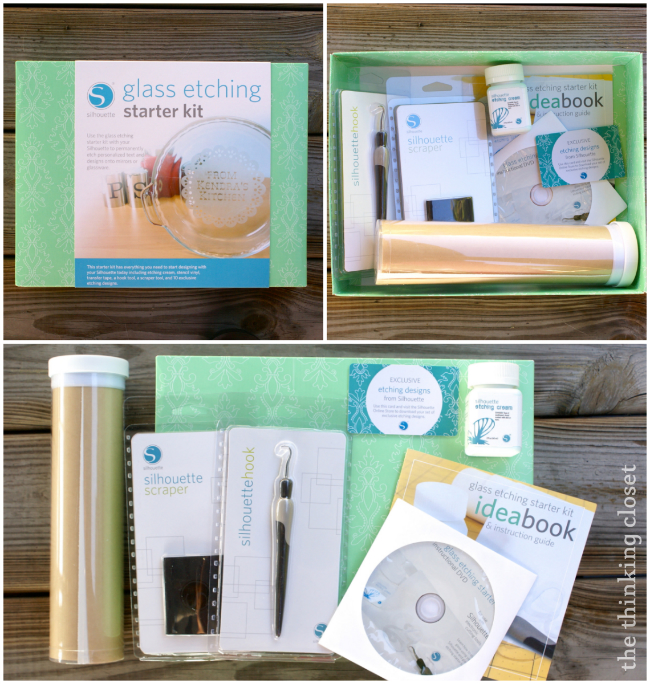
And The Glass Etching Starter Kit already has a lot of these items included if you want to check that out.
To Close
There you have it!
Between this post and my original tutorial, you should be equipped to snap those rubber gloves right onto those capable hands of yours, and dive right in to creating mini masterpieces on bakeware of your own.
Go get ’em, gifters!
And if you have any follow-up questions, don’t hesitate to comment below to ask them. Or if you have any glass etching tips or tricks of the trade of your own, do share. I’d love to learn from YOU!
Want to Check Out More Silhouette Projects?
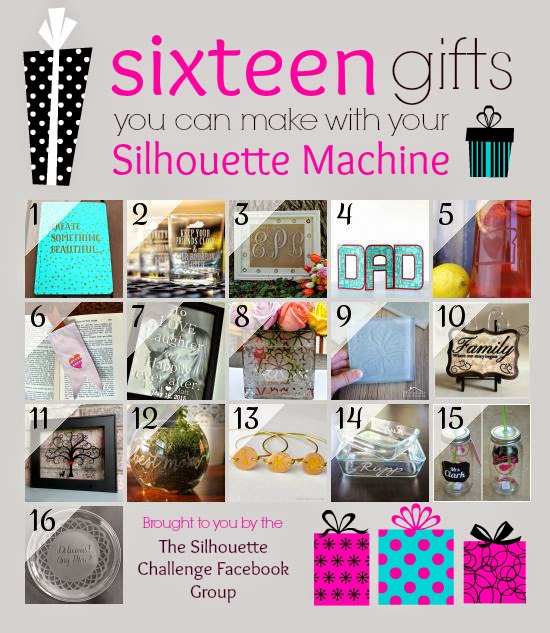
My Silhouette Challenge buddies and I are all sharing D.I.Y. gift projects on our blogs today, so peruse the projects below for a wealth of Silhouette inspiration!
1. Weekend Craft // 2. Where The Smiles Have Been // 3. Confessions of an Overworked Mom // 4. Simply Kelly Designs // 5. Adventures in All Things Food // 6. Sisters, What! // 7. Create & Babble // 8. Creative Ramblings // 9. Practically Functional // 10. Briick by Briick // 11. My Paper Craze // 12. DIYJustCuz // 13. Made in a Day // 14. The Thinking Closet // 15. Architecture of a Mom // 16. Get Silvered
Full Disclosure: This post contains affiliate links, meaning that if you make a purchase after clicking through, The Thinking Closet may receive a small commission at no extra cost to you. Thanks for helping to support this site!



I bought a new deep-dish Pyrex casserole dish. I used Armour etching cream. It came out really blotchy. Unfortunately, I peeled off the vinyl stencil before looking at. I tried correcting it. I have another dish that I want to do (same type). Other than going over it twice is there something I can do to make it even. I have done it before on a casserole dish and it came out perfect, just not sure if it’s the new dish or the etching cream.
Ugh, I’m sorry to hear it came out blotchy. If you used the same etching cream with success before, I’m guessing it was the dish! Hoping for better luck for you next time.
Can this work with the cricut explore air?
If you can convert the file to svg, then you can use them in Cricut software! You’ll just need to download the free Silhouette Studio software, open the .studio file there, and save as SVG!
Do I have to use brand new dishes for this project or can I use glass that’s alteady been in the oven?
It doesn’t matter if it’s been in the oven before or not! Just make sure it’s good and clean and dry before starting. Then etch away!
Sorry if this has been asked previously, but where do you get your kitchen/cooking themed stencils? Is it from Silouhette?
I designed these myself! And you can nab the free cut files HERE.
But yes, you can download similar type designs in the Silhouette store. Hope that helps!
I’ve worked in other glass mediums and recently decided to give etching a try . I’ve fallen in love with it trying different ideas having a great time
I’m so glad you’re lovin’ it! It’s a fantastic medium. Thanks for the comment, Jennifer.
Which Silhouette machine did you use? I’ve been looking at a curio. They are on sale now, must be a new version coming out.
Hi Dolly! I may be too late in my reply…but I started with the regular Silhouette Cameo and now I have a Cameo 3! It’s awesome. You can use my affiliate link to check it out…and the code 10OFF for 10% off at checkout. The promo code box appears once you sign in or create an account. Best of luck!
I learned that it’s hard to protect the areas that you don’t want the cream to touch. So now after I have my stencil in place, I cover the rest of the dish with plastic wrap and it solves the problem.
Brilliant solution! Thanks for sharing, Ruth.
What a comprehensive article. Answered all of my questions. I have some Dollar Store glass plates that I would love to dress up with a monogram. Now I think I have the confidence to do it!
Aw, I’m so happy to hear that, Lisa! That was my hope. Hope the project turned out great!
In terms of centered placement, using the hinge method (just like putting a screen protector on a cell phone) would probably be very effective. Align the design as wanted before removing any of the backing. Then, using a piece (or two depending on size of the design) of tape along one edge of the transfer paper, create a hinge. Once you have the tape hinge attached to the surface, peel the backing off from the stencil and carefully flip the design back into place. Use the scraper as normal to seal the design in place. Remove the tape along with the transfer paper before etching.
Also, if you’re slightly clumsy like me, it doesn’t hurt to remeasure once you have the tape hinge in place but BEFORE you remove the backing from the stencil. I’ve been known to bump things out of alignment when sticking the tape down.
These are great tips and pointers, Zipporah! Thank you for spelling them out in such detail. What a wonderful resource for others!
Thanks Lauren, very helpful, just wondering is there any way of getting coloured etching cream or some how colour the etched surface?
I’ve never heard of such a thing! But where there’s a will…(or a really awesome Google search). Let me know if you discover the answer!
What a personalized and special gift you’ve made for the newlyweds. Thanks for answering those FAQs~pinning for future reference!
Great tips Lauren! I tried glass etching for the first time a few months ago (and used your original casserole post as reference!). Not as scary as it sounds, especially if you carefully read the instructions and take the right precautions.
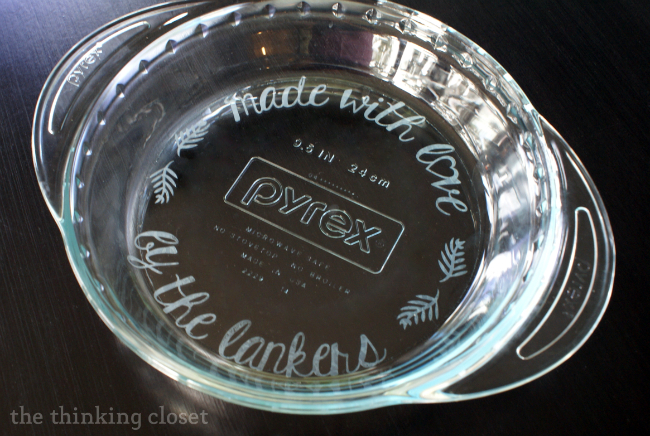
Wow, Lauren! Thanks for this FAQ. I have not entered into the world of etching (yet) and am glad you put this together so I can refer to it. I love the pie dish–so beautiful!
This is a great FAQ Lauren! I have yet to try etching but I will come back and read this before I do. Pinning for future reference.
Great post Lauren. You’ve thought of everything and this post is a great resource. I’ve yet to try etching on Pyrex but I know I’ll refer back here when I give it a try so Thank You 🙂
Thanks for referring to my etching post!! Thanks for rounding up all the etching questions, too. Etching is so intimidating to most people, but it doesn’t have to be!