The Beginner’s Guide to Annie Sloan Chalk Paint
You’ve heard of the five stages of grief, right? Well, have you heard of the five stages of Annie Sloan Chalk Paint®? No? Well, let me enlighten you….
(Perhaps this experience will ring true for some of you.)
STAGE #1: Intrigue: “A paint that requires no stripping, sanding, or priming? Tell me more!”
STAGE #2: Intimidation: “Oh wait – – I have to seal it with wax? Then buff it? That sounds scary! I don’t think I’m ready for this.”
STAGE #3: Provocation: “Ugh! I’m sick and tired of seeing all the pretty Annie Sloan Chalk Paint® projects blowing up my Pinterest stream. It’s time to bite the bullet and see if this paint can really live up to all the hype.”
STAGE #4: Disbelief: “Wait a minute: am I missing something? When’s it going to get really complicated?”
STAGE #5: Elation: “I did it! Ain’t she a beaut? I cannot believe it took me so long to try it. At least I still have practically the entire quart of paint leftover…so onto the next painting project!”
I see some of you nodding your heads on the other side of the screen. I know for me, I was stuck at STAGE #2 for a lonnnnnnng time. But once I actually dove in to my first painting project with Chalk Paint® decorative paint by Annie Sloan, I quickly catapulted from STAGE #4 with disbelief at its ease of use to STAGE #5 with elation over how my project turned out.
And my hope is that by sharing my beginner experience with you all, dear readers, I can help nudge some of you out of your intimidation phase and onward toward elation!
In short: “Come on in, the water’s Chalk Paint’s fine!”
The Beginner’s Guide to Annie Sloan Chalk Paint®
{Tips from One Beginner to Another}
I had a lot of questions when I first started off…so I’m going to give probably more detail than usual in hopes of filling in the blanks, so you don’t have to hunt down the answers through multiple Google searches like I did. This will be your one stop shop!
For those of you who are experienced Chalk Paint® users, well, then, I’d love for you to chime in with your own tips and tricks in the comments below. The more shared knowledge we can harness, the more magnificent our furniture transformations!
Step 1. Choose your first victim furniture piece.
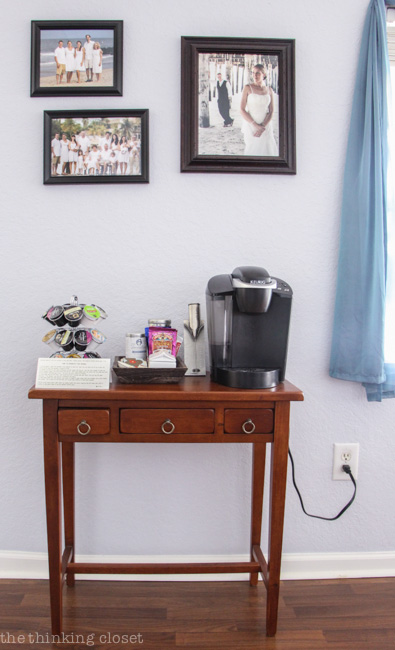
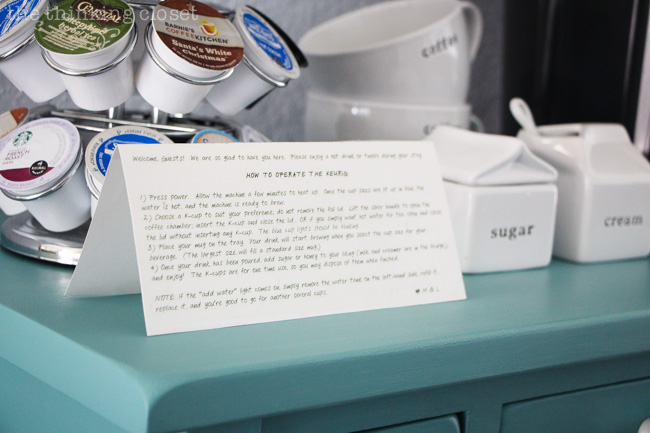
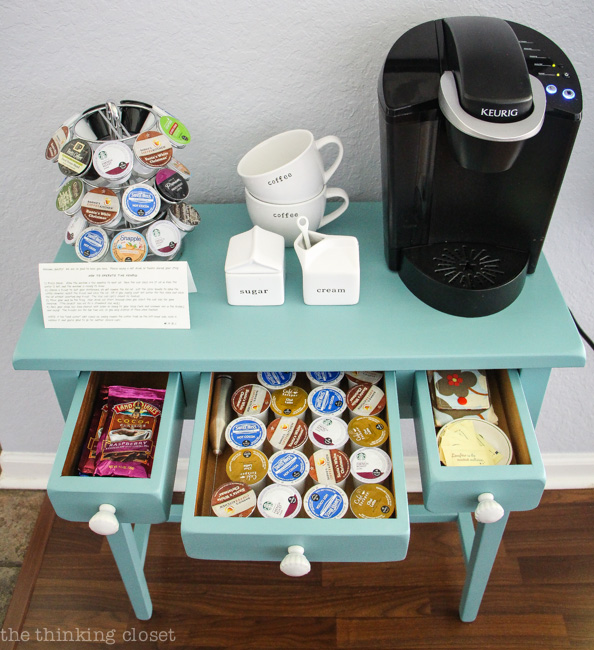
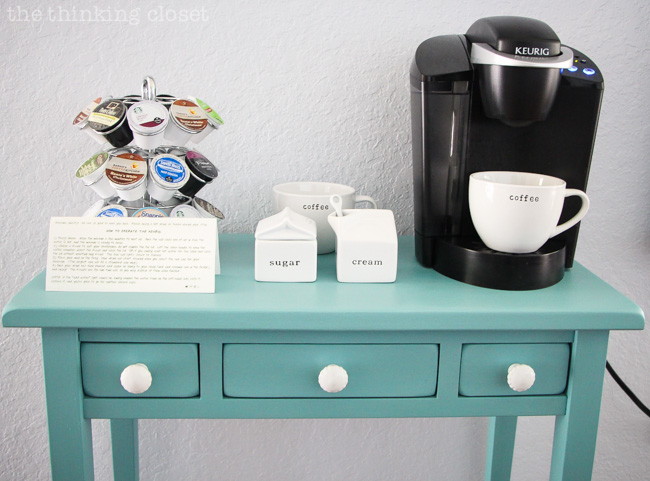
For my first Chalk Paint® project, I decided to tackle a small hand-me-down hall table from my in-laws that we’ve been using as a Hot Drinks Station. Some of you Thinking Closet veterans may remember the original Hot Drinks Station in our guest room; but over the past two years, it has just been much more practical to have the station out in our main living space. Not only can Mark and I more easily get our hot drinks on, but so can our guests when we host group gatherings.
Step 2. Gather your supplies!
Annie Sloan products are sold through retailers (or “stockists”) in the US, Canada, UK, Australia and New Zealand. Just search here to find the stockist nearest you. Not near a stockist? Many of them ship!
Here’s a list of the supplies I used on this project:
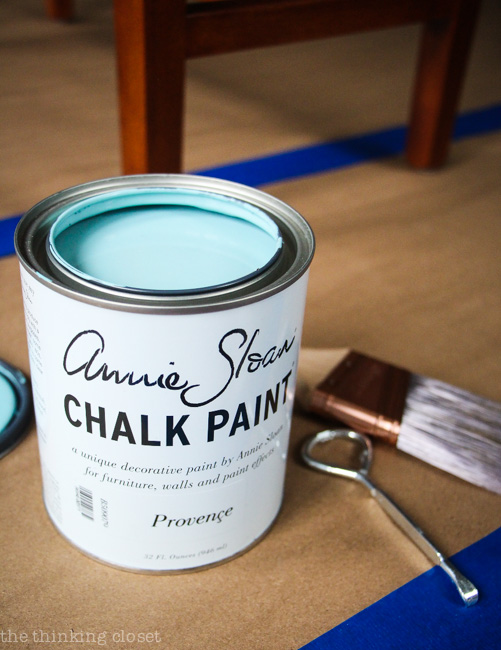
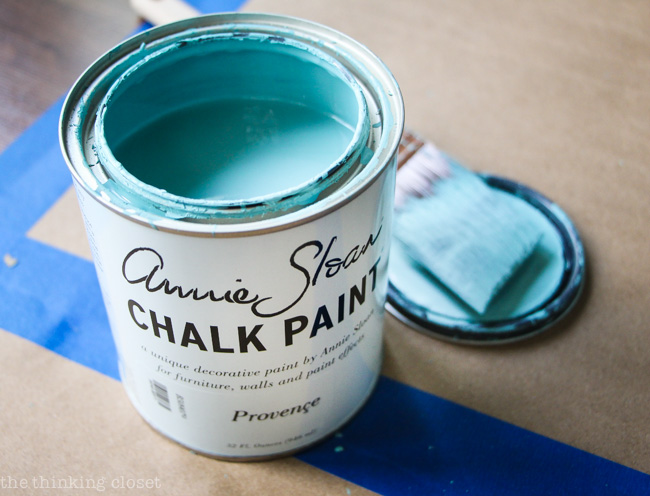
- 1 quart of Chalk Paint® decorative paint by Annie Sloan in the color Provence (this can cost $34.95 or more, which seems steep, I know; however, between the money saved on primers and considering how far the paint will go, it’s worth it I.M.O!)
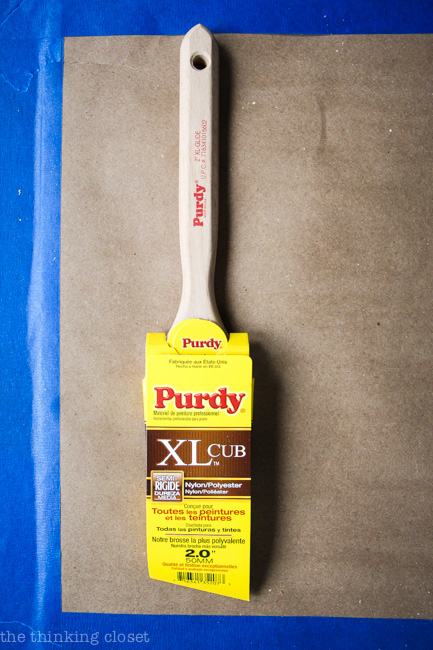
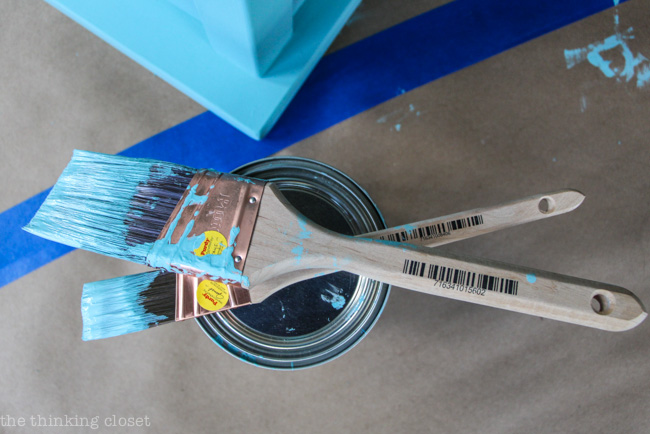
- paint brushes: I used Purdy’s XL 2″ and 1″ Angular Trim Cub Brush, but I’ve read that a plain ole’ chip brush works just as well! Just be prepared to lose some bristles along the way when working with a new chip brush.
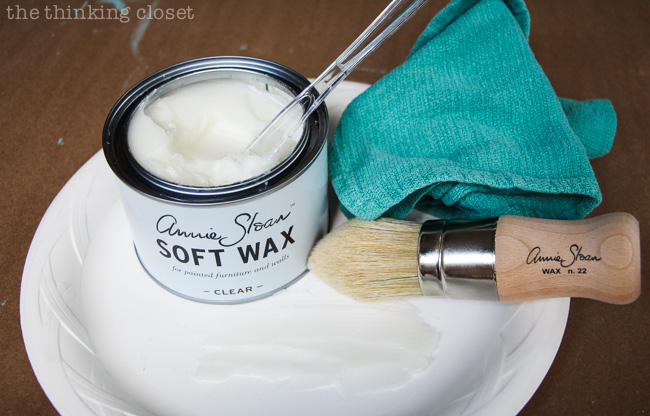
- 1 tin of Annie Sloan Clear Soft Wax (500 ml.)
- Annie Sloan Wax Brush
- 2 clean, soft rags (microfiber, cheesecloth, or t-shirt with seams cut out will work)
- New drawer knobs from Hobby Lobby ($3.99 each)
- Extra supplies: brown builder’s paper, painter’s tape, paint can opener, wooden paint stirrer, screw driver for removing hardware, rubber gloves, paper plate, plastic knife.
Step 3. Choose and prepare an ideal workspace.
Things to consider when choosing the proper space:
- temperature: experts recommend working at “room temperature.” After having painted furniture both outside and inside, I much prefer working indoors. Not only can you better control temperature by setting the air, but you have less chance of insects or dust landing on your piece while paint is drying.
- ventilation: if you are in a small workspace, make sure you have windows and fans to help move the air during the drying time (keep the fans off while painting). Although I have to say, Annie Sloan Chalk Paint® is non-toxic, low odor, and has low VOCs, so you don’t have to worry about strong fumes.
- light: working in natural light is ideal…although, many painting projects will likely last into the night. So, bring extra lamps into the workspace if needed.
- protecting the floor: I used painter’s tape to tape down some brown builder’s paper onto a section of the living room floor, so I wouldn’t have to worry about paint drips.
Step 4. Prep and clean your furniture piece.
These are steps I take for any furniture makeover project I’m undertaking. So, you’ve heard some of these before!
- Remove any removable elements like hardware, shelves, drawers.
- Run your hand across the piece to find any rough patches that might need sanding (but you do NOT need to sand the entire piece when using Chalk Paint® – – even if it’s varnished!).
- Remove any sticky gunk with soap and water or one of my favorite products, Goo Gone.
- Fill any holes with wood glue.
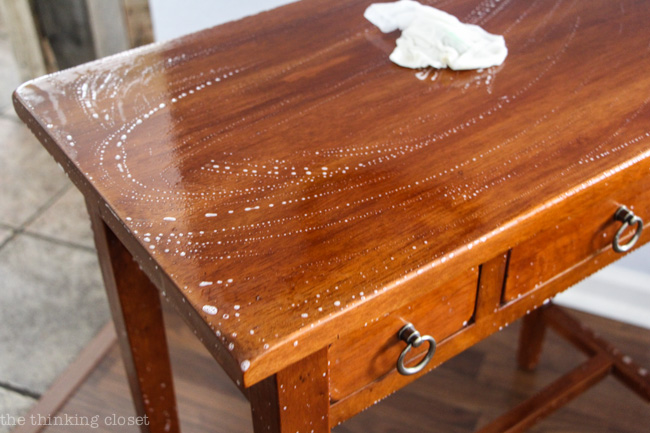
- Even if your furniture piece appears to be clean, it will still be covered in oils from hands. So, make sure to give it a once over with some warm soapy water. I just used a mild dishsoap, followed up with a final pass of clear water, so I didn’t leave behind any soapy residue. Then, just allow ample dry time before applying your first coat of paint.
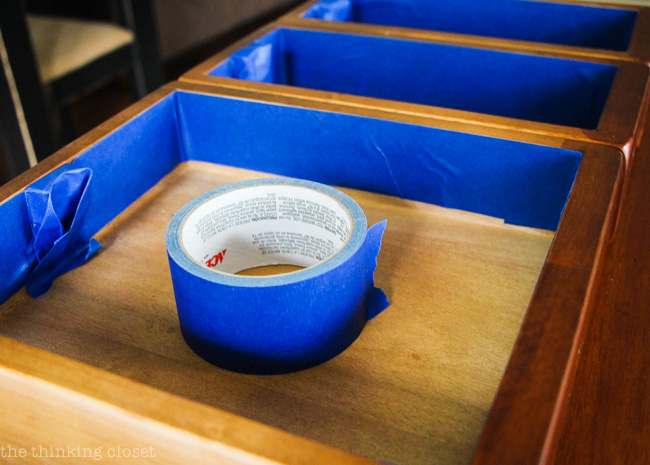
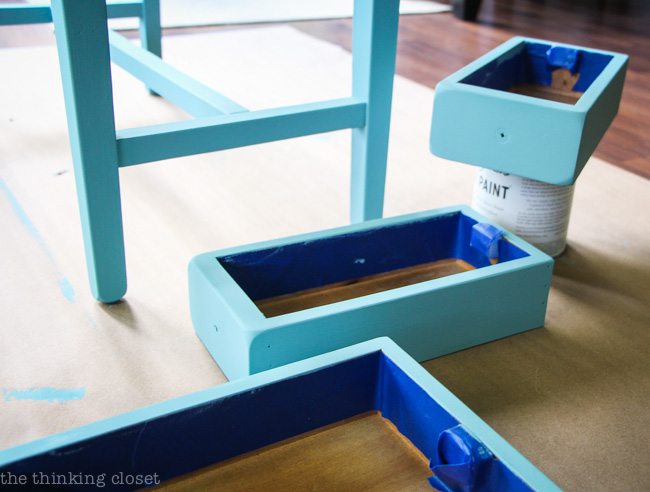
- Edge off any sections that won’t be painted using painter’s tape (like the inside of drawers).
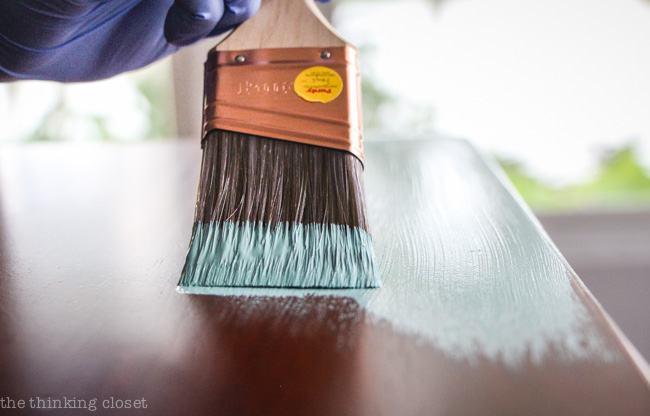
Step 5. Apply your first coat of Chalk Paint®.
Make sure your can of paint is good n’ mixed (you can set it upside down for a while…or use a wooden paint stirrer). Then, slowly work section by section. If you’re feeling extra anxious, you can start with a side of the furniture that won’t get as much “air time” like the back legs of a table. That way, you get a sense for the rhythm of using this paint. But I can tell you: it’s not as complicated to use as you think it is!
A few things I learned along the way:
- Since the paint is so thick, sometimes I applied too much paint to a section…but I found the paint to be very forgiving. So, whereas with latex paint, once 10 seconds have passed and it has started to dry, you can’t go back over it without the “skid” marks, the Chalk Paint® had more give to it…so I had more leeway in going back over a wet section to thin out the paint a bit.
- I also worked straight from the can, but was sure to cap it in between dipping my brush. That’s a tip I picked up from Perfectly Imperfect!
- Sometimes I painted against the wood grain in order to more easily cover a section, but I always made sure that my final strokes were in the direction of the wood grain.
- And if I had to hit the pause button on my painting project in order to work on something else, I just popped my wet paintbrush in a ziplock in the fridge. It won’t dry out that way! This is one of my tried and true painting tricks.
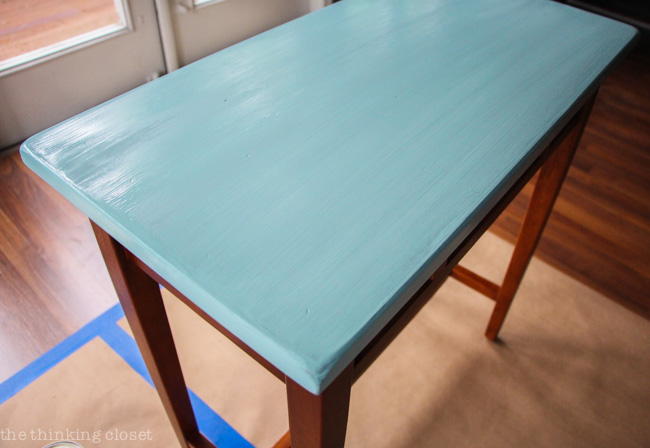
- Don’t panic when your first coat dries looking streaky with TONS of brushstrokes. This is normal. And everything will look very different after your second coat.
Step 6. Apply your second coat of Chalk Paint®.
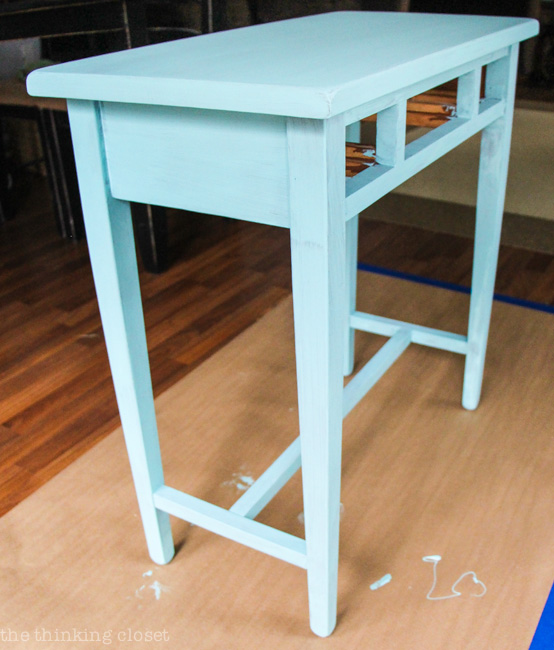
My first coat dried very quickly – – in an under an hour. Soon after, I went back in for coat #2! And here’s where the magic really happened. As my paint dried, I could see those heavy brushstrokes vanishing into a smooth finish. 2 coats were enough for most of the table.
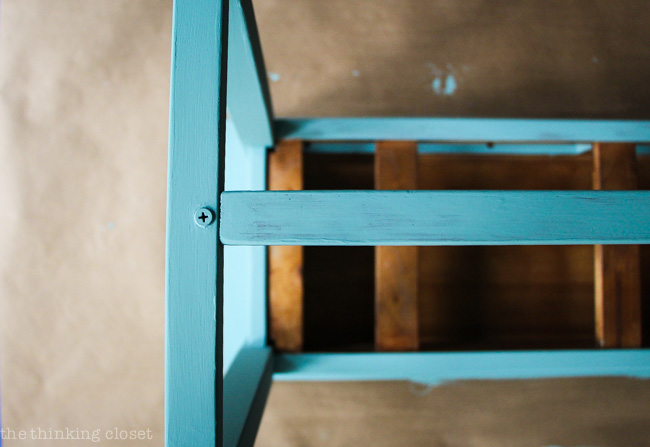
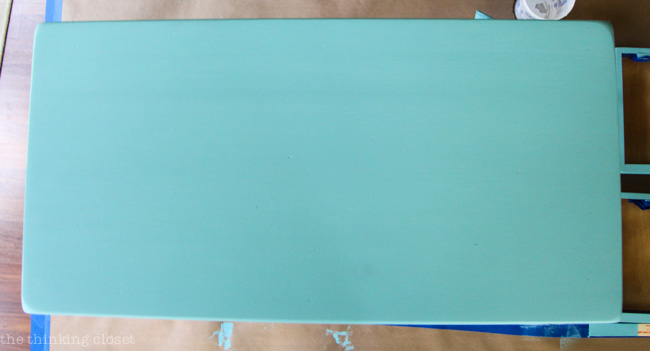
I ended up painting a third and a fourth coat on my tabletop because of a very faint dark streak I saw across the top that wouldn’t go away. In retrospect, 2 – 3 coats would have been sufficient, since no one else really saw the streak but me. (I think the streak was from some of the dark mahogany wood peering through.) 4 coats is excessive. And as smooth as my tabletop is, I think it would have been even smoother had I not done that extra coat. Lesson learned.
Step 7. Clean your paint brushes.
I know we’re in the home stretch, and who wants to pause to clean your brushes? But trust me, it’s worth the five minutes it takes to run your brushes through some warm, soapy water. Your brushes will last for years and years to come if you take good care of them now.
Optional Step 8. Distress your piece.
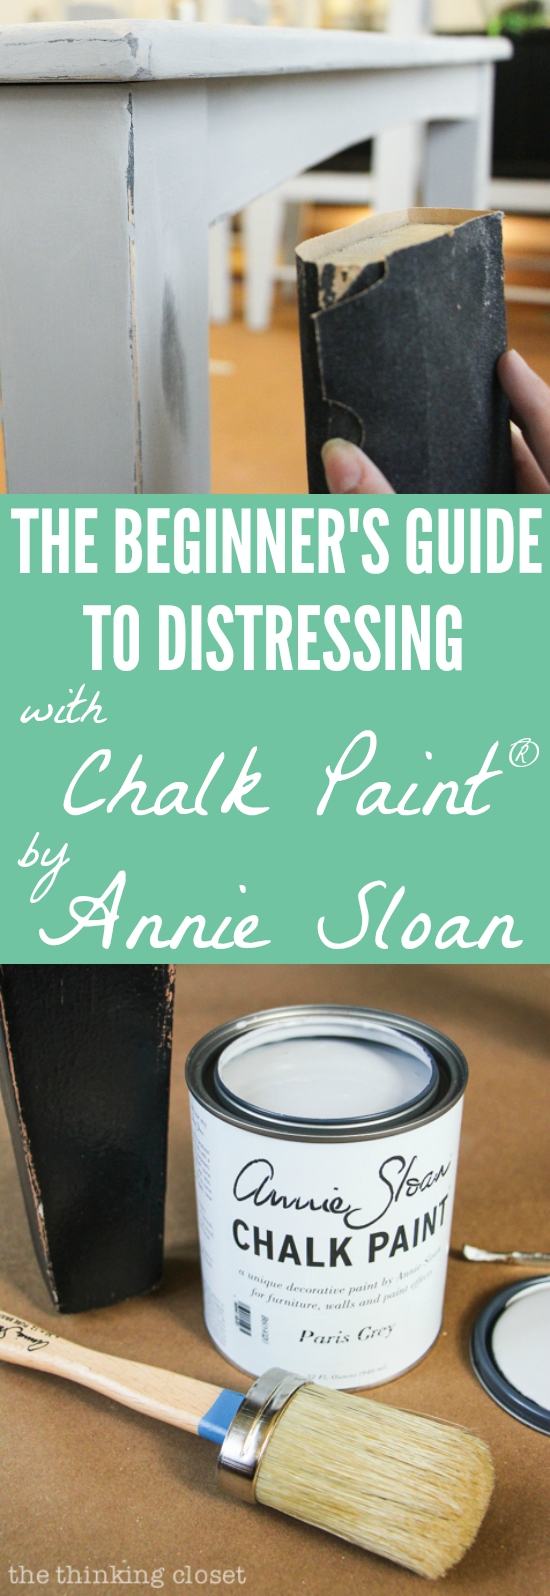
Since this was my first project, I decided not to do any distressing, but if you want to try it, go for it! Annie Sloan herself actually recommends distressing after applying clear wax, but you can do it beforehand (just with a light hand; here’s a great video to watch for technique). You can use a medium-grade piece of sandpaper or a sanding block and rub it across the sections that would naturally get distressed like edges, corners, top, wooden knobs or detailing, protrusions…have fun! Just dust off your sanding with a dry brush or damp cloth before applying your clear or dark wax.
Update!
Guess what?! I finally tried distressing, and I lurved it…so much so that I created an epic post for you all called The Beginner’s Guide to Distressing with Annie Sloan Chalk Paint®. Check it out for tips on aging, antiquing, and distressing to achieve that glorious, time-worn look!
Okay, now back to your regularly scheduled programming….
Step 9. Apply your Annie Sloan Soft Wax to seal the paint.
This is the step that perplexed and intimidated me the most, but now that I have tried it, I’m shaking my head at how easy it was. If you hear anything from this post, hear this: Do not be intimidated by the waxing step. It’s easier than applying a Polycrylic Protective Finish in my opinion.
The wax seals and protects your piece…and although it comes out of the can super soft, like Crisco, it will harden when it dries.
First, I watched several YouTube videos to get the sense of the waxing technique (like this one by The Purple Painted Lady and this one by Locksley Lane). Seriously, it’s so easy. I don’t know what I was afraid of.
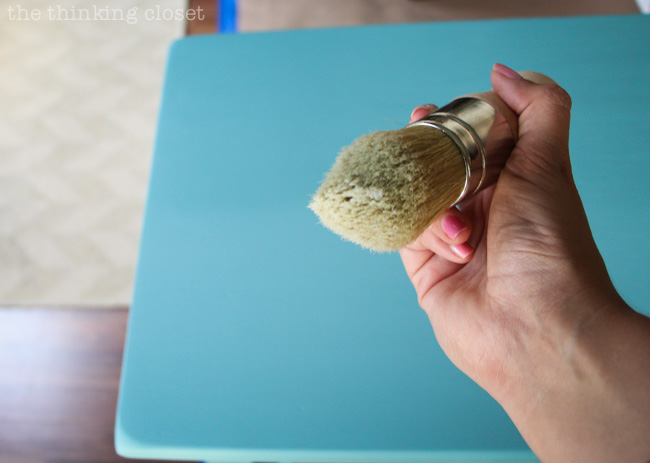
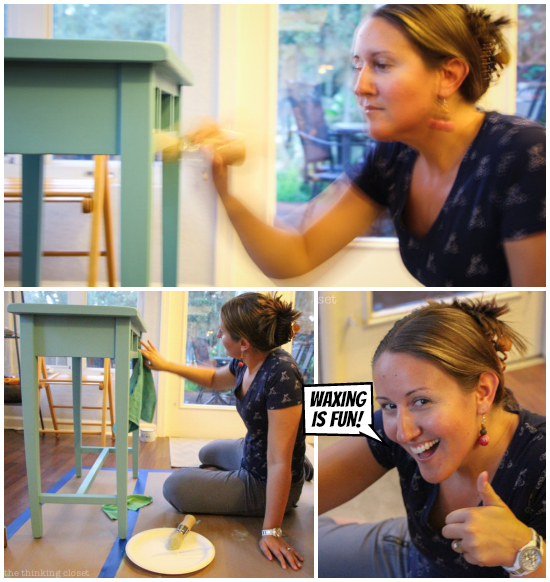
I simply used my knife to smear a chunk of wax onto a paper plate. Then, I took my wax brush and dabbed it into the wax a few times (just so I got some of the wax on the tip).
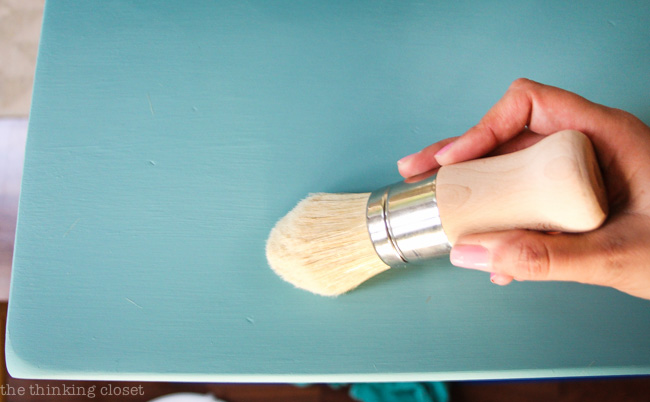
I would massage the wax into a small section (like a quarter of the tabletop or one surface of one table leg), using a combination of circular and side-sweeping motions, always ending with a sweep in the direction of the grain. You’ll see the section you are working on slightly darken. (The clear wax doesn’t darken your paint, but enhances the color a bit.) Also, don’t worry if some of the bristles on your brush fall out here. You’ll wipe them away in the next step.
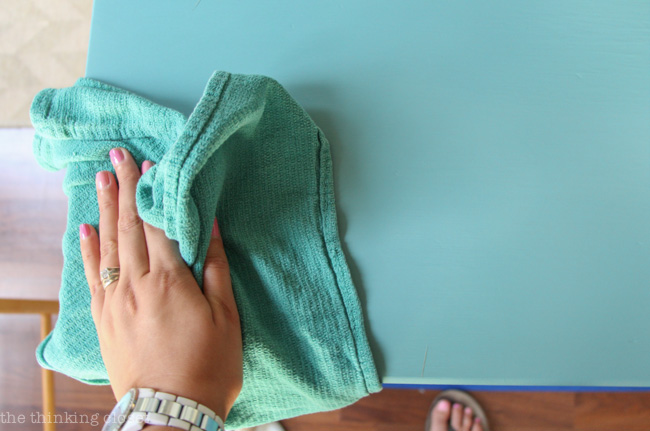
Then, I put down my brush, grabbed a soft, clean cloth (a microfiber cloth, piece of cheesecloth, or t-shirt will do), and wiped in the direction of the grain to further massage that wax into the piece and remove any excess. The Purple Painted Lady says, “Just one or two uniformed swipes across the whole area in one sweep – and that is it.”
Then, I simply repeated this step, section by section, covering every painted part of my table. You may need to switch to a new clean cloth if yours gets to “waxy” during this process.
Step 10. Add a second or third layer of wax on any tabletop.
One layer of wax should be sufficient, but for a table where you’ll be getting extra wear on the tabletop, I read that it’s recommended to do two or three layers of wax. Most recommend waiting 24 hours of dry time in between each one.
According to the Annie Sloan Unfolded F.A.Q., a piece will take about 30 days to cure in its entirety, but you should be able to use it gently within 24 hours.
Step 11. Clean your wax brush.
If using a brush to apply your wax, you’ll want to clean it out using odorless mineral spirits. I just filled a cup with a half cup or so of mineral spirits and let my wax brush sit it in for a few hours. Then, I rinsed it out with warm soapy water, and my brush is soft again!
Optional Step 12. Buff your piece.
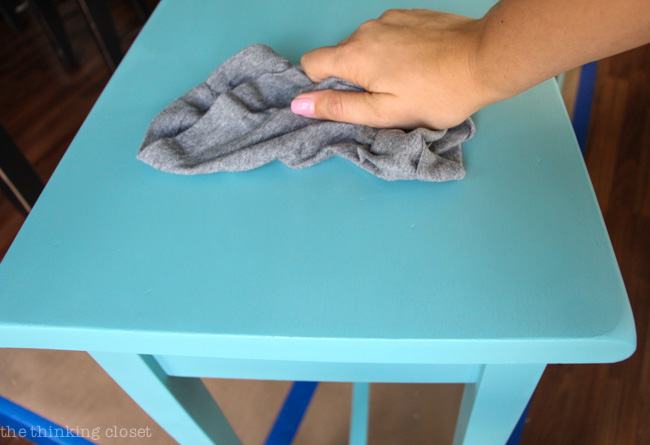
If you like the look of your finish as is, great – – you’re done! Or if you want a glossier finish to your piece, just take take a clean, soft cloth and rub circles across your piece to bring out the shine! Just make sure your last coat of wax has had about 24 hours to dry.
Step 13. Install your hardware.
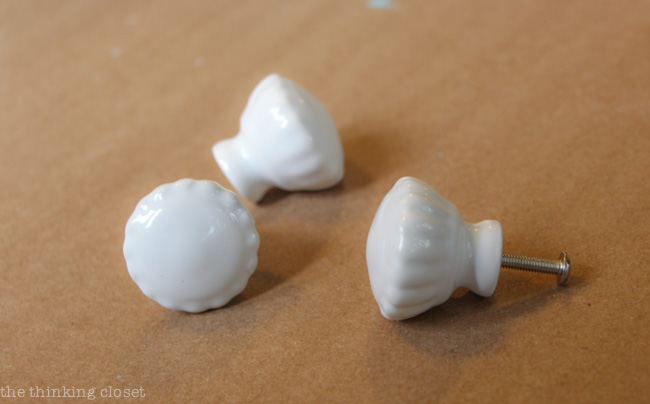
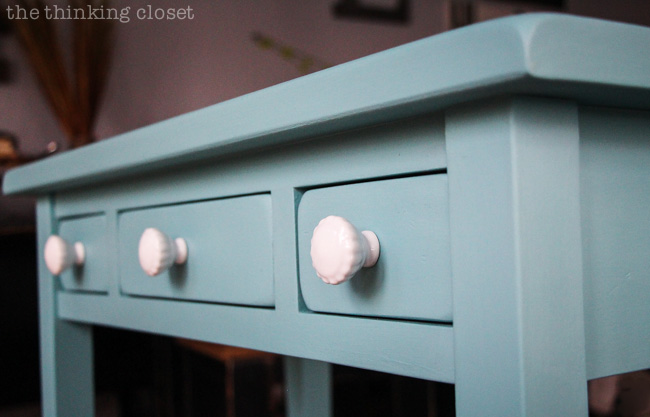
I opted for NEW hardware to to make the before and after even more dramatic, and took way too long at Hobby Lobby picking these little knobbies out. Aren’t they sweet? In a vintage milk glass kind of way?
And seeing them installed with the freshly painted table…in the words of Yenta, “It’s a match!”
New & Improved Hot Drinks Station
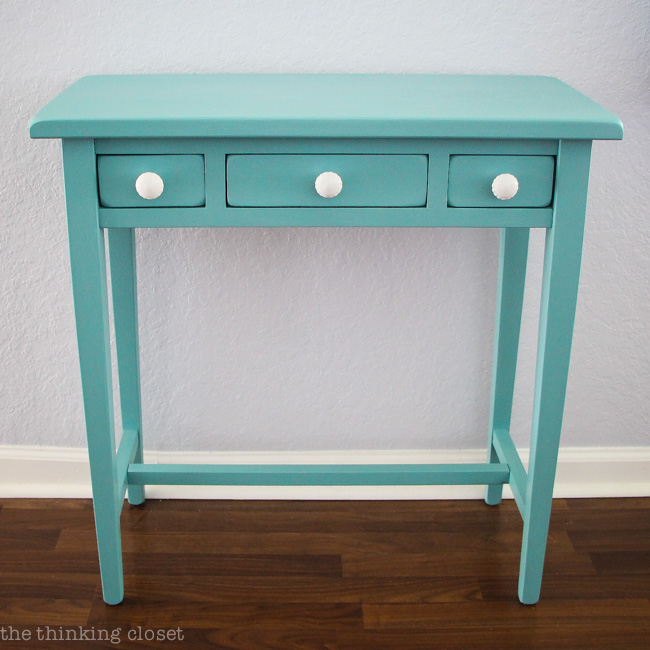
Alright, so here’s my finished table back in her old spot lookin’ like she owns the place!
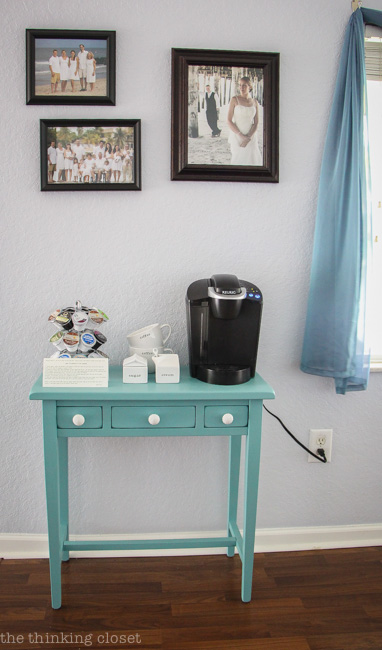
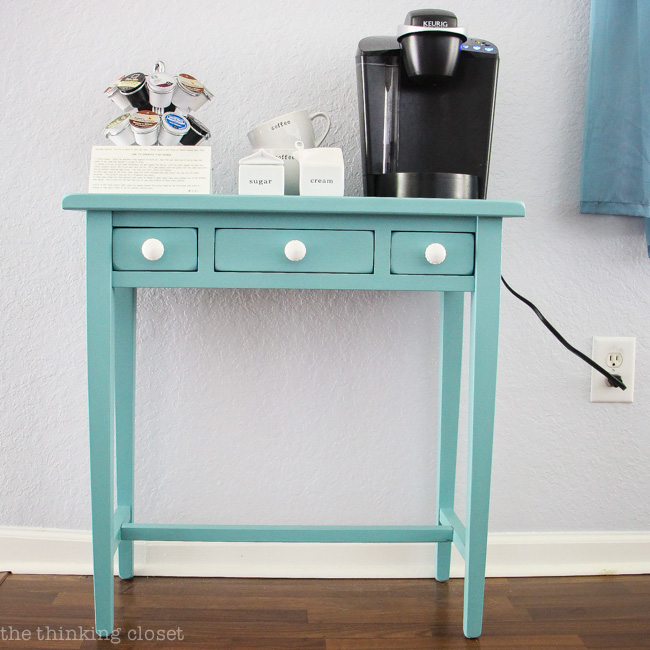
And now, are you ready to see her transformed into our Hot Drinks Station 3.0? Here ya go!
I love how the combination of the Provence paint and new hardware just lightens and brightens up this little nook. It’ll serve as a bright beacon on those rough, early mornings, when all I can think is: “Coffeeeeee.” {Smile.}
And now that my drawers have cute little knobs, I’m actually utilizing them – – so the tabletop is less cluttered.
LOVES
Now that I’m officially in STAGE #5, the elation phase, here’s what I love about Chalk Paint® decorative paint by Annie Sloan:
- No stripping, priming, or sanding needed. Whoo hoo!
- The pretty color palette.
- That you can MIX the paints. (Thanks to Bre for teaching us that in her guest post!)
- How far a quart of paint will go. Here’s how much was left after I finished my table project:
- That the wax is an easier sealant to work with than Polycrylic.
- You’re not limited just to painting wood surfaces. The paint will adhere to plastic, metal, glass, and more! #ohthepossibilities
So, what do you think?
What “Stage of Annie Sloan Chalk Paint” are you at now? Was I able to budge you from STAGE #2, intimidation, to STAGE #3, provocation? Or maybe like my MIL, you’ve been in STAGE #5 for eons now, and you’re saying, “Finally, Lauren! Welcome to the Club!” {Smile.}
Either way, I hope this post can serve as some inspiration for you as you dream n’ scheme your next furniture makeover project.
It turns out, it doesn’t have to be as complicated as we think it is.
MORE Tips for Beginners
I did a call on Instagram and Facebook for tips from those of you with Chalk Paint® experience, and y’all shared a slew of awesome tips! So, be sure to check those out HERE and HERE.
And don’t forget to check out the follow-up post to this one, The Beginner’s Guide to Distressing with Chalk Paint.
Here’s a video where I chatted with my friends on Periscope about my 5 Top Tips for Using Chalk Paint® by Annie Sloan:
Full Disclosure: I was not compensated for this post, but received free product in exchange for an honest review. As always, all opinions are 100% my own. This post also contains affiliate links, meaning that if you make a purchase after clicking through, The Thinking Closet may receive a small commission at no extra cost to you. Thanks for helping to support this site! For more policy information, click here.







Here I am years later running across this VERY VERY well written tutorial wishing I had heard about this paint years AGO! Where has this been all my life? Just completed my first and NOT last project using this paint…and I am hooked! Thank you for the great tips which were so helpful!
Huzzah! I’m overjoyed to hear you’ve caught the bug as well. It’s really amazing stuff! I’m so glad you found the tips helpful and plan to do more ASCP projects. Go girl, go!
Thanks so much for the tips! I haven’t painted for a few years and now I want to get back into it starting off with my sons dresser! Was a little nervous about using Annie Salians Chalk paint, but after reading your tips and watching you video, I am now really excited to get started! Thank you so much!
Oh I’m so happy to hear that, Fran! Hope you have fun with that dresser project of yours.
Okay! That was INSPIRATIONAL and MOTIVATING. So here I am in my living room about to tackle my first project. An old 3 drawer cabinet I got from Craig’s List FREE. I’ve been in Stage 2 for 8 MONTHS. Tonight I start! I have no Annie Sloans Chalk Paint YET, so I’m using Americana Decor Chalky Finish. Thank you Lauren! You’ve inspired us all!!
Oh I’m just beaming from ear to ear to hear that you’ve felt so inspired! By now, you’ve no doubt conquered that old 3 drawer cabinet and are on to more projects. Go Laura!
I’ve just put a second coat on a small table but think I may have put too thick a coat as the paint had dried showing a lot of brush strokes? Should I do a 3rd coat but water the paint down – will that hide the brush strokes?
Some people recommend cutting your paint with a bit of water. Even just dipping your brush in the water first, then the paint, and that can smooth the finish. I’ve also used foam brushes with latex paint and that can really minimize visible brushstrokes. Though I was able to have very minimal brushstrokes on my Hot Drinks Station table with the Purdy brush. Hopefully by now you conquered those brush strokes…or just embraced them!
Hi Lauren: I loved your beginner’s guide, you encouraged me to try chalk painting. My first project was a side table and it turned out awesome! Before beginning my second project, I turned to your tips again before starting. Thank you!
Thanks for taking the time to stop by and share that wonderful comment! I’m so delighted to hear these tips have been a help to you…and that you’re taking on multiple projects. You go, Melissa!
What do you think about using chalk paint on kitchen cabinets? I have an older kitchen where some of the cabinets were replaced due to a fire at one time. They aren’t the same and I’d like to give them a fresh look and for all of them to look the same.
I hear ya on wanting to give your cabinets a fresh start and unifying look! It’s a big job, but the outcome can be really outstanding if you do it right. Here’s a blog post with some great tips and reflections on how her cabinets have held up after 2 years of wear. Hope that’s helpful. Best of luck, Kim!
Ok – I admit it…I’ve been sitting at stage 3 for soooo long. I’m going to do it on a sweet little table that was being thrown out (also confessing to being a dumpster diver!). Once I looked at your table, I thought that if you wanted more space for cups, a row of hooks below the drawers would look so sweet with some white cups to match those adorable milk glass knobs! Thanks so much for your inspiration!
Ooo! Such a great idea, Marcia. Thank YOU for the inspiration!
I’m curious how the wax finish has held up? I want to do my kitchen table but it will be HEAVY use so I can’t decide if wax is strong enough
Great question, Ashley! We use a wet rag to remove drink stains at least once a week, and the finish has held up REALLY well. We have another table we refinished using ASCP in our living room that we work at / eat at / play games on…it gets HEAVY use…and after 3 years, it’s just now looking like it could use a fresh coat of wax. Apparently the process is really easy, so we’re going to tackle that soon! But if you’re not keen on brushing it up every few years, then I’d go with a Polycrylic sealant (affiliate link) instead of the wax. That’s okay to use atop chalk paint! You can read an interesting post on poly vs. wax HERE. And I have some tips on the DOs and DON’Ts of using polycrylic HERE if you’re new to it. Best of luck, Ashley!
Thank you so much! Im excited to get started on my project! My husband and I took our 30 year old queen size bed frame and turned it into a bench! I’ve never used chalk paint before but now I’m excited to try it because of you! I’m glad I found you on Pinterest! I can’t wait to check out all of the Annie Sloan paint!
Thank you!
Hooray! I’m so glad you found me and this post, and that you’ve also grown in your excitement for starting this project. Wow. The bed frame into bench project sounds EPICALLY AWESOME. Chalk paint will be such a fun medium for you to use in this transformation. Enjoy!
OMG that looks totally amazing, I have a dining table and 4 chairs, one large welsh dresser, and a small table similar to yours you just painted, was daunted by the task of prepping everything so held off but seeing there is no prep work to Annie Sloan paint I can dive in, thku so much for great instructions x
That’s truly the best part. I hope you feel liberated to take it on with gusto. Happy painting! (And you are so welcome, Jim.)
Can you do this on kitchen cabinets? Also the end panels of my cabinets are a laminent no just ‘wood’. Can this work on that slick laminent surface?
Yes m’am! It’s a big job to tackle kitchen cabinets, but the outcome can be really outstanding if you do it right. Here’s a blog post with some great tips and reflections on how her cabinets have held up after 2 years of wear.
And yes, laminate surfaces is GREAT for Annie Sloan Chalk Paint. The Purple Painted Lady recommends making sure that laminate surfaces are clean and that you give them a very light sanding beforehand.
Hope that’s helpful. Best of luck!
I want to paint the crib we have for our second little nugget and this totally gave me the confidence to do it! We have a vendor in town who sells the Annie chalk paint but never realized how awesome it was until googling and finding your blog. The biggest appeal is the no sanding and the fact it is a gentle non toxic paint which is great cause I’m pregnant and want to be careful about what I’m inhaling! Super excited to go pick out my color today and get started. Thank you!!
Congrats on your bundle of joy! So exciting! And I’m delighted to hear that Google led you this way, and that you found some inspiration here in my post. Yes, the non-toxic paint is going to be a dream for you to work with! One thing to consider: I’ve heard that folk recommend pregnant women have someone else apply the wax for them. And when painting a crib, just make sure you have 4-6 weeks for it to cure before nestling your little sweetness inside. Happy color-picking!
on the edge of my couch (again) digging deep for the courage to do my dining room table (was my grandmothers) and is now loved and needing a new lift…. this was certainly a boost of confidence that even I can do this!!!
I am so happy to hear that you got a little boost of confidence, Becky! Hope you have such fun with that dining room table project. You’ve got this!
Your table is stunning! I am in love with it…and THANK YOU for this post!! I have always wanted to try it but was also afraid of the waxing part….I am 100% going to try this now! Your tips and instructions are deeply appreciated by this lady 🙂
Oh wow! I’m so happy to hear that you’re going to give it a go! Enjoy the process, Jo.
Hi Lauren
Thanks for your post! Im inspired! Im doing a small built in kitchen cabinet in the basement. Do I have to buy that wax brush or can I just use a rag and wipe it on? I saw some people doing this on youtube. Thanks!
Yes, I have a friend who swears by the rag to wipe it on and off. I’ve never tried that myself, but give it a go!
Hello Lauren, I am going to be chalk painting two tall shelves. I have never used chalk paint and came across your post. What great instruction you gave! I feel much more knowledgeable and confident after reading what you shared. I will come back to this post as I proceed. Thank you for sharing your chalk paint experience with us. You were very thorough and I loved the step by step instruction!
I’m overjoyed to hear this, Sandi! Hope the shelves project turned out smashingly.
Wow – the table looks fantastic. I just bought this colour for my first project. I may have to go on the hunt for white knobs too! I have been feeling a bit anxious but your post is reassuring. I am in New Brunswick Canada and fortunately for me there is a lovely little shop called Serendipity that sells Annie Sloan. FIngers crossed for me please! 🙂
I’m so glad I was able to provide a wee bit of encouragement for you! You’ve got this! And how wonderful that you have a shop nearby where you can stock up on A.S.C.P. Have so much fun with your first project!
Love the color and the little table! I would however run that Keurig cord down the table leg in the back, tape it at the bottom and run the cord along the floor tack it down again and then run it up to the outlet. The cord is a real distraction to the overall look.
For sure! That would be less distracting. Thanks for the tip, Alisa!
Yes I agree! And if the black cord is too short just get the shortest white extension cord or even those power bars with the short cord, and hide the cord behind the leg.
I’ll get the hubby on it!
Thank you for posting! I’ve painted so many pieces and finally ordered chalk paint and wax. I put two coats on my kitchen island and I might be ready for m first coat of wax. Your directions were great!!!! I usually don’t read posts b/c so,e people are difficult to understand. Your directions were easy to follow. Hoping this is my first of many using chalk paint and wax.
??
I’m so happy to hear you found the post helpful! That was my high hope: to demystify the process and empower others to take on those projects they only dreamed of in the past. So impressed by you taking on your kitchen island! I have no doubt it’s a thing of beauty.
can the chalk paint be used to paint walls?
Yes! The Purple Painted Lady is my go to gal for questions like this one and she has a whole post dedicated to the process that you can check out here. Best of luck!
Beautiful! I recently did a Annie Sloan paint and wax to my coffee table. I wanted to try a different chalk paint brand just to compare and contrast though I loved Annie this one also has good reviews! Can I still use the soft wax for the different kind? I imagine it works on any sort of chalk paint.
Thanks so much for your kind comment. Ya know, as for your question about using soft wax, I can’t speak from experience, but I would give it a try! Worst case scenario: you can always paint over it with more chalk paint, right? Best of luck, Chas!
It looks great!????????
Now, I’m nervous to tackle the job of KITCHEN CABINETS!
What do you think? Can this paint and procedures be used to chipper up a CHERRY WOOD KITCHEN, which is waaay to dark and one that I never really liked! I just purchased a weathered brown/grey floor! The cabinets don’t have to be perfect ..I kinda like a bit of shabby chic/weathered looking furniture (that blends with life and kids)!
You totally can do it! Here’s a link to a post by a blog buddy who tackled a cherry wood piece and didn’t have coverage issues. But she does lend a few tips that might be helpful. I agree – – the weathered look is so forgiving and great for life with kids. I have a hunch your updated cabinets will look fantastic with your new floor. Enjoy the process, Jo!
Hi, thank you for this great tutorial! Can you paint over a piece that’s been painted with chalk paint and waxed? Will the wax keep it from setting?
Yes! You can paint right over a previously painted and waxed piece. Hence my obsession with this paint! Skip sanding and priming and just dive right into painting. But be sure to review my tips on prepping a piece before making that first brushstroke. Best of luck, Amy!
Thanks for the tutorial! Just finished my first piece with your help!
Oh, I’m delighted to hear that, Kristin! Way to go!
when you put your first coat of wax on did it appear to be blotchy?
Thank you for posting the how to’s! I do have a question that I hope someone can answer.
I’d like to go chalk paint nutty and tackle my bathroom vanity (one that’s used many times per day).
Will the wax alone be enough to stand up to all the water that will hit the vanity? If not, should I put some type of a sealer on it when it’s done?
Thank you!
You might consider using Polycrylic sealer instead for something like a vanity with heavy wear and water, that way you don’t end up needing to re-do a wax finish every year or so. That’s my two cents!
I have just read your instructions, thank you for this information. I have wanted to paint my kitchen cupboards and this sounds like a great paint for them. Do you know if there would be any reason for a protective coating other then the wax?
No, the wax should do the trick! But hopefully you knew that and your cabinets are already a fantastic new color of chalk paint. 😉
Super helpful directions! Thank you so much! I am midway through my first chalk painting project!!! I watched a bunch of videos and started but had some lingering questions that your advice totally cleared up.
I absolutely loved your post! You totally captured by Journey about chalk paint! Your five stages are completely accurate! So after reading your blog I jumped in and bought the supplies and completed by first project in four hours and I love it! Thank you so much. I am now a believer in chalk paint all because of you : )
Hello Lauren
I am planning on redo in my kitchen cabinets and was wondering if you think the pain would be Ok for cabinets ? Thank you
It’s a big job, but the outcome can be really outstanding if you do it right. Here’s a blog post with some great tips and reflections on how her cabinets have held up after 2 years of wear. Hope that’s helpful. Best of luck!
Love your table…it looks great! I’m trying to get started on a chalk paint project but I’m scared!! Haha~ Have you done any distressed pieces with chalk paint? If so, any tips? Also, do you know if you can use this chalk paint or any chalk paint on laminate surfaces?
Yes! I have a whole post dedicated to distressed chalk paint pieces you can check out HERE.
And yes, laminate surfaces is GREAT for Annie Sloan Chalk Paint. The Purple Painted Lady recommends making sure that laminate surfaces are clean and that you give them a very light sanding beforehand.
Hope that’s helpful. Best of luck!
I am about to tackle my first victim but I have a few questions.
When you add a second coat of paint did you use the paint out of the can or did you dilute it? I have read that in other entries so I was curious.
Also, have you done any pieces with the General Finishes Gel Stain on perhaps the top then the rest painted with chalk paint? I am trying to figure out which part should be tackled first.
Thanks!
I didn’t do any diluting with this project if I recall, though I did dip my brush in water sometimes when working on my distressed table and chairs. However, it seemed to make my brushstrokes more streaky once it dried, so I think I’m a fan of not diluting. Totally personal preference, though!
No, I haven’t tried to the gel stain you mention…but I’d think that starting with the stain would be best since the paint is water soluble and could easily be cleaned up if some of it got onto your top. Sounds like a pretty piece! Have fun tackling it.
Thank you so much for this tutorial!! It has been very helpful to me. Although I haven’t started on a project, I was looking for an article or video to help me break this intimidation of “chalk paint.” Now I can start and follow your well explained and helpful tips!
Whoo hoo! That is music to my ears. So happy to hear you’re feeling encouraged. You’ve got this!
Hi Lauren,
I have just finished my own little project! Thank you so much for your help and enthusiasm! I love it! If only there was a way to show you!
Anyway, it’s great and you encouraged me to finally do it!
Thanks,
Josh 🙂
I’m so happy to hear that, Josh! I can imagine your great success quite vividly in my mind…though I’m sure in person is even more magnificent. Way to go!
two questions: can you use polyacrylic over it for a more shiny shine? has you tried it on trim on walls? I have trim I want to repaint but I do not want to sand a whole house of trim! lol any suggestions are welcome!
Oh yes to polycrylic! I plan to try that on my next project. I haven’t tried it on wall trim, but I don’t see why you couldn’t! I bet it will save you lots of time skipping that sanding step. I’d go ahead and Google it to see if others have tutorials on the subject, but I’m sure you’d be great even without it. Best of luck, Brandy.
I redid my dresser with some chalk paint from a local store and put a glaze over it. I have done this before and has turned out great!!! But this time it didn’t. When I opened one of the drawers the paint peeled off. So, I have decided I am going to buy the Annie Sloan paint and redo it. Since it already has paint, will I have to strip and sand it first?
Oh no! So sorry to hear you ran into trouble. No need to strip and sand with Annie Sloan! That’s the magic of this paint. It goes right overtop pretty much everything, including painted surfaces. The only reason you’d gently sand is if you wanted to smooth the surface or if it was super shiny, give the paint a little something more to grip to.
I have red oak wooden furniture in the bedroom that is looking slightly “orange” because of the nature of the wood. My husband stained them and put a varnish on them. They are in great condition I am just fed up with the look. Can I use the paint directly on them or do I have to rub off all the varnish first. Thanks.
No sanding or priming is necessary with ASCP…so go ahead and paint overtop it! Actually, it’s probably best that it is sealed with a varnish so the red grain doesn’t seep through. You’re golden!
I’m holding my breath as I go to the store today to purchase my first batch of chalk paint to begin painting an old bedroom set I just got for our bedroom. I’m so nervous, but you’ve encouraged me to take the plunge! OH! And anyone who quotes Fiddler on the Roof is someone I could definitely be friends with! 🙂 Thanks for the post!!
How long did you wait between your last coat of paint and the first coat of wax? The table looks so great and thanks for such a helpful tutorial!!!
Thanks in advance…
Eek! It’s hard to remember, but I think you’d be fine after a few hours…as long as your final coat of paint is totally dry! And then 24 hours in between coats of wax. Have fun!
This article was so helpful – and I just discovered that there is an Annie Sloan stockist very close to home. I am so excited to get started! Thanks so much.
Huzzah! I’m excited FOR you! Have fun with your painting projects, Neena.
I’m so glad I found this resource! I just painted my first piece–a cherry stained tv stand that I found at the Salvation Army for $30 (score!). I painted it with ASCP Old White (2 coats followed by distressing). It looked great… until I applied the sealant. I used Minwax Matte Polycrylic, which I had read excellent reviews of and is supposed to be safe with chalk paint since it is water-based. The white paint now has an overall sort of yellow/brownish tint, which is more pronounced in some places like the cabinet doors. I used a rougher-grit sandpaper in the places that it was the most yellowed, which seemed to help. Overall, it sort of adds to the old/vintage-y feel of the tv stand, but I’d like to know what went wrong for next time.
So–why did this happen, and what could I do differently next time? I know wax is supposed to be better with chalk paint, but I didn’t want to use that since I had read that you have to re-apply it regularly (my next piece will be a kitchen table and I definitely don’t want to use wax on that since it will get a lot of wear and tear) and I’d read good things about polycrylic as an alternative. I thought yellowing only happened with an oil based seal? Please help!
Ya know, I’m as a surprised as you are about the yellowing. I had heard the same about Polycrylic not causing such a problem. 🙁 The Purple Painted Lady has a great FAQ page on her site that might solve this conundrum. But I’m glad to hear you’re looking at the glass half full and seeing it as a form of “aging” the piece (even if it wasn’t intended). Sorry, I wish I knew the answer! Best of luck, Andrea.
Super helpful! I have been wanting to repaint my bedroom furniture for a very long time. I’m thinking of doing it now. I’m moving soon but my new place doesn’t really have a spot for me to paint. I’m wondering if I should do it now, a week before I move? You said it takes 30 days to cure, would it get extremely damaged during the move even if we were careful? Would love to hear what you think about this! Thank you 🙂
I think I might be a bit late, but if you’re going to be very careful, I think that should be no problem! You just want to avoid heavy use until it’s fully cured. But we started gently using our tables after just a few days. Blessings on your new home!
What a fabulous post – just about to attempt a farmhouse table and 8 chairs I bought on eBay and feeling far more confident after reading this, thank you!
I am just starting getting interest in this. I have to say that your post has been very enlighening, and thank you for this! The piece you transformed looks great! As you mentioned that chalk paint can be used on metal surfaces, I couldn’ t help thinking that you could have painted the knobs you already have. (On the other hand there would be no excuse for the brand new cute knobs you got!). I also noticed how beautifully is combined the light blue paint of the top with the former colour of the wood. That could also be a suggestion, to change only partially of an item. Options are endless… Thank you once again for your helful post!
I will NEVER use chalk paint again!! I will NEVER use chalk paint again!!! I will NEVER use chalk paint again!
Thanks for the post. My wife and I have chalk painted a few things so far with mostly good results. I’m still getting used to the “feel” of having the correct amount of paint in the brush. There are some times I layed it on a bit too thick and it resulted in some drips that I had to go back and sand down prior to applying the second coat. I suppose it’s better to lay it on too thin and go over it a few times. We’ve been using the Amy Howard paint because we can get it local but I want to try both Annie Sloan as well as Mud Paint. Thanks again.
You’ve pushed me over the edge; past stage two and now sailing happily through the rest! This is the first tut that has broken it down and made it not scary. And I’m not scared of many DIY’s to begin with! Many thanks!!
Thank you so much for this! I am just ready to apply wax to my table and was a nervous wreck about it! I am calm, cool, and collected after reading your post! Thanks again!!
I just bought my first can of Annie Sloan for a piece I picked up at an estate sale and was googling how to use it. I’m scared! You mention you live in Orlando. Have you checked out Adjectives and Unhinged in Altamonte Springs? Unhinged is a great resource for Annie Sloan and other DIY materials and I could spend all day at Adjectives Market! Check it out!!!
i am chalk painting an old sewing machine table. Something is bleeding through on it. So, I got out the Kiltz and gave it a coat. It is bleeding through my Kiltz. Looks like grape juice was spilled on it. Help! I don’t want to paint this purple.
I haven’t had that issue myself, but The Purple Painted Lady says that you can have bleed through with furniture that are deep red with a mahogany stain (perhaps this is the grape juice you speak of)? Or similarly with pieces covered in an oil-based polish that includes a stain like “Old English.” In this case, she recommends going back and using a Zinsser Shellac on the piece, which will seal it and prevent further bleed-through. Here’s her post on when and how to use it. Hope that helps solve your problem, Sue Anne! No more grape juice spills allowed. 😉
Hi, I have a 3 piece wood dresser set that I painted years ago. Would I need to remove the current paint in order to use this technique? Or could I just paint over it?
Nope! You can paint right over it! Therein lies the magic of Annie Sloan. I just recommend running through the prep items I suggest in this post…but no stripping, sanding, or priming is needed. Such a relief, right?
Done a few projects now, love how easy it is
Isn’t it amazing? I was stuck at the intimidation phase for way too long! So glad I finally dove in and gave it a whirl. Now I’m hooked for life!
Thank you SO MUCH for this post! I finally got up the courage to buy my first set of ASCP today… I got the “pure white” and clear gloss… but I faltered at the wax brush… the store I was shopping at was charging $50… I was having a hard enough time justifying the cost of the paint and wax!!! Do you think that my results won’t be as good if I don’t use the AS wax brush? :/
Yay! So happy to hear that! I have only ever worked with the wax brush, so I don’t have anything to compare it to. But from what I have read by the pros, they recommend investing in the wax brush if you plan to do multiple ASCP projects. They say it’s worth the investment! Though you can try using a lint free rag instead–just be aware it may be challenging to get an even coverage of wax. I wonder if you could shop around to different stockists to see their rates: https://www.thinkingcloset.com/unfolded Many will ship to you, and you may find a more affordable wax brush out there. Best of luck!
This has given me the inspiration to give it a go. I live in north wales uk.
That is music to my ears, Eirian! Enjoy the process!
Love this! I’m working with chalk paint on a few projects over on my blog but haven’t tried Annie Sloan. I heard it’s VERY chalky, but I will have to have a go!
I’ve only ever worked with Annie Sloan brand but I’ve been nothing short of ecstatic over it. Gearing up for another Chalk Paint project next week. Eek!
Hope your projects turn out dandy, Emma!
I just painted my bedside table with ASCP red. I did two coats allowed 24hrs to dry then waxed. The tables look chalky. I thought maybe I did not wax well. I bought a buffer and it helped some but still not great.
Thank you
Judy
Ha! You’re a star. I am on my very step into trying our annie sloan paint on our poor old piano. I keep wondering if I need to sand it but, this post gave more lights into the tunnel. Thanks for sharing. xx
Aw, thanks Melody. I’m so glad to hear this post was like a lantern for you in the darkness. Would love to see a photo of your finished piano project. Did you complete it? Here’s my email! thethinkingcloset@gmail.com
If I have a black hutch, and I just want to refinish it the same color, with a distressed color of brown.. Would i just repaint the distressed color I would want, then paint over it black, and then sand how I would want it distressed?
Hey Erin! Great question – – in fact, this is really relevant because this week, I’m doing some distressing on a piece that a few different layers of paint underneath – – so I’m trying to wrap my head around getting the right color to show through. But there are a few ways you can go about two-color distressing.
1) paint the brown on your hutch, then black, then sand with a fine grit sandpaper so the brown comes through. Or better yet, try using a wet rag. You’ll have more control. Here’s a vid of Annie Sloan herself demoing this method: https://www.youtube.com/watch?v=mjxKGQrO1UE.
2) Give the effect of brown peering through but really, you’ll using a dry brush technique to paint it atop your edges and detail for added dimension. This can be done quite effectively with a little practice. We have a set of chairs that I STILL can’t figure out whether the distressed color is under the topcoat or atop of it!
Best of luck, and keep me posted on how things turn out / turned out.
I realize this post is from a year ago, but I have been hovering between stages 2 and 3 for some time and yes, I think you nudged me to move forward! Given that I’m an artist, I can’t figure out what I’m so intimidated about, but you’re definitely right that the wax stage is particularly intimidating, and I also enjoy a good amount of antiquing and distressing most of the time. May start with a flat paint project as well. Ultimately, I’d love to graduate to doing my kitchen cabinets, but that may be a little too tall an order for now. Thanks so much for the great tutorial!!
Best,
Lory
Great chalk painting tutorial! I have never tried it myself but was in a cute antique shop in Leesburg, VA about a month ago with a friend, and we were admiring the chalk-painted pieces … I especially loved the distressed pieces! So, I came upon your tutorial tonight, have been taking lots of notes, and look forward to getting my supplies soon at some of our local stores. My husband had a hobby of picking up furniture left out in the neighborhood and fixing them up, and now I’m excited about him finding me an old piece of furniture that I can practice on. I’ll keep you posted on my progress!
Yes! We have plans to do some distressed pieces next…and I can’t WAIT to get my hands on more paint to make it happen. So excited for you and your first venture in the wonderful world of A.S.C.P! Yes, definitely keep me posted on how it goes! And have fun with it.
Love this tutorial!! Is sanding required at all with chalk paint? I saw where you said just the rough spots so I am just wanting to make sure! Thanks!!
Jennifer
That’s the beauty of Annie Sloan Chalk Paint! Unless the surface you are working with is extremely glossy, no sanding or priming is needed…that way, you don’t lose steam on all of the prep, but rather can really enjoy the process of transforming a piece through painting. Just be sure to really clean and dust a piece before diving in to your first coat. Have fun, Jennifer!
Thanks for the great post! It was very helpful! I followed your instructions when redoing a dresser. After I put on the wax, it developed a crackeling which was ok with this project because I’m going to distress it but I’m wondering what I did wrong before I try new projects. Thanks so much!
Hmmm…yes, I can see your concern! Do you think the finish on the dresser might have had some sort of additive that would cause the paint not to adhere in certain areas, perhaps like some IKEA furniture? For the future, you could apply a thin coat of shellac to those areas to help ensure that the Chalk Paint will adhere smoothly and not crack. Best of luck!
I want to chalk paint 2 side tables and a coffee table that are bare oak. The kids at my school made them in shop so they are just naked wood. I am thinking the Chalk paint would be perfect for this but my question is this… do I need to prep them in any way? and….
After I chalk paint can I paint a design on the top of it.?
Annie Sloan Chalk Paint can be painted right onto bare wood, varnished wood, laminate surfaces – – all of the above – – without any prep. And yes, you can paint a design overtop of it, too! I recommend using Chalk Paint for that, too, if possible. However, if you use acrylic, be aware that the acrylic paint will likely resist the wax (not absorb it like the Chalk Paint), so you could either move forward and just know that the acrylic paint won’t be fully sealed. Or you could skip the wax altogether and seal it with something like Polycrylic, which works for all paint types. I will say that waxing is easier than applying Polycrylic in my opinion. So if there’s any way you can get your hands on the colors of Chalk Paint you want for the decorative painting, that’d be my rec. Best of luck!
I loved your tutorial, i wish i’ve watched it before i ever got started with Annie Sloan….would have save me alot of trouble!! I want to know, if i finished painting 2 coates and waxed my wood door, abd i am not satisfied with the colour, can i just paint over that again or do i need to remove the paint first? Thank you, Love to hear from you!!
You can paint RIGHT atop the wax and not remove it. That’s the beauty of Chalk Paint by Annie Sloan. It allows for a change of heart! Sorry for the delayed reply, and I hope your door project is a success!
What a beautiful transformation and color on your table!! I just redid an old china cabinet in black chalk finish, got new hardware and also splurged on seeded glass to replace the old plain glass in the doors! I agree that the paint looks streaky with the first coat but looks great when it dries and then the second coat goes on. I did a bit of distressing before wax and it looks great! I would love to use a pretty color like you did on something soon but thought black (ala Pottery Barn) would be better for the cabinet!
Hooray! So happy to hear you found the paint to be easy to work with, too. I’m working on my first distressed piece this week, and I’m hoping for the same success you found with your china cabinet. (And that black Pottery Barn look is one of our favorites – – our buffet looks like that – – so I can imagine exactly what your cabinet looks like. So dreamy!) Thanks for the kind comment, Jerilynn!
love this tutorial! i’m finally about to dive in to ASCP for the first time and spruce up an old antique table. question though- is it necessary to have the wax brush or could you rub in the the wax with a cloth or make up brush?
Happy to hear that, Keri! And I was curious to find out the answer to your question, since I wasn’t certain myself, and I discovered this great demo done by Blue Egg Brown Nest where she says she prefers using a lint-free rag for applying wax rather than a brush! I may need to try that technique with our next ASCP project!
After too many late nights spent perusing Pinterest…dreaming and freezing (def’n: inaction; failure to actually proceed to a point where I even remotely consider this is something I can do…but pins continue to fill my Pinterest boards nonetheless!), I was very happy to have found your beginner’s guide ASCP today and read it in its entirety. Your clearly explained steps, your words, your photos, your links, your humour and informative comments and questions by others have brought me to a “Hmmm…I know more than I did before AND I think I can do this!” stage. I feel a thaw coming on :-). Thank you!
Oh Melinda. You are the reason I do what I do. Seriously. Thank you for sharing your story and words of encouragement. I’m SO glad that this post may have emboldened you to get to the “I think I can do this!” stage. Because you SO can! And I am in your corner, cheering for you. Time to bring on the thaw and let that inspiration spill over into Annie Sloan action! Go girl, go!
I have totally finished ALL the steps and still have brush strokes. HELP!!!
Did you try cutting your paint with a little bit of water? You can dip your brush in the water first, then the paint, and that can smooth the finish. I’ve also used foam brushes with latex paint and that can really minimize visible brushstrokes. Though I was able to have very minimal brushstrokes on my Hot Drinks Station table with the Purdy brush. Which brush did you use, Kathy?
Purdy nylon bristle.
Hi! Thanks for the tutorial. I have the furniture and am about to embark on this journey (after a few more YouTube videos). I’m painting over a maple stained wood and am thi in I want to distress so that he maple shows through the paint. Would I wipe the chalk paint off as I paint? Or paint, wax and then sand? Thanks for the help!
Since this was my first project, I decided not to do any distressing, but if you want to try it, go for it! Annie Sloan herself actually recommends distressing after applying clear wax, but you can do it beforehand (just with a light hand; here’s a great video to watch for technique). You can use a medium-grade piece of sandpaper or a sanding block and rub it across the sections that would naturally get distressed like edges, corners, top, wooden knobs or detailing, protrusions…have fun! Just dust off your sanding with a dry brush or damp cloth before applying your clear or dark wax. Best of luck, Jaime!
Lauren, I can not stress to you the extremely high level of my ineptness for having a creative side (think illegible stick man drawing, color blind, and have never painted in my life). However, I am drawn to chalk painted look, mainly because I adore (heart skips beat kind) the look and can’t afford to buy the pieces that are completed in the boutiques. I have a piece (unfortunately it’s large; not great for first time) and I have researched this endlessly and keep coming back to your site/advice. Your detail (for us first timers), your writing, and your award winning humor is unparalleled! I truly thank you for giving me the nudge and I will let you know if I have regretted saying that in a few months time. I’m driven to succeed if for no other reason but to force my husband to admit I was correct about purchasing this $30 junky (solid wood) cabinet that has sat in our garage for months! You have a very special gift Lauren and I thank you for sharing it with us mere mortals!
Thanks for the great tutorial and links for the wax! I am about to dive in and paint old kitchen cabinets in a rental property that I am going to sell. I didn’t want to bother taking a class…you just saved me a whole lot of time!
Susan
So happy to hear this was helpful and saved you some time! I’m sure the cabinets turned out smashingly!
I bought a different brand than Anne Sloan Chalk paint. This is the first time I’d ever painted anything with Chalk paint, but I paint everything all the time so I’m not new to painting.
However, I didn’t find the coverage very good. I had to put 3 coats on one dining chair and it still is sparse in areas. I think the same effects could be achieved with a flat paint as opposed to Chalk paint. I’m just not sure if it was the paint or if I was putting it on too thin, etc.
This is more of a question. (But first, thanks so much for the helpful post!) I’m getting ready to do my first chalk paint piece – our breakfast table. Since this table gets lots of wear and tear (food/drink spills, glue and marker streaks from crafts, etc), will the wax topcoat protect against these? I’m hoping I can simply wipe the messes away with a damp cloth like I do now (currently stained oak with varnish/poly on top). Thanks for the help!
i didn’t read all the posts, so it could be in the comments. I wondered how well it would cover kitchen cabinets? I need to redo them. Does the wax yellow over time?
It’s a big job to tackle kitchen cabinets, but the outcome can be really outstanding if you do it right. Here’s a blog post with some great tips and reflections on how her cabinets have held up after 2 years of wear. Hope that’s helpful. Best of luck!
This may be a dumb question, but can it be used like chalkboard paint? I want to have a table the kids can draw on with chalk; is that doable with the wax coating?
Not dumb at all! For the longest time, I thought Chalk Paint was akin to chalkboard paint – – but lo and behold, it turns out they are completely different. If you want to be able to write on a table with chalk, you’ll need chalkBOARD paint…though there are plenty of easy DIY recipes out there for how to make your own. Or you can buy chalkboard paint at most craft / hardware stores now. Just do a little Pinterest or Google search and I’m certain you’ll find what you need! Good luck!
Thank you for sharing! What a beautiful transformation.
My pleasure, Michelle! I appreciate your kind and generous words. Cheers!
What exactly is a “chip brush”?? Thanks!!!
Hi Anne! Chip brushes are “ideal for touch-ups and one time use” as the internet tells us. They’re really inexpensive and usually I try to keep a bunch on hand just for quick projects here and there. You’ve probably seen them before! They look like THIS. Hope that helps!
Is chalk paint a good option for oak trim?
People have different opinions on the subject, but what I’ve gleaned is that Chalk Paint is ideal for furniture and latex paint more suited to walls, trim, and doors. I recommend checking out this post by Miss Mustard Seed for her PROS and CONS for different types of paint. Still…I have used latex paint on furniture (prime example: my roll-top desk), and I’m sure people have used Chalk Paint on trim (with a Google image search, you’ll see some examples!), so I would use whichever medium you’re most comfortable with and excited about!
Best of luck, Jackie.
Wonderful post. Thank you for the highlight on my waxing video! It really is super easy right?
All the best,
Paula
Locksley Lane
My pleasure, Paula! You provided such a great resource for me when I was first learning how to wax, I just HAD to share it with my readers! Thanks you for your expert example.
Thank you for this compilation, it’s been very helpful! I’m curious to how the paint job has held up. I’ve noticed that my Annie Sloan paint chips are a bit scratched, but they’re not waxed. Does the was help protect against this? This is my major obsticle to overcome.
Oh yes! The Chalk Paint has been very durable on our table, which gets a lot of use (we love hot drinks in this house!). Drips clean up easily, too, with a wet rag. All that to say, the waxing step is key for any indoor surface that will encounter people or pets! The wax literally fuses with the paint and protect it from the oils from our skin and other staining sources. And if your surface is expected to get A LOT of wear, you should do 2 – 3 coats (waiting for the wax to dry in between each coat). I did 2 on our table surface. You can read up on this and more over at one of my favorite resources for all things Chalk Paint: The Purple Painted Lady!
How long did you wait until using the table again?
I have read that the curing process for wax can take up to six weeks! But I couldn’t wait that long before setting up my coffee station again so it was just a few days for us. Call me a rule-breaker! I just tried to be cautious in the beginning about not letting drink drips settle on the table for long…and it has held up great!
I just bought my first quart of chalk paint! I cannot wait for it to arrive so I can try it out on a fruit basket that I make! I’m going to do it in Florence and think it will be a really nice pop of color in a kitchen. Thanks for the tips!
https://www.etsy.com/listing/225005372/hanging-fruit-basket-fruit-bin-crate?ref=shop_home_active_12
Thank you!!! I have a thrift store and I have so so many pieces that I want to paint and redo ( they’re not selling ) ( but will when I get done with them ) (after I take the plunge ). I’m gonna do it !!! I can’t wait to get started.
Have been SO on the fence, but I’m totally going for it now!! I have twins coming, and two non-matching cribs….what a perfect time to try it! Thanks!
Oh yay! So happy to hear that, Carrie. And congrats on your little ones on the way. They are going to have two snazzy-looking cribs pretty soon, that’s for sure. 😉
i want to repaint my large entertainment center. I want to use black and the chalk paint sounds easy. But I don’t want it to have a chalky looking finish. I want it to have a satin finish will the finish be satin looking?
You’re going to need to seal the paint regardless, and I would say that my table has a “matte” finish after using the clear wax…so if you want something more satin or semi-gloss, you might try a Polycrylic sealant instead of the wax. Those are okay to use atop chalk paint! You can read an interesting post on poly vs. wax HERE. And I have some tips on the DOs and DON’Ts of using polycrylic HERE if you’re new to it. Best of luck!
I love the color and your project it turned out so nice. I am just now getting into doing the chalk paint. Love to refinish furniture. My family is always in amazement when I bring home a piece of furniture that is just so ugly and they see how it is transformed. Eventually they will have faith in me and know that I can see a vision and make something ugly look good.
I saw your picture frames above your drink station and think you should do chalk paint on them as well. I did a picture frame for myself to match my entertainment center and it looks so nice
Thanks so much for the encouraging words. That means so much coming from a lover of refinished furniture! Love that you have a vision to see what a piece CAN be even when it is ugly. That’s a gift!
And you’re not the first person to recommend I chalk paint those frames. It’s definitely on THE LIST! I think I might need to bump it up to high priority, though. 😉
I just found your pin on Pinterest. I am going to paint two of my chairs aka first victims tonight with chalk paint, so I am so glad I found this. Great tips!
When you mentioned your first victims, I could instantly hear your maniacal “mwah ha ha” laugh. 😉 Enjoy your painting party, Amanda!
Love the piece! I bought a small antique dresser with a ruined finish planning on painting it but have been too scared…two years too scared! I’m excited to try now. I do have one question though. I plan on painting my piece a sea foam green and will distress it. But I also want to had a dark “old english” type glaze. When would I do that? Before or after the waxing process? And is it hard to do?
I loved your makeover of the coffee station. I also painted my first piece with Provence, it is a round kitchen table with a pedestal leg. I was a wreck, but I did speak to the staff at Robyn Story designs and they helped quite a bit. She has a great supply of all things decorative. After painting the table I stencilled the top and I am really pleased with the final outcome. I agree I was fearful of the waxing, I overthought it but did and it looks great. I really do love the product. Thanks for all your tips!
Will this work on kitchen cabinets?
Yes m’am! It’s a big job to tackle kitchen cabinets, but the outcome can be really outstanding if you do it right. Here’s a blog post with some great tips and reflections on how her cabinets have held up after 2 years of wear. Hope that’s helpful. Best of luck!
Wow! Thank you for this fabulous post. Iv just started upcycling furniture so this is perfect for me. Im going to run out & buy this product so I can try it on my next piece. Like you I was nervous about using it but thanks to this I am confident it will be amazing.
This is an awesome tutorial! I have experience using Annie Sloan paint, but I’m sending this link to a friend. Thanks! One comment about distressing; it will be MUCH easier to distress BEFORE any wax is applied. There’s a lot of dust doing it that way, but soooo much faster and easier!! I’ve done distressing both ways and will always distress before waxing.
So you have totally convinced me to try ASCP! Seriously. Quick question.. my dresser I am going to make over is in pretty rough shape. IF I have quite a few rough spots is it best to just sand the whole thing? Or just stick to sanding out ONLY the imperfections. And did you put wood fill in the wholes of previous hardware?
P.s. It is hard to believe this requires no sanding. My mind is like “No you must always sand and prime.. lol”.
Thanks for the tips! All the instructions that came with my paint were in Finnish so it was very reassuring to read your guide and see how straight forward it is. Job done! Thanks ; )
I use Annie Sloan Chalk Paint a lot lately but I struggle with it sometimes, especially with waxing so I use clear satin finish varnish instead for some projects. I like your step by step tutorial and I’d like to add a link to my post about Annie Sloan paint:)
This is what I wanted to know…I love the chalk paint but sometimes want a little bit of shine to it. So you can apply a satin varnish on top of the chalk paint? Any special kind or instructions? I love your input/experience on this.
The more you buff the wax, the more shine you get. But if you want something more satin or semi-gloss, you might try a Polycrylic sealant (affiliate link) instead of the wax. That’s okay to use atop chalk paint! You can read an interesting post on poly vs. wax HERE. And I have some tips on the DOs and DON’Ts of using polycrylic HERE if you’re new to it. Best of luck!
Need some help! This may have been covered in the previous comments, but there were too many to read. I am in the process of redoing my dining room table and chairs. My husband and I have already started sanding it down because it was a lighter wood then the new floors we just put down. My goal is to stain the whole table and all chairs darker to match the floors. Then I want to do an off white/vintage chalk paint to the legs and parts under the actual table top. After I apply the new stain, do I go ahead and seal everything and then chalk paint the legs? Any suggestions on what steps to take?
I *think I understand your project idea – – so, the table and chairs will receive a dark stain treatment…then the chair legs and seat (?) will be painted with chalk paint? If so, then I might skip the staining and sealing part on the sections of the chair that will receive the chalk paint method. Just tape them off when staining/sealing. And do the chalk painting as the last step. If you want a great step by step, check out this post by my blog buddy Nancy over at Artsy Chicks Rule. Hope that helps!
Are you distressing through the chalk paint?
Hi! This has been so helpful and has been so motivational for me! Im off to buy supplies today!
Thank you!!
🙂
Your project came out beautifully! I really love that aqua color with the white knobs! I am one of those who has been intimidated by AS chalk paint but I just picked up a couple of free furniture pieces from CraigsList and I’m ready to get going. I will be applying the chalk paint, then painting some designs with acrylic paint. When should I apply the wax – after the chalk paint but before I use the acrylic paint? Will the acrylic paint even stick if I apply it over the wax? Or should I do the chalk paint, then the acrylic designs, then the wax?
Thanks for the warm words, Cathy! And that’s exciting you have some furniture pieces to play with (can’t beat FREE!). As for your question, I had to do some researching myself since I wasn’t certain of the answer. I definitely think I’d do your acrylic painting BEFORE sealing, so it actually adheres to the piece. But according to a discussion within the comments of this blog post, the acrylic paint will likely resist the wax (not absorb it like the chalk paint), so you could either move forward and just know that the acrylic paint won’t be fully sealed. Or you could skip the wax altogether and seal it with something like Polycrylic, which works for all paint types, which you can read up on in this post about a roll-top desk makeover we did. I will say that waxing is easier than applying Polycrylic in my opinion. So if there’s any way you can get your hands on the colors of chalk paint you want for the decorative painting, that’d be my rec. Best of luck!
Thank you for this clear, concise, encouraging and helpful post! I just painted a record table (as in a piece of furniture meant to hold a record player) from the 1940s that my parents painted mint green for my nursery in the 1970s. I’ve had the piece for over 20 years and always meant to paint it but didn’t know how. I think I was just waiting for AS chalk paint to come along! I completed the project at a relaxed pace over 4 days and really enjoyed it. Your post was a huge help. I painted it Aubusson Blue. It’s a gorgeous shade of blue. Again, thank you for your help and, most of all, your encouragement!
Hi, just came across your tutorial and I am placing an order from The Purple Painted Lady right now! I just picked up a hall tree that needs a makeover and I was intrigued by using chalk paint. Now I see that it so easy, I’m all in! Great tutorial. I can’t wait to get started using this stuff!
I’ve got an antique dresser that needs a re-do and I think that this might be my next experiment! I don’t have experience in painting furniture (beyond the pieces that I messed up in the first place,) let alone with something like chalk paint, so this is exactly what I need to be able to get started. Now I just have to decide what color I want. Cheers!
I loved the table you did, brilliant, and you made it look so simple. I am longing to have ago with chalk paint and wax on a few pieces of my pine furniture. I have been reading lots of blogs but nowhere can I find an anwer to my question, can I paint straight over waxed pine furniture or do I have to rub the furniture down with white spirit.
Sorry I’m just getting to you question now, Ruby! I hope I’m not too late. So, according to this post, if the pine is untreated, you’ll want to shellac FIRST to wood knots and grains to prevent the tannins from bleeding through. However, if the surface is “waxed” as you said, I would probably just wipe it down with some gentle dish soap and water just to rid it of any dust or surface debris. As long as it’s not a super glossy surface, the chalk paint should adhere to it just fine. Let us know how it goes! And good luck.
Hi, thanks so much for your tutorial! Chalk Paint is hard to find in Italy and the 2 website that have it are not well stocked 🙁 but i will keep trying!!!
I want to do my kitchen, first project…am I taking on too much? Also want to do a bedroom wood parquet floor, will it wear well? And what about tiles?
I have a lot of painting to do!
Best of luck securing some Chalk Paint for your projects! It would be a lovely excuse for me to travel to Italy to bring you some. 😉
Wow, I’d probably recommend trying a small furniture piece as “practice” just to get the swing of the technique, but it won’t take you long before you are feeling comfortable and tackling bigger projects like your kitchen!
As for your question about wood parquet floors, I’d recommend reading up on some blog posts where folk have gone through this process. And the Annie Sloan website has some great tips for how to make it durable. Check it out HERE. And good luck to you, Vittoria!
Loved the paint colour. Have you thought of painting the picture frames above the drinks station to match? Thanks for the fab tutorialxx
Thanks so much for the info and encouragement. I have a can of Annie Sloan Chalk Paint and Wax waiting in the wings to paint my huge oak china cabinet, but have been too nervous and unsure of myself to start it. What if I ruin it? What if I hate it? What if it turns out looking awful? I have been paralyzed with fear, but now I am ready to tackle it. However, since I have waited this long, I will impatiently wait until after the holidays to start on it! I can’t wait to see it, as the star of my dining room, wearing it’s new coat of Napoleonic Blue!
NormaJean, I got such a smile thinking of your dining room star…hopefully still proudly rocking its Napoleonic Blue four years later!
I just did my entire kitchen cabinets in Annie sloan off white and dark glaze an 4 coats of wax they were 1990 builder oak cabinets , lot of work but what a change
Oh wow, Suzie. That sounds fantastic! Yes, I can imagine that it would a lot of work – – but well worth the effort. You inspire me!
Your 5 stages of AS chalk paint crack me up! They are so true!! I’m in the middle of my first AS project- my kitchen cabinets!
Hi Erin, how did your kitchen cabinets turn out? I am really interested in doing mine. Any tips you have? I am a little nervous about it.
Thanks, Laura
I understand the nerves. It’s a big job, but the outcome can be really outstanding if you do it right. Here’s a blog post with some great tips and reflections on how her cabinets have held up after 2 years of wear. Hope that’s helpful. Best of luck!
I painted a chair with the AS paint and then applied the wax. I wasn’t sure if I applied enough wax. I just had a little on the brush and spread it on, I think I waited about 10 minutes then buffed with a clean cloth. The chair seemed a little “tacky” for lack of a better word when I would rub my hand over the surface. Did I not buff it enough? It would seem like you would wipe it all off if you buffed it too much. Still a little unsure about the waxing process and what it should feel and look like when finished the correct way. Advice?
I know my M.I.L. has left the wax on (without removing) overnight even. Then, she removes the wax / buffs it in the morning. So there are a few approaches. Has it hardened up over time? Our table isn’t tacky…but I have had that happen with Polycrylic, especially if I’m using it in a humid environment. Let me know if I can help you troubleshoot in any way!
You can buff it at any point in time. In fact, some recommend buffing it every-so-often. (Depending of traffic of the piece)
Hi Cindy! From what I’ve read, “tacky” means there is too much wax. It will dry & become less tacky in time (a day or two), then you can buff. From all the reading I’ve done on the product, you can buff anytime after its dry. Some even say buffing often is necessary.
Hello!
I was looking for instructions about chalk paint because I am on “stage 0” and I found your website. I love the way you explain the steps of making your project. No doubts! I’m determined to use chalk paint.
Thanks from Valencia, Spain.
Oh yay, Tere! I’m so glad to know my post helped give you a boost of courage. You can do it! And let me know when you finish your first project; I’d love to send some cheers from across the pond. P.S. You should read my post from today! I mention Spain…and how it’s on my bucket list to visit your country someday.
I must be living under a rock because this is the first time I’ve heard of this paint! One, I love the packaging, so you got me there. Two it sounds pretty nifty and I’m interested in waxing now. Three, your table looks super awesome! I love love love the color! Nice job! Found you on the I Should Be Mopping The Floor link up =)
It’s magnificent stuff, Kyla! And I agree – – the presentation is top notch (which says something, doesn’t it?). Aw, so glad you approve and that you like how the table came out. Hope you get a chance to try the paint sometime. You’ll get hooked! Thanks for popping over from I Should Be Mopping the Floor – – one of my favorite link parties, for sure.
BTW, I’ve teamed up with a couple other bloggers to debut a new linky party tonight (Saturday) at 8PM called Found & Foraged. You should stop over! Your posts are perfection! http://houseofhipsters.com/
Could this work for a laminate surface?
Angely, I’ve not tried it yet myself, but in my online research, the consensus is that YES, you can use Annie Sloan Chalk Paint on laminate surfaces. You just need to be sure the surface is clean and the Purple Painted Lady recommends giving it a very light sanding with some 150 grit sandpaper to ensure the paint’s durability. Good luck!
What a lovely transformation! The color is great and you made it look so easy.
I will look into Annie Sloan paints for some of our furniture pieces in OG.
The knobs were a perfect choice.
It’s just the perfect hot drinks station!
Looking forward to a stop at that station really soon! 🙂
Oh yes, I think you’d really enjoy working with Annie Sloan…especially for your beach-tastic OG furniture! Oh yes, I, too, can’t wait for you to end some drinks at the new and improved hot drinks station. I have the k-cups carousel all re-stocked and ready fer ya!
Thanks for the great tips and making it look so easy. Great tutorial!!!
You are so welcome, Ellie! I’m glad you enjoyed it!
Great tuitorial; well done and in layman’s language too! I have nothing but dark cherry furniture and I’m so tired of it but DH wouldn’t let me change any expensive furniture but I have some Sauder and Sullivan pieces that I wouldn’t mind trying it on. Guess you would consider them laminate..will AS paint work well on them? What about metal file cabinets? I’m going to stop by Habitat for Humanity resale store and they always have some older furniture pieces, some you can tell they were expensive when purchased by original owner that donated them. Prices are right and it would be a good place to start. I’ve seen some beautiful pieces come in and same way at another local thrift store. Somebody mentioned the price of AS paint, if $34.95 is price, that’s no more expensive then Benjamin Moore paint that we love to use.
Yep! Laminate surfaces is GREAT for Annie Sloan Chalk Paint. The Purple Painted Lady recommends making sure that laminate surfaces are clean and that you give them a very light sanding beforehand. And you’re right – – it’s really not crazy expensive considering the quality and how far it goes. I’m planning on getting several more furniture projects out of this one quart. Best of luck with your projects, Betty!
Great tutorial, love the color!! I just started painting an old dresser, I used pure white by Annie Sloane, did 3 coats, suddenly as the paint was drying I noticed that the color was changing to a creamy yellow, so now I’m just stuck and wondering what I should do…I bought the dresser last week on the classified ads, I’m thinking that this dresser must have been waxed with pledge or something and that’s why the yellowish color is appearing…any ideas??? Help!!!
Hi Corinne! Thanks for you comment! And I’m so sorry to hear that you’re having trouble with your dresser project. One of my favorite resources for all things Annie Sloan is The Purple Painted Lady. If you check out THIS POST of hers, and scroll down to the section on “What To Do About Water Stains or Wood Grain Bleeding Through Paint?” and perhaps her tip about spraying with clear Shellac will help fix your bleeding problem. (The Annie Sloan Unfolded website confirms this technique and says you can put it right on top of your chalk paint without needing to strip or sand it down. Phew!) Good luck! And let me know how it goes.
I’ve been wondering where the best place to pick up this brand of paint products is??
~ thanks
Kirsten, Annie Sloan products are sold through retailers (or “stockists”) in the US, Canada, UK, Australia and New Zealand. Just click HERE to search to find the stockist nearest you. Not near a stockist? Many of them ship! Happy painting!
Hi Lauren, I love all your projects! I was wondering where you got your adorable coffee mugs and cream and sugar set. I love them and would love to have some myself. Thanks!
Aw, thanks, Angela! Ya know, the coffee mugs, creamer, and sugar set were all from Crate & Barrel 5 years ago when we made our wedding registry. Hope they still have them! They really are fantastic. Or if not, you might be able to find some used ones for sale online somewhere? Or DIY your own!!!
Thank you for the wonderful step by step info. I am off to buy my first tin of Annie Sloan paint. i would just paint the inside of the drawers as well. White perhaps? Have a look at the blog LIVELOVEDIY. I also paint everything I can lay my hands on but I am going back to al my pieces to paint the inside of the drawers soon. Happy painting
Oh yes! Both Annie Sloan and painting the interior of drawers are two of my favorite things – – though I have yet to combine the two! You’ll have to pave the way and let me know how it goes. Here’s our post where we painted the inside of my roll-topdesk drawers a bright turquoise for a pop of fun. It was time consuming, but oh so fun. And if we had used chalk paint, we would have saved ourselves at least one if not two coats! Happy painting to you, too, Erna!
Love your transformation. Provence is one of my favorite colors in the ASCP line! Nice job! ~Michelle
Why thank you, Michelle! Provence is one of my new favorite colors period. Will probably need to push myself to try something different next time! #provenceallthethings! Lol.
I have been wanting to do a project with ASCP and searching Craig’s list for a roll-top desk. I found your blog last night and you have projects using both.
I love your step-by-step descriptions. I have a bit more confidence beginning my upcycle project.
How well will chalk paint hold up on furniture frequently used by kids under 10 yo? I am assuming well cured wax will provide a protective layer.
Haha I can completely identify with the thinking steps! It really is amazing how easy it is! I just madeover my daughter’s bedroom furniture (a headboard/footboard and dresser I thrifted for a total of $35) and it looks so expensive and chic now. I just bought a new color to play with in our living room. Your comic strip was way too cute. 🙂 Great makeover and super cute coffee station! I love the color you chose.
Oh my goodness, this is amazing. I have a big huge dresser staring at me in my bedroom waited to be painted… How long did take you? Visiting from Mabey She Made it linky 😉
come visit me at
http://kraftmint.com
I saw in your newsletter that you finished your painted piece! Love the color and it turned out so well! You’ll see how addicting and empowering a little paint can be… soon you’ll be looking around and thinking about how your table or and old dresser would look in a new color! I’m glad my little mineral spirits tip helped out too 🙂
Thank you SO much, friend, for all the tips you shared with me – – and mostly for the boost in self-confidence. It was JUST what I needed to finish ‘er up. And yes, now I’m hooked for life!
Oh my goodness Lauren what a difference color makes! I am crushing on this table now and love all of your tips and steps included in this post! I too was intimidated by the whole wax thing when recently re-doing some coffee tables, but realized it’s not as intimidating as it seems, and watching tons of videos definitely helped. Love this post AND your new table!
Yes! Thank goodness for the YouTube, no? Kicking myself for being intimidated for so long. But now, there’s no turning back. 😉 Thanks so much for the warm words, friend. Table crushes from you Katie are such a boost to the ole confidence!
I love this post. I’ve been wanting to try AS chalk paint for a long time. Two things holding me back. It’s expensive and I fear I will make a disaster of my piece of furniture. Thanks for the inspiration! Your piece is beautiful.
I had those SAME exact fears, Carol. But after using it, you can quickly see how many projects you’ll get out of one quart (plus how much you’ll save on expensive primers). Also, I don’t think it’s possible to make a disaster of furniture using A.S.C.P. I really don’t! I hope you have the opportunity to try it out for yourself, Carol. You’ll fall in love, I know it.
Thanks for the tutorial! It’s great!!! Also, I love your new coffee station…I think the knobs you selected really make the piece!
Aw…thanks, Marilyn! I’m partial to the knobs, as well. Gosh I love the knobs row at Hobby Lobby…. 😉
I too am a beginner, getting better though. I am a total advocate for Annie sloan chalk Paint. I think its the best I’ve tried several and even made my own. their is nothing smoother or silkier. A new step that I have started is, I always do 2 good coats. and I water down my paint for a third coat. I then sand my entire piece (every surface) with 320 or 400 grit sandpaper, lightly not to distress but to smooth out. I wipe the entire piece down with and damp sponge and then I will distress edges with a damp sponge (or 600 grit sand paper) I tend to have more control and keep the patina of the wood underneath using a wet distress style. Doing this makes for an almost factory like smooth finish after waxing. It still has the painted vintage style in a more modern way. Thanks for sharing your tutorial. I think this paint is for anyone and everyone. sooo sooo simple.
Thank you SO much for sharing your new step, Leigh! I’m definitely going to try that next time. Question: do you water down your paint by pouring it in a separate container and mixing it up? And how many parts water to paint would you guess? So glad you approve of the paint, too! As a fellow beginner, your testimony definitely helps add credibility to mine. 😉
Yay! Thanks so much for the information and confidence. I’ve been wanting to try out the Chalk Paint, but have been very intimidated. I think I need to run and buy some asap! I have 2 dressers in my step daughters room that are brown and 32 years old! They could stand to use a fancy face lift….plus the pink and white bed is starting to make fun of it. 🙂 Can’t wait to tackle them and put on my blog (and reference your steps). 🙂
Yes, Jamie! Run run run and get your creative hands on some. Those dressers are going to silence that snickering bed as soon as your doll them up with some Annie Sloan Chalk Paint! (Oh, and I heard from my MIL that Annie Sloan just released a new shade and it’s PINK! Perfect timing, eh?) Let me know when you share your post on your blog! I’d love to feature you in my next Reader Showcase. 😉
I had the old white and gold furniture from the 80s and I painted it with a seafoam green type color chalk paint and it turned out beautiful where the gold trim was around the white dresser it went into the groove and it made it so gorgeous I just love it I wish I had more of it I will look for them at yard sales now. Outdated with a new flare with the truck paint is amazing
That does sound divine! Love the color combo you chose. Happy yard sale picking!
I love the tutorial! I bought my first can of chalk paint years ago, and had no idea you had to wax it! It wasn’t until I had my dresser taken apart in the garage and halfway painted that I learned you had the wax the whole thing! It turned out super easy (like you said) but I was freaking out! Good to know I wasn’t alone in being intimidated by the waxing/buffing stage!
I love how it turned out. I tried a different brand of chalk paint – which was my first time using chalk paint & I fell in love. I’m looking forward to trying the Annie Sloan brand. (Sloan is my maiden name – so I’m sort of drawn to it) I also tried the wax over a project I painted with standard flat paint. It worked quite well too.
Oh yes, Gina! Already being a Sloan, I have a feeling you’ll take to it like a duck to water. 😉 And I didn’t know you could use wax on latex paint – – good to know! (Now, you’ve got my gears turning.)
You are a life saver! Well, a furniture saver, at least. I have an Ikea cabinet I wanted to paint to use in my new bathroom, but figured it was impossible to paint laminate surfaces without a lot of work. You’ve solved my problem! Now to choose the colour… 😉 Your table looks lovely, Lauren. Love that colour.
Oh yay, Meggie! I’m always delighted when I get to save someone else some time – – and yes, I’ve heard A.S.C.P. is grrrrreat on laminate surfaces. Oh, and you have so many fabulous colors to search from. And remember, you can mix the paint, so if you wanted to lighten or darken it a few shades, you could! Happy painting!
It looks fantastic, Lauren! I love the fabulous colour. I’m a huge fan of both chalk paint and Purdy brushes. I didn’t know to keep my brush in the fridge, though! I always just wrap them in a plastic shopping bag and squeeze out the air while waiting between coats. Great tip – I’ll try that next time.
Oh yeah – – just pop that plastic shopping bag in the fridge, and you can take it out in 24 hours and be good to go! (Watch out though – – it will encourage you to take frequent snack breaks when you open that fridge, ha ha.)
Beautiful. I love the white knobs with the turquoise. Maybe I need to get over my fear of chalk paint. I have two night stands that are in desperate need of painting but I’m just so nervous about it. Also, I can’t believe how nicely you’re dressed when painting/waxing. I usually work in old, paint-stained pjs.
Oh yes, Al – – you can totally conquer that fear! (This is a girl who shared in that same fear just a week ago.)
Oh, and I have learned my lesson to wear painting clothes when painting – – I probably should have changed back into them to wax, but I was daring. Ha ha. Thankfully, waxing was not a messy job at all.
I LOVE how this turned out! And what a great how-to! I have been dying to try out AS chalk paint, and now, of course, I want to even more!!!
Aw, thanks, Bethany! I’m SO excited for you to try it out. Seriously, with your creative brain, the sky’s the limit for what you can transform. Eek!
so pretty – love that color- I have used other chalk paints but have not bitten the bullet to splurge on hers! yours is great!
Thanks, Kelly! Yeah, that Provence color is inspiring me to re-imagine our entire living room and kitchen color scheme. It’s just so calming. Gotta get my calm on, wherever I can!
Great job Lauren! Really turned out well. Just so your readers know, Annie Sloan paint can be ordered from some stores, I have ordered from Robyn Story Designs in Tampa, they are very helpful If you have questions, and ship very quickly. Note: For small projects you can also order sample pots which are much less expensive and of course small quantities.
Thanks, Mom! You were such an inspiration to me with your many Annie Sloan Chalk Paint transformations. You really paved the way…. And that’s great to know that Robyn in Tampa is so easy to work with. I’ve heard great things about her from others! We might need to take a road trip together sometime to visit her shop in person!
Great colour choice. I recently became introduced to Annie Sloan paints and can’t wait to start experimenting!
Thank you, Karolina! Provence was a clear winner for me when I was looking at the color palette – – now I’m eager to try one of the whites on a bench I have. You’re going to have so much fun with the paints once you dive in!
Thanks. I just decided to use normal paint for my kitchen buffet. But now I’m again in the “Okay, I WANT CHALK PAINT!” phase! Annie Sloan Paint is so hard to get here. I have to do some reseach and see if there is any other chalk paint I can get more easily or if and how I can get Annie Sloans paint……
Anyway! I love your little table and especially the knobs, they are so cute!
Hugs!
You’ll just HAVE to journey over to the states and visit so you can load up your suitcase with lots of Annie Sloan Chalk Paint and of course, swing by Orlando for lots of Lauren hugs. (I don’t see any other reasonable solution, do you?)
😉
I ordered my Annie Sloan Chalk Paint online and received it within a few days.
Excellent work, Lauren, and the color you chose is just heavenly!! Love that you are joining forces with the Chalk Side, sweet girl!! 🙂 Can’t wait to see what you have in store for us next!
Ha ha. “The Chalk Side.” It’s a whole new world, and I am loving it! (Can’t believe it took me this long.) Thanks for the vote of confidence, friend!
Terrific results Lauren, It really transformed your little table beautifully. I was happy to see a couple of stockists close by me in Western Australia too! I’ll have to pop it on my list of things to try 🙂
Thanks for the kind words, Pam! And that’s awesome to know you have some stockists in “the neighborhood.” I have a hunch that you’re going to fall in love with Chalk Paint, too, as soon as you dip in that paintbrush. 😉
Love the color and those cute white knobs!! It turned out so pretty!!!
Why thank you, Tori-dorable! (Has anyone ever called you that before? If not, I claim it as MY nickname for you. Ha ha.)
Awesome. I’ve been stuck on #2 for a long time, but maybe I’ll give it a try soon. I want to paint my piano but haven’t because I don’t want to sand the whole thing down. This might be a good paint to try for that project.
Oh yes – – if you’re looking to avoid the sanding / priming process, this is a great way to do it! And as long as you carefully protected those sweet ivories, I could see this being a project for the record books. You’ll be at stage #5 before you know it, Rebekah!
I LOVE this!!!! You are amazing Lauren! Perfect color, makes me want to try it 🙂
Aw, thanks, Tondra! You are too sweet, my friend. You should totally try it! I know you’ll get hooked, too. Sending hugs your way!
You did it!! Yay!! Sounds like you made a new best friend to me! This table turned out so great 🙂 Provence is one of the colors I haven’t used yet, but you’re making me think it needs to be next on my list! So glad you took the AS plunge, welcome to the club!
Thanks for the warm welcome. You played a big role in encouraging me to get to this point, Bre! Seriously…thanks for bolstering my confidence! (And for the paint brush tip.) Oh, you’ll love Provence – – it matches your blog logo! Yes, definitely add it to the TO PAINT list.
What a BEAUTIFUL JOB, LAUREN! Your piece of furniture looks gorgeous and professionally done! Really amazing work! Am going to HAVE to find where to purchase some Annie Sloan products, and try to make some “furniture magic” myself! Thank you for your encouragement and inspiration.
The “furniture magic” is yours for the making! I’m excited for you to give it a go, Cindi!
Wow! Of course, you got me so excited, I now want to pull off the matresses from my fourposter, and start immediately! Thank you. Personally, I find most videos tedious and your explanatins are just perfect. Clear and concise.
If I may? Re arrange the pictures on the wall so that they are lower, move the largest one over to the space to the left of the coffee make and hang it a bit lower to maker, place ALL of your pods in a drawer as really, the holder is just not” clean”.
Don’t know what is on that card, but do consider if it needs to be on display ALL the time and finally, run that black cord downt he back of the leg, connect it to a Very shot extension cord in white (or move the table farther to the left but it probably is nice there close to the window, can’t tell withour seeing more), run the extension along the baseboard attaching it with small cable tacks and then up to the socket. Use one of those small, wire covers and paint it the same color as the wall (together with the plug of course prior to plugging it in – hah!) and voila!
Anyway, thahnk you again for giving me theh courage to try this, as soon as I leave this desk I am going out to cast an eye about to find the perfect to piece with which to beggin!!
Thank you for passing on all your wonderful tips and EASY to follow instructions!!
ox Tilde
Ha ha. I should hire you as my own personal home decorator! Great ideas here. We’ve since really changed up the space including the photos on the wall…but I’m grateful for the tips you share! So happy you found the instructions helpful, Tilde.
Hello Lauren,
One more tip I have used successfully for years. Cut some felt to the same shape as the base of the legs on any furniture that is positioned on hard floor, especially chairs. Using contact cement, glue the felt in place.
Furniture can now be moved easily for cleaning or seating without any damage/scratching to the floor.
About to venture using your instructions to update a buffet.
Thank you for the help
Great tip, Peter! Hope your updated buffet turned out beautifully.
Great suggestions!
The card is to explain how to use the Keurig. Which I would imagine is very helpful. I don’t even know how to use ours since I like my coffee SUPER s t r o n g. I would probably blow it up without the directions.
Ha ha. Yes, the directions are helpful, especially with houseguests!