Recycling Pallets into a Rustic Recycle Bin
There’s one corner of our kitchen that has never ever been photographed to appear on the blog; not even close. It’s the corner I always crop out of photos because…well…it’s the definition of a hot mess. Or rather, it was the definition of a hot mess. I give to you our recycle bin corner: before and after.
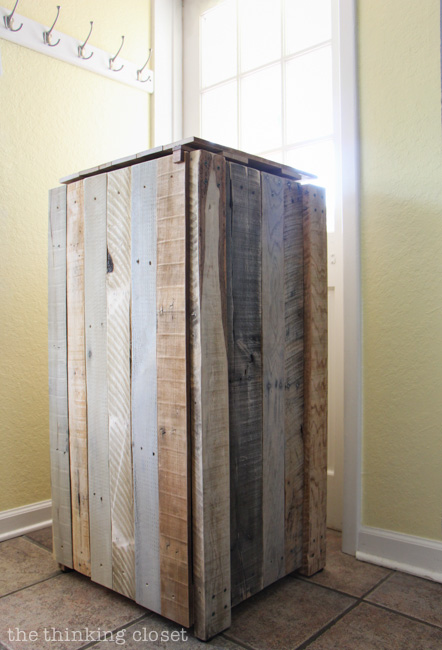
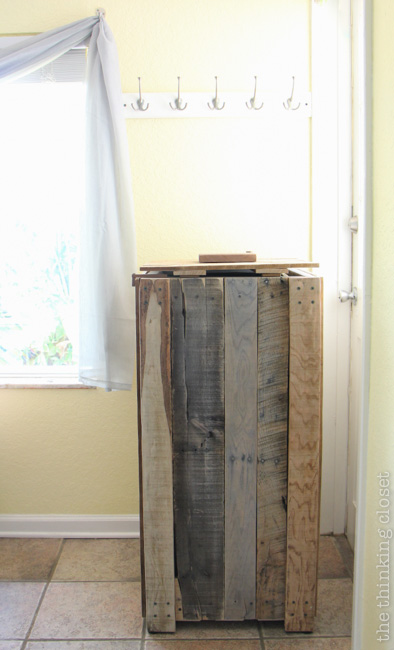
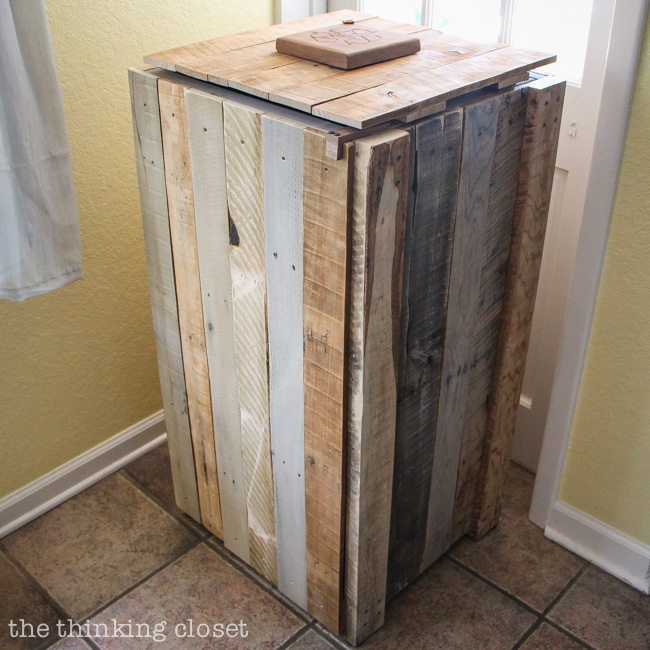
Now, ain’t she a beaut? Here’s the backstory on how our Rustic Pallet Recycle Bin came to be.
Mark and I were complaining one night about how our two little white plastic recycle bins were always overflowing, it seemed, even when emptying them a couple times a week. Their lids were hard to open and close. And let’s face it: they weren’t winning any beauty pageants.
Suddenly, a lightbulb went off. I said, “You know what would be perfect for our recyclables? Something like the teak hamper in our bedroom!”
And Mark’s eyes lit up, catching the vision, too. “But made from pallet wood!” he added. And the rest is history.
Mark built this baby top to bottom, and he’s going to walk you through the steps he took in case you, too, are fed up with your recycle bins and want something bigger, better, and with a rustic vibe that perhaps fits your style like it does ours. Take it away, Mark!
Mark’s Konstruction Korner
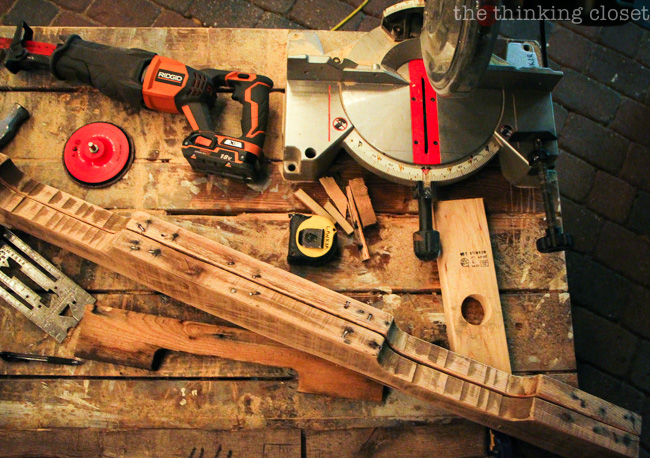
Okay, so if you want to build this recycle bin, here’s the supply list:
- pallet wood (approximately 2 pallets worth)
- (2) 2″x4″x8′ studs (standard white pine)
- 1.5″ x 1″ strips (can be cut from a piece of 2″x4″)
- wood screws (you’ll need some 3″, 2.5″, 1 5/8″ and 1″)
- 4 hinges (reclaimed or purchased)
- drill
- miter saw (chop saw)
- reciprocating saw for harvesting pallets and making hinge notches
- small scrap of hard wood to make trap door and latch (i.e. pallet wood or walnut)
- leather scraps
- optional: *wood burner
- (4) heavy-duty anti-skid pads
- Husky brand contractor clean-up bags
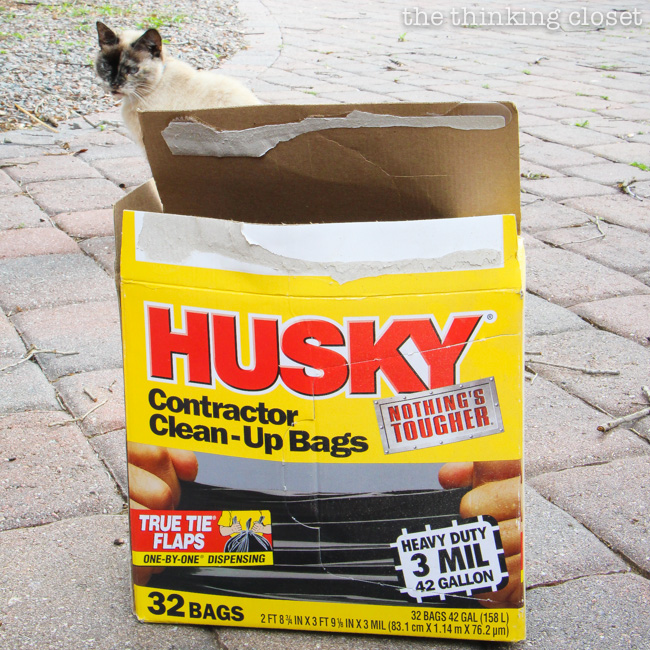
And the full run-down:
Step 1. Gather your pallet wood. Find some pallets to harvest for wood. Earlier this year when sharing how we built our Pallet Headboard, we wrote a whole post with tips and tricks for working with pallets. There’s even a short video demo! Click HERE to check it out.
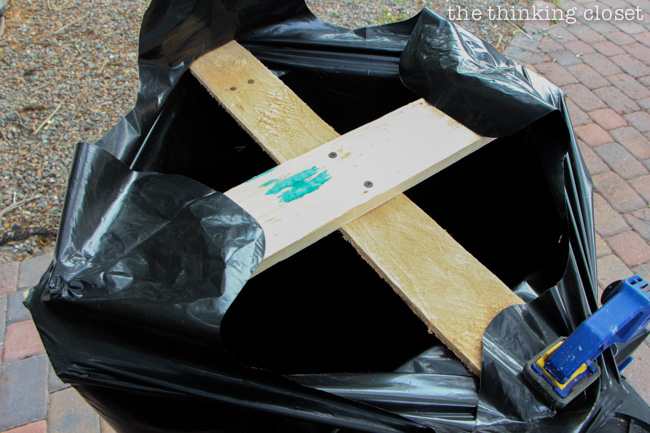
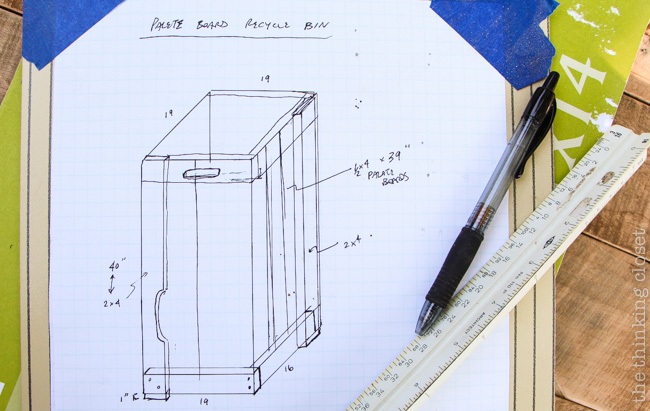
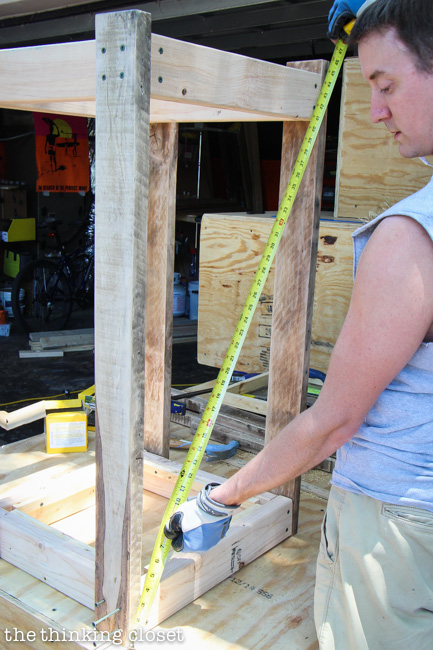
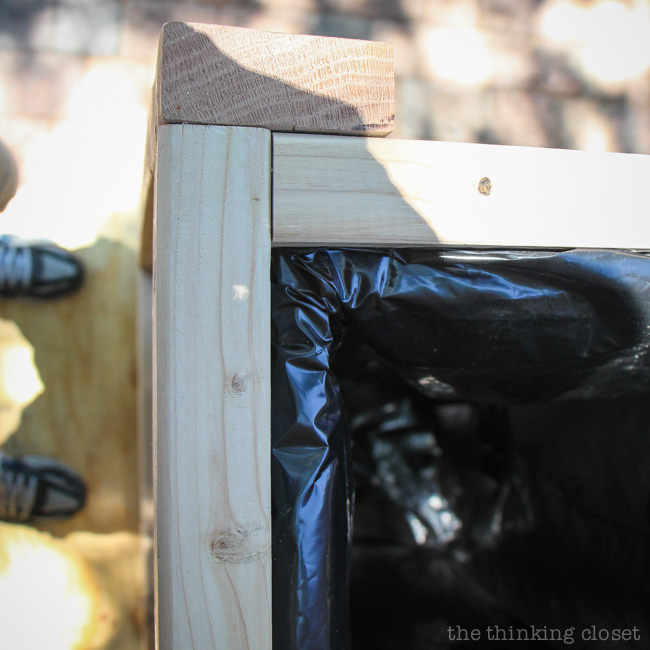
Step 2. Determine your dimensions. Starting with the size of the bag, I took measurements to determine what size square the top of the bag could be stretched around and how tall the bin should be. Since we wanted to really max out the size of our bin, we used Husky brand contractor clean-up bags.
Our dimensions ended up 40″ for the outside legs and the pallet boards that fill in the side walls are 39″. The large outer frame is 19″ square and the small inner frame is just under 16″ square (the inner frame needs to fit inside the outer frame).
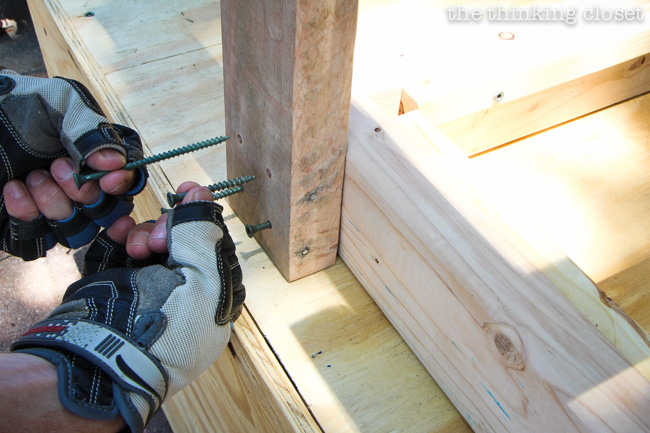
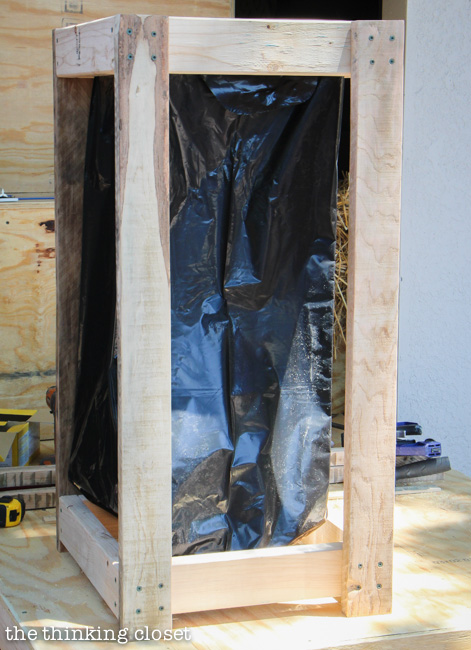
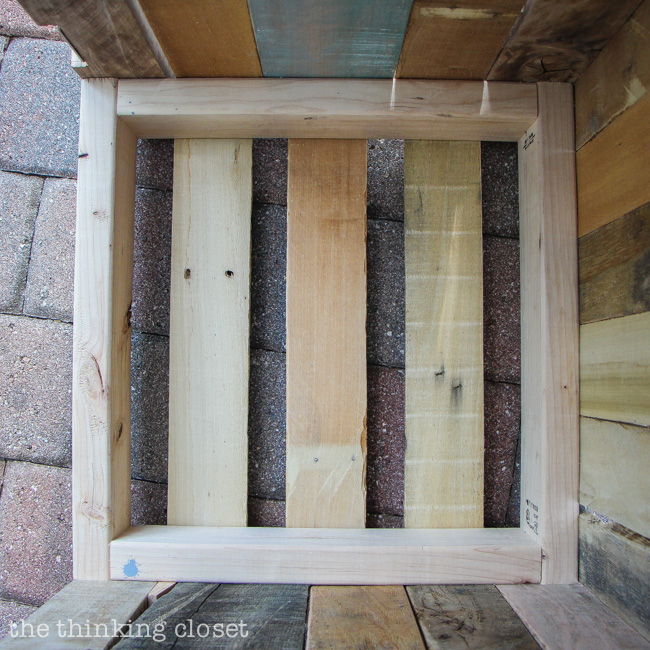
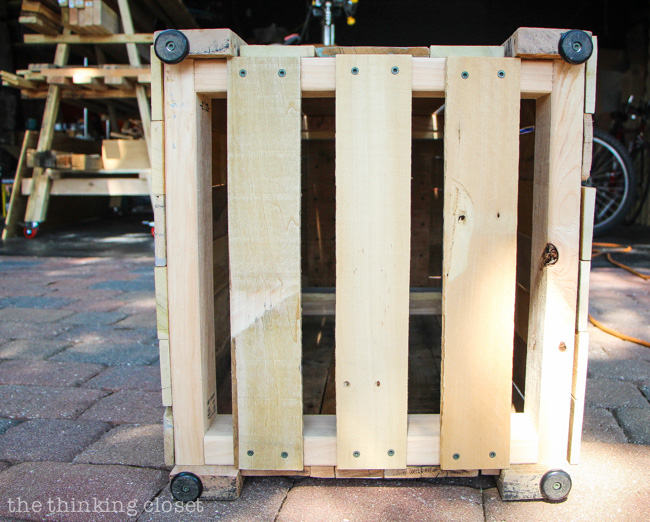
Step 3. Build the box. I used standard white pine 2″x4″x8′ studs to build 2 square frames each 19″ in outside diameter (for the top and bottom). Then, I connected the 2 frames with 4 legs using sturdier pallet boards (approximately 2″x4″x40″). The bottom frame should be 1″ off the ground.
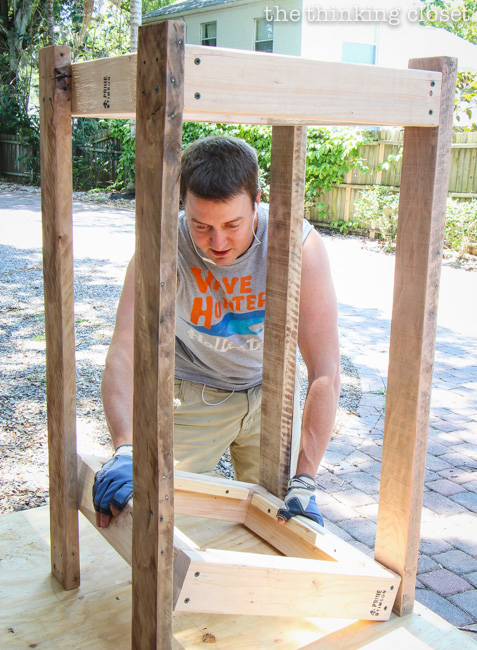
Check that it’s square at every step, especially when connecting the 2 frames, using the corner-to-corner measurement method in all planes.
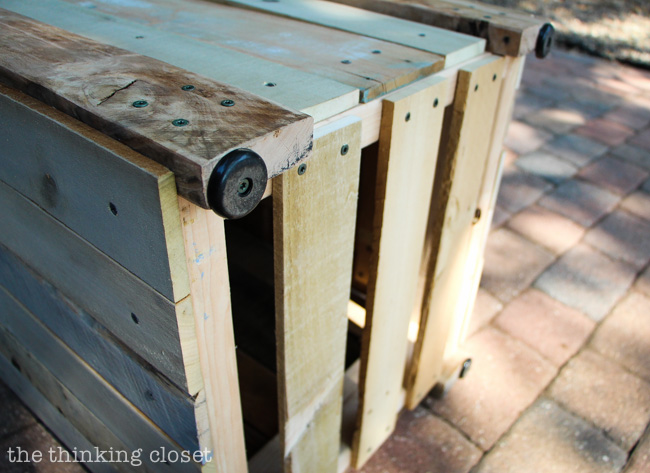
This is also a good time to place the heavy-duty anti-skid pads on the bottom of each of the 4 legs.
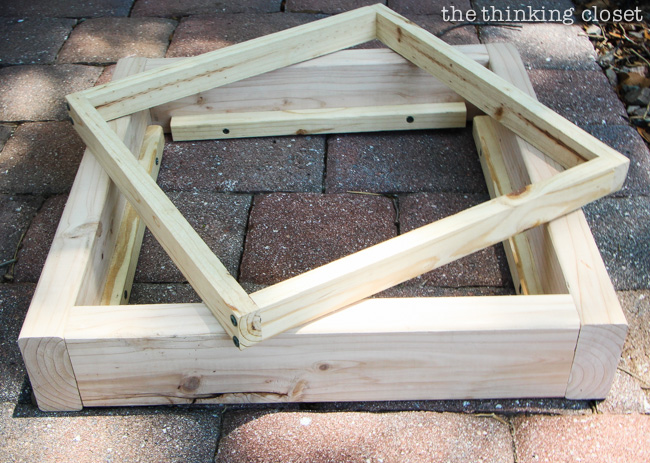
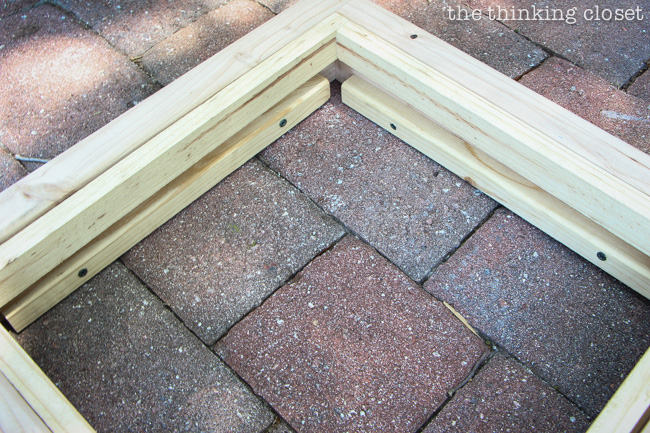
Step 4. Build the bag-grabber. Next, I created the small square frame that would fit within the top large square frame (just under 16″ x 16″ to fit inside 19″ x 19″ frame). This piece will secure the plastic bag to the top frame until it’s time to unload. I also fastened 1/2″ x 1″ stoppers inside the outer top frame to keep the inner frame from sliding down. It should be a snug fit, but when a plastic bag is wrapped around the inner frame, it is actually easier to place it back in the outer frame because of the slippery bag.
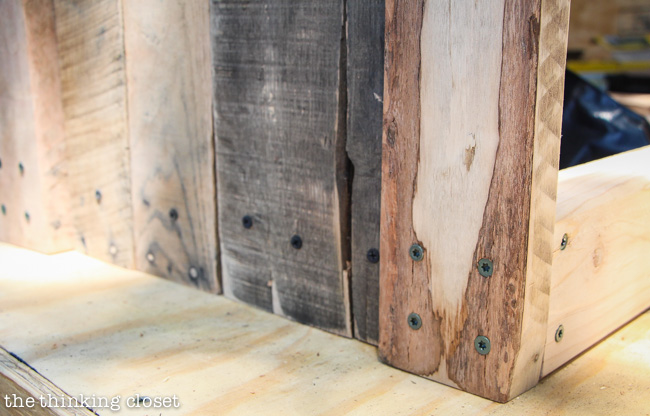
Step 5. Build the side walls. Since the leg heights are 40″, you want the side walls to be made of 39″ pallet boards (so they are one inch off the ground at the bottom). Pre-drill them at the points where they will intersect the outer frames, then use wood screws (1 5/8″) to fasten them side by side. Because of the way the 2″ x 4″s are laid out, there’s going to be a skinny side wall gap and a wide side wall gap. Leave open one of the wide side walls, since it will become the side door in the next step.
Step 6. Build the side door. One problem we ran into after finishing the whole project the first time was that once the bin was full, it was difficult and awkward to pull the bag out of the top of the bin; it really needs a side door. So, I recommend incorporating that into your design from the start, before putting everything together.
Here’s how to do it:
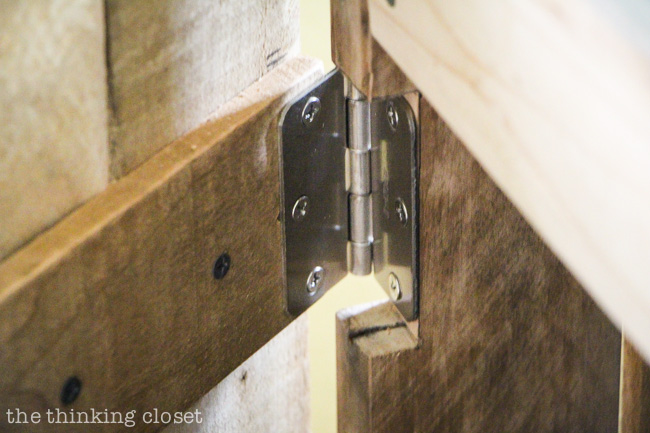
- Cut notches in one of the vertical beams for the hinges using a reciprocating saw.
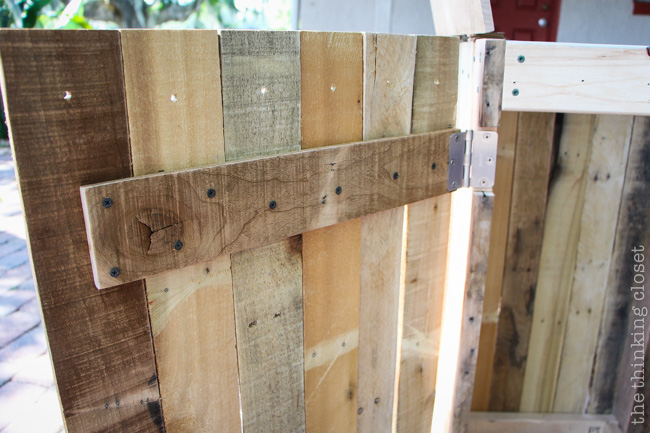
- Once you get your measurements down, lie your 39″ boards parallel on the table so that you have 20 – 21″ of coverage, then lay your hinge boards (mine ended up 19″) perpendicular to them, so they are flush on one edge. (This will be the inside of the door.)
- Then, screw the hinges down to the horizontals on the flush side. Now you have a door with hinges ready to attach to the bin.
- Make sure there are no sharp screw ends sticking out anywhere, and if there are, file or sand them down before proceeding.
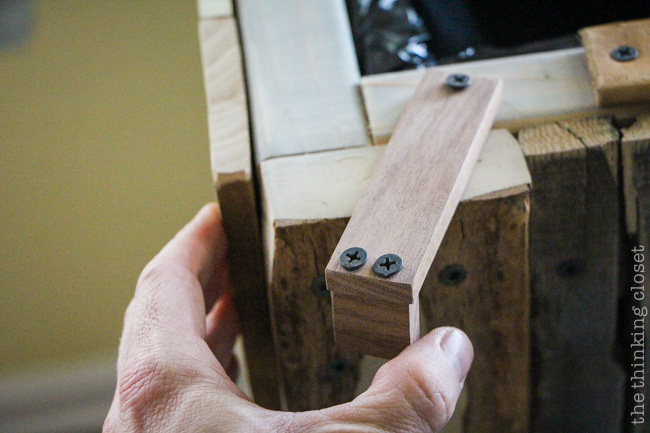
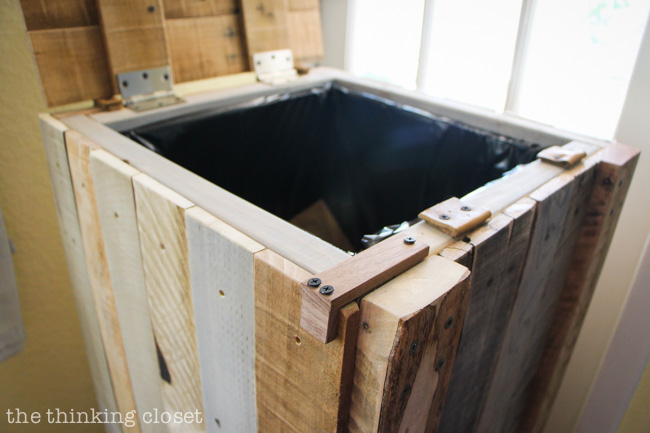
- The latch was created with 2 thin strips of walnut; you could definitely just buy a metal latch as an easier alternative. But if you prefer the wood latch, just use a strong wood and pre-drill to avoid splitting.
TIP: Anytime you are screwing boards together, the top board (the one you are going through to get to the other board) should be pre-drilled, slightly larger than screw diameter. The board that you are going into should be pre-drilled slightly smaller than the screw diameter if it’s a hard wood (anything but pine). In other words, if the screw is grabbing into a hard wood board (including pallet board), run through this pre-drilling process to prevent splitting.
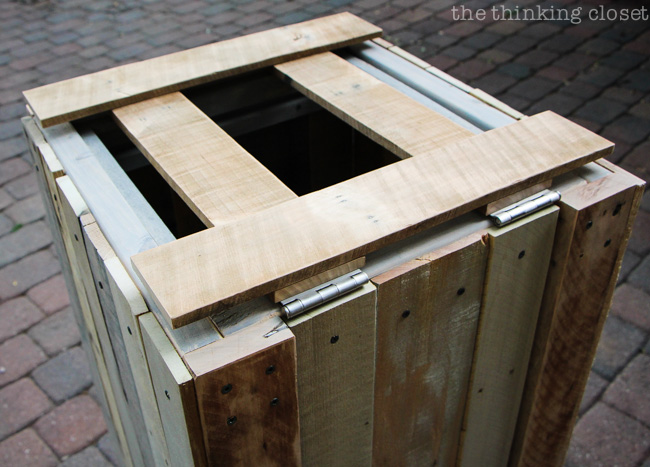
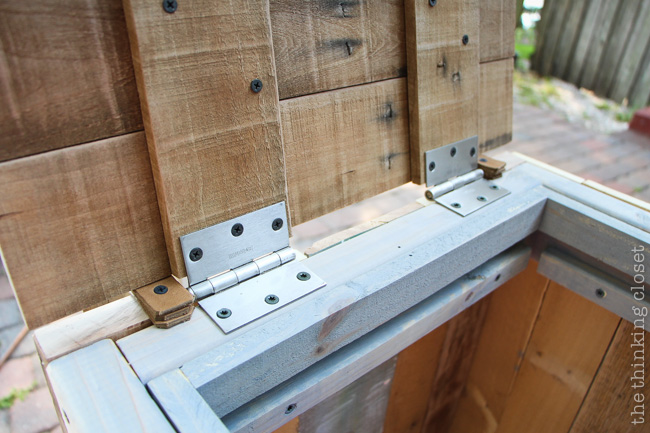
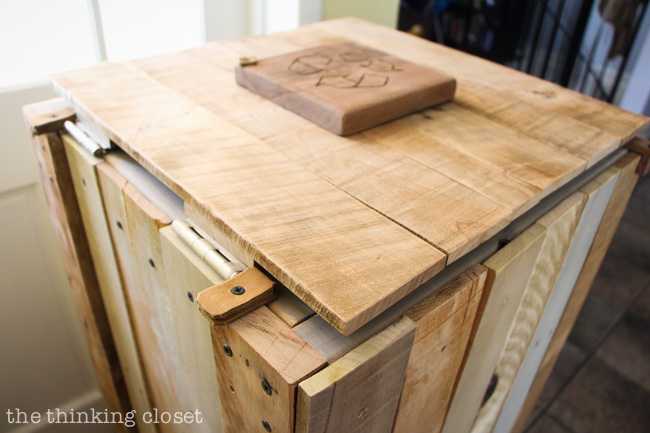
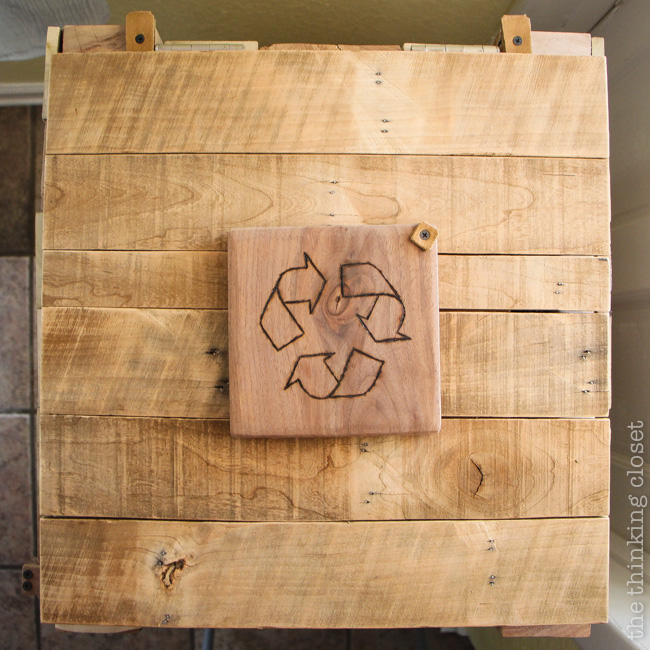
Step 7. Build the top lid. Next, you’ll build the top door that will lift like a lid with a hinge on the far side. Just like you did with the side door, you want to build the lid and attach hinges first…then attach the hinged lid to the bin. The hinges attach to 2 pallet boards, which are then covered with perpendicular boards, except for the square in the center, for which you will measure boards to cover each side, leaving a square hole. (Ours was 5.5″ square.) I used strips of stacked leather to make a soft-close and to keep the door from falling all the way back behind the bin.
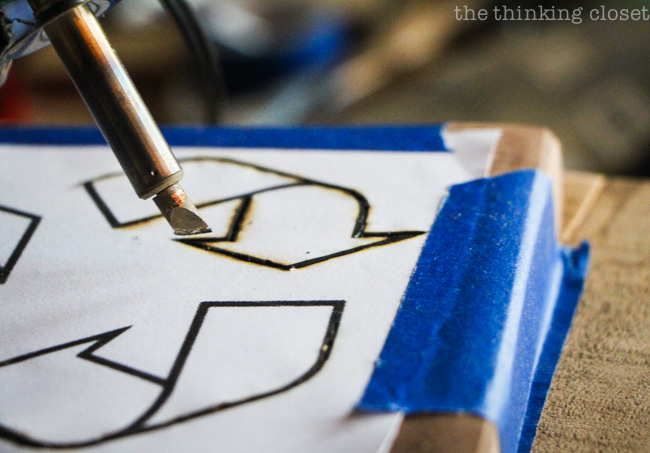
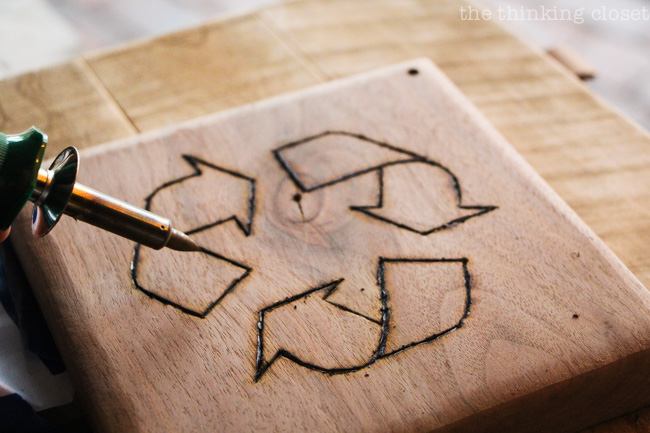
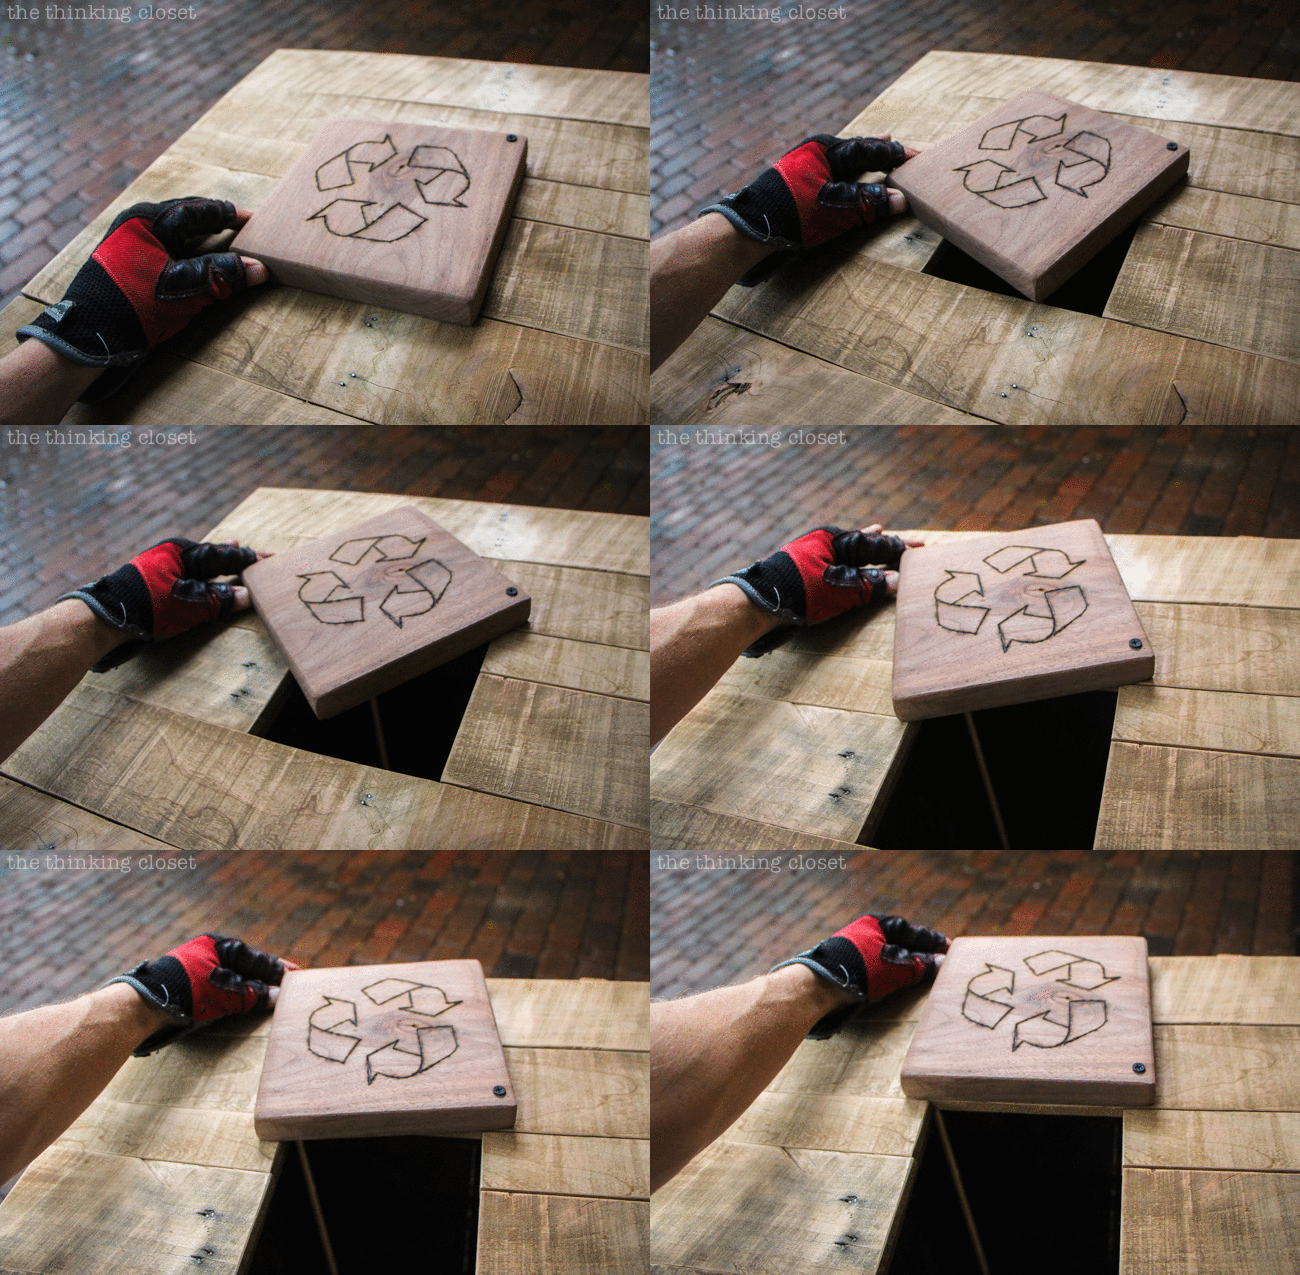
Step 8. Build the top lid “trap door.” I decided to utilize a cut-out in the top lid that we can use for the smaller items we recycle like jars and cans. But we still wanted it completely sealed. So, I created a sliding “trap door” by first cutting a 6.5″ square from a sturdy thick walnut board. It was a beautiful old board from my grandpa’s woods. Then, I sanded it down, using my wood burner to burn the recycle symbol onto one side. (Psst, Lauren here! I can’t help but jump in to say that the woodburned recycle logo is my absolute favorite part! Okay, back to you, Mark.) For this part, I just found a Google image that looked right, printed it in several different sizes, then taped the right one down, and burned right through paper into wood. Then, I removed the paper and finished up the wood burn to get the lines as clean as possible.
You can then drill a hole in one corner down into the top lid. This allows a sliding mechanism that is easy to open by nudging with one hand. For 90% of the things we recycle, they can pass through the trap door, without needing to open the hinged top door.
Step 9. Build the interior bottom. After building everything up until this point, I put a bag in place, then threw a glass jar in to test it. Lo and behold, smash it went when it hit our kitchen tile. So, I added three strips of pallet board across the bottom to cradle the fall of breakable items and that did the trick.
Step 10. Finishing touches. We decided not to apply a finish because the sanded boards already looked so good; all I did was gray wash a few of the boards for some variety, but you could paint, stain, or even weatherproof this if you wanted to.
That’s it. Enjoy!
Thanks, Mark! Look at you and your GIF…I think someone’s becoming a pro-blogger in addition to being a master carpenter! {Smile.}
And now, a little photo shoot of the finished bin. But first, I thought I should explain the placement of our recycle bin. The door that it appears to be blocking is actually one we never use. (The home we’re renting has a lot of odd “quirks,” one of them being an excess of doors.) Anyway…just in case you were curious about our terrible feng shui.
Now, let’s see that finished Rustic Pallet Recycle Bin!

Video Evidence
And before we depart, I thought I’d share a short 15 second Instagram video we took of our Pallet Recycle Bin in action. There are just so many movable parts, I think it helps to see how it all functions in real time.
To Close
And so, now, you’ve seen our recycle bin corner in all of its shame…and now all of its glory! After using it the past few weeks, I’m just ecstatic at how it’s ten million times more practical in terms of size, super functional in design, and I have to say, this one may take the top prize in the Miss Pallet Beauty Pageant (that exists, right?). And who knows…maybe a Pallet Trash Can is next!
Bottom line: thanks, dear reader, for taking the time out of your day to stop by to check it out. I hope you’re feeling inspired to wrangle some pallets into something new and exciting.
And if you’d like to check out some of our other furniture transformation projects, you are more than welcome to linger! The closet door is always open….
{Linking up here.}
*Full Disclosure: Some of the links in this post are Amazon affiliate links, meaning if you make a purchase after clicking through, I receive a small commission at no extra cost to you. Thanks so much for supporting this site! For more policy information, click here.


My fiancée has been wanting something like this for our trash can for a while now. Thank you for your step by step plan. I made a few modifications so it works a little different but appreciate the premise. Again, thank you for posting.
Oh yay! That’s super exciting to hear. I love that you guys made it your own. Enjoy it!
I was Stumbling and came across this Lauren! I absolutely love it!! Great job!
I love all the things you create from the old pallets. Seriously, you two are an amazing team when it comes to building some new from the old wood. And it’s exactly my style, of course. There’s nothing better than old wood, right?!
My next apartment, next year, definitely need to have enough space for such a bin! 😉
Oh boy, and I green with envy. I’d love to have one of these in our kitchen! Maybe even 2 – one for the garbage and on for the recycling. Now, to get myself some pallets and convince Earl!
I love this! Recycled – tick. Functional – tick. Beautiful – tick!
Aw. You and your creative comment made my night. Thanks for the tick-love, Marisa! So happy to know you’re a fan.
Oh my gosh Lauren I LOVE this idea! We don’t have a place to “hide” our trash can and the prettier looking ones can be so expensive. This is such a great solution! Pinned 🙂
Yeah, I saw some “pretty” ones at HomeGoods, but wasn’t about to drop $75 on a recycle bin…especially because it did not look very sturdy. This guy can definitely handle lots of items and fits our decor style MUCH better. So happy to hear you’re a fan, Katie! Thanks for the pin, too!
Whoaaaa…… that’s a crazy awesome project, lady! And your wood-burning?!?!? Girl, I love it!
Great idea! It turned out great!!! Love it!!
What a great idea! So much cuter than a regular old trash can!
You guys come up with the greatest ideas and your about the best team I know of ! Keep the ideas coming. Mark you are a great carpenter. My Grandfather was a carpenter and I think were he alive now, this is the sort of thing he would love doing. Keep up the good work.
What a great idea Lauren! So creative – love the symbol you added! Happy weekend:)
Looks great! I love bringing beauty to every day items : ]
What a difference. It looks and feels fabulous. Hooray! 😀
Love love love love love love love LOVE this! I want to make one so bad now! Great job!
I’ve heard about this & now its so amazing to see it in real life! Wow, what an ingenious creation – great job, it looks so cool and yet is so super-functional! Great job!! Your kitchen has received a major corner-lift!! Always fun to think of what you two will come up with next!
What an awesome idea! The guest blogs from Mark are great to see. Reminds me of my recent trip to Facebook, where in addition to free food and video games, they have a woodshop for employees to play in! No wonder, these projects look like so much fun.
Go, Mark! This is so practical and natural-looking! You thought of EVERYTHING, from the side door to empty the trash to the cute little wood-burned sliding door on top! The top with wood-burned recycle symbols is also my favorite. You could submit to a Green Recycling site!
How much would one cost should you go into the business? 🙂
Next pallet project? An outdoor compost container? Just a thought…(but the wood might disintegrate with the compost.)
Liked the photo bomb by Mangey and the gifs! You two are just the best team! xxoo
This is so stinkin’ cool! Not only is it super functional, it’s so neat looking! I love all of the moving parts and doors – it’s genius! My favorite is the top, too. What a way to make recycling fun!