“Together Since” T-Shirts: Creative Anniversary Gift Idea
On April 12th, 1980, my beloved parents, Carolyn and Jay, got hitched! That was 34 years ago. Ten years plus ten years plus ten years plus four! (Sometimes I need to break numbers down like that so their value really sinks in.) Now that’s not nothin’!
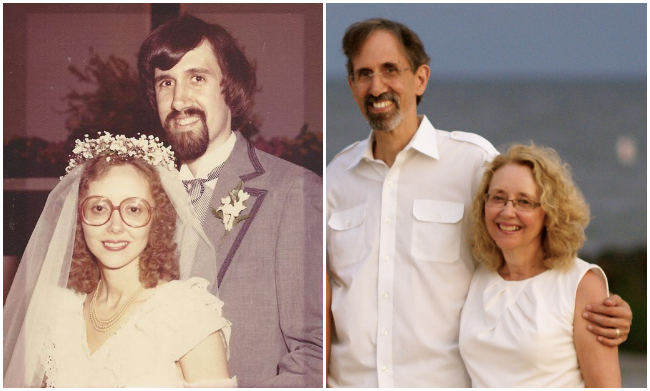
Fun facts: It rained on their wedding day. My mom wore her mother’s handmade wedding dress. Baby’s breath decorated the church and her veil. And my father successfully calmed down a tearful ring bearer with a Mickey Mouse pin just moments before the ceremony. {Note to self: always carry a Mickey Mouse pin in your pocket on your wedding day. You’ll never know when a rodent in red shorts will save the day!}
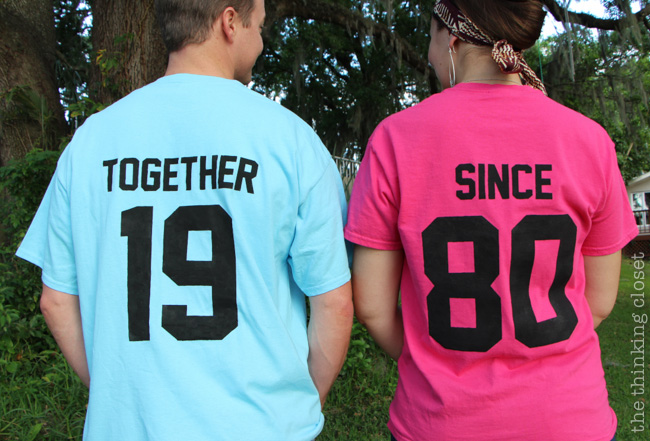
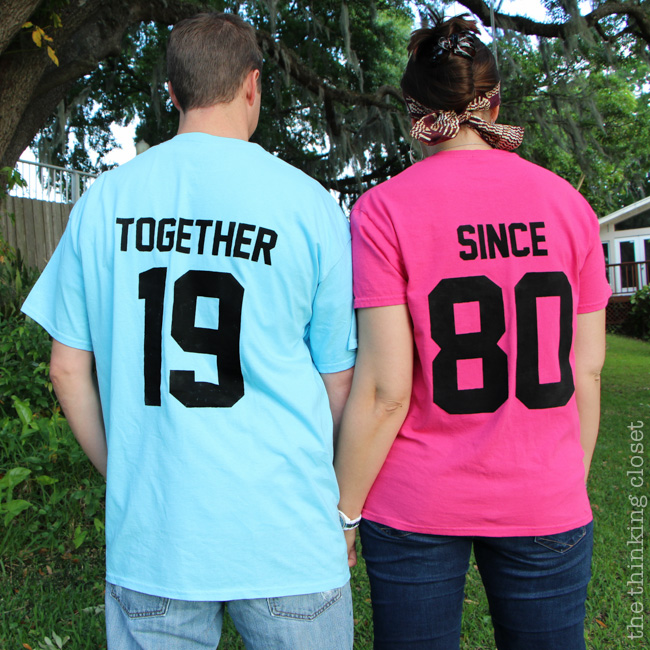
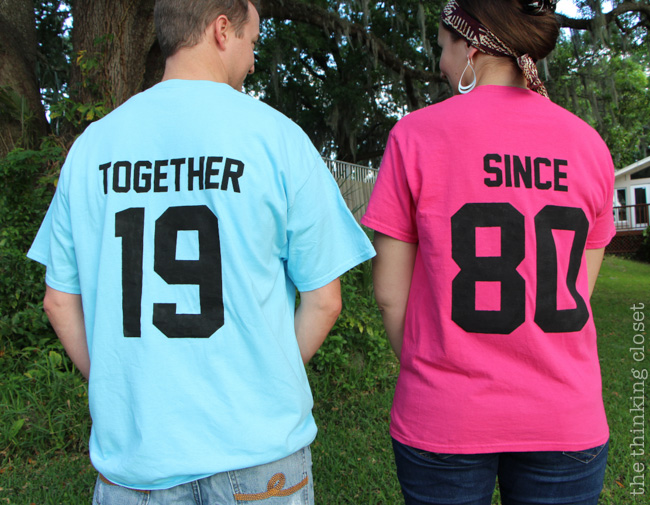
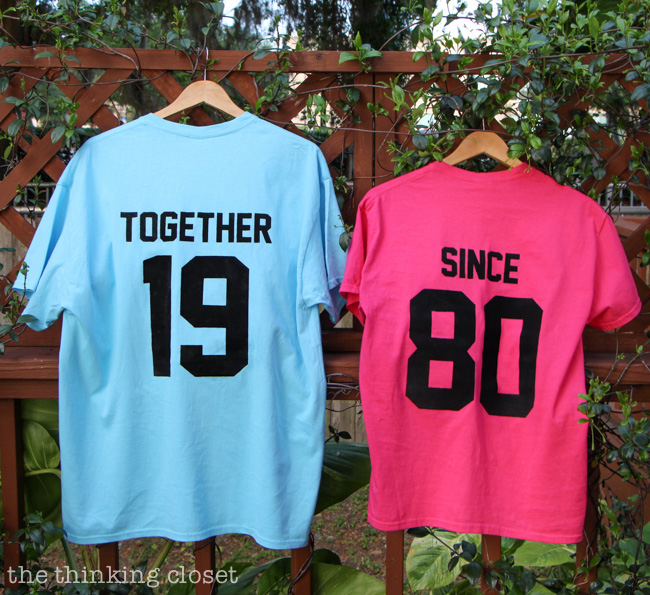
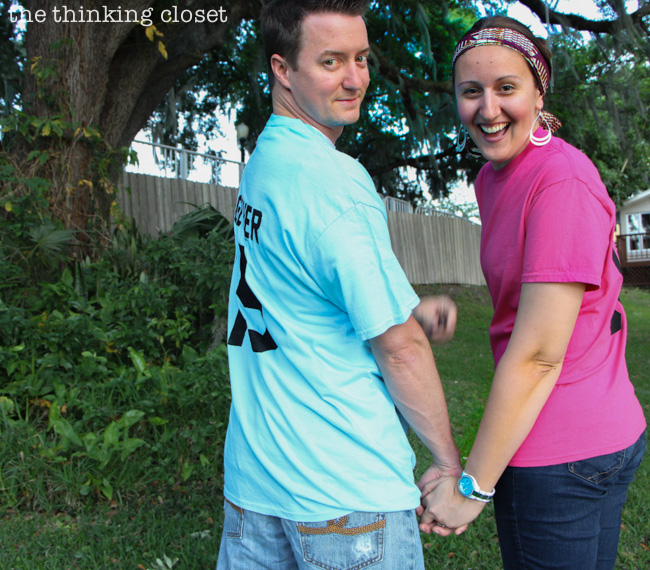
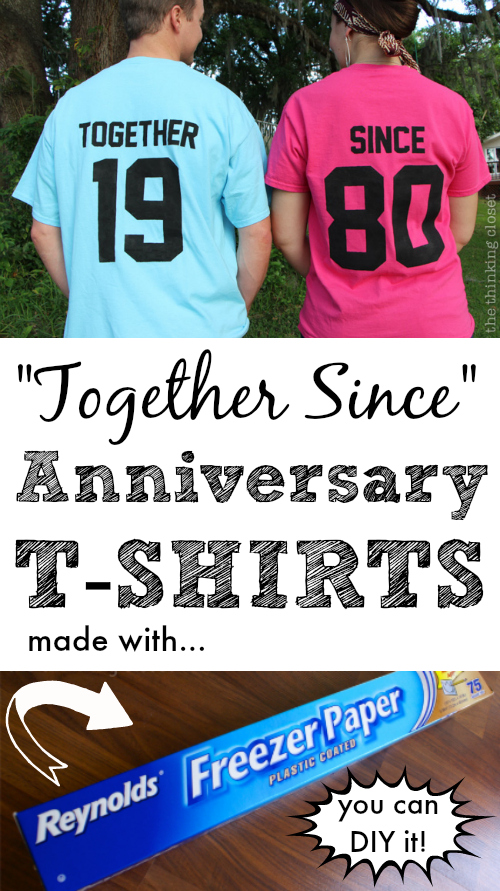
So, to honor their 34 years together, I whipped up a couple of t-shirts that really only make sense if you’re standing side by side, which is part of their charm. Here are Mark and I modeling them for you:
You won’t believe how easy it was to create them, too. Well, you will once I tell you. So, let’s get to it!
Tutorial
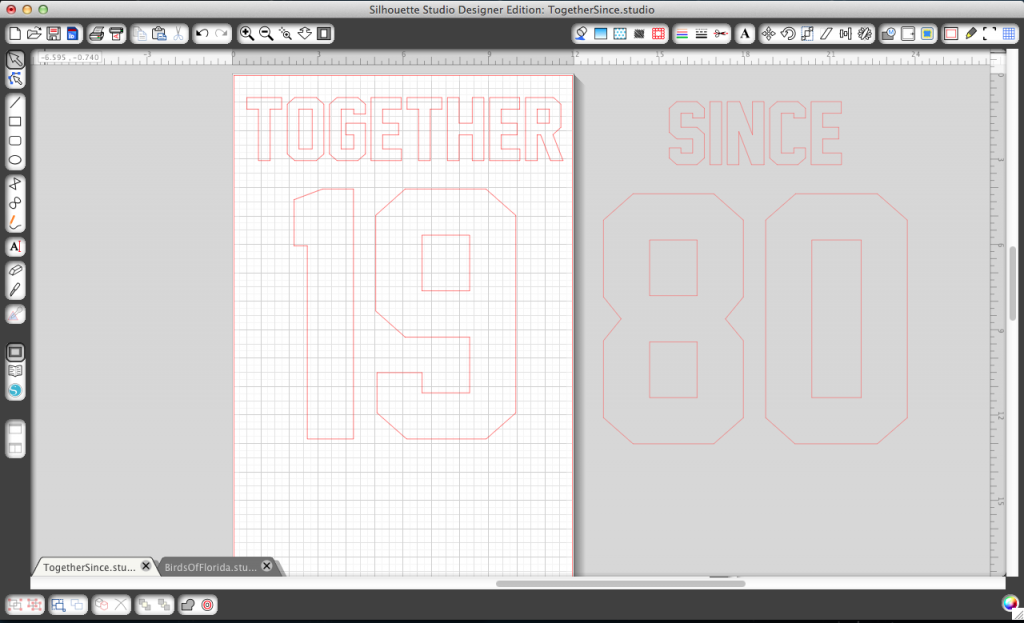
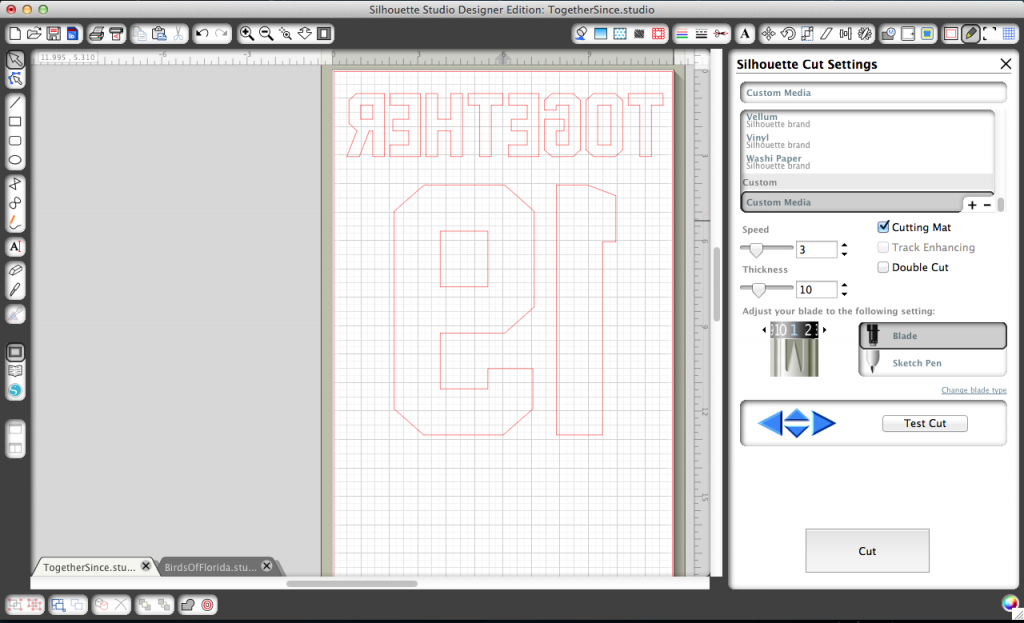
Step 1. Create your design. First of all, I’ve gotta give credit where credit is due: I came across a pin of this project in my Pinterest wanderings that initially inspired me. And designing this puppy was really as easy as downloading a new font called Jersey M54 from dafont.com and typing out my text and letters in Silhouette Studio! (If you don’t have *a Silhouette machine, you’ll just create your design in a program like Microsoft Word.) I sized mine pretty large: about 11″ wide x 12″ high.
Step 2. Create your freezer paper stencil. Yup, we’re back again with another freezer paper stencil (because I’m obsessed – – and you will be, too, if you try it!).
If you don’t have a digital craft-cutter like a Silhouette, no problemo because you can print directly on freezer paper (see!), and then just use an x-acto knife to carefully cut out the stencil. For a larger design like this one, you’ll just have to print it on multiple pages and tape it together.
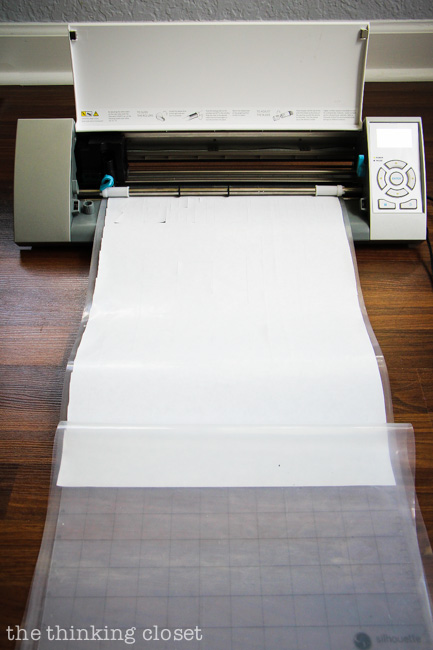
Now, for the Silhouette-ers, I flipped my design horizontally (top menu, OBJECT, TRANSFORM, FLIP HORIZONTALLY) since I would be cutting the design on the shiny side of the freezer paper, which gets ironed down onto the fabric. Then, I was ready to cut!
It took me a bit of trial and error the first time I cut freezer paper with my Silhouette, but the settings that have consistently worked for me are a blade of 1, speed of 3, thickness of 10 with the freezer paper shiny side up. But always-always-always do a test-cut first to make sure your settings are right for your particular material and blade. Trust me: I’ve learned the hard way too many times to let you make that mistake!
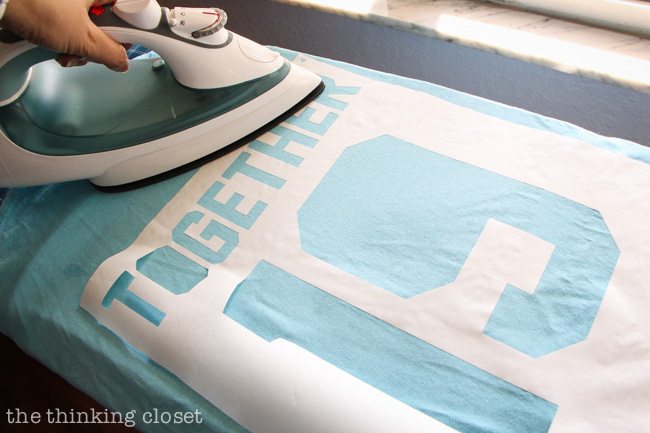
Step 3. Iron your freezer paper stencil to your tee. First things first, iron out any wrinkles on your pre-washed shirt. Then, place a piece of cardboard inside to protect the back of your t-shirt from any paint bleeding through (I used a cut up cereal box). Then, center your stencil where you want it on the tee with the shiny side down.
Now, here’s where the magic happens: using a dry iron on the heat settings appropriate for your garment, carefully iron down the stencil. You’ll find that it adheres to the garment as soon as the iron passes over it. But you’ll want to make several passes, especially on the edges where the paint might try to seep under. Make sure everything is good and sealed!
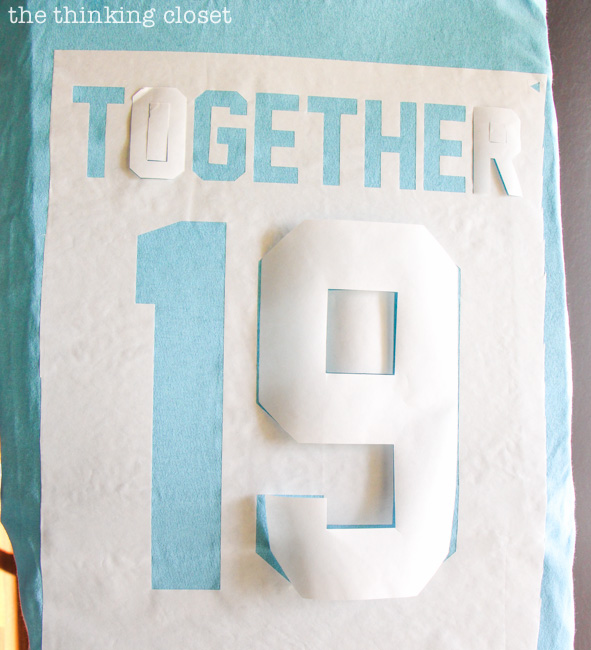
TIP: To help you center any solo pieces (like the center of the O, R, or 9), line it up inside the entire remnant of that shape prior to ironing.
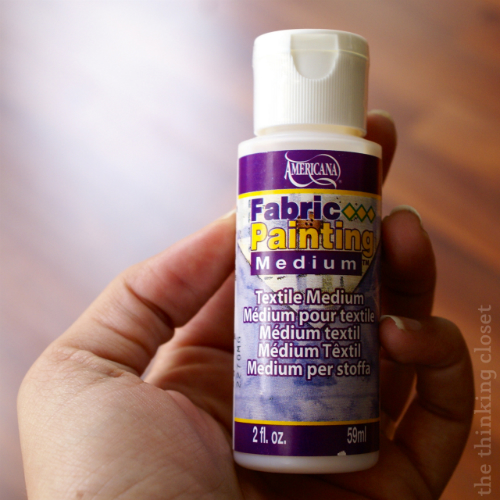
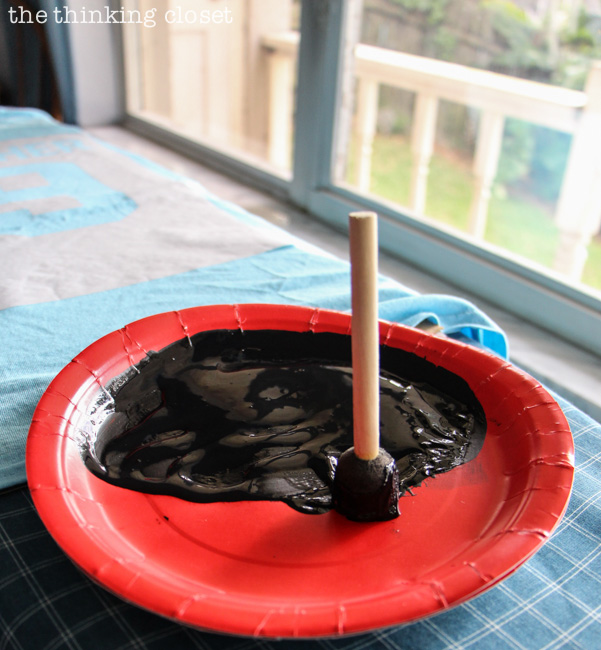
Step 4. Prep your paint. One item you’ll want to pick up during your next run to the craft store if you don’t have it already is a bottle of Americana fabric medium. I got mine for just $1.99 at JoAnn’s and it works wonders. Basically, you can add 2 parts acrylic paint to one part fabric medium, and it functions the same as fabric paint! It doesn’t harden up the fabric like acrylic paint on its own would, and it’s washable, too. So, essentially, you can transform any paint you have into fabric paint with this little bottle. Awesome-sauce.
Just make sure to really mix your medium with your paint, especially if you’re using a dark color like black.
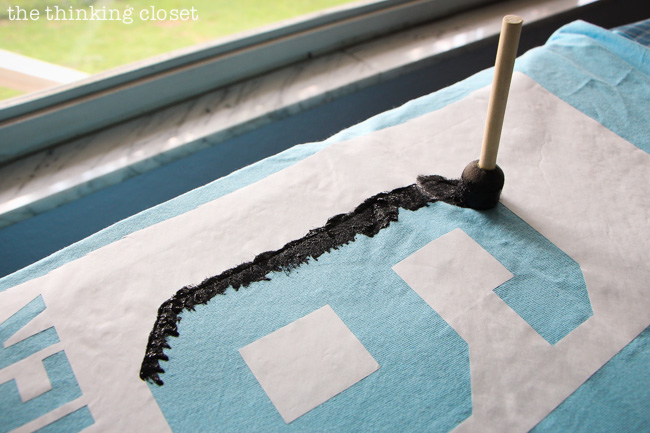
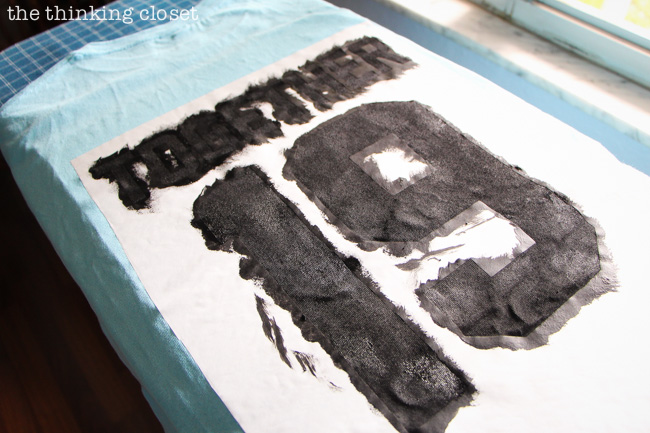
Step 5. Painting party! I used a rounded foam brush and applied the paint in light coats by dabbing it straight down, never doing side to side strokes unless they were off of the freezer paper onto the tee. This will ensure the paint doesn’t seep under the edges of your stencil.
It’s funny, though, no matter how many times I use freezer paper, I’m still a doubting Thomas. I really did think, “There’s no way this will come out crisp. I’m laying the paint on too thick!” I was truly prepared for this project to be a craft fail. Especially at this point:
Buuuuut…
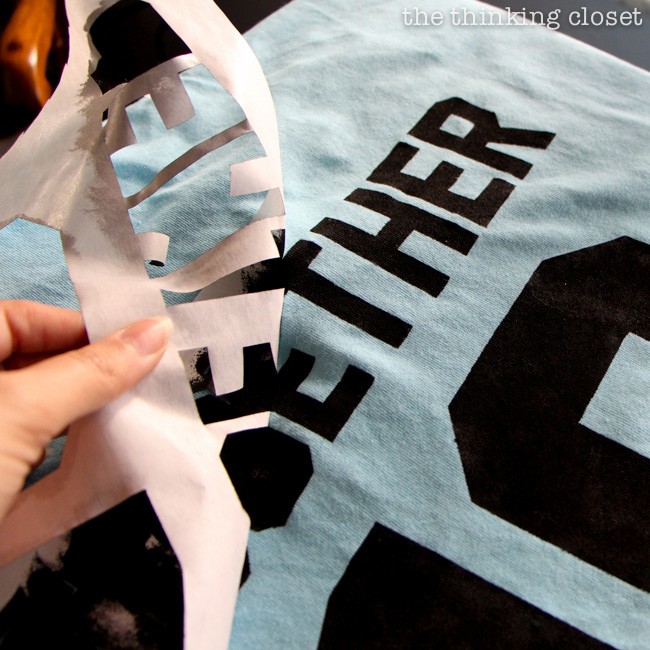
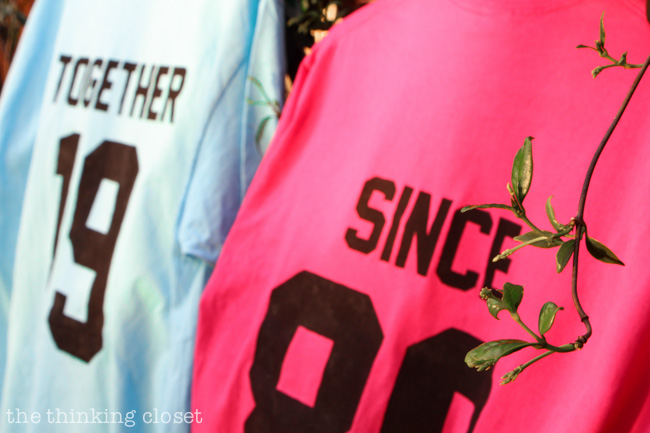
Step 5. Peel and press! …after a few hours of dry time, I carefully peeled up the stencil, and all my fears of paint leakage vanished. The lines came out crisp and sharp. When Mark first saw the shirts, he thought I had used heat transfer vinyl. Oh no, sir. It’s all paint!
You’ll want to follow the instructions on the fabric paint or medium you use, but mine called for 24-48 hours of dry time, followed by 30 seconds of heat set with the iron on each side (I used a cloth in between the design and the iron to be safe).
And that’s it! Hopefully soon I can update this post with a photo of Carolyn and Jay wearing their tees soon, but for now, Mark and I will model them for you.
I cannot wait to package these up and mail them to my parents, though they’re getting their gift “on time” today through this blog post! (Sneaky, aren’t I?)
So, happy anniversary Mom and Dad! Three cheers for 34 years! And the many to come. Hip hip….
HOORAY!
Update!
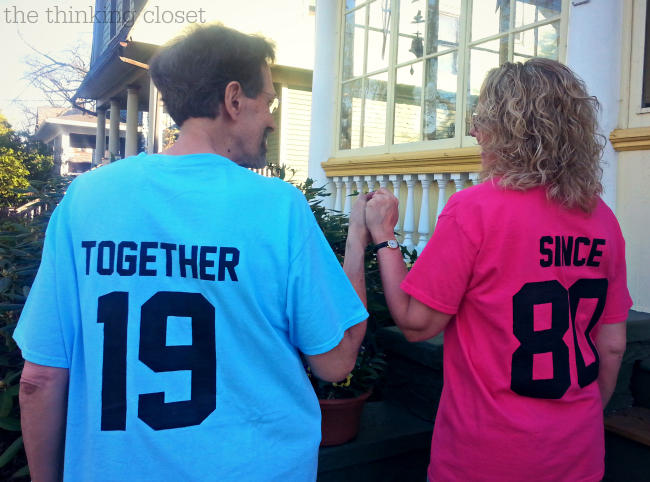
And here are the sweet ‘rents rocking their new tees! They sent me a few pics, but this one takes cuteness to a whole ‘nother level.
If you liked this project…
…here are some more goodies to explore:
- More freezer paper stenciling projects: Nautical Anchor Pillow & KEEP CALM Onesie.
- My anniversary gift from last year which was as easy as slapping some vinyl on a shadowbox.
- More last minute gift ideas for couples or for your sweetheart…30 of them, in fact!
Happy Saturday!
{I like to link up here.}
*Full Disclosure: Some links in this post are affiliate links, meaning that if you make a purchase after clicking through, I receive a small commission at no extra cost to you. Thanks for supporting this site! Click here to read more of my site policies.


have you tried this method on a polyester/spandex blend tshirt?
Sorry, I haven’t! I think it might be trickier because of the stretchy material…but worth a shot, no?
Oh my gosh do I love your story and everything you creat/do! I feel like we have a connection! My best friend is from Wheaton, IL though we went to college in PA. I have lived in Columbus and still have relatives there and love to shop and eat there as I only live an hour away! My daughter graduated from OSU with a theater and Spanish degree and my son still attends OSU. He was on main campus, but is now at home at the Mansfield branch.Where did you teach English and theater? I taught at Soutwestern in Grove City, but am much older than you and retired from teaching at the end of last year! My brother teaches in Reynoldsburg, but had taught at Jonathan Alder and Delaware High Schools. Thanks for all your helpful tutorials!
Wow! What a small world! I taught at Canal Winchester High School…not very far from you and your brother. We’re now in Florida, but I left a big piece of my heart in Ohio. Such a wonderful part of the country with wonderful people. Love the Wheaton connection, too! Thanks so much for stopping by and for the sweet as pie comment, Tammy.
Hi! I loved your idea so I decided to try it for my parents 28th Anniversary. But I can’t get my printer to print on the freezer paper! Any tips? Your help would be appreciated! Thanks
Just a word of wisdom to any of the non-fancy cricut machiners out there like me (I only have the crappiest version of the cricut which won’t let you download fonts and import them)….If you are going to PRINT on the freezer paper make sure your printer can handle it. In the photos, she uses a cannon. I have an HP and have printed on all kinds of things from paper bags to photo iron on transfers, etc. and my printer would NOT print on the freezer paper. It actually sucked it up, jammed and spewed ink everywhere and now my printer won’t work anymore 🙁 Just be careful! I now have no printer until I can somehow find $$ to get a new one, lol. I was planning on doing these for my 10 year anniversary getaway this weekend and now I have 2 blank T-shirts 🙁
Oh no! Amber, I’m so sorry to hear about your printer problems! That’s so strange that your printer could handle paper bags but for some reason didn’t like the freezer paper (too thin?). Anyway, I hope you can get your printer fixed soon without too much trouble! And in a pinch, you might be able to purchase iron on letters and numbers at the craft store (I did that in my pre-Silhouette days and was able to make some pretty professional-looking shirts). Still…MAJOR bummer! 🙁
Hope you and your hubby enjoy your getaway! Happy 10 years!
Amazing!!!!!!!!!!!!the anniversary T-shirts are really very different from the common gifts.This is going to be a wonderful way of celebrating the anniversary.so creative and thanks for this idea.
Thanks, Terry! Yes, I enjoy sort of breaking from the mold and creating gifts that are a bit out of the ordinary. Gotta love the element of surprise! Hope it’s an idea you can use yourself someday soon!
What a cool idea! That gets me thinking…especially as my anniversary is coming up next month!
I think this is a very sweet idea! I would love it if you joined and contribute your awesome posts at my link party at City of Creative Dreams on Fridays 😀 Hope to see you there at City of Creative Dreams Link Party
Saw your post at the C.R.A.F.T party! I had to stop by since your photo really caught my eye!
This is an adorable idea, and once Adam and I have celebrated a few more anniversaries I’d love to make these for us!
Anyway, I’m so glad I found your blog–I’m following you now, and I look forward to your new posts! 🙂
Would love it if you stopped by our Facebook page and said “hi!”
https://www.facebook.com/OurMiniFamily
~Cathy~
OurMiniFamily.com
I loved your Tip Me Tuesday link this week. {thanks girl!} Would you like Tip Junkie to feature your blog post to over 200,000 creative women? If you upload this blog post into your Tip Junkie craft room using at least 2 images, 2 steps, and blog post URL then I can easily feature it in my RSS feed, home page, and all my social networks instantly. {squealing with delight} ~ Laurie {a.k.a. the Tip Junkie}
http://www.tipjunkie.com/post/how-to-add-a-craft-room-project-on-tip-junkie/
Happy anniversary to them! I love this idea. What a unique way to celebrate 34 years! May there be many more for them!
Such a cute idea! I love it…I need to try that flip on the silhouette sometime, I just barely feel confident doing the basic stuff!
Aw, that means so much coming from you, Kristen! Oh, and you can totally conquer the Silhouette! I think it can be intimidating in the beginning, but knowing you and your creative ways, you’ll be unstoppable. In the meantime, let me know if you have any questions I can help with! (Though I have a feeling you’re probably much more skilled with the basics than you give yourself credit for.) 😉
Those are so crisp looking, I could have sworn they were vinyl! You did a great job and I love the shirt colors!
Yay! A sign of a solid freezer paper stenciling job! Thanks for the kind words, Erin. 😉 You rock.
Freezer paper to the rescue again! I love the adorable design. It reminds me of sports jerseys. And so simple! You are a creative machine Lauren, thanks for sharing your awesomeness with the rest of us.
Yeah, they’ve totally got the sports jersey vibe going on, don’t they? Ha ha, and I take the term “creative machine” as extremely high praise coming from quite the creative machine herself! 😉
Hey Lauren,
Thats so nice of you. 🙂 You know what.. next month on 20th, my parents gonna complete 32 years of togetherness. I too want to do something special for them this time..
An early happy anniversary to your parents, Jyo! I’m sure you’ll come up with a special way to celebrate them!
What an AWESOME gift! When my parents 30th anniversary roles around in 3 years I’ll be referring back to this post. Love it 🙂
Thank you for such an indepth post and creative gift!
As one of the two recipients of this clever gift, I say “go for it” with your parents!! They will love this gift and it will never be outdated either–as long as they stick together!!
Kelly, I love that you’re already thinking ahead to your parents’ 30th! This would be an uber fun gift to make for their special celebration. I echo my Mom’s “go for it” charge! 😉
Hey Girl! It’s Deonna from the Child at Heart blog. I was just stopping by to say hello! These are SO funny. I would have to convince the husband to wear them at the same time. haha I am doing a great spring necklace giveaway and would love for you to come by and enter to win 🙂 Have a joyful week!
http://www.thechildatheartblog.com/2014/04/spring-statement-necklaces-from.html
Ha ha. Glad you enjoyed them, Deonna! Thanks for stopping by. Have a joyous rest of your weekend!
What a great idea! They turned out great! You make it look so easy!
I love this. I am always on the hunt for a diy gift for a man and this is perfect. Pinned to http://www.pinterest.com/alicilaly/gifts-for-the-man-who-wont-tell-you-what-he-wants/ btw visiting from Do Tell Tuesday!
What a fantastic project! I can’t believe you did that with freezer paper. I’ll definitely try it. Thanks for the great tutorial!
How cute! I need to remember the freezer paper trick! I have a big vinyl cutter, but sometimes you don’t feel like getting all of that going and heating up the heat press
This is very cute, it made me go “Aaawwwwh!” You mum is rocking those glasses back in 1980 (in the UK we call those “Deirdre Barlow glasses” after a character in Coronation Street who used to wear them, literally everyone in the UK over the age of about 30 will know what I mean!)
I just love love love this idea! Soo fun!
Love these, Lauren! Great job!
Very nicely done Lauren! And the lettering is so crisp – love it! I haven’t done any clothing yet, I’m not sure why, I’ve got all these onsies to decorate!
I love it, Lauren! These are so cute – and your fabric paint turned out so crisp! I’m going to have to try this freezer paper method; you make it look so easy!
Love this! I’m addicted to freezer paper printing as well! I have yet to run it through my silhouette machine. Thanks for the inspiration!
This is too cute!
“You’ll never know when a rodent in red shorts will save the day!” That made me laugh heartily! True statement. What a sweet tribute to da Mommas and da Papas, Laur. I, too, love how these shirts are timeless! Thanks for giving them such a sweet gift on their anny…they deserve it, don’t they? There are none like them…thanks to the Lord for his provision of such caretakers, friends, and loving parents to us!! We know so much of His sweetness through them.
Ah, thanks, Lisbeth!! We were surely abundantly blessed with you two, and now Mark!! xxoo
😀 xo
“Da Mommas and da Papas” had me smiling…because I can hear your voice delivering that phrase in a perfect Italian accent as I read it, sis. And you’re right – – there are none like them! Such gifts from God. (And I love that you count Mark among your children, Mama. A further testament to your abounding love.)
Amazing, Lauren!! So excited to get some freezer paper and fabric medium and go to town with this project…thanks so much for sharing such a cool idea! Happy Anniversary to your mom and dad and way to go on the super-sweet gift!! 🙂
Thank you so much for your anniversary wishes, Stefanie! We were delighted by this fun and creative gift!
Oh yes, Stefanie! I know you’d work your wonders with some freezer paper and fabric medium at your disposal. Cannot WAIT to see what you create!
And Mom did you know that Stefanie is the same Stefanie who made the fun hot air balloon magnet craft? Loved to see your comment interchange with her on that post! #peopleiheartconnecting
Gifts with personal meaning are the best! What a sweet way to say happy anniversary too. I have no doubt that your parents will have lots of fun wearing these cute shirts. I’m sure they are as fun as you are and the apple didn’t fall far from the tree!
Thanks, Wendi! You gave me an idea…we should take a pic of ourselves in these shirts for Lauren to post at some point. I can’t wait to wear them together and then also confuse people by wearing them separately!!
Aw, thanks for the warm words, Wendi! Yes, my parents really are quite FUN…and I’d like to think some of their spirit has rubbed off on me. 😉 Looking forward to having fun with YOU in Punta Gorda next month.
And yes, Mom, I’d LOVE to add a photo to this post of you two wearing your new shirts. But first, I guess I need to mail them to you…lol!
These are such fun Lauren and I see from your Mom’s comment above that they were a big hit too 🙂
What a lovely gift for a lovely couple! 🙂
These are so stinkin fun, Lauren and you look just like your mama (I look like mine too!) XO
amazing i love it.
I especially love pictures of you and mark! 😉
you constantly amaze me!
This is sooooo cute and thoughtful!. I was planing on doing something like that for mother’s day =D from Emma and my brother to my mom! You gave me a couple of good tips that I was wondering about such as the painting technique… I’m guilty I used to paint in freezer paper direction so now I understand why sometimes I had that ugly finish! LOL duh!
As usual I’m so inspired by your awesome ideas!!!
XOXO
THANK YOU SO MUCH! What a fun gift to “open” this morning on our 34th! It is the grace of God that enables two very different people to live life together–and joyfully–all these years.
It seems like you two are right with us today! Thank you for plotting and planning this. Now I know why I was getting some mysterious questions via text messages.
The shirts look SO professional. They will never get outdated either! Genius!
It will be such fun to wear them together…and even separately to totally confuse people! 🙂
Sending MUCH love you, and happy 4.8 years to you both!! God is good!
Great job on the shirts, and congrats to the parentals on 34 years!
I’m going to have to start being more diligent in my Silhouette Giveaway entering. I find myself (entirely too often) thinking how much easier my projects would be if I had this little contraption. (especially since I’ve started a massive nautical nursery project)