How to Build a Custom King Size Bed Frame
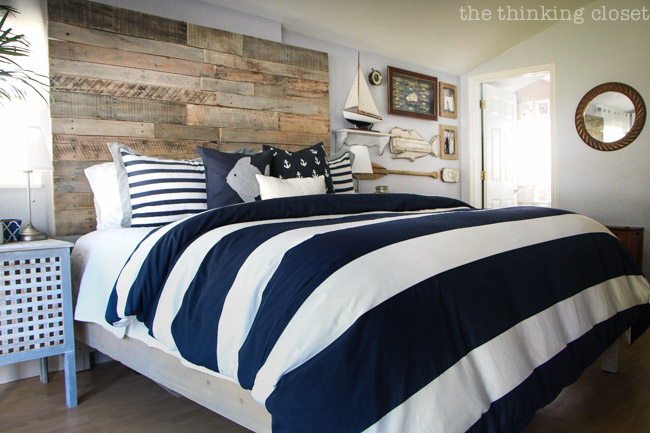
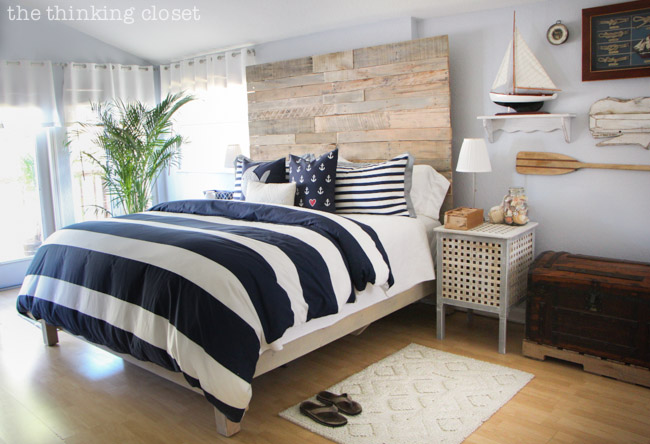
So, first of all, let’s just pause for a moment to talk about the fact that you all rocked my metaphorical socks off last week when we shared the Grand Reveal of our Rustic Nautical Master Bedroom Makeover. I guess I’ve been building it up for so long, I started to doubt myself in the final hour. I’ve never done a total room makeover before, let alone shared it with blogland. Before clicking publish, I wondered,
Will this even be worth all the hype? Or will everyone yawn and say, “Ho hum. That’s it?”
I braced myself for whatever responses would come our way; even if you asked for my resignation as DIY blogger. (Now, you see why I became a theatre teacher; melodrama runs through my veins.)
Then, you all had the nerve to blow my expectations out of the water with some of the most enthusiastic and supportive comments we have ever received…ever.
Okay, be honest, guys: did my Mom put you up to this? Or did you maybe drink a jug of Kindness Kool-Aid before reading that post? Because it was kind of unbelievable. And I’m so glad I don’t have to resign because I kinda sorta really love this whole blogging thing. Thanks, friends!

Alright now I’m going to actually hush up for once (what?!) and let my husband take over the rest of this blog post. Because when it comes to building a custom king size bed frame, well, he’s your man! He planned out the design, purchased the materials, and built that sucker all himself, so trust me, you want to hear it from him and not me.
And without any further ado, I give you my hubby, Mark, with the full run-down of How to Build a Custom King Size Bed Frame!
Mark’s Konstruction Korner
Mark here with a step-by-step of how we built our king size bed frame. It’s a simple design held together with bolts. I’ll take you through each phase, so you can tackle this on your own. Especially if you’re like me and you’d rather build it than buy it.
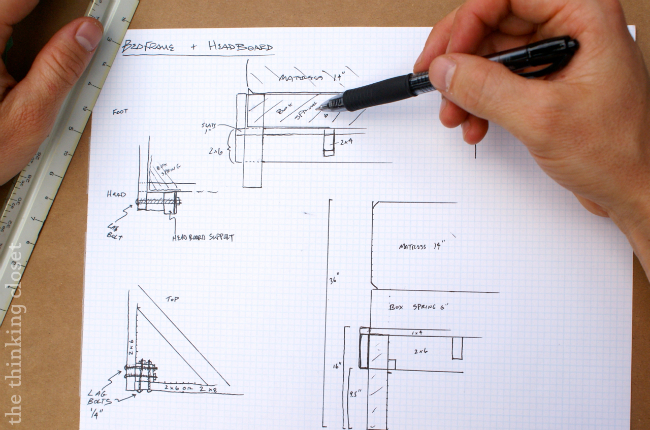
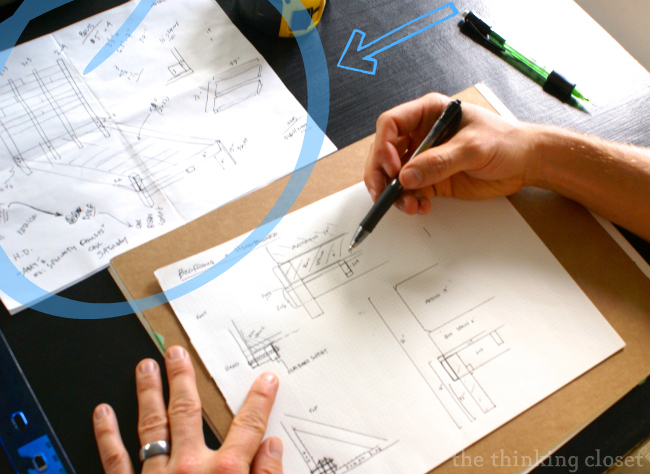
1. DESIGNING. First, draw out your plan. here are some pictures of ours:
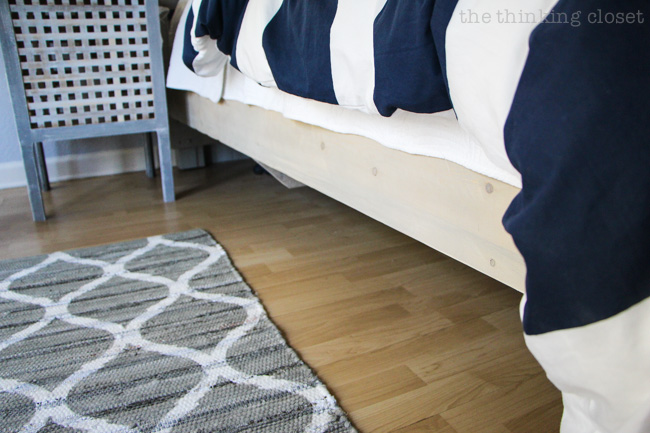
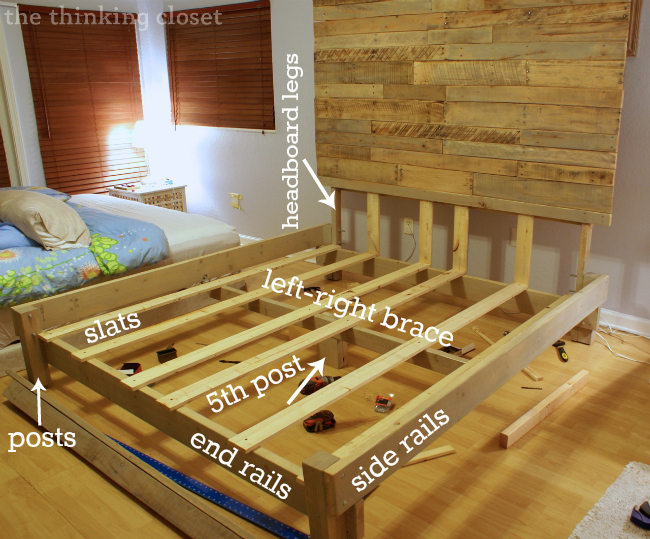
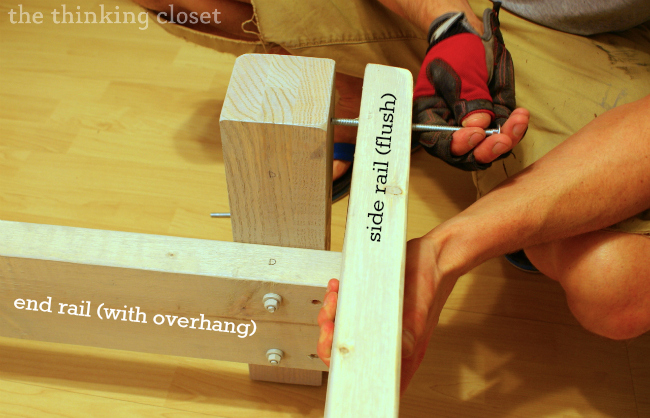
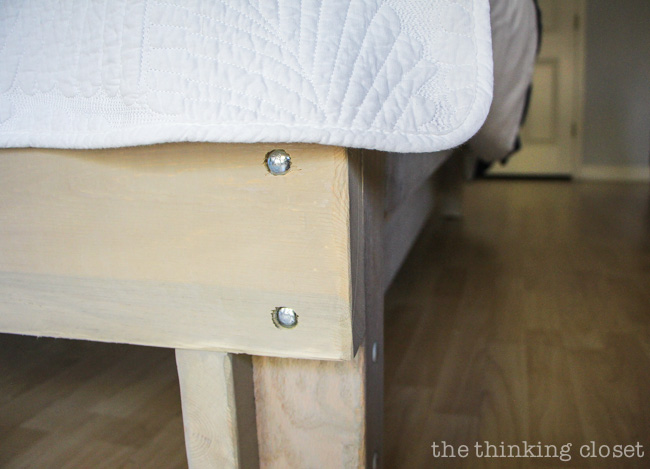
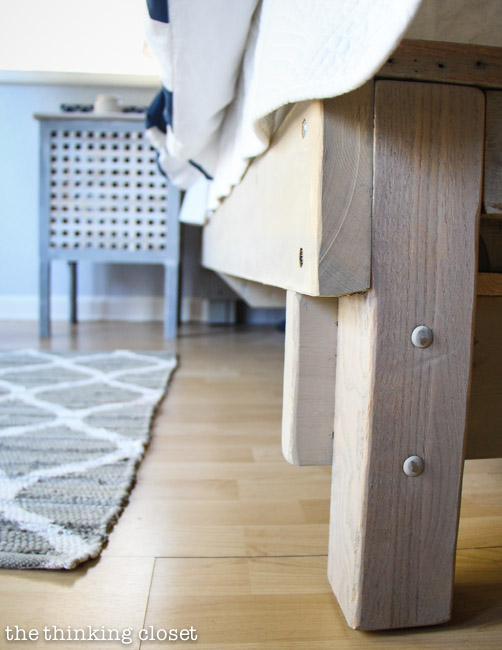
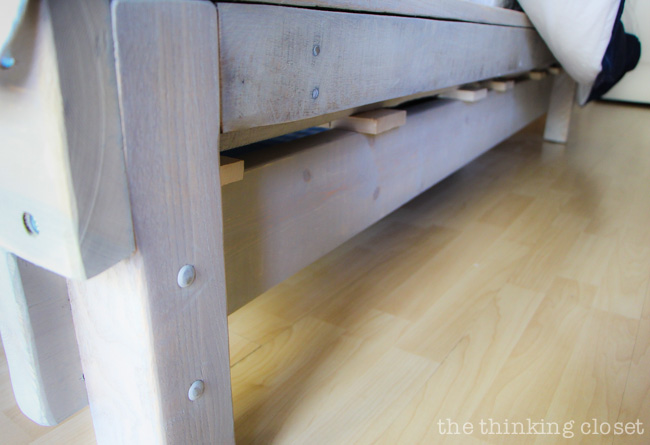
The basic design features side and end rails bolted onto the outside of 3″ vertical posts. The side rails will rest on the end rails where they overlap at the corners. Consider using bolts as your primary fastener, since they are hard to beat in terms of strength, and a large bed can be easily taken apart and put back together.
Our box spring and mattress are king size, so I made it a 5-post frame. The fifth post is in the middle and supports a left-right brace. Our box spring was only 6″ thick, so we designed the frame to “bury” or enclose the box spring.
As you draft up your plans, pay attention to the total height of the bed, considering the thickness of your box spring and mattress. A pretty standard total height is 30 inches, plus or minus a few.
And here’s a photo with a key to help you keep track of the terms I’ll be using:
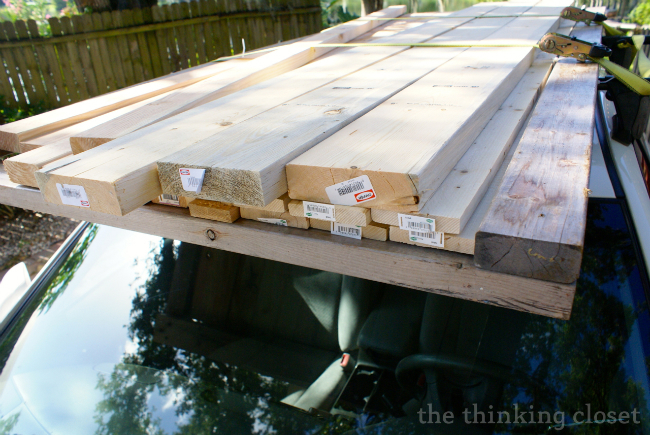
2. GATHERING. Find your materials. Although the headboard is made mostly from reclaimed pallet wood (click HERE for the full tutorial on that step), for the frame I went with white pine and oak from Home Depot.
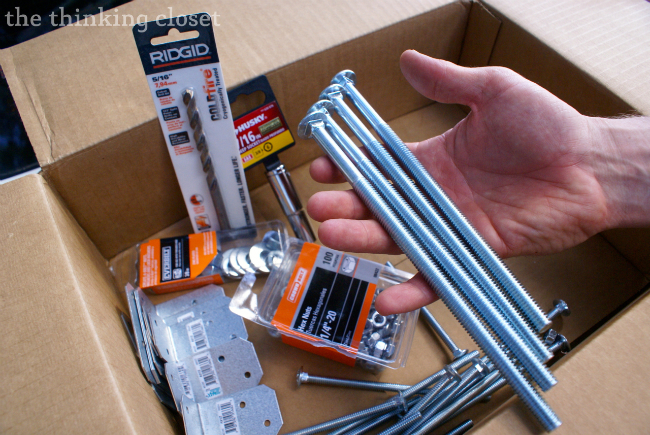
Here is a rough list of the supplies needed for our king bed:
- (4) 3″x 3″ solid oak posts, each 15″ long.
- (4) 2″ x 6″ white pine (spf), 10′ long. Carefully select boards that are not warped.
- (8) 1″x 4″ slats
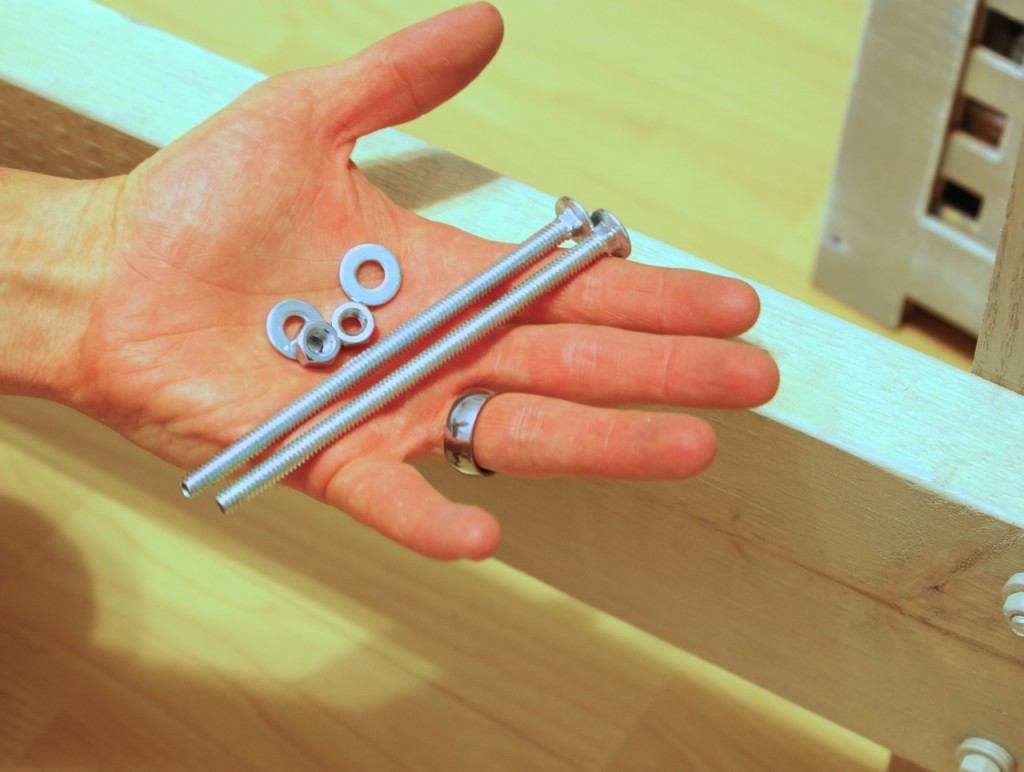
- (12) 1/4″ carriage bolts, each 5″ long
- (4) 3/8″ carriage bolts, each 6.5″ long for attaching frame to headboard uprights
- (1) package of nuts and washers for each size (3/8 and 1/4)
- (4) galvanized steel right angle braces, to attach the fifth post to left-right brace, and left-right brace to middle of side rails
- (4) non-skid black pads that you’ll add to the bottom of each of the 4 outside posts
- (1) 2×4 for left-right reinforcement across the middle. the post that supports this is made of (2) 2″ x 6″ pieces leftover from rails. It’s never a bad idea to have extra 2x4s, as you may need more or less bracing. Your call.
All of this rang up to about $150. Not bad!
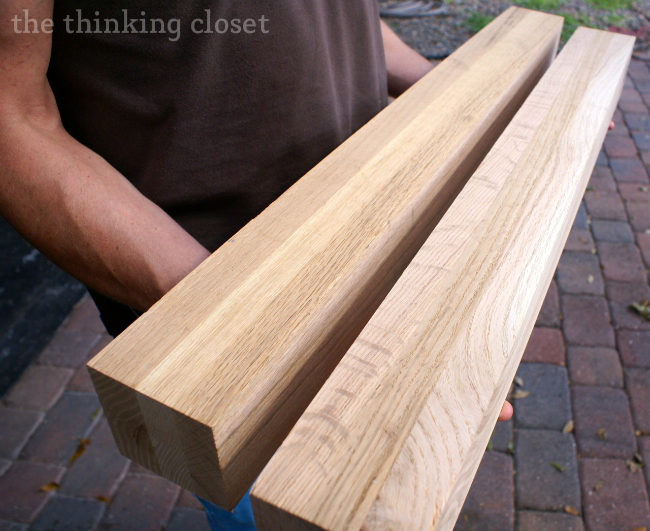
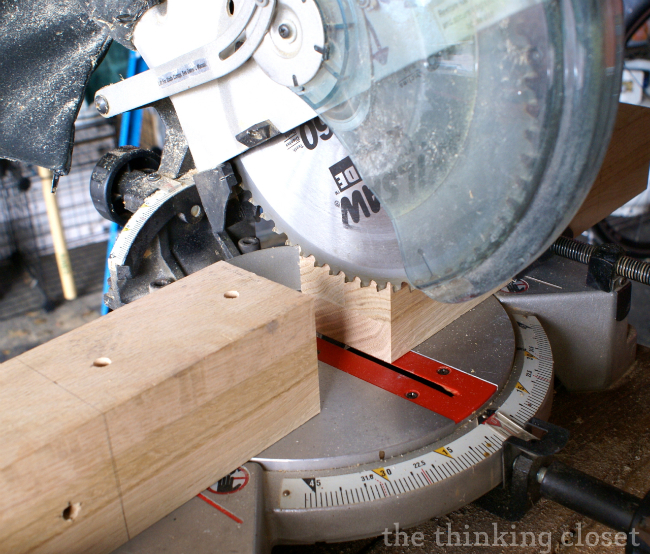
3. CUTTING AND DRILLING. Remember to “measure twice, cut once.” This is a saying in carpentry that is so true. You probably will make a few wrong cuts or holes, just like I did, but if you measure and plan before firing up your tools, it will work out much better.
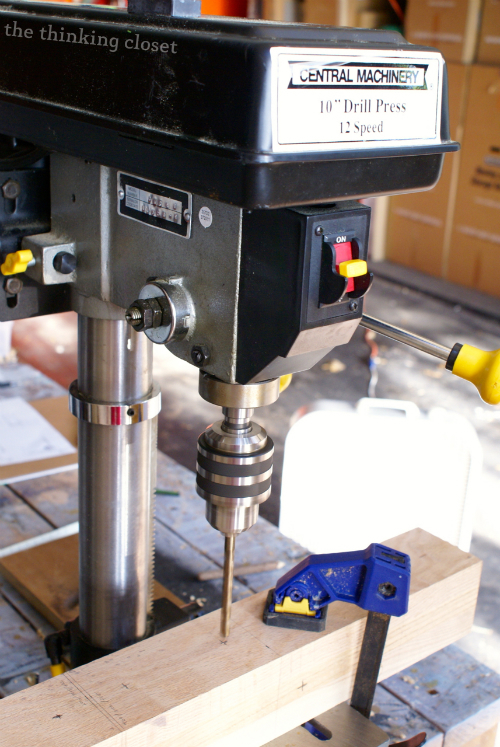
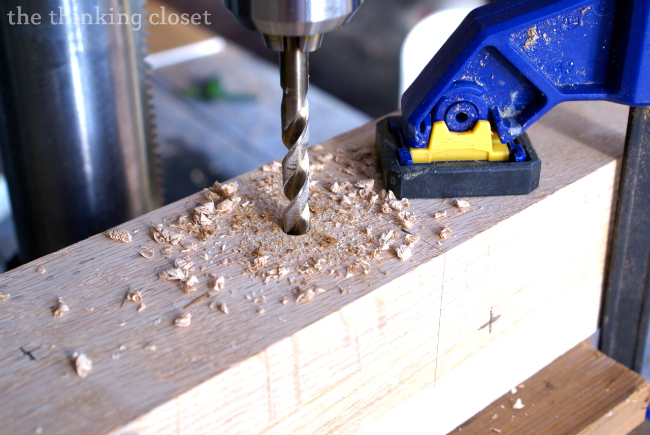
Cut the boards to the right length for the size of your bed. For the end rails, drill 2 holes roughly 3″ from each end, so that there will be just over 1.5″ of board hanging over. For the side rails, the holes can be 1.5″ from the end, since the side rails will rest on the end rail overhang. It’s much easier to show than tell…
The ideal way to make the holes is with a drill press. However, a hand drill could be used instead, if you are just careful to drill at a 90 degree angle (it’s harder than it looks to do this in both planes). The angle and precise location of those holes will matter later when you place the bolts in step 4.
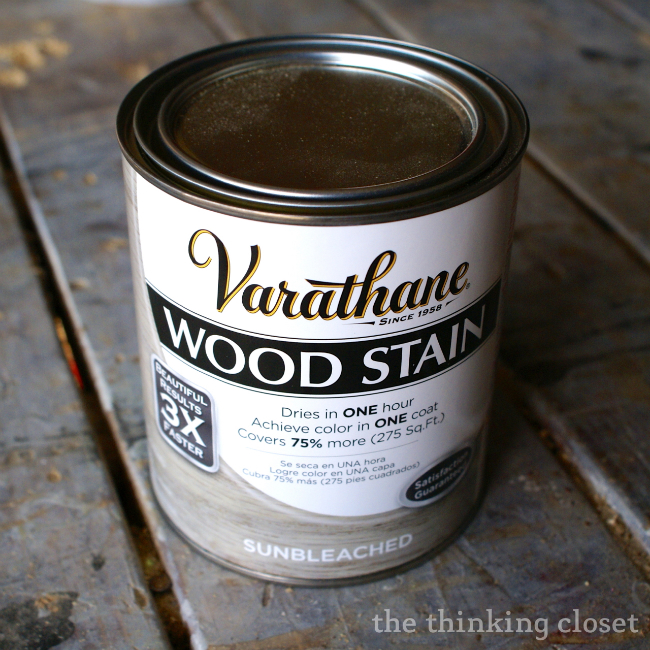
To get rid of splinters, you’ll want to sand everything, as well. We also stained our wood prior to assembly using Varathane “sunbleached” wood stain, which Lauren shared about in a separate video tutorial. Check it out here.
4. ASSEMBLE the structural pieces according to your plan. It is easy to lose track of which pieces go together when you try to reassemble inside the room. Once it is put together, label the insides of the boards at each corner (A,B,C,D).
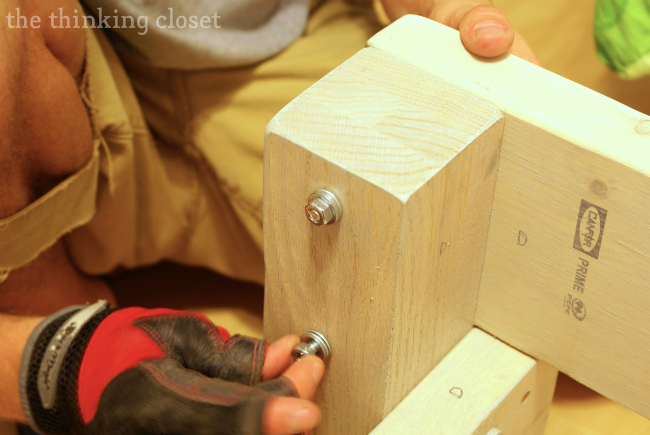
Quick-grip clamps are helpful here to hold the pieces together while you place the bolts through and tighten them loosely with your fingers or a couple turns of the wrench.
Be sure to note that the 4 larger bolts need to be at the head of the bed. They will be positioned parallel to the headboard and will go through the bed post, the side rail, and the headboard leg . For now, just put them through the bed posts and side rail, since we’ll add the headboard later.
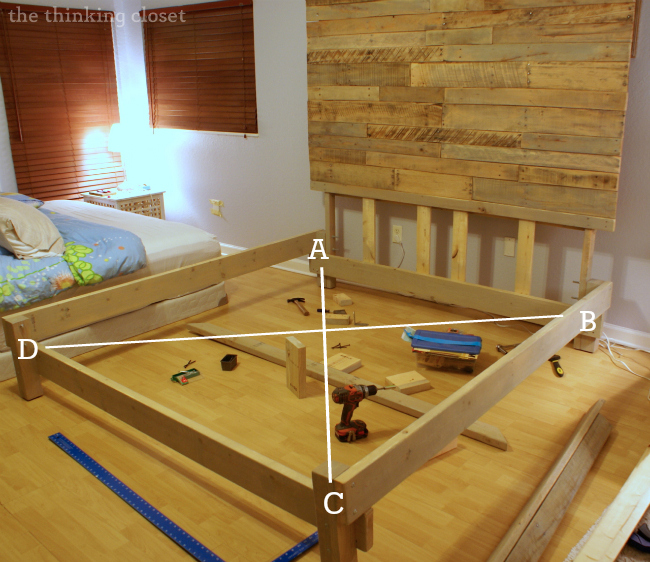
5. SQUARING. Before placing the left-right brace (when the bed frame is still just an open rectangle), you need to make sure the bed is a rectangle and not a parallelogram (perhaps you haven’t heard these words since 9th grade geometry?). Another way to say it is that you want all 4 corner angles to be 90 degrees exactly.
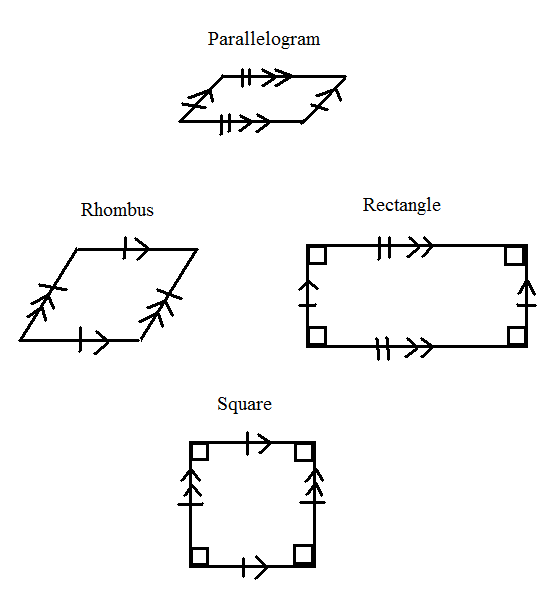
The easiest and most accurate way to do this is measure diagonally corner to corner. A to C distance should be equal to B to D distance. If they are not, you and a helper will pull the 2 corners apart, pulling at the 2 corners that had a smaller distance. Then, remeasure and repeat until it is square.
When it is square, you can place one or 2 temporary diagonal braces to hold the rails at 90 degrees.
6. BRACING. When you are sure it is square (I can’t over-emphasize how important that step is), go ahead and place cross-braces and tighten up all bolts. You can brace in a variety of ways, and it only matters that in the end, the bed feels solid and does not shift… here’s the way I did it:
I cut a 2×4 just long enough to catch the 2 side rails, and set this vertically (like a roof truss) underneath the side rails. I later added a 5th post to this brace (see step #10), but for right now, just put in the left-right brace with no center post. I placed 6 of the 1x4s perpendicular to the headboard and fastened them down with screws. These will be the pieces that the box springs will lie directly on. Again, it doesn’t matter if you brace it how I did, as long as it ends up rock-solid.
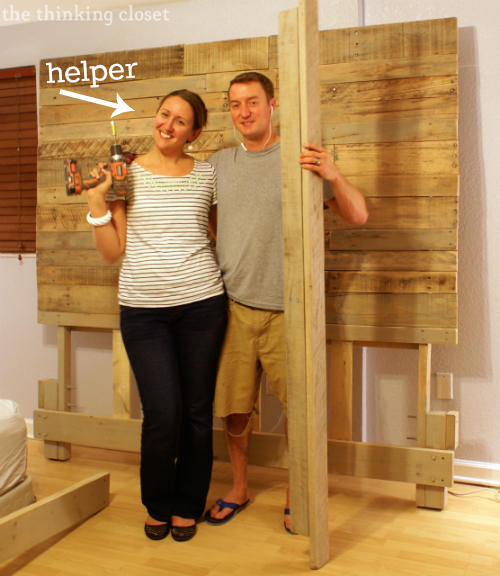
7. JOINING. You will have assembled the headboard separately (tutorial to come). Now, it is time to join them. A helper is key for this part and definitely use your clamps.
Back the bolts up so that the ends protrude to the outside and there’s no extra bolt hanging over on the inside of the post.
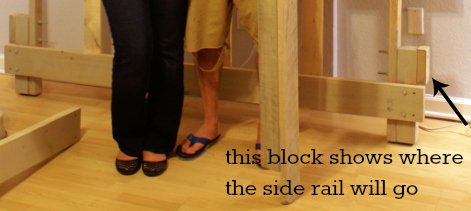
First, the 2 of you should raise the headboard upright, standing it on its legs (made of a 2×3). Clamp the legs firmly onto the posts at the head of the bed. The holes at the bottom of the legs were drilled ahead of time to match up perfectly with the 2 legs at the head of the bed. Using the larger bolts (⅜ by 6.5), which are already through the bed post and side rail, advance the bolts through all 3 pieces, and replace the washer and hex nut, tightening them loosely with a couple turns of your wrench. A socket wrench is best if you have it.
8. SQUARING. Squaring again? Yes, now the headboard must be squared up with the bed frame. If you have a large square, great, but you could also use anything large and square, such as a floor and wall (if you are certain they are 90 degrees) or a piece of foam board or large book.
Have your helper push or pull until it is perfect, then hold in place while you tighten up those 4 bolts. Whether you are using a nut driver or a wrench, you are going to want to turn until the carriage bolt head is pulled into the wood and the washers likewise are crushed into the wood on the side you are tightening. When you hear the sounds of wood crushing, you’re on the right track. Give it another turn or two.
9. BRACING ROUND 2. Before placing the box springs and mattresses on your frame, walk all around the bed and make sure everything is sturdy. Lean, push, pull, and stand on the horizontals. If anything is not sturdy enough, add bracing (keeping in mind that it cannot get in the way of the box springs).
You may even need bracing for the large right angle formed by the headboard and frame. Alternatively, if you make the 4 bolts tight enough, it may give you enough stability without braces.
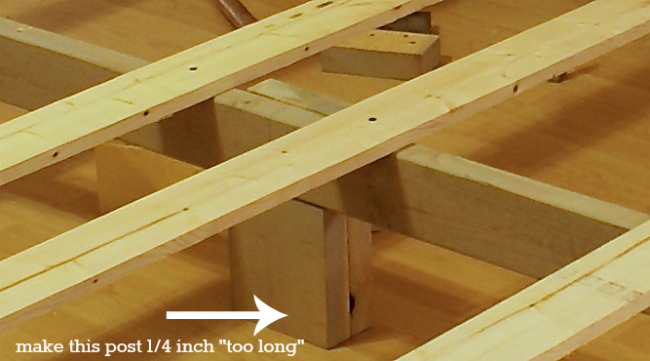
10. SUPPORTING. For a large bed like a king, you will probably want a fifth post in the center. You can attach this post to the 2×4 (left-right brace). Now, the key to a good 5th post is that you need to fasten (2) 2×6’s together, with one of them long enough to fasten to the 2×4, and cut this newly created post about 1/4″ to 3/8″ too long.
I think it works better if you do this 5th post as step 10, rather than with step 6, which is why it is here. The reason is this: with the headboard joined to the bed frame, you will find that placing the 5th post causes the two posts at the foot to hover just above the floor. That is good. That is what you want. Within a few days the boards and bolts will “settle,” and you’ll end up with all 5 posts on the floor and the weight distributed properly.
That’s it! Now, you’re ready to add the box springs and mattress to your finished hand-built bed.
Coming Up Next!
Thanks, Mark! I think I need to let you take over the blog more often. Seriously, I could get used to this.
Alright, friends. I hope you have a fabulous weekend. I’ll be back on Monday with a video tutorial, yup…a VIDEO tutorial…on my process of staining the wood on our bed frame. And it promises to be a grand time. Though I’ll warn you in advance, you may be blinded by the shine of sweat on my forehead because this went down in October, folks, and October was the height of our summer in Florida this past year. And I always save our biggest DIYs for the height of summer. {Smile.}
Rustic Nautical Master Bedroom Makeover Series
And if you’re just tuning in, be sure to check out the other posts in this series!
- Rustic Nautical Master Bedroom Makeover: How We Found Our Shared Style
- IKEA Hack: Whitewashed Fjell Wardrobe with Pallet Shelves
- How to Stain Wood with a HomeRight Finish Max Sprayer: Video Tutorial
- How to Build a Custom King Size Bed Frame (you’re here!)
- So You Want to Build a Pallet Headboard
- IKEA Side Table Hack: Such Great Heights
- The Thrifty Girl’s Guide to Coastal Decor
- Nautical Anchor Pillow Tutorial
- Felt Fish Pillow for the Nautically-Inclined
- Roll-Top Desk Makeover: Business on the Outside, Party on the Inside
- Desk Styling 101: Say Goodbye to Styling Anxiety
- Adding Scallop Stencil Details to a Roll-Top Desk
Ciao!

Hi i was just curious on what he had done to the footboard and ended it off on that end? I see theres something there but its not covered in the right up. Also sorry for commenting on an older post!
No worries, Josh! Sent you an email with some detailed info and pics. Let me know if it didn’t come through!
Excellent tutorial, and I love the way you have used oak for an overall better look, and it will wear so much better than a softwood. I love the look of this bed and the instructions are so good it is a potential project for the future!
Thanks for sharing!
I just finished this project as a wedding gift for my fiancé. Stuck to your main structure but added some trim and shelves on a shorter headboard. It turned out great and your material list and price was spot on. Great post, great project. Thank you!
What kids of screws did you use to secure the braces and what did you use to secure the slats? It looks like they are screwed in.
Lauren
We are beginning to “recreate” your king size bed and pallet headboard. Your plans for the bed are super specific (thank you). Is there any dimensions for the pallet headboard frame? We have the pallets read to go. Just wondering about the dimensions for the frame on the headboard. LOVE, LOVE, LOVE your ideas. I have a LARGE “to do” list thanks to you guys!
Aw, I’m so happy to hear that, Pat! Let’s see if we can help you out with some math. (Fun fun, right?)
A = width of your mattress. B = total height of the headboard (ours was 72″ from the floor up; decide how tall you want yours to be). C = the height from the top of the mattress to the ground. (B – C) x A = square footage you have to cover with pallet boards. A x B = square footage of scaffolding.
Hope that helps y’all in your project! And thanks for the warm words.
can i get a copy of the blueprints?
Hi Desiree – – we don’t have blueprints made up, but you’ll see from our recent comment replies some of the dimensions. A lot will depend on your own personal preference for bed height and your exact mattress size…but we will get to work on updating this post in the coming months with some more detailed plans. Best of luck!
We do not want to use box springs, so what design changes do you suggest other than making the legs longer so the bed is higher? Also, it has now been a year since you built your bed. Any squeaking? Any changes you would make in the design? Thanks.
Hi Linda:
Thanks for your question. If you do not want to use a boxspring, that is fine. The only change I would recommend for you in that case is to use more 1x 4’s to support the mattress (i.e. space them closer together). That is all a boxspring is doing anyway, is transferring the force from the mattress evenly to the ground. The only other design change/addition I would make is to make sure your left-right brace is securely anchored to the side rails. We used metal right-angle braces for this, secured with 6 wood screws on each side. good luck.
Where did you buy the materials? Homedepot does not have the oak solid post… Could you share a list of the materials and a website? thanks
We got ours at Home Depot; I recommend calling around to your local lumber stores to see who might have one in stock. Best of luck!
Very excited! I bought the lumber you listed last weekend and cut the legs today. What are the length measurements of the end and side rails?Thanks!
That’s awesome, Shana! So glad you’re going to take this project on; we are STILL loving our bed, over a year later. As for the length measurements of our boards, we intentionally left them out because it will all depend on the mattress (believe it or not there can be a fair amount of variation, especially with a boxspring and pillow top). Just be sure to measure your mattress and add a little extra space to ensure to fits within. Ours nests pretty snugly. Best of luck! And keep me posted on how it all goes.
Hey Shana. I went ahead and made some measurements for you. 85 1/2″ long for our side rails. End rails are 79″ long. The two part foot-piece at the foot of the bed (the one we are holding in step #7) is 79″ long on top and 70″ between the foot posts. I fastened these two pieces together using metal right angle brackets, then installed them as a unit. Hope that helps.
Hi! Thanks for sharing your hard work. I also have a question about the construction 🙂
The pictures in #8 and the second picture under #10 show a board(s) at the foot of the bed that are flush in height with the side rails and also flush with the front of the 3×3 posts. I cannot find where this is described in the post. Can you please describe what you did here?
Thank you in advance & keep up the good work!
Hey Andrea. The two part foot-piece at the foot of the bed (the one we are holding in step #7) is 79″ long on top and 70″ between the foot posts. I fastened these two pieces together using metal right angle brackets, then installed them as a unit by screwing them down into the top ends of the foot posts. Hope that helps.
Love this tutorial! Thank you!! Trying to convince my handy hubby to tackle this project for us! Quick question…is your bed a true King or a Cal King?
Thanks again!
It’s a true king, Cori! Best of luck!
I have been looking for plans on a DIY king size bed frame for months, all were confusing and seemed to advanced for this beginner-intermediate builder. Then i ran across your site! I love this plan and its easy to understand. Me and my wife are excited about this project. My only question is how high is the bed with the matresses? Me and my wife are tall and kinda want the bed to be high.
Thanks for sharing this project!!!!
Thanks, Toby! So glad you’re taking this on. We can tell you that ours comes out to 30″ off the ground but we are using a thick mattress and a thin boxspring. A “high” bed is 36″ so go with whatever you are looking for – – that’s the beauty of DIY!
Live the bed frame! Also love the headboard- Did you buy or make it. If you made it can you tell me how & what you used please?
We made the headboard ourselves! You can read more about that process in this post: https://www.thinkingcloset.com/2014/02/24/so-you-want-to-build-a-pallet-headboard/ Best of luck, Tara!
Love this project. Just the bedroom I want. I have great pictures of north carolina lighthouses that will set this room up for me. Just the bed I want too… Wonderfully Beautiful!
Hi guys, I am seriously thinking about building my own Kin size bed frame and yours was one of the more interesting designs I came across during my browsing. I have a question… Are the four corner posts completely outside of the rectangle of the box spring and mattress? The photo of the frame only would indicate that, but the photos with the box spring and mattress appear to at least partially cover the 3″x3″ posts, so I am just a bit confused. Any help would be greatly appreciated, even a top view os sketch with L and W measurements. Thanks so much! Dan
Sorry about typos on last post…Kin -= King and last line “os” = or. Thanks again.
Yes. It is designed so the posts are fully outside of the box spring and mattress. I went ahead and made some measurements for you. 85 1/2″ long for our side rails. End rails are 79″ long. The two part foot-piece at the foot of the bed (the one we are holding in step #7) is 79″ long on top and 70″ between the foot posts. I fastened these two pieces together using metal right angle brackets, then installed them as a unit. Hope that helps. And sorry for the delay in reply.
Hi there! The bed looks amazing!
I have to know though… is it really sturdy? I’m a pretty light sleeper and am sensitive to my hubby’s movements that make the bed frame wiggle. (We have a new mattress – the problem is definitely bed frame moveage) I love having the mattress on the floor because there is zero movement, but we’re not in college anymore and that just won’t fly. So far the bed frames we’ve used (including the wooden platform bed he just built yesterday) have not felt sturdy enough. I’m desperate to know if the frame your husband built mimics the floor in any appreciable way… as you can see from the timestamp I am really hurtin’ for sleep! My hubby is a woodworker so he’s not new to this kind of work… I’m just wondering if there’s a better design than the one he went with.
Thank you!
Thanks, Lindsay! So glad you’re a fan. I actually asked my hubby to respond to your question since he is the mastermind behind its construction…and he is BIG on making things sturdy. So, here’s his response: “The bed frame, if built by this plan, squared up, and fastened using bolts, is extremely sturdy, but the other key to sturdiness is the contact point with the floor. If you have a hard floor (wood, tile, etc), use a non-slip rubber or acrylic disk fastened to the bottom of each post. If you have carpet, this may also work well, or you may want something with tiny spikes. The whole idea is to have the floor and posts stuck together so that the stability of the floor prevents bed movement. Hope this helps.” Hope this helps you get a good night’s sleep! And let us know if you have any further questions we can take a stab at. Good luck!
Great DIY project. My fiance showed me this, and we are getting ready to start making a version of your bed frame this weekend. we are really looking forward to it. Just one question. becacause you nested your boxspring in the frame, and you put the 3×3 posts on the interior of the corners. did you build it so the box spring is flush along the side boards, and has the gaps between the end boards and the box spring (my guess), or did you fit themso they fit between the posts on the foot of the bed, and had the 3 inch gap between the sides and the box spring. I hope my question makes sense, thanks again for this post.
Jon, you have no idea how freaking COOL it is to us that you are going to use our bed as an inspiration for your own! I definitely had a mini dance party in my living room when I first read your comment. Wow! So, I asked Mark your question since he was the wood-working mastermind behind it all. And here is his response to your question:
“The 3 inch post should lie just beyond the foot of the bed. The third picture illustrates best. The foot rail is on bottom (lowest) and the side-rails rest on the head and foot rails. Hope that helps. We are so honored you are making the bed!”
And when he speaks of pictures, we snapped a few on our iPhone, and I will email them over to you now. And don’t hesitate to ask us any more questions as they arise! And we’d absolutely DIE if you sent us a photo of your bed upon completion. That would take the cake as our biggest DIY reader inspiration to date! And I’d love to feature y’all in my next Reader Showcase. Okay, gushing is over now. Off to send you that email, Jon. And happy bed-building!
You know (and I know you know) you are truly blessed to have such a handy husband who is an expert carpenter and can figure out how to make something from scratch, figure out any problems or complications that might get in the way, bring new life and purposes to wood/pallets, evaluate and rework something, make it safe and sturdy! All elements for being a good diagnostician and doctor, too!! Please let him know I am very proud of his work!
Yes, it is such a blessing indeed! And so different from the way my brain works – – it always fascinates me to come across his sketches and plans. It’s almost like reading another language! And yes, I definitely see so much crossover to his work as a doctor. He likes to build things that are beautiful, strong, and efficient…much like how he approaches resetting a broken bone. Will pass your sweet message along, Mama!
Not gonna lie, most of that went over my head. Like WAY over! But I did get the part with all the shapes because… you know… substitute teaching comes with its share of Math! haha
Ok let’s get serious. This is nothing short of completely amazing and ridiculously impressive. Alex just about fell off his chair when he saw the plans and how this was all done. He seems to get it. Me? Ummm… rhombus, yes, I know what THAT is!
Amazing job you guys, and Mark could for sure make a career in blogging… you know, if being a doctor gets old, ever! 🙂
Love you comforter!! Where is it from!?
Thanks, Kerri! I have a post coming where I’ll source all the decor items, but to answer your question now, it’s a duvet cover from Target, believe it or not! Only $34.99. Now, the fabric is very thin, so you’ll need to ensure you have a white duvet underneath, and I’m nervous about the color bleeding in the wash…but so far, so good! We love it!
Wow amazing DIY project! I even had to show my husband! 🙂
Wow. I take that as high praise, Carmen! Thank you, girl. (Also, I LOVE your profile pic. So. Much. Fun!)
I knew those hands the minute i saw the drawing because of how he holds the pen….
this blog is AH.MAZING.
love you guys, and how the blog reflects, each of you and the sum that is greater than its parts….
the bedroom is amazing too.
there is just so much truth, goodness and beauty reflected here i just can’t express it!
no don’t resign!!!
ps we are headed up to west point and have to go to a banquet without kids. we were discussing what to do with them in the hotel room…chad offered a memory….(without names)
“mom, remember the wedding of the girl with the creative blog and the really nice guy who plays frisbee in the rain? well when we went there……”
Okay, first of all, I think this might be the first time you ever linked to your blog, Denice, and I am kind of freaking out about it! A) That it exists. B) That I didn’t have the url until now. C) That you are such a fantastic photographer. D) That I have an archive of spirit-filled posts to sift through in the days ahead. Jackpot.
Now, re: your out-of-this-world-encouraging comment: thank you, Denice! It’s so true about the sum being greater than its parts. And if there’s one place we really have seen that lived out, it’s in the Parker family! You and Jeff have been such role models for us as a couple. Thank you for always being so generous with your wisdom. We cannot WAIT until we see you again!
(Also, Chad’s memory made me chuckle! Yep, blog and frisbee in the rain pretty much sums us up.) Love you, Parkers!
Very cool! We recently bought a king size bed/set…but this may come handy for our old bedroom set now in our guest room. Thanks for the idea/instructions!
-Danielle
@DanielleASB
ChatterOutLoud.com
You’re welcome, Danielle! So happy to hear you’re a fan!
Lauren, your bedroom reveal is so fantastical and your headboard is a dream! I’m so happy you posted it and you have no reason to ever doubt yourself, you create amazing work! I would love it if you linked up to The Makers link party going on right now on my blog, http://upcycledtreasures.com/2014/02/the-makers-link-party-5/
-Katie @ Upcycled Treasures
I FINALLY got my rear in gear and added y’all’s button to my linky page, so I’ll be sure to remember to link up each week. Can’t wait to join in on the fun! I heart all three of you hostesses. And thanks for the super duper sweet comment about our makeover! It means so much coming from you, Ms. Upcycle Queen!
Totally and completely amazing! I can hardly believe you BUILT that bed frame… it totally rocks. Thank you for sharing your awesomeness at our Link It or Lump It party!
Of course! Thank you SO much for hosting such a fab party (shhh! Don’t tell the other link parties, but yours is one of my faves!).
I am BEYOND impressed that you & Mark made your own bed frame! Holy Awesome DIY Batman! I think that’s the icing on your proverbial Nautical Bedroom Makeover Cake. (ps… umm, why don’t we celebrate big diy successes with cake? this seems like a no-brainer…)
I think you’re onto something here with this whole cake business. Yummmmm! And thanks for your enthusiastic response, Emily! We’re so thrilled to finally share these DIY projects with our friends in blogland. 😉
Beautiful! I won’t lie, making this would be a bit out of my comfort zone right now, but I appreciate the tutorial! I love it, and it caught my eye at the ishouldbemoppingthefloor.com party–I had to stop by!
I would love it if you stopped by our Facebook page, and said “hello!”
https://www.facebook.com/OurMiniFamily
Your fan,
~Cathy Mini
ourminifamily.com
I’m so touched that you took the time to stop by! And I can understand the intimidation factor; I know I would have brave enough to tackle it on my own. But it really does help to have a buddy! And our hope is that this post can serve as a helpful point of reference for anyone hoping to try something similar. Off to say hello on your FB page!
What a great team! This is so awesome, you guys! Thanks for the breakdown. Emailing it to my hubby so he can get started on ours! 😀 Pinned!
~Abby =)
Hehe. Hope you and the hubby do get to tackle a big DIY project together someday soon. While we definitely had a few moments where we needed to work through our differences of opinion, we both were so pleased with the final outcome, and I have no doubt it strengthened our relationship. If we can tackle a Master Bedroom Makeover together, we can take on the world, right? 😉 Thanks for the pin-love, too, Abby!
Absolutely amazing!! Great post! I’m stopping by from “Inspiration Monday blog hop.
Thanks
Angie
http://www.godsgrowinggarden.com/
Thank you so much for taking the time to stop by and leave such a sweet comment! I appreciate it, Angie!
I was excited to see a post with Mark’s bed frame tutorial! I really was. Coming from a long line of building types (my folks built the house I grew up in that they still live in, and half the furniture in it), I love DIY, and even my dad would be impressed by Mark’s construction (he is SO right about using the bolts).
As for your mom putting us up to our kind comments, Lauren… the room really does look like something from a magazine, only better because it also looks real. Real = comfortable, actually useable/liveable, practical where needed but still pretty, inviting, warm; full of personal mementos and not just a bunch of stuff to fill space. You guys rock! <3
Aw, I’ll have to tell him that, Raven! Love that you come from a family of builders…and that you were able to appreciate his use of bolts. Mark really does care a lot about making things sturdy. It’s funny, whenever he helps build sets for the shows I direct, I have to reassure him that it doesn’t need to last 20 years. That we’ll be tearing it down in 4 weeks. It just needs to make it through the run of the show. But he can’t help himself. 😉
Also, your comment about the room looking REAL and comfortable and livable and inviting…well, all your words just cut straight to my heart. And made me feel so very affirmed. Because, you see, that was our hope, Raven. And the fact that you articulated what you did from an outsider’s perspective, well, it really does give me such a sense that we did it right. So, thank you for that gift! You’re a gem-and-a-half.
Wow, you guys are such a great team! I can’t believe you made the plans AND made the bed! Amazing!! Great job guys! I don’t think I’d even attempt it.
Hugs,
Jamie
It really has been such fun discovering that we CAN be a team in this way; it’s new for us. Because we actually have time in our lives right now for such endeavors. We’re soaking it up while we can! 😉 Thanks for the affirmation and hugs, Jamie!
I just found your blog and love it. Can’t wait to read more! 🙂
http://www.erinbrans.com
Yay! I’m deeeeeelighted you found me, too, Erin! Thanks for the visit. Come back again soon!
What a great team you are!!! The bed is just wonderful. Pics to follow a la lucile! 🙂
I think we might need team t-shirts soon. Doncha think? I have no excuses with a Silhouette lying around. 😉 Also, you have me on pins and needles to see this fab hair of yours! I have an appointment to go back and get my red re-done in early March. It faded too fast!
Wow! How awesome are you guys?! I love your hubby’s sketches, and the finished product is amazing!
Thanks, Bethany! I love the sketches, too. He thinks in a way I don’t (spatially), so seeing someone use grid-lines is always so intriguing to me….
This is AWESOME! you’ve totally inspired me to make our own 🙂 we so need a king size bed! http://www.handmadeintheheartland.com/
Angela, do it! Do it! Do it! It really does feel regal to have a King! (Especially one you made yourself.)
Love the bed and headboard! The whole room looks fabulous!
Thank you so much, Glenna! Headboard post goes live tomorrow! (Or today rather. Eeeek!)
Okay, I love this post. I love this project. I love your bedroom! Now I’m experiencing a real sense of separation anxiety from my power drill… Must.. build… ASAP!
You go girl, you are a DIY blogging superstar! And like, I wish my boyfriend was a handy as your hubby. 😉
Ha ha. Hope you and your power drill can get back together again soon! I know awesomeness will result! Because, well, Mon makes things. That’s just what she does. 😉
Oh, and seriously, if I need a confidence boost, I am just going to re-read your comments. DIY blogging superstar? Wow. Doesn’t feel true most days, but I will certain take it! Thanks, love!