Receipt Organization with Free Cut File
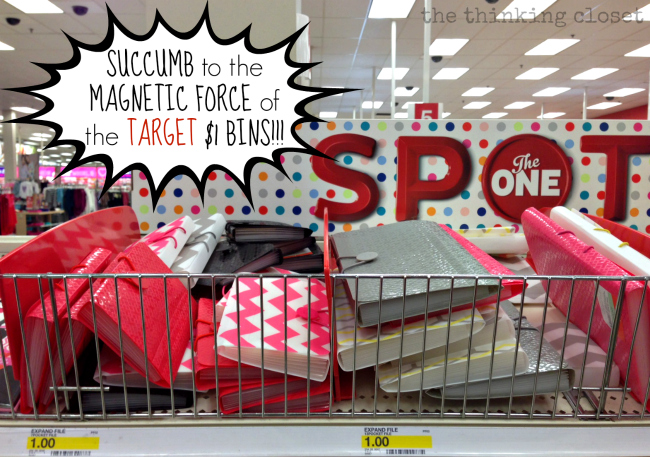
It’s like there’s some kind of magnetic force field around the $1 bin section at Target. It just draws me in like a moth to the flame, and before I’ve even begun to tackle my shopping list, my cart is filled with goodies. It doesn’t help that it’s the first thing you walk by after grabbing your cart. It’s like they’re intentionally trying to get you to buy stuff, or something. {Grin.}
But I’m not complaining because I’ve gotten several incredible finds from those dollar bins…one that I’ll be sharing about on Thursday and another that has its fifteen minutes of fame today!
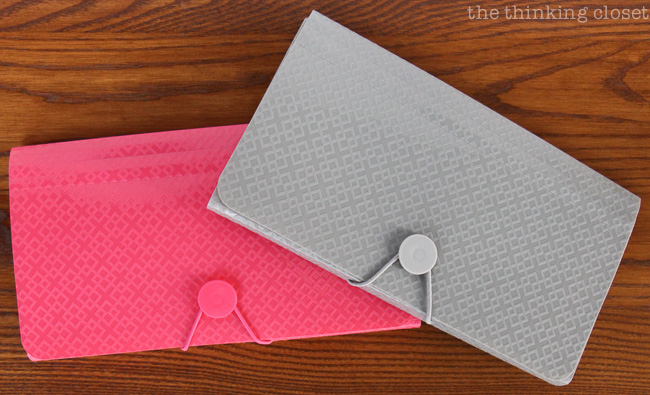
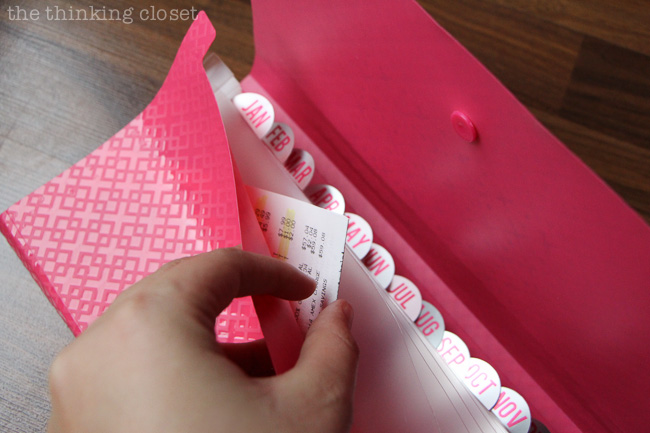
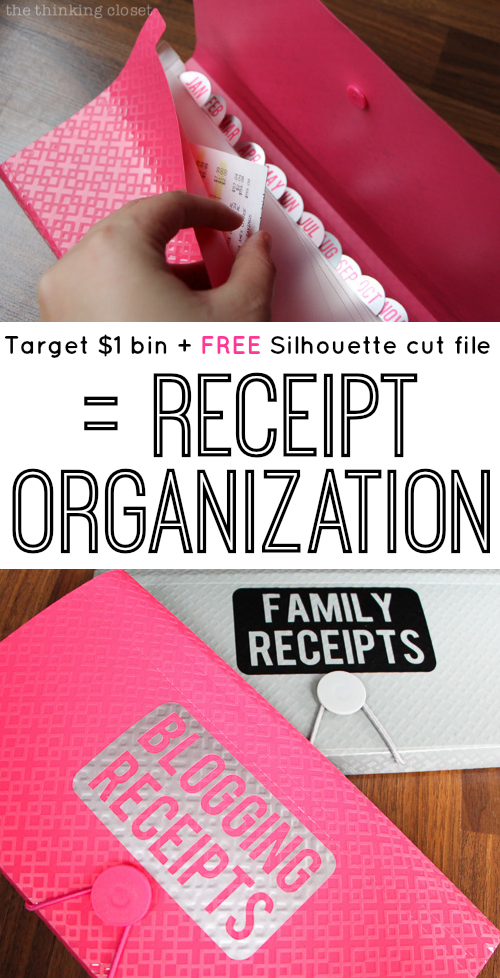
When I saw these cutie accordion-style file organizers, I immediately snatched two of them up. The force was strong with these ones. {Groan.}
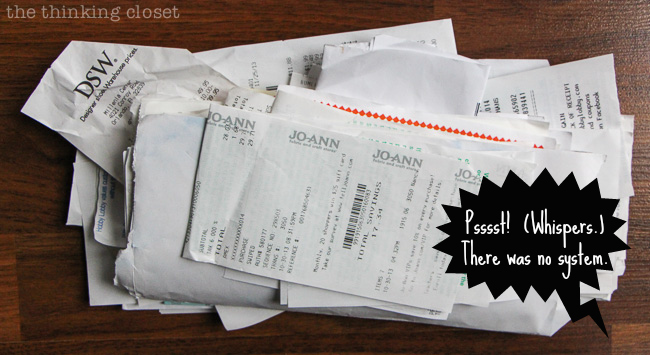
You see we have some desperate need for a new system of organizing our receipts. Here was our old system:
Whenever we needed to return an item, we’d have to dig through the mountain of receipts from months prior just to find it…and oftentimes we didn’t because it was such a mess. Add on top of it the receipts I’ve started to save for the purchases related to my blog, and we’ll just go ahead and call it a piping hot mess.
So, these two nifty accordion files will house our family receipts and my blogging receipts. And of course, I needed to label each one accordingly as well as create some pretty tab stickers for the 12 months of the year. I mean, it just wouldn’t do to use a sharpie and write on the white tab stickers that came with them. Oh no. This calls for a quick n’ easy Silhouette tutorial!
Heads up: I’m going to be more thorough than usual since I know there are many of you out there with new machines who could use the extra screenshots and detail. So, don’t be dismayed by how long this it. It really is do-able for beginners!
Tutorial
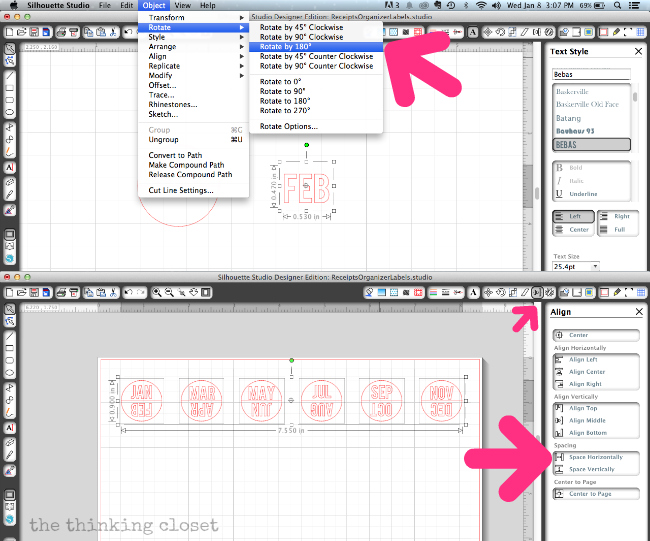
Step 1. Open up Silhouette Studio and create your month stickers. It’s actually really easy to get a precise measurement of a shape in Silhouette Studio. So, after drawing a circle, I just opened up the SCALE window and specified my circle width and height (which ended up being 1.055, unlike what is pictured).
Then, I just I clicked on “Draw a Line” on the left toolbar to slice a circle in half; then I made sure the line was perfectly centered by opening the ALIGN window and selecting “align middle.” Lastly, I grouped the two shapes by selecting them both and hitting COMMAND-G, and then just copied and pasted a bunch more!
For my font, I chose a favorite, Bebas (free download), and typed out my abbreviated months to fit inside the half circles (26.9 pt. contrary to what the photo says). To ensure the text for the bottom halves were perfectly level, I just rotated them by 180 degrees (see photo below for reference). Then, I repeated this step until all my months were completed.
Next, I drew a box around each circle to select all the shapes inside of it and grouped them using COMMAND-G again. To space them perfectly in a line across my mat, I used the Align Tool again to first “align middle,” then “space horizontally.” Not a necessary step in this case, but it’s a fun trick to know!
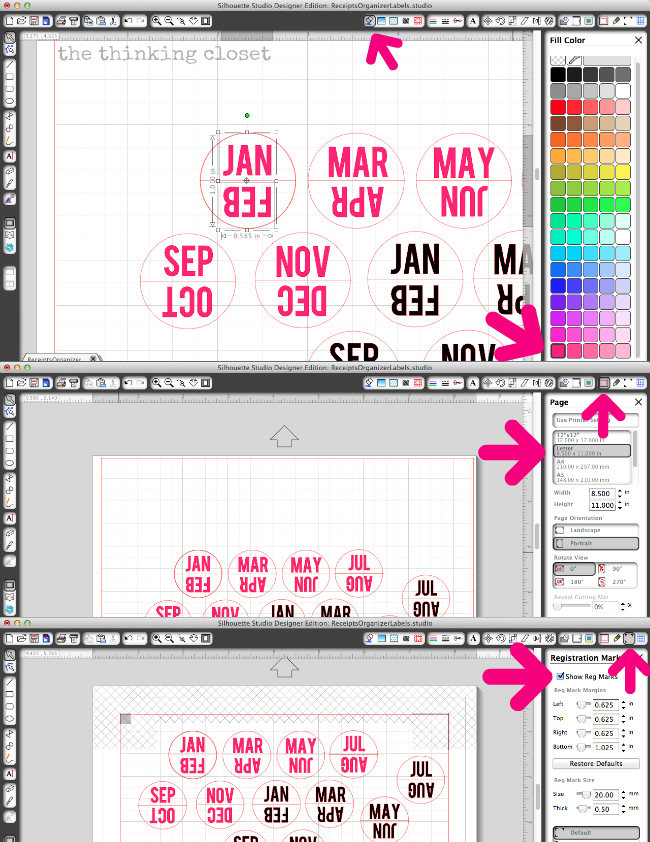
If you’re doing a print-and-cut design like I did, then, you’ll need to ungroup the shapes in order to fill the text with color (COMMAND-U). When selecting multiple groups of text to fill with the same color, click on them while pressing down on the SHIFT key to make sure they are selected. Then fill them with your color of choice. After you’re done, you can re-group them.
And now, it’s time to change our media size from the 12″ x 12″ default to letter size. Do that under the PAGE tab (see photo). The, select the REGISTRATION MARKS tab in order to click “show registration marks.” Registration marks help your machine know where your images are when it comes time to cut, so this is a very important step. Also, make sure your designs fit inside those registration marks.
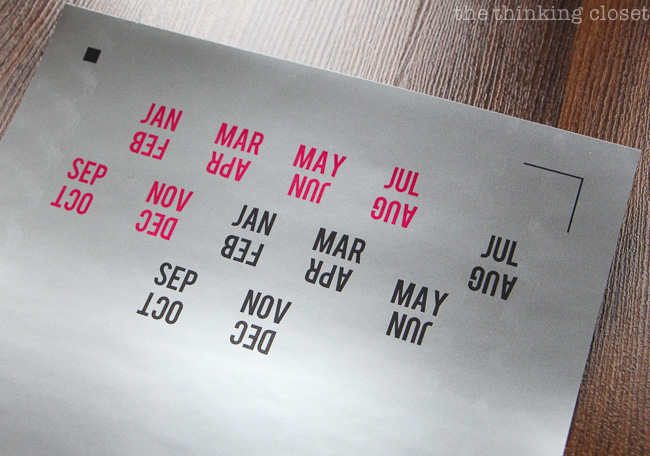
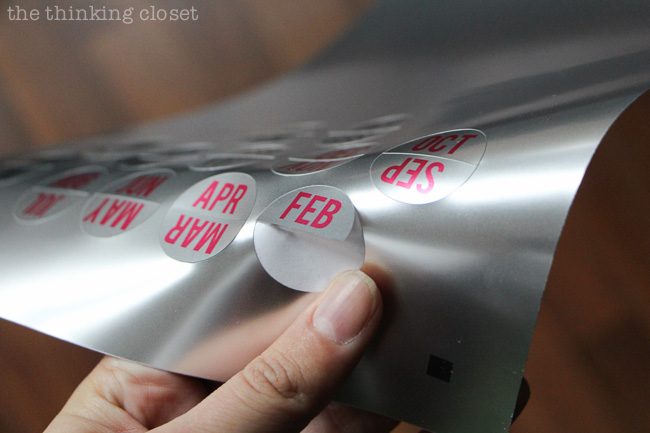
Step 2. Load printable foil in your printer and print your month text. I thought about this long and hard and ultimately decided that the Silver Printable Foil would be the best media for my month stickers. Not only is the metallic sheen eye-catching, but I could simply print my text onto the foil instead of dealing with tiny, intricate cuts on vinyl or adhesive cardstock (which can be tricky when so small). So, I loaded up my printer, adjusted my printer settings to print in high quality and on “photo” paper (since it’s akin in thickness to the foil), and ended up with this:
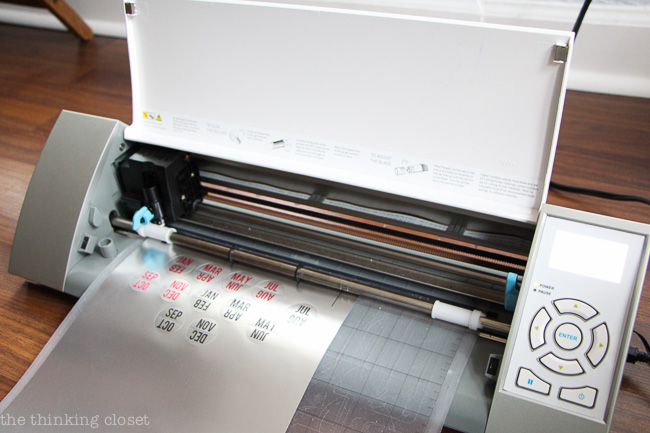
Step 3. Cut out your month stickers using your Silhouette machine. So, now that the text has been printed, it’s time to cut out those stickers! Back into Silhouette Studio, open up the Cut Style window (the little scissors), and select “No Cut” to the text and the circle and line should still be marked in red (which you DO want cut). Everything left in bright red will be cut by your machine.
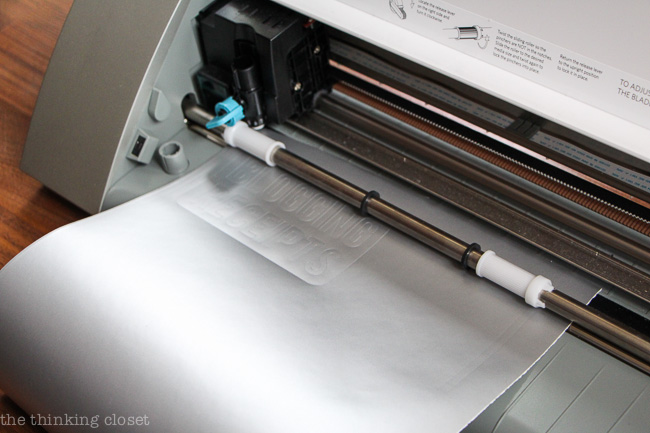
Use your machine’s recommended cut settings for Printable Foil (adjusting your blade accordingly), and cut away!
This part never ceases to amaze me: how a Silhouette machine can use the registration marks to locate your design and cut exactly what you want it to. I always stare and watch it in amazement.
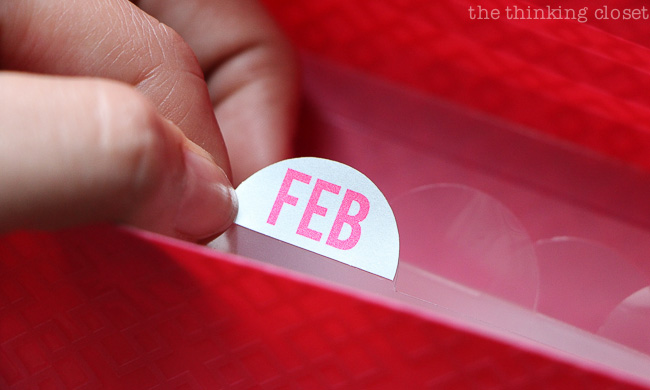
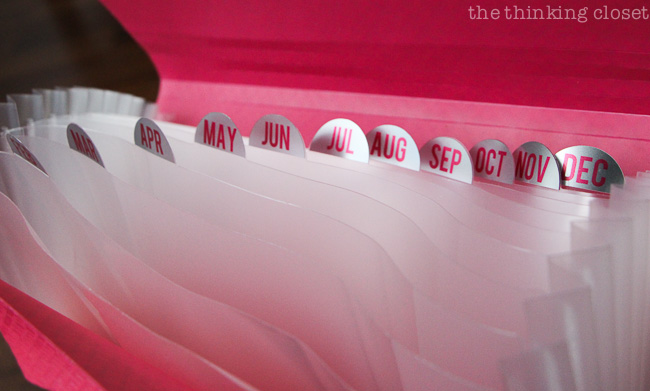
Step 4. Apply your month stickers to your accordion file tabs!
Step 5. Create vinyl labels for the exterior of your accordion files. As I said before, I bought 2 different file organizers: one for our family receipts and one for my blog-related receipts. So, I created vinyl labels to help distinguish between them. I used the Bebas font again and just drew rounded rectangles around the text in the dimensions I wanted. (4.2″ x 2.5″.) And you can remove the registration marks since you’re done with the printing!
Step 5. Cut your vinyl labels using your Silhouette machine. The cutting mat is optional when cutting something like vinyl off the roll, so just make sure to either check or uncheck “cutting mat” in your cut settings. And you’ll need to adjust your rollers if cutting off of the roll, so release the blue lever on the right, spin the white plastic roller on the right to unlock it, slide it where you want it, lock it back into place with a twist, then secure down the blue lever. (If your material is swimming all over the place when cutting, it’s usually because you forgot to lock the rollers down again.)
With vinyl, I often run a “Test Cut” which just cuts a tiny triangle within a rectangle out of the upper left corner of your vinyl. If your blade is brand new, a blade level of 1 might suffice! But a 2 worked fine with me, achieving that perfect “kiss cut” where it cuts through the vinyl, but not the vinyl backing. I used silver and black vinyl for my two different labels.
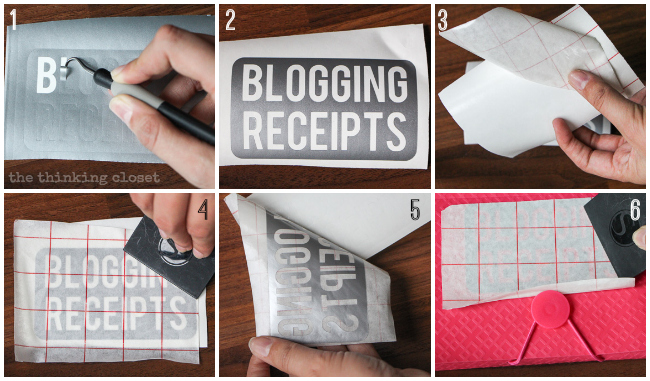
Step 6. Weed and apply your vinyl labels. The process of applying vinyl to anything is old hat to veteran Silhouette users, but I remember just starting off and being SO perplexed at how Silhouette users lined things up so perfectly when applying vinyl. Their trick? A hook tool, scraper, and transfer paper! This visual should show you how the process works:
1 & 2: Weed out the unwanted parts of your design using a hook tool.
3: Cut a piece of transfer paper down to size, remove the backing and…
4: …apply it atop your vinyl. Use a scraper to smooth it out. The goal is to get the vinyl to stick to the transfer paper, so you can apply a little pressure.
5: Slowly peel the transfer tape up, ensuring the vinyl is coming along with it!
6: Apply the vinyl to your subject, which in this case, is the accordion file organizer! Use the scraper to transfer the design from the transfer tape TO the subject.
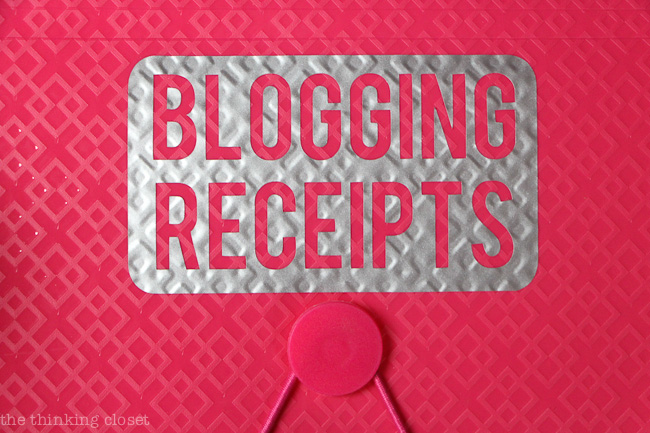
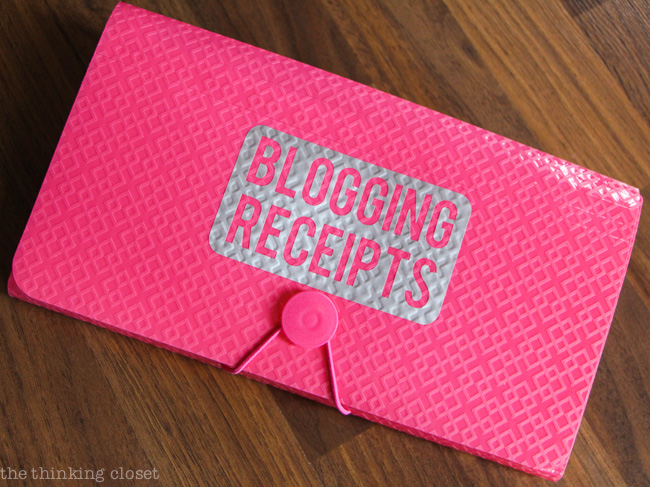
And here it after application! I actually was pleasantly surprised at how great it looked atop the textured surface. You almost can’t tell it’s a vinyl label – – it’s like it could have been made this way! (In my humble opinion.)
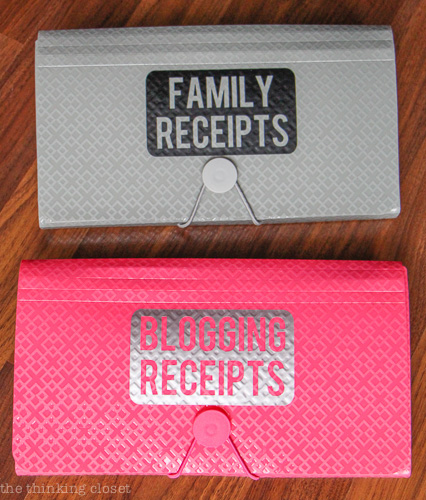
And here are the two receipt organizers together! We shan’t mix them up now that they’re so appropriately labeled. What a relief!
The day I made these, we were already putting them to use!
Come tax season 2015, we’ll be sittin’ pretty. Now, this year on the other hand is another story. Well, onwards and upwards, right?
And here’s a little diddy for the Pinterest fanatics:
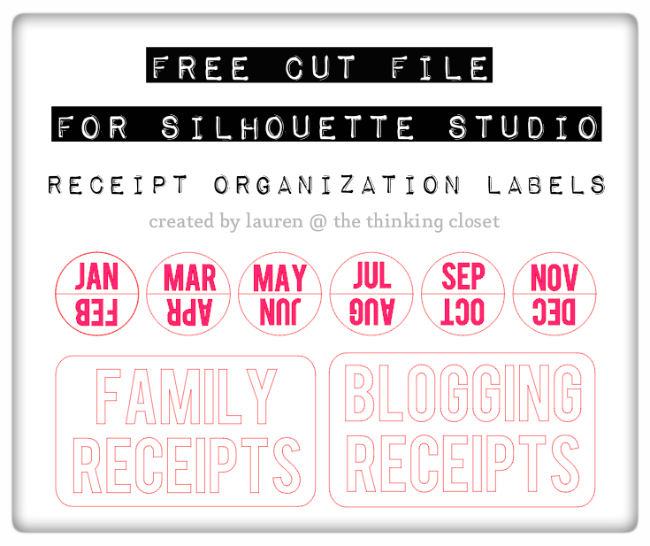
Free Cut File
I know, I went through all those steps in the tutorial just to GIVE you my Silhouette cut file. Well, I guess I’m in teacher mode…and I figure there will be several of you out there who want to learn how to design your own labels and tabs for future projects. But for those of you who are like, “Ain’t nobody got time for that! Gimme the freebie!” just sign up to nab your download using the nifty form below or by clicking HERE. {Fine print: this design is for personal use only and is not to be used for commercial purposes. Thanks!}
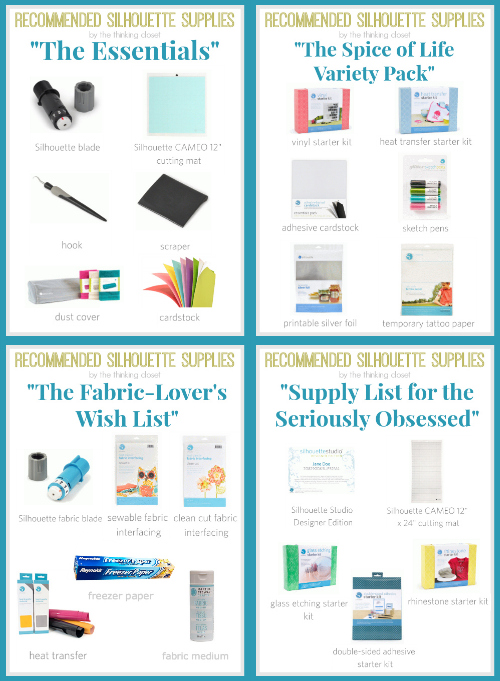
Recommended Silhouette Supplies
Not sure what the “essential” Silhouette supplies are? I’ve gotcha covered with four different supply lists depending on your interest and skill level. Check ’em out HERE.
The Silhouette Challenge
It’s a new year, which means a new Silhouette Challenge! Last year, it was all about 12 unique projects in 12 months, and I’m proud to say that I was able to accomplish that (and a whole lot more).
So this year, my Silhouette Challenge buddies and I are tackling themed challenges, and this month’s theme is…you guessed it! Organization!
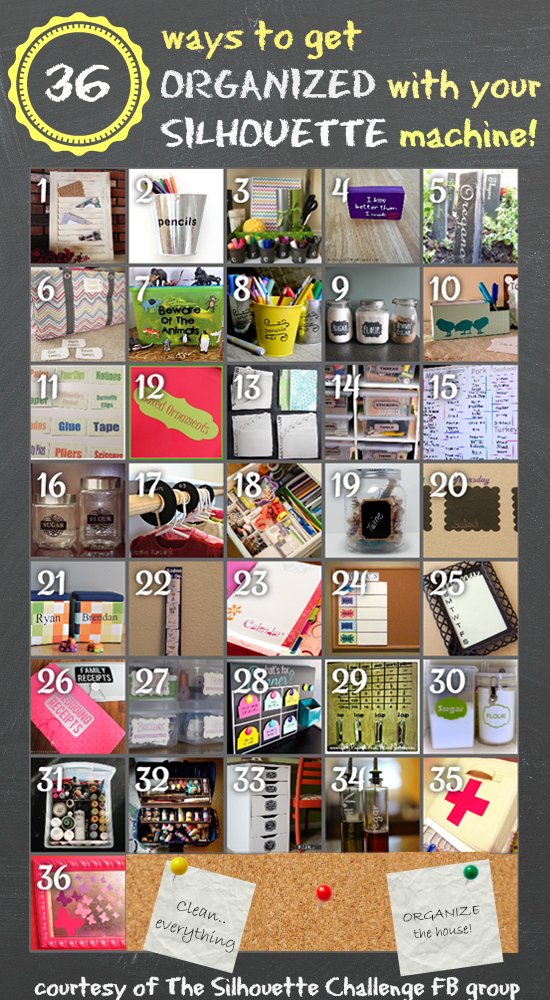
So, check out the 35 other organization projects being shared in blogland today!
- DIY Window Shutter Mail Organizer by Weekend Craft
- Kids’ Art Wall by Tried & True
- Organizing Silhouette and Craft Supplies by The Happier Homemaker
- Simple Recipe Organization by It’s Always Craft Time
- Put a Label on it! Herb Names for Plant Stakes by Get Silvered
- Super Simple Linen Closet Labels by Two Purple Couches
- Beware of the Animals Vinyl Toy Box by A Tossed Salad Life
- Child desk accessories by Architecture of a Mom
- Organizing & the Important of Labels by The Turquoise Home
- Index Card Organizer for Easier Meal Planning by Chicken Scratch NY
- Create Craft Room Labels by Dragonfly & Lilypads
- Simple Storage Solution for your Christmas Ornaments by Vintage News Junkie
- Organize this: DIY Planner Covers, Tags & Dividers (made with Cereal Boxes) by Black and White Obsession
- How to Make a Cut File into a Print & Cut by Create & Babble
- Simple Chest Freezer Organizational Board by Nearly Handmade
- Vinyl Your Kitchen Canisters! by From Wine to Whine
- Nursery Closet Dividers & Silhouette Cut File by Creative Ramblings
- Make Custom Box Templates with a Silhouette for Drawer Organization by One Dog Woof
- Organizing the Craft Room by What’s Next Ma
- Vinyl Wall Calendar by Crafts Cakes and Cats
- Personalized Toy Storage Bins by Lil’ Mrs. Tori
- Personalized Routine Chart by Work in Progress
- Blog Planner Sheet Dividers + Free Cut Files by TitiCrafty by Camila
- Simple Project Calendar by Little Blue’s Room
- Dry Erase Photo Frame Menu Board + Free Cut File by Essentially Eclectic
- Receipt Organization with Free Cut File by The Thinking Closet (you are here!)
- Cute and Easy Labels by Life After Laundry
- “What’s For Dinner?” Menu Planning Board by unOriginal Mom
- Mixing Organization and Function: An Easy Conversion Chart by My Paper Craze
- Why do my cookies taste so bad? A lesson in baking. by The Life and Times of a TAP
- Custom Drawer Dividers by Please Excuse My Craftermath…
- The evolution of my labeling system by feto soap
- Ikea Drawer labels by McCall Manor
- Glass Etched Vinegar & Oil bottles by Terri Johnson Creates
- Organize It: Bathroom Closet by The House on Hillbrook
- Ombre Butterfly Magnet Board by Sowdering About
Phew. Not my shortest post ever; not by a long shot. But I hope you’re feeling inspired to get your organizing on…or at least make a Target run. One or the other. {Smile.}
Full Disclosure: This post contains affiliate links, meaning that if you make a purchase using my code, I receive a small commission. Please rest assured that as always, I only recommend products that I use and love.






hi i’m new with silhouette cameo and my first cutting machine ever. I just tried to make a label such as the one you feature in this post. I have no trouble cutting out letters, but this type you feature here is sort of like making a stencil label and i just can’t seem to make it work with certain letters. I am using the same font that you used here (Bebas font) but i end up with the whole outline of letters B, A, O, R, P In other words in the B there is no line between the upper hole and the lower hole so it just shows the outline of the be, not the two holes you normally see on a B like yours. same goes for my A, O, R, P i wish i could attach a pic of what these letters look like so you can see what i mean. i’ve been trying to figure this out for days and cannot find a post that addresses this problem. Then i saw your post and tried the same font as you did, but still those letters just don’t come out stenciled with the lines in the center to separate the center cutouts. How did you get the B to cut out to look like a B without the insides getting cut out. Is there a setting or workaround for stencil cuts like this? Thanks for any help you can offer. if there is an email i can send a picture. Thank you!
Hmmm…it sounds like you may have somehow set the cut lines to only be the outside the letters instead of the entire thing. When you go into your cut settings (scissors icon), make sure that all the parts of the letters are outlined in the dark red. And if you’re still struggling, I’d start a new document and type out the text afresh. It should automatically cut the inside and outside of all fonts unless you tell it otherwise. Sorry if that’s wordy…hope it helps!
Thank you for taking the time to reply. I do have all the boxes checked off for “cut all” and not just the outside. i’ve tried everything and asked and i just can’t seem to find out why the whole inside of the B is being cut, even the line between the upper opening and lower opening of an upper case B. I just cannot make a label with the letters cut out. I know i have the setting correct because this does not happen with all the letters, only some like the B a lower case e, the inside of an upper case A. I’ve searched all Silhouette help advice and i do not see this mentioned. Thanks for replying, i’ll just not make labels and go back to cutting where i am just using the words, not an outline of the words inside a shape. Thanks, love your blog!
merci pour toutes ces jolies créations que vous nous offrez : elles sont toujours très réussies ! je me permets juste de vous faire une toute petite remarque – partagée par une bonne partie de mes contacts : ce serait vraiment parfait si vous proposiez l’image en format png ! cela permettrait de les utiliser non seulement avec d’autres machines mais aussi pour tous ceux qui ne possèdent pas de machine de découpe et qui pourraient ainsi les ajouter à leurs créations digitales ou hybrides !… j’ai créé des liens ici : http://www.pinterest.com/lemondedis/freebies-fichiers-de-coupe-svg-gsd/ et là : https://www.facebook.com/pages/LMIlesptitesdecoupes/498251196924176
Thanks for the kind remarks and for sharing my cut files! I hear ya – – if I had the software to easily convert .studio files into png, I would definitely love to offer that up. Maybe one day when I invest in Illustrator…. Take care and thanks for the support!
Love this idea! I knew I had to do something similar as soon as I saw your post here, and I’ve just posted about it on my blog: http://confessionsofarecoveringchocoholic.com/2014/03/29/how-to-organize-receipts/
Lauren,
I love this Idea for keeping track of receipts for blog and home. I was thinking of taking it one step farther with Christmas or Birthday receipts. Then when I am searching for those “darling pieces of paper”, to return exchange I will know right where to find them. I am going to add this to my To Do List!
Inspired, Karen Marie
Wonderful tutorial. I pinned because one day I will be following these directions step by step. You should see our big box of receipts (or maybe you shouldn’t)…I’m sure there are receipts from 1988 or so still there. I keep thinking it’s a project for a snowy day while I watch TV…to just go through them in case there is an important receipt. But alas, snow days come and go, and the receipts remain in their pile!
I think Target should be happy you gave them some positive advertising with all their bad press lately!!
In past years I’ve just stuffed receipts in a brown paper envelope. Now you’ve inspired me to head to Target’s $1 bins and see if there are any accordion files left. I’ll have to label with a Sharpie, though! I don’t have a fancy machine!
This is such a great idea! I’ve been keeping business sized envelopes with all of my Home Depot and Lowes receipts… but it’s just not cutting it… Or holding up very well! So excited to start getting more organized in 2014!
What a great idea! I am soooooo making my son use this. As long as I have to do his tax stuff, he’s gonna get a folder…maybe not pink, but he’s getting one. He gave me two walmart bags full of receipts the other day. They are crumbled and all. It’s gonna take me FOREVER to go through them. THANKS for sharing the cutting file!! As usual, you totally ROCK!
Ack, I so need one of those for my blog! And you’re totally making me crush on that printable foil. Must. Have.
Brilliant!!!! I picked up a couple of these as well. Now all I need is the Silhouette! 🙂
These look great! Guess I’ll get out my sad little Sharpie and label my receipt holder all while gazing longingly at your adorable fancy $1 accordion file and lamenting the fact that I still don’t own a Silhouette.
By the way, I like how you strategically had the Jo-Ann receipt on top!
Love it! I haven’t tried to do a print and cut yet and I really want to do one. Thank you for the great example! It’s so much easier to use organization tools when they are cute like this one! I’m more drawn to the tool and motivated to use it for some reason.
Love this project! And I believe that there are at least 3 project from the challenge this month (including yours and mine) that has included Target $1 Spot products! I think we have all succumbed to that siren call.
What a great project Lauren. Geeze, all these posts on organization are just pointing out how un-organized I am! I love that the texture from the stickers shows through the organizer – it reminds me of diamond plate metal. 🙂
Ooooooooh I could definitely use this idea and you got me with the colors!!! LOve gray and pink!!!! I need to my hands on so many silhouette kits! Oh dear! Love love!!!! Pinning!
XOXO
Cami
Love ti with the silver! So snazzy… I get drawn into the Dollar Bins ever time! It’s a sickness!
Another fantastic idea! Thanks for the free cut file, I’ll be using it.
Um. I want a Silhouette. Or, I want to live close to you and buy you vinyl and then have you make these for me. I don’t even need them for receipts but for tax stuff and for donation receipts and those receipts that I take surveys on to get money off of my next meal and…well, you get the point. I NEED YOU. <3
Love this, Lauren! Great job!
Hi Lauren,
This is a FABULOUS idea! I need to get to Target and pick up a couple of these folders. Thanks for the detailed tutorial. Since I’ve only made 3 projects since opening my Silhouette Cameo yesterday, I really appreciate your breaking it down to such specific steps!!!
When I finish making these, I would like to post the project on my blog. May I have your permission to CASE this and share? Of course I would link back to your tutorial and give you the credit!
Peace, Love and Joy,
Joyce
these look great and GREAT IDEA although I don’t have a silhouette so I”m probably just go for sharpie marker. Ha! I have a question though cause I’m new to wanting to expound my blogging… what kind of blogging receipts/costs do you have??
Thanks, Becky
Good question, Becky! Ya know, 2013 is the first year I made income on my blog so it’s the first year that I’m dealing with itemizing deductions. But here’s a list of some of the things you can write off on your taxes as an independent contractor. (This list was extracted from an email I got from one of the networks I’ve worked with, Pollinate.) “Conference expenses, web hosting, part of your rent/mortgage if you work from home, travel, meals, web design, materials for projects and any other expenses related to the business.” In fact, I’m realizing there’s a whole lot more I can write off from this past year than I initially thought…so it may be a bit of work to get it all itemized for this past year, but hopefully this receipts organizer in conjunction with a spreadsheet will help me be more organized going forward!
Hope that helps!
I SO need to do this…especially with the blog receipts. I’ll keep an eye out next time at Target! And wow, that silver vinyl looks AWESOME! I love it! Luckily I have a birthday coming up…I know what’s going on my list, hehe.
The crafty person in me is thinking, “Fabulous! Who knew receipts could look so good?” The tax professional in me is thinking, “Great start! Now to make your life even easier, go back and change your blogging labels to categories instead of months!” Seriously, you’re fantastic!
Lauren, I love this!! Have you ever noticed that the ink tends to rub off of receipts and you are left with a blank piece of receipt sized paper? I’m the worst about receipt organization, but it’s a small thing that could make a big difference for me. Thanks for sharing.
Why didn’t I think of this?! Great idea!!! I first love how you pre-separated the receipt categories. And then laying it out by month was super smart, that will make searching for receipts so much easier! Thanks for adding the cut file, you just made it really easy for me to follow in your organized footsteps.
I love this idea! I have a great receipt filing system right now too, it’s called getting thrown in the “junk” drawer. haha Not. This would be the perfect solution! Thanks for the great idea!
Hehe, I totally have a small accordion folder for blogging receipts that I picked up from Target. Only I think I underestimated myself and need a bigger folder. Cute project, Lauren!!
Just so you know…I’M TOTALLY STEALING THIS IDEA! I was preparing my tax documents the other day and realized I have no system to receipts and things for my shop, blog, or home. BUT NOW I DO. And the cut file? A-MAZING! Thanks so much for sharing that.