Nautical Anchor Pillow Tutorial
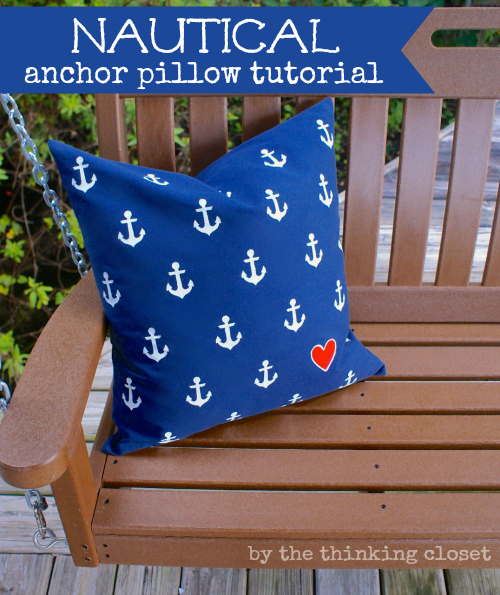
Ready for a super do-able tutorial for creating a nautical anchor pillow using freezer paper stenciling? I thought so. Anchors away!
So, I’ve somehow managed to keep this a secret from you guys up until now, but we are in the midst of our biggest d.i.y. endeavor yet: a total master bedroom makeover!
I guess you could say the ball started rolling over the summer when we conquered our IKEA Wardrobe Hack. The rest of the room was looking pretty ho-hum next to our newly done-over wardrobe, so we’ve been busy the past several months, working to transform the rest of the space. Today, you’re getting a close look at one DIY project for our new master bedroom (see the finished space HERE): a nautical anchor pillow.
So, I’m sure you can now guess what our bedroom’s design scheme is going to be. That’s right: nautical!
I even made the envelope pillow cover myself out of navy duck cloth. I followed a really easy video tutorial by my buddy Jackie from Teal & Lime, which you can check out HERE. I share more of my tips on creating the pillow cover and finding inexpensive pillow forms in my Felt Fish Pillow Tutorial, which you can find HERE.
Today, I’m going to walk you through the steps of stenciling on fabric using one of my favorite materials: *freezer paper!
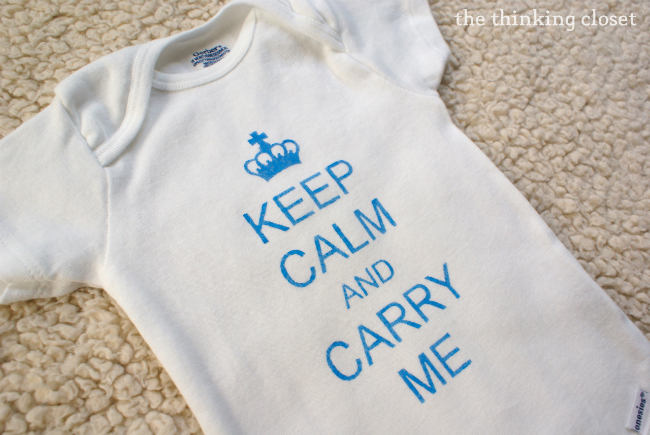
You may remember that I tackled my first freezer paper stenciling endeavor not too long ago with my “KEEP CALM” onesie. {You can check that tutorial HERE.}
And I thought this medium would be fun to try again, but this time, on my navy pillow cover! Here’s the play-by-play, and I promise it’s an easy one.
Tutorial
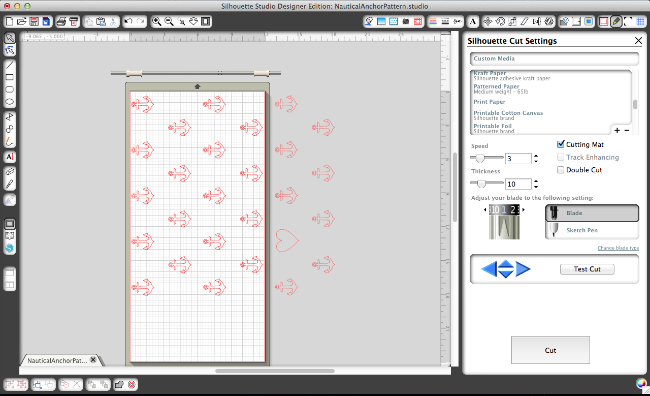
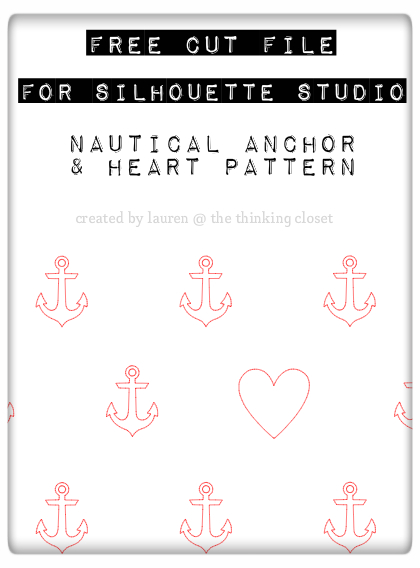
Step 1. Create & cut your design. I opened up my Silhouette Studio Designer Edition software and grabbed two free clip art files: one of an anchor, and one of a heart. Then, after tracing the images, I created a 20″ x 20″ box, the size of my pillow cover. Then, I just copied and pasted the anchor several times over, using the Align Tool to evenly space out the anchors on each line.
I had the idea that it would be fun to replace one of the anchors with a heart, so I chose an anchor on the bottom right corner to swap out for my heart shape. I flipped my design horizontally (top menu, OBJECT, TRANSFORM, FLIP HORIZONTALLY) since I would be cutting the design on the shiny side of the freezer paper, which gets ironed down onto the fabric. Then, I was ready to cut!
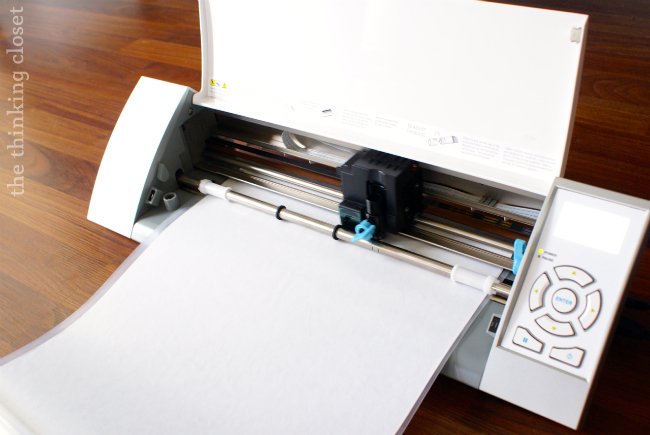
Now, it took me a bit of trial and error the first time I cut freezer paper with my Silhouette, but the settings that work best for me (with a new blade) are a blade of 1, speed of 3, thickness of 10, with the freezer paper shiny side up.
I have an extra long mat (12″ x 24″), which proved really useful because I was able to cut out my 20″ x 20″ stencil in just two parts, with one line that could overlap on each stencil to help with alignment.
Free Cut File
Now, if anyone else is interested in using this anchor-and-heart pattern to create a nautical pillow, t-shirt, tabletop, you name it, I’m happy to offer up my cut file to y’all for FREE! You can sign up to download your free cut file using the nifty form below or by clicking HERE. {Fine print: this design is for personal use only and is not to be used for commercial purposes. Thanks!}
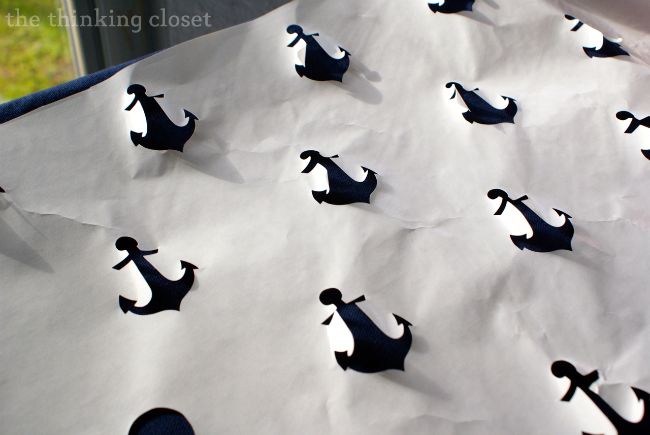
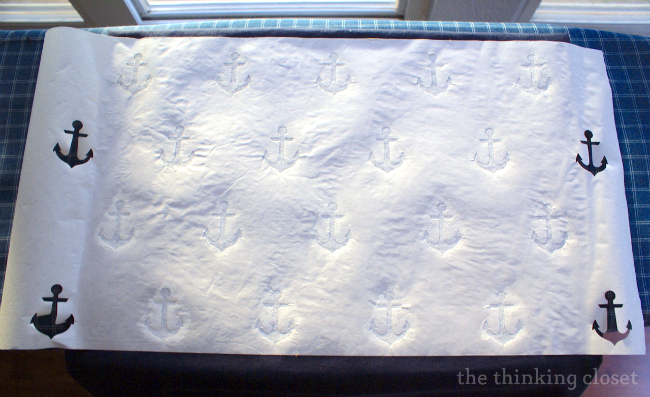
Step 2. Weed your design. For Silhouette newbies, “weed” is just a fancy term for “peeling out” your design. Just be sure to remove the stencil from the mat slowly and carefully; the thin paper can easily rip. And don’t be alarmed if your stencil looks like this when you’re done with the weeding process:
All those curled up edges will iron down nice and smooth in just a moment. I promise!
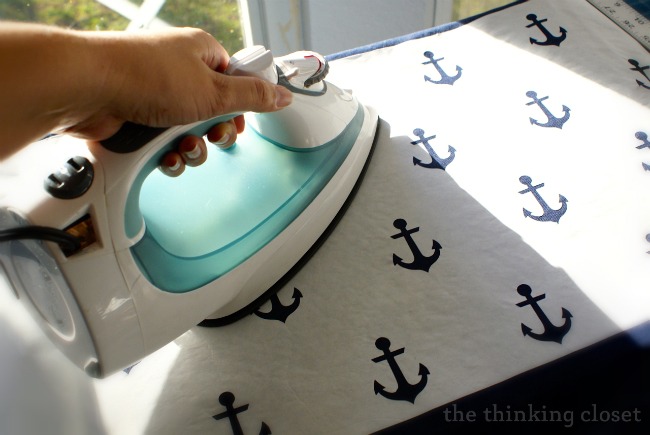
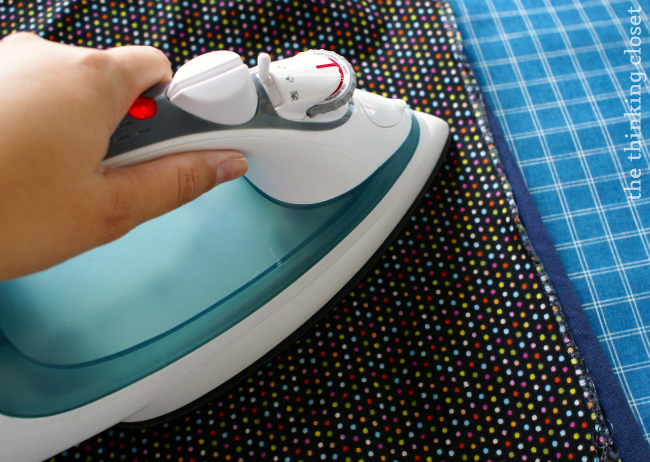
Step 3. Iron down your freezer paper. Once you have your freezer paper stencil placed where you want it, apply heat from a dry iron on the settings for that fabric. Really make sure to press down all of the edges. You want to make sure to create a strong seal between the freezer paper and the fabric.
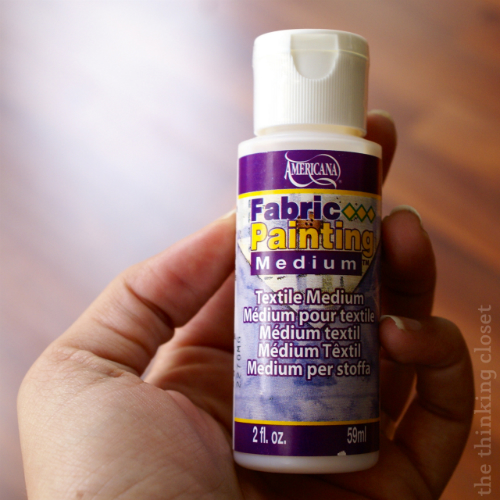
Step 4. Painting time! Since the only fabric paint I have on hand is the baby blue I used on my onesie, I invested in a bottle of Americana fabric medium (affiliate link) at Jo-Ann’s for $1.99.
Have you heard of this magical elixir? Basically, you can add 2 parts acrylic paint to one part fabric medium, and it functions the same as fabric paint! It doesn’t harden up the fabric, and it’s washable, too. So, essentially, you can transform any paint you have into fabric paint with this little bottle. (Can’t beat the price either.)
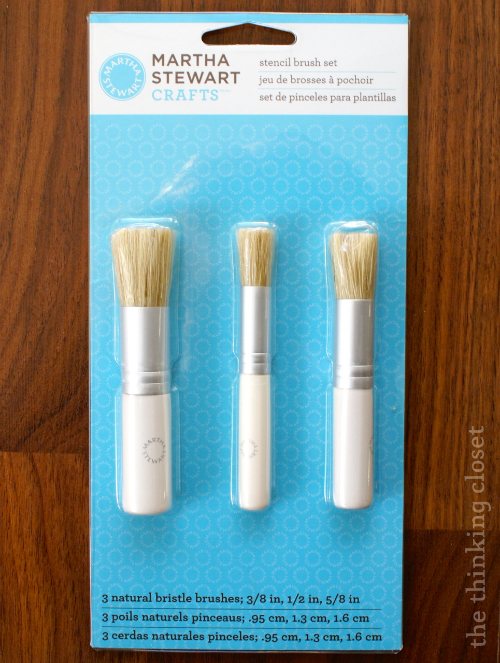
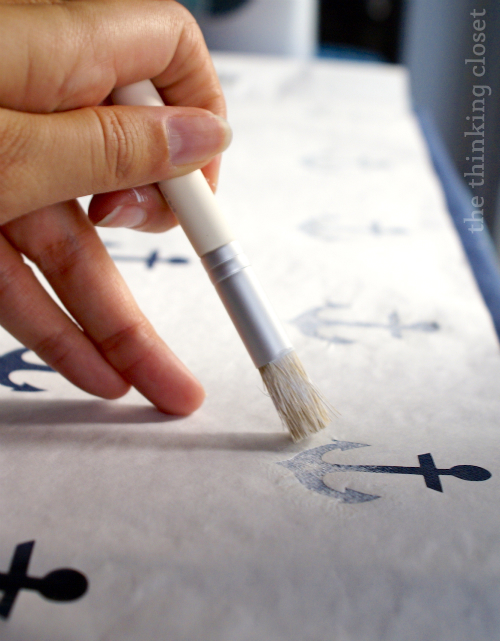
So, after mixing up some white paint with the fabric medium, I placed a piece of cardboard inside my pillow cover (to prevent any paint from bleeding through to the back). Then, I used a brush from new stencil brush set (affiliate link) that I got on sale for $5.99 at Jo-Ann’s to dab on the paint in thin coats.
Always be sure to dab it straight down and not paint it side to side (or else you risk the paint seeping under the edges of the freezer paper stencil).
I let the paint dry for 20 minutes or so and then applied another thin coat of white paint. Then, I let the first four rows of anchors dry for a few hours before moving on to the last 2 rows!
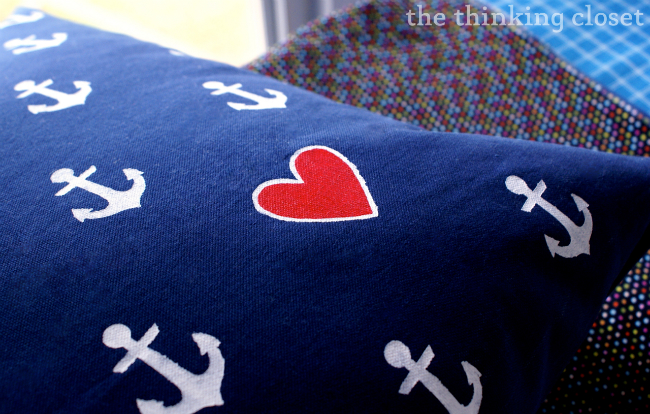
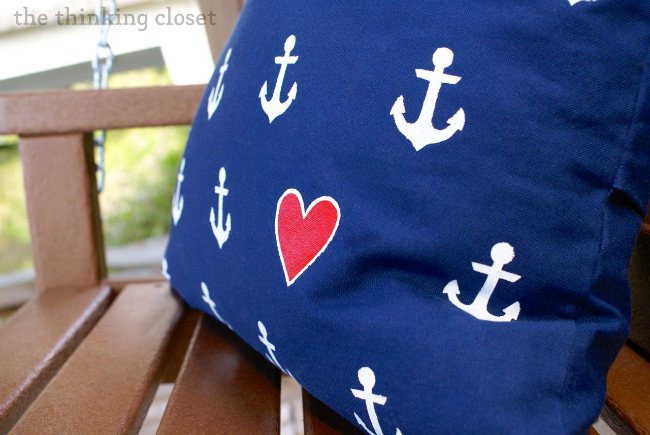
Now, for the heart, I gave that 2 coats of white paint first and then hand-painted the center of the heart read, leaving a thin white outline. I was worried that an all-red heart might get lost on the navy fabric, so the white outline allows it to really stand out.
Step 5. Peel and press! You’ll want to follow the instructions on the fabric paint or medium you use, but mine called for 24-48 hours of dry time, followed by 30 seconds of heat set with the iron on each side (I used a cloth in between the design and the iron to be safe).
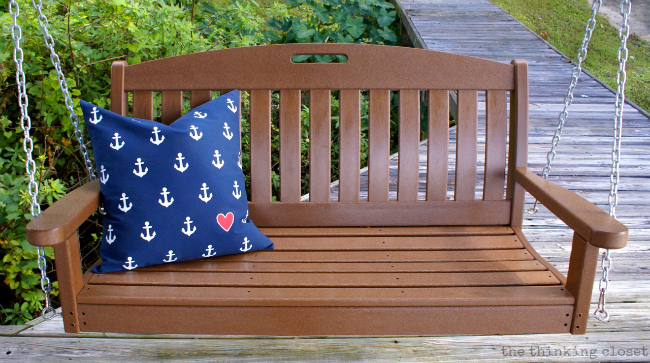
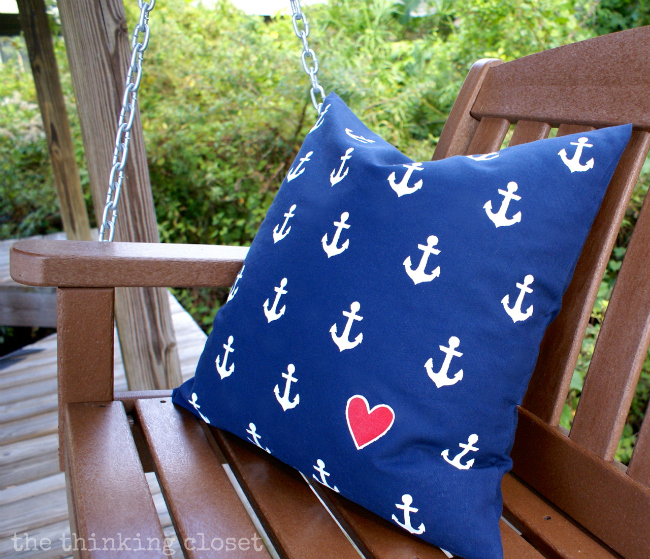
And because I want to keep our bedding a surprise, I’m going to do a little photo session on the dock on our porch swing, so you can see the finished look, and I can keep our master bedroom makeover a secret just a wee bit longer. Gotta have all my ducklings in a row before the grand reveal, ya know?
Update: Our Rustic Nautical Master Bedroom Makeover is finally completed! Check out the grand reveal HERE.
Ahoy, matey!
Other Posts in This Series:
And this is just the tip of the iceberg, my friends. For more nautical awesomeness (nau-someness), check out our Master Bedroom Reveal! As well as the other posts in this series:
- Rustic Nautical Master Bedroom Makeover: How We Found Our Shared Style
- IKEA Hack: Whitewashed Fjell Wardrobe with Pallet Shelves
- How to Stain Wood with a HomeRight Finish Max Sprayer: Video Tutorial
- How to Build a Custom King Size Bed Frame
- So You Want to Build a Pallet Headboard
- IKEA Side Table Hack: Such Great Heights
- The Thrifty Girl’s Guide to Coastal Decor
- Nautical Anchor Pillow Tutorial (you’re here!)
- Felt Fish Pillow for the Nautically-Inclined
- Roll-Top Desk Makeover: Business on the Outside, Party on the Inside
- Desk Styling 101: Say Goodbye to Styling Anxiety
- Adding Scallop Stencil Details to a Roll-Top Desk
Keepin’ it real!
If you’d like to see a glimpse behind the scenes, you can check out my post: How to Make a Mess: Tips & Tricks from an Expert. It’s one of my favorite posts I’ve ever written, and I hope it’ll give you a laugh and serve as a reminder of what really happens behind the scenes of blogger craft projects. It ain’t pretty people, let me tell ya!
Want to Check Out More Silhouette Projects?
My Silhouette Challenge buddies are all sharing projects today on their blogs, so peruse the links below for a blog-hopping good time.
Silhouette Challenge: Time Zone Bathroom Art by Nearly Handmade
Santa’s Christmas Countdown by Tried & True
Christmas Card Ornament with Free Cut File by unOriginalMom
Thanksgiving and Christmas Dual Sign by Architecture of a Mom
Itching to Etch by Get Silvered
Snowman Tag ~ Silhouette Challenge by Whats Next Ma
Thanksgiving Sign by Chicken Scratch NY
DIY Horse Silhouette Pillow by Rain on a Tin Roof
Sketching on Fabric by The Sensory Emporium
Paper Leaf Garland by Lil’ Mrs. Tori
Christmas Pillow by Create & Babble
Glass Painting with Reverse Stencils by Givemeapaintbrush
Chalkboard Thankful Tree by Cutesy Crafts
Bottoms Up! MYO Wine Tag by From Wine to Whine
‘Happy Holly-days’ Tags for the Swap by An Elegant Touch…
Advent Star Christmas Countdown by My Favorite Finds
Geometric Fabric Bowls by Please Excuse My Craftermath…
Silhouette Cameo Tutorial: Dual Sided Business Cards by Black and White Obsession
Christmas On My Mind by Creative Turn
Jingle all the Way! by My Paper Craze
Christmas Lights Garland by Making Home Base
We Are Thankful by 4 You With Love
Seattle Skyline Silhouette by Sowdering About in Seattle


What an expert job you did stenciling! And your talk of boats makes me want to go on one. I’ve only ever been on a ferry. But at any rate I digress… I love the pattern you came up with. So genius!
I think your project was awesome and that’s why I featured it at Craftionary.. 🙂 Thanks for linking up at The weekly creative.. Come by and see other fun projects that got featured along with you.
Have a great weekend! 🙂
I love the anchor pillow!
Navy Wifey Peters @ USS Crafty
That came out super cute…I’m a sucker for anything nautical!
That came out super cute…I’m a sucker for anything nautical!
This is fab! Can’t wait to see the master bedroom reveal!
Thanks, Heather! Still some key items to cross off on my TO MAKE list. Wish we lived closer so you could pop over to help me with styling. You rock with that, girlfriend!
Obsessed. Can one be obsessed with a pillow? Can now! So cute and I love that you used the good ol’ freezer paper method! I absolutely cannot wait to see the full room reveal. I know it’s going to be totally amazing because ummmm… pillow and wardrobe. Already awesome. I can only imagine what the rest will be like!
My nautical anchor pillow asked me to thank you for your very generous words, Thalita. It says, “Yes, yes, you can be obsessed with me. I will allow it.” Ha ha. (I don’t know why, but personification gets me every time.)
And thanks for your exuberance about our master bedroom re-do! It’s coming along! Day by day. Project by project. I just need to grow a few more arms to get everything done by the deadline I’ve set for myself. Maybe my magical talking nautical pillow can help me out with that. 😉
Ah-mazing!! I love these little anchors and the heart is the perfect adorable touch!! Pinning and sharing on my FB page 😉
Hugs,
Jamie
Aw, thanks for the share, Jamie! You show me so much FB love, I don’t even know what to do with you. Okay, I know: a knock-you-over virtual hug is comin’ your way riiiiiight…NOW!
Love love love! All these posts are making me want to redo my entire house! I love doing freezer paper stencils. They are one of my top sellers in my shop. Slower this time of year, but really pick up at wedding season. Thanks again for opening this opportunity for me.
Finally having a chance to go through all the Silhouette Challenge project inspiration– I’m like a [big] kid on Christmas but earlier!!
Lauren, you’ve outdone yourself yet again!! These pillows look so easy yet absolutely stunning! I CANNOT WAIT to see how your room comes together. The nautical theme is so close to my heart since I’ve always been a fan of Navy Blues, swimming, and well any water sport. Fishies are beautiful too!
Keep on being fabulous!!
Gorgeous pillow Lauren!! This would be perfect in my living room!! Thanks for the cut file and the awesome tip on that paint!! How cool is that!?
Can’t wait to see your amazing bedroom…which I totally know it will be! You’ve become quite the freezer paper expert. Pinned for later!
I LOVE this nautical pillow! Makes me wish I had a Silhouette to create cool designs like that. I’m stuck with an x-acto and don’t think I’d have the patience to cut out that many anchors! ha! Can’t wait to see your master bedroom makeover!
Saw your messy post yesterday and had to pop over to see the pillow! Cute cute cute. Love the heart! Looking forward to seeing more of this master bedroom re-do.
This turned out so great! You’ve got mad stenciling skills! 🙂
This turned out SO cute Lauren! Love it. Came by from Sugar Bee Crafts. 😉 But you know I love everything you do!
The nautical stencils looked so great…when I first saw the pillow I assumed the anchors were part of the fabric. The red heart is a great touch especially for the bedroom! I can’t wait to see the big reveal and also the messy post.
This post is so appropriate for Veteran’s day, esp. for those who served our country at sea–“I joined the Navy to see the sea, and what did I see, I saw the sea!”
I loved seeing that pillow and your nautically-themed bedroom in person! What a joy to see the creativity of BOTH of you beloveds!
Taking a break from working on my paper, and thought I’d stop by the beloved Thinking Closet! Sorry it’s been a while…what was I thinking??! Temporary insanity, perhaps. Oh how I’ve missed it! I’m loving these nautical pillows…especially the little heart included. It spices things up! Your bedroom is certainly coming together. I’m looking forward to the upcoming big reveal (and also feeling a bit special since I’ve seen some of the recent changes in person)!!! xo p.s. The Monday Mess Movement post was fantastic…we Castelli’s have that creatively messy thang down.
Wow, Lauren I absolutely LOVE this project! My mother-in-law would have LOVED this, before she fell victim to Alzheimers. My in-laws took early retirement, purchased a catamaran and modified it with a kitchen, dining area, and sleeping for 8 and then sailed for 10 years…yup! 10 years on the seas!
Super cute! Love the little heart among all the anchors.
Such a cute pillow!!! Good luck with the rest of your redecorating!
I love your modern spin on stencilling!!! I am a mad stenciler myself!! Must blog about it one day! 🙂
This looks so effective – the navy and white combo looks so smart. I love the “suprise” heart nestled among those anchors.
I’m intrigued by the freezer paper – I’ve seen it a lot on the web but it’s not sold here in Australia – maybe one day……
I need to get some of that fabric medium. Thanks for the tip Lauren!
That pillow is totally adorbs! I love the heart. Can’t wait for the big reveal.
That turned out really nice. I love stenciling and this looks like a really good one for lake cottage decor. I’m gonna steal this idea right away.
Beautiful pillow, Lauren! I can’t wait to see your bedroom!
I love your nautical pillow, I’m sure it will look good in your bedroom, can’t wait to see the big reveal 🙂
Lauren…how cute! I’m a sucker for all things nautical…with a Coastie as a daughter, that’s kind of a given, right? Thanks for the tips on freezer paper stenciling, I’m thinking that when I visit her in Jan I’ll bring some stencils and we can have some fun making pillows for her new apartment!
I love, love, love freezer paper stenciling! This was such a cute project! Great job and thanks for stopping by my little blog! 🙂 It has been so fun being involved in this months challenge!
This is so cute, Lauren! The colors are just perfect… the white outline on the red heart is genius! And that heart adds such a sweet touch!! I can only imagine what you are cooking up in your nautical bedroom!! I can’t wait to see it!
Can’t wait to get my Silhouette!! Should be here within the week! I am booking a flight now for a weekend tutorial with the best of the best!! Florida sun and crafting on the dock! We can drag an extension cord out there!! Mmmkay? Mmmkay!
After seeing that adorable pillow…I am So excited to see the Master Bedroom!
You are an amazing teacher!
xoxo
that sudden pop of red heart just seals the deal for me, great work!!
How adorable!! I love the heart with the anchors! Thanks so much for arranging this Silhouette Challenge. I am already so inspired with my very first month of participating.
You know I love this! <3 Thanks for the free cut file. I'm totally going to make something with that pattern! And a big ol' thanks for including me on this challenge. So fun!
Loving it! Great job and it it looks super simple too!
Lauren this is AWESOME! I think we’ve already established the fact that you and I both love all things nautical, so you know I’ll have to steal this design for something in my house! Great job girl! XOXO
Yay for freezer paper! I don’t know why I keep pushing this medium off you make it seem so simple! I love the allover print, and I think you were spot on for adding the heart. (and we must have been on the same crafty brain wave this month because I did an anchor as well! You know what they say great minds think a like! 🙂 )
And… that was supposed to say “heart” 🙂
This is so cute! I love the little hear detail that you added!
So cute, Lauren! I’ve been wanting to try freezer paper, and it looks so easy! Love it!
Wow, Lauren! Your pillow looks like it came right out of a high-end catalog – I love it! Especially adding the heart with the white behind it; the perfect touch. I can’t wait to see your “new” bedroom, I’m sure it will be amazing!
I never knew there was something you could add to acrilics to make fabric paint! Thanks for sharing that! And your nautical pillow is great, I love the switch up with the heart. I’m just itching to see the rest of the bedroom makeover! 🙂
I never knew there was something you could add to acrilics to make fabric paint! Thanks for sharing that! And your nautical pillow is great, I love the switch up with the heart. I’m just itching to see the rest of the bedroom makeover! 🙂