DIY Photo Booth Props & Free Silhouette Cut File
Gearing up to DIY your own photo booth props using your Silhouette machine? You’ve come to the right place!
When planning our Costume Party for this Saturday, the idea just seized me: this is the perfect opportunity to create my own photo booth!
I mean, who doesn’t love a photo booth complete with goofy props and cliche Charlie’s Angels poses?
And then, when I received a most-amazing-package-of-goodies from Silhouette full of their *specialty media, I thought: this is fuel to my photo-booth-creating fire! And I set to work to DIY my own props.
Here’s the full tutorial, so you can incorporate a photo booth into your future wedding or parties!
Photo Booth Props Tutorial:
Step 1. Create your designs. In scouring the world-wide-web for ideas for my photo booth props, I came across a really helpful resource from the blog, Oh Happy Day. Jordan shares several posts with free printables of photo booth props she designed, and here’s the one I used. Since this is a pdf file, I used a free pdf to jpg converter to then copy and paste the pages I wanted to trace into Silhouette Studio. (I pulled the small mustache, top hat, monocle, trendy glasses, and my personal fave, the Batman mask). The best part is that the props are already sized properly, so I just adjusted my page size to “Letter” in my Page Tools window and fit my copy-and-pasted page to that size prior to tracing.
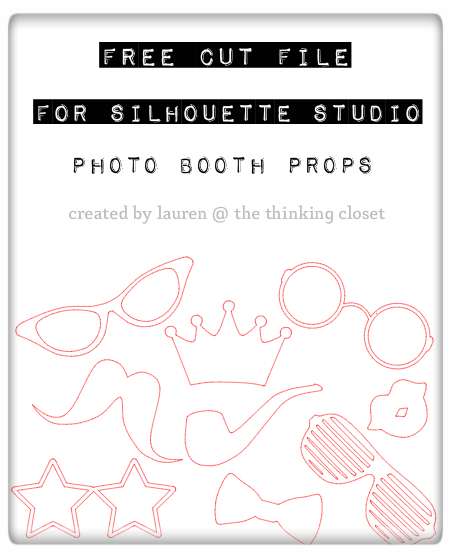
Then, I found free clip art files for the other 9 props I wanted to create.
Free Cut File
I’m happy to share those diddies with y’all today to save you some precious time. You can download your free cut file by clicking HERE. {Fine print: these designs are for personal use only and are not to be used for commercial purposes. Thanks!}
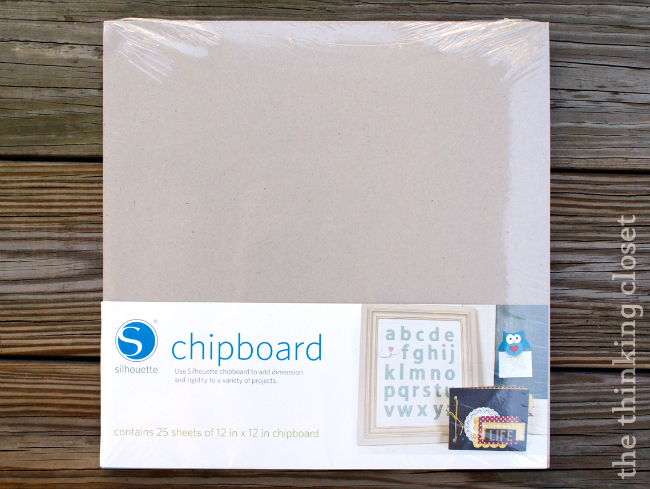
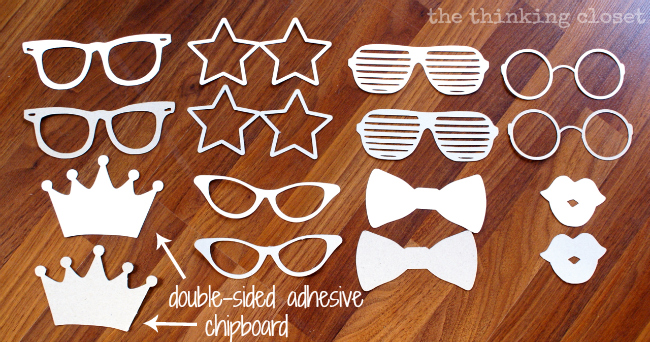
Step 2. Cut your designs. So, I actually used three different types of specialty media for this project: chipboard, adhesive-backed cardstock, and double-sided adhesive. And I used ZERO glue to assemble them. Three cheers for less mess! Hip hip….
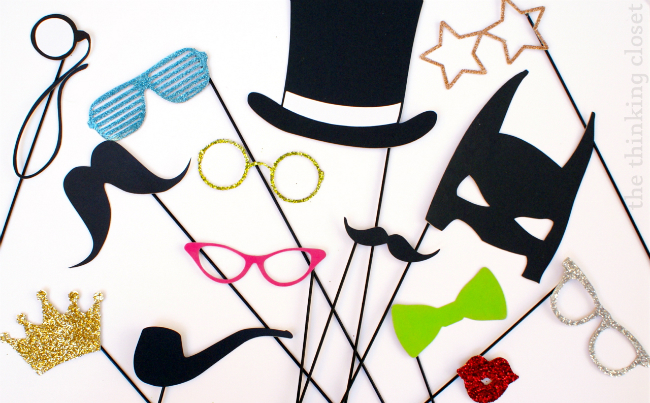
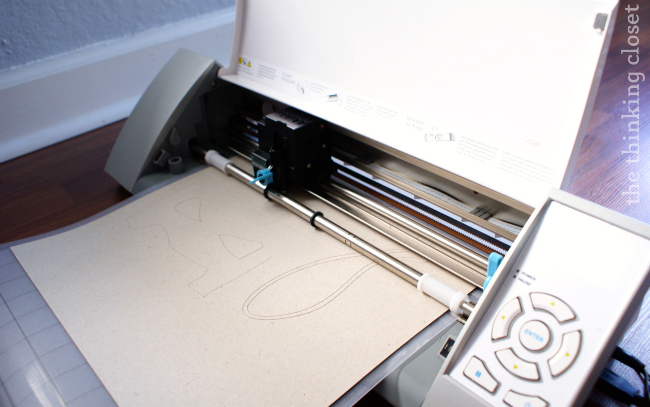
First, I cut all 14 shapes out in chipboard to give my props a sturdy foundation (I want these puppies to last through many a hoppin’ party). I actually used an old blade for this step because I’ve found that cutting cardstock dulls the blade rather quickly…so I just used a higher blade setting to get a clean cut.
Then, I divided my props into two groups:
Adhesive-Backed Cardstock
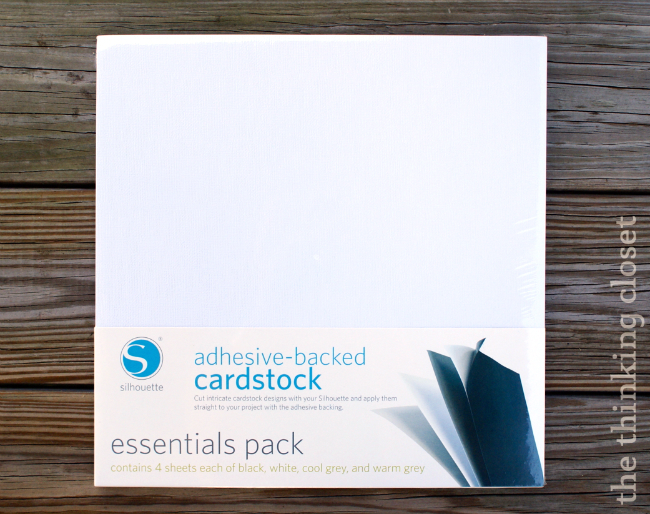
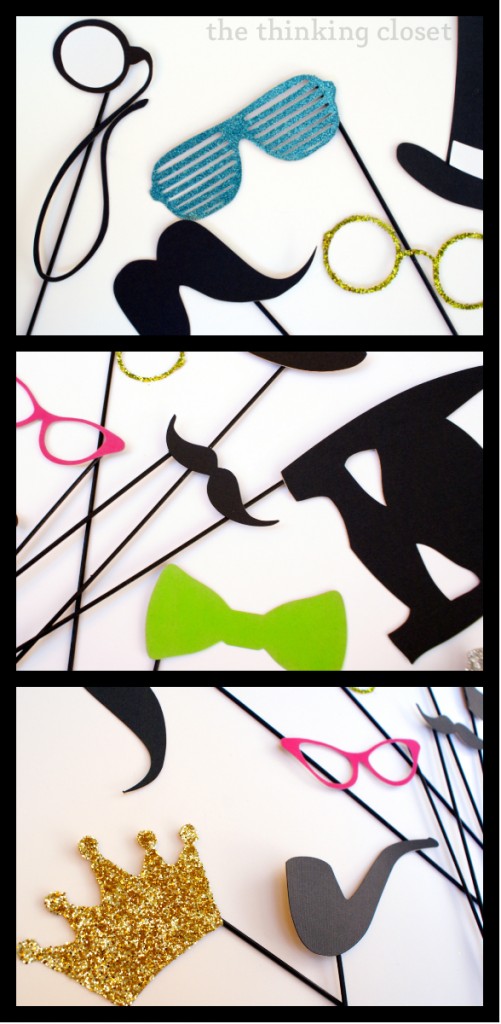
The first group would use adhesive-backed cardstock in black (top hat, Batman mask, monocle, 2 mustaches, pipe) with a few embellishments in white (top hat and monocle).
The adhesive-backed cardstock was super easy to work with! In fact, I really wish I had used this material when creating Justine and Andrew’s wedding scrapbook! It would have made the process so much more speedy.
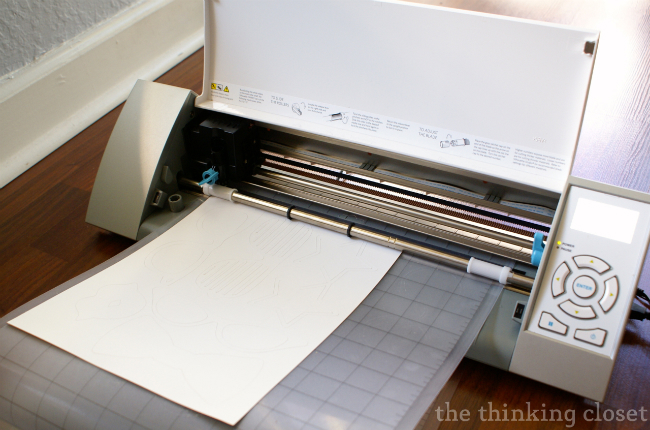
It took me just a few minutes to cut the shapes in black and white and stick them to my chipboard pieces. Easy peasy.
Double-Sided Adhesive
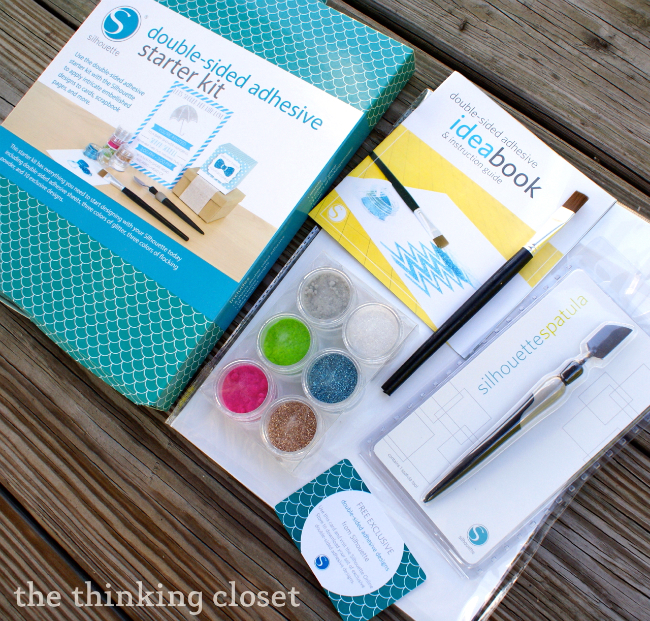
The second group would use double-sided adhesive in order to be glitter-ized and flocking-powder-ized (yes, those are words): the 5 sets of glasses, bow-tie, pouty lips, and crown.
I was really eager to try this material, especially after hearing great things about it from my friend Meredith at unOriginal Mom (check out her glitter monogrammed pumpkin project using double-sided adhesive here).
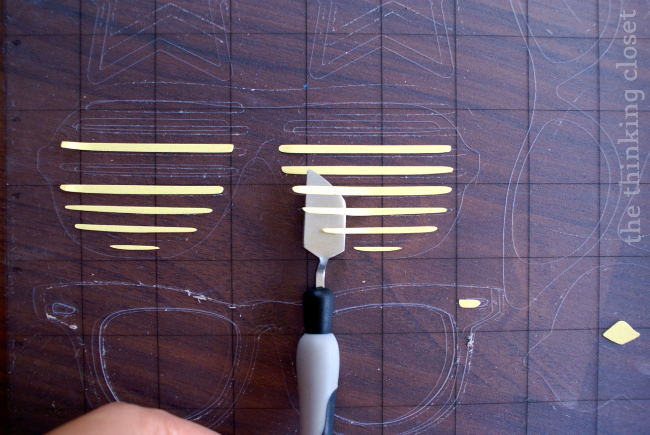
So, I followed the instructions in my idea book, positioning the sheet of double-sided adhesive white side up on my mat when cutting.
I even got to use the handy dandy spatula tool that came with my kit to gently lift the cut-outs that remained on my mat.
I weeded out the designs so they match my chipboard cut-outs. Then, I was ready for the fun part!
Step 3. Bling it on! So, I decided to work outside for this part because when it comes to glitter, we all know this to be true.
I laid a fresh piece of newsprint down on my surface in between each prop to help make clean-up easier.
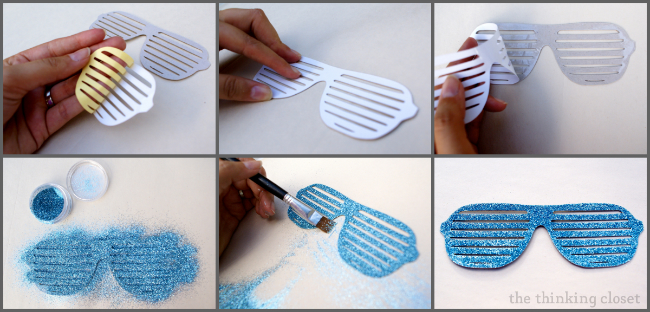
- First, I removed the yellow liner from the back of one of my double-sided adhesive cut-outs. The tricky part is making sure you remove just the backing and not the adhesive along with it.
- Then, I applied the adesive to the corresponding chipboard cut-out, carefully matching up the two designs as closely as possible. I gave it a good hard press.
- I slowly peeled off the white liner, ensuring that the adhesive had transferred to the chipboard.
- Glitter time! Next I sprinkled my glitter all over the adhesive or “liberally” as my instruction guides put it. (I tend to have a liberal stance toward glitter, don’t you?)
- Then, I used the paint brush that came with my kit to first brush the glitter all over the adhesive, making sure it was well applied, and then brush away the excess.
- After, I was able to fold the newsprint in half and carefully pour the excess glitter back into the container for next time.
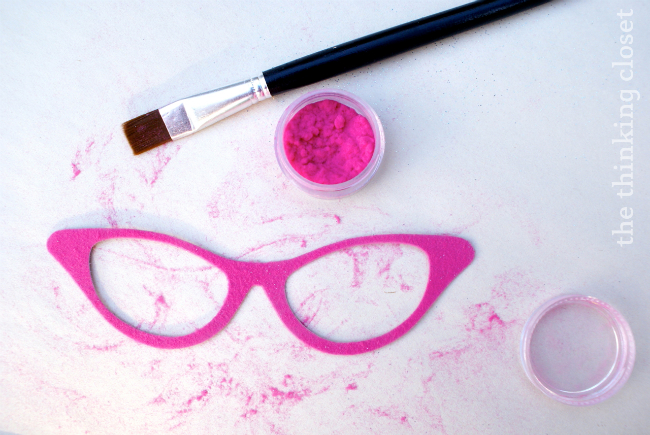
Then, it was onto a fresh sheet of newsprint and a new prop! I used both the extra-fine glitter that came in my kit as well as the regular “chunky” kind that one gets at craft stores. The former definitely covers the surface area better, but they both look fantastic in my opinion. I even ventured into flocking powder for the first time since that came with my kit. It left a fuzzy, velvety finish in some bright n’ bold colors, and I’m definitely a fan!
If I were doing this again, I would have first started with the flocking powder, then moved onto the fine glitter, and finished with the chunky glitter…but only a perfectionist like me is going to be bugged by the flecks of glitter in the flocking. #perfectionistproblems #imworkingonit
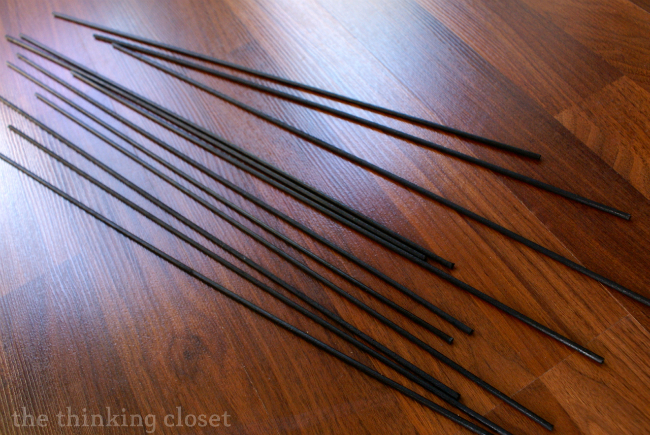
Step 4. Glue your designs to wooden dowels. I picked up some extra-thin wooden dowels at Jo-Ann’s for 29 cents a yard. (They were so thin, I could cut them in half with Cutco Super Sheers. I’m sure clipping sheers would work, too. Or your brute strength.) I painted them black and sealed them with Zinsser Bulls Eye Shellac Spray.
Then, I just glued those suckers onto the prop cut-outs, alternating between orienting them on the left and right sides. The flimsiest prop is definitely the monocle, and that needed dabs of glue in three spots to stabilize it, but everything else was smooth sailing.
And there you have it! 14 prop pieces, cut, assembled, and blinged out thanks to some specialty media…just waiting for some cheesy smiles and the flash of the photo booth camera to bring them to life!
And I may have given them a test-run.
It doesn’t take much to entertain me. {Smile.}
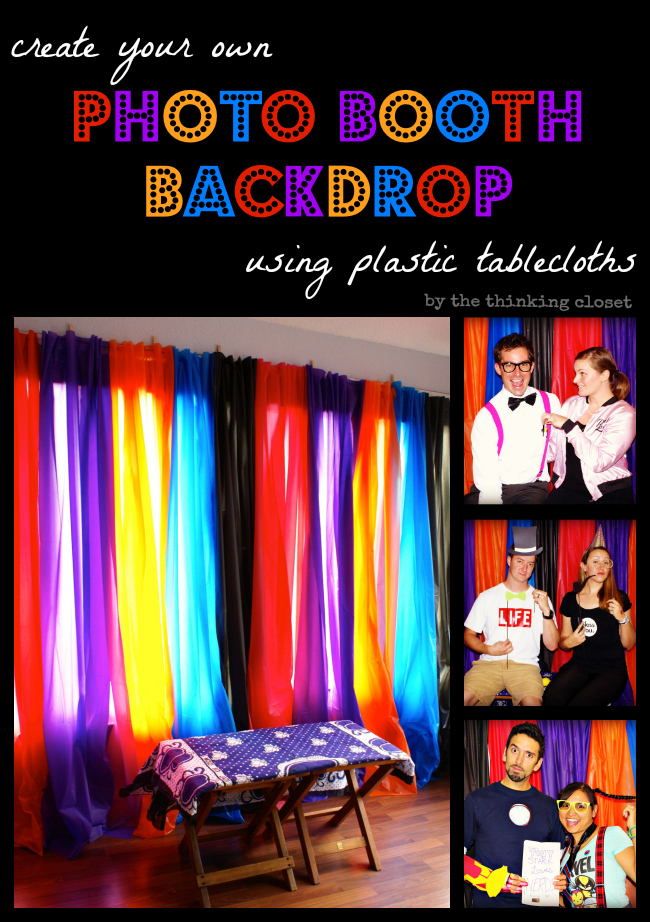
Photo Booth Backdrop
I even created a backdrop to go along with our Photo Booth…and it was both easy & inexpensive. Check it out:
More Specialty Media Tutorials & Freebies
Full Disclosure: I was not compensated for this post; however, I received free product in exchange for an honest review. This post contains affiliate links, meaning that if you make a purchase after clicking through, I may receive a small commission. Please rest assured that as always, I only recommend products that I use and love. And I seriously heart my Silhouette Cameo!




I really like your props – thanks a lot!!!!
best wishes,
Julena
Sure thing, Julena! Glad to share them!
Hi, I’m trying to download the free cut file for the silhouette (the photo booth props) but it won’t let me download. Is that .studio extension specifically for the silhouette software. I have that on my computer but it still won’t open. Any suggestions on maybe why it’s not?
Heather, thanks so much for alerting me to this issue. I actually ended up calling up box.com today to get it figured out, and it looks like it’s an issue on their end. Off to email it to you at the me.com address! Let me know if it doesn’t come through. (And yes, the .studio file can only be opened in Silhouette Studio.)
Here come the belated comments from your sistah. 😀 Again, better late than never! I love this photo booth idea. And I especially love that you did it for a costume party…photo booths don’t only have to be at weddings. In fact, for my surprise bday party last year we ended the night with some photo booth action! I also don’t think I’ve ever seen a batman mask before, and that’s awesome. Plus, you look AMAZING in orange by the by.
Pinned this to my Pinterest Wedding Board! You never know when you might need something like this in the future!
Adorable props and you model them so well! xxoo
This looks so easy and pretty. Thanks for the great idea.
Super cute as always, Lauren! I especially love the Kanye glasses. Awesome!
Ha ha. Thanks! Those glasses always cracked me up for their ineffectiveness; they do look cool, though, you gotta give ’em that!
Oh you already know how much I love these! You will be featured tomorrow! 😉
Still doing a little happy dance on the couch over this. Thanks, friend!
Wow, Lauren, all those media supplies look amazing. I don’t know what to choose….what are your recommendations?
Marilyn, I have now tried the chipboard, double-sided adhesive, glitter, printable silver foil, printable tattoo paper, and adhesive-backed cardstock…and I’m seriously loving them all! But of them all, I’ve now used the adhesive-backed cardstock and double-sided adhesive on multiple projects, so those seem to best suit me and my crafting tendencies. But I also just haven’t had the time to dive into the others yet, and I know they’re going to be just as fun. Ahhh! So much crafting to do, so many fun supplies, so little time. But instead of freaking out about it, I’ll just advise you to consider your upcoming projects or what mediums feel most like YOU. You may want to create cute kraft paper labels for sealing up baked goods or clear sticker paper for labeling glass jars with spices…the possibilities are endless. You know where to find me if you have more specific questions. 🙂
And the last day of the 30% off promo is today (Thursday), but free shipping runs through the end of the month if you can’t decide right away.
P.S. Apologies for this spastic response! I don’t know what came over me. Decisions over favorite Silhouette supplies clearly does something wacky to me. Ha ha.
You have some really cool ideas!
Why thank you, Shamene! That’s so kind!
I like the temporary tattoo paper. I’d make tattoos for my boys!
I would love to use the canvas or magnet paper to make some christmas gifts!
I’m already thinking ahead to Christmas gifts, too, Stacie! Can never start brainstorming too early.
the adhesive paper looks amazing!! sooo many possibilities!
Oh my word! The Silhouette products are just never-ending! I would LOVE to try these out!! Okay, this is what I’d love to win – of course the Portrait or Cameo, the adhesive kraft paper, clear sticker paper, temporary tattoo paper, printable cotton canvas, the chipboard, the printable silver foil, the printable magnet paper and the double-sided adhesive. Oh, that’s probably everything! LOL. I have so many ideas!!! Come oooonnn Silhouette!!!
Jamie @ somuchbetterwithage.com
haha. totally agree! my wheels are turning!
Ha ha. You two are too funny! But I’m with you 100%. It’s all pretty fabulous and the ideas for each material are never-ending. Why choose one? Choose them all! 😉
I would love to use the clear sticker paper. I would label everything!
Ha ha. I love the idea of a household covered in clear stickers. That makes me smile! (And the label-lover in me can relate, Mindy.)
I love gold everything and would love to try out the gold foil paper. Thanks for the chance!
You and me both, sister! Gold is my jam this year!
We have a vinyl wall art project we’ve been waiting to do! : )
Oooo! I’m intrigued, Tammy…. Hope you get to create it soon with a new Silhouette!
I would like to try the temporary tattoo paper it would make great additions to Halloween costumes
Agreed, Ellen! I’ve heard that it’s a great substitute for face-paint (lasts longer, can be more precise, and who doesn’t love a fake tattoo?).
Great amazing props!
I would love a chance to figure out a project for the canvas.
I want to use it to monogram everything!!!
I never seem to tire of monograms myself, C!
Super cute props. I would love to try out the chipboard to make some of my crafting more durable! Thanks!
Chipboard is great for that! I loved the support it added to my props!
After reading all of your creative posts on what you can do with a silhouette I’ve had to put it on the “I want list”. Love it!
You’d love it, Wendi! I could seriously sing it’s praises all day long. (Oh wait, I sorta already do. Lol.)
CUTE !! CUTE !! CUTE !! Lovin your blog!! Thanks!
Why thank you, Ms. Anna! What a sweet compliment!
I am the most excited about the glass etching stuff
The glass etching starter kit pretty much rocked my world…and I already have etched Christmas gifts in the works.
What a fun idea!
They all look so fun – so many creative possibilities!!
I like the pen attachment that you can use
I’m hoping to try that out soon!
I love that you are able to print on canvas. The art projects would be endless!
It’s true, it’s true, Liberty! (And by the by, I absolutely LOVE your first name. Beautiful.)
These look SOOOOO GOOD!!!!! I love them. You are going to have the coolest, best Halloween party EVER! Wish I was there…so I could invite myself. Wait, I did that already, right? 😉
Girrrrl, you know you and Alex have a standing invitation to come and visit us anytime, for any party or ordinary day. In fact, just having you two in our household would be an instant party, I am sure of that!
Lauren, you TOTALLY rock those pink cats eye glasses! What a fun party idea. 🙂
Ha ha. Thanks, Maaike! If I could have grown up in a different time than the 80s and 90s, it would have been the 50s and 60s…and then I could have worn cat-eye glasses for realz! 😉
I don’t have a silhouette, so any material would be exciting to try. But right now, the foil sounds great for some Christmas decorations!
Good thinkin’ Elaine. The shiny metallics are just so perfect for the holidays!
I had a photo booth at my daughter’s last birthday party and we had so much fun with it! These props would have been perfect for that event! I’m hopping over from Inspire Me Please (my link up was #9 Orange and Chocolate Halloween Cookies)
Really?! How fun! Thanks for popping over; off to check out those yummy-sounding Halloween cookies!
Those are some seriously awesome props! Have fun at your party this weekend!
Thank you, Cindy! I took your charge to heart and had a BLAST!
I would love a Silhouette so I can finally create some of your amazing ideas! I’d also use it for my events (I’m currently getting my bachelor’s in Hospitality Management with a focus in Conventions, Meetings, and Event Planning). This would give me a wonderful leg up on the private events I currently consult on.
What a great bachelor’s degree, Heather! Yes, a Silhouette machine would be a perfect right-hand woman for event planning!
You know, I want a Silhoutte so much, that I’m not going to be picky over “the best” special media product! I like them all!
And I thought I was already cyber-stalking you much more than I was…I hadn’t even liked your page on FB from my personal page until tonight! (Shame on me!) 🙂
No, really…I want to win…
Ha ha. I’m complimented by your cyber-stalking, and no worries about the FB page! Honored by the follow (I’m already following you – – I think from the pre-Haven FB book group list). Hoping you get that Silhouette soon, Brooke. You’d churn out some seriously awesome creations, I just know it! Best of luck!
Would love to be able to make some of the photo props for our holiday party. Thanks for the chance to win.
It’d be a heap of fun at a holiday party, for sure! You could even create some holiday-themed props like reindeer antlers and Santa hats! (Now, you’ve got me thinking of my next batch of props….) Thanks!
Such cute photo booth prop ideas! I actually want to have a photo both set up at my son’s next birthday… I’d love for you to link this up to my weekly link party! Consider yourself invited! 🙂 http://thelifeofjenniferdawn.blogspot.com/2013/10/a-little-bird-told-me-link-party-63.html
Thanks, Jennifer! And how fun that you want to have a photo booth at your son’s birthday! Instant entertainment.
I would like to try the magnet paper. Thanks for the giveaway. Good luck everyone.
You get the good sportswomanship award, Brandi! Delighted to have you join in on the giveaway fun.
Hahaha – I feel so special being in one of your prop photos with you! These are SO fun Lauren, what a great idea!! Thanks for the awesome giveaway too. xo
You are special, Claire! And it was so much to snap those photo booth pics with you at FLBlogCon’13. I’m already looking forward to the fun times we’ll share at our next hang out. 😉
Ooooooh Printable Cotton Canvas & Printable Silver & Gold Foil sound really nice to work with! Thanks for this! keeping fingers crossed!!! 🙂
You’re welcome, Meg! Great picks, too! I’m itchin’ to try out the printable cotton canvas, and I’m already a huge fan of the printable foil. Hope you get to try your hand at them soon!
Thank you for the giveaway, Lauren.
I would really like to try the magnet paper.
I don’t have a silhouette, but it looks fun and easy to work with!
You’re welcome, Ana! And yes, the Silhouette really is so much fun – – it opens up a floodgate of crafty inspiration. The hardest part is knowing where to start first!
lol, “may have” given them a test run.
Thanks for being my test-run buddy and snapping these pics before we totally lost the light! You’re my hero! (And not just for that.)
Lauren, stop!! I can’t believe how awesome these props are!! You are a genius. Pinning and sharing on my FB page tomorrow. And I’m hoping to win a Silhouette!!!!!!!!!!!!!
Hugs,
Jamie @ somuchbetterwithage.com
No, I won’t stop! Ha ha. Not until you get a Silhouette of your own, my creative friend. I can only imagine what you’d whip up with one.
Thanks for the pin and share-love, friend. You’re the best share-er I know! Hugs back.
Thanks for the great giveaway. If I win a silhouette I would love to try the adhesive backed card stock.
You’re welcome, Debi! The adhesive-backed cardstock is pretty stellar to work with, I must say! Great pick.
Super cool..
You are TOOOO cute int hose photo prop pics! I have decided: we must hang out. You, me: Haven-July. You can teach me to take flattering and amusing selfies.
It’s a date, girlfriend! Cannot WAIT to hang with you at Haven 2014. Bring on the selfies! 😉
You are too cute with all of your props! Love! Thanks for the giveaway, Lauren!
~Abby =)
Lol. Thanks, Abby! This was an exceptionally fun project…it brought out the thespian in me working with all these “props”!
I LOVE this idea, we need this for our next party!!
Thanks so much, Adrianne! I’m glad to know you’re a fan!
I like the sticky paper!
This is such a cute idea!! Now I just need a Silhouette and a party;)
adhesive paper
I want to make some tattoos for my kiddos birthday party!
I think DIY tattoos would be perfect for a kid’s birthday party! I thought that many times while playing with the tattoo paper this weekend (tutorial coming Monday).
Lauren, those are so cute and turned out so well! Just in time for all the holiday parties coming up! they will be a definite hit! I just know it! Good thing you gave them a test run- you gotta make sure they work properly first!
Oh yeah, wanted to make sure they were actually fun, and not just fun looking. Ha ha. But they get the ACTUALLY FUN stamp of approval in my book!
Well hello there, Lauren! I’m was so happy to see this post, it really looks like you had a ton of fun at your party! That photo booth was an awesome idea! 😀
As for your Silhouette question: I think I’d most like to try the adhesive backed cardstock. The possibilities are endless there!
Thanks so much for hosting this giveaway, I hope someday to own a Silhouette, I’m actually DYING to get one, so here’s to hoping! 🙂 🙂 🙂
Hello, Andrea! Thanks for your detailed response. We had our party last night, and it was quite a fun time. Can’t wait to share pics from the event later this week! And the adhesive-backed cardstock was SO easy to work with; perhaps the easiest of all the Silhouette mediums I’ve tried, so great selection, Andrea! Thanks for entering the giveaway, and I hope you get your creative hands on one sooner than later, girl.
I can’t wait to try the chipboard. I would love to use it to make embellishments for my scrapbook layouts!
Your photo props are so cute! I love the idea of the printable canvas though!
Sooooo cute! I hosted a Mary Kay party, and turned it into an actual fun girl’s night with a photo booth, since I didn’t want it to be like a “you-must-buy-something” party. I purchased a few props from random places like Hobby Lobby and Dollar Tree, but this is even better, making your own!
Wow – – now THAT’S a Mary Kay party I would want to go to! Way to go above and beyond, Rebecca!
I LOVE the double-sided adhesive with glitter glitter glitter!
Ha ha. Someone as enthusiastic about glitter as I am! Yeah!
These look like so much fun!
I want one of these sooooo bad. I hope the Lucky Clover will come my way. I have my fingers crossed and toes.
I know that feeling, Maria! That’s where I was at about a year ago. I had just seen SO many amazing tutorials, I thought, “I’ve gotta get my hands on machine.” My lucky clover came in the form of a Christmas gift…hoping yours comes in a giveaway soon!
I love the chipboard! I’d use it to cut out words for quote canvases.
Great idea, Kristin! I did a white on white canvas with chipboard letters before I had my Silhouette; it’s one of my favorite pieces of DIY art to date! https://www.thinkingcloset.com/2012/09/25/white-letters-on-white-canvas-d-i-y-artwork-tutorial/
Those sunglasses are super fab, just like you! Love these crafts! Thanks for the giveaway opportunity!
Aw, shucks. You’re too kind, Heather! And thanks for entering in the giveaway fun. Fingers and toes crossed!
I think a better question is what WOULDN’T I create ;). I have been wanting a silhouette forever now. I will own one eventually! lol
I like that determination, Michelle. I believe you’ll own one, too! Good luck!
I love the adhesive cardstock… it would be great to make props for my twin nephews superhero party come February!!! thanks for the chance to win!!!
You’re welcome, Savanna. And I love that you’re already thinking ahead to your nephews’ superhero party; sounds like a really fun time, especially if props are involved!
LOVE LOVE LOVE THIS! im dying for a silhouette…the possibilties are endless. love you blog and how detailed you are with your tutorials. keep it up girl!
Aw, thanks for the boost, Brittany! I’ll keep that detail coming!
i would LOVE LOVE to try the chipboard and the magnet paper…..and the temporary tattoos and the clear labels.
The inspiration with those mediums is never-ending, isn’t it, Lesley? Hope you get a chance to test-run them!
Great idea! Love the designs you chose!
Thanks, Glenna! It was hard to stop at 12 actually…but think it ended up being a good variety of props. After last night’s party, they are tested and approved! Ha ha.
My son LOVES temporary tattoos – we’d have a blast making our own!
I love your ideas! thanks for sharing
Why thank you, Kiki! It’s my pleasure!
You are ADORABLE!! I LOVE these props…and the pics of you testing them out!
The only problem?…I wish I was there to play too!!!
You are so creative Lauren.
Your party is going to be a BLAST!!
xoxo
Aw…yes, I wish you had been here, too, Sharon. I know we’d have been giggling for hours on end. And thanks for the vote of confidence with the party. We had a fantastic time last night – – can’t wait to share pics later this week!
These are adorable!! I LOVE the Batman mask! I’m a slight Batman nerd! These are a must for a party soon! Thanks for the file dear!
Being a Batman fanatic makes you actually the coolest kid on the block in my book – – and anything but a nerd. (We’re slightly Batman obsessed over here. So, knowing you are, too, makes me love you all the more, Jenna!)
Ahhhhh We had a photobooth at an event last weekend and it was the first time i’d used one and it was awesome!!! Now I’m slightly obsessed with all things photobooth-related.
In other news, I’m hoping to randomly find a Silhouette on the footpath one day, as I will never be able to afford one, and then I’ll be able to join in on the prop making fun!
Hoping a Silhouette comes your way, Annabel, either through a magical footpath or giveaway!
(And I’m delighted to know you’re as big of a fan of photo booths as I am. Yay!)
I think personalized temporary tattoos would be so much fun to make with my kids.
Thank you for the chance to win!
You’re so welcome, Kristin! Thanks for joining in on the giveaway fun!
Oh the portrait is just the right size I would love to try the magnetic paper
Can’t wait to begin crafting!
Just saw this on craftgawker.. Awesome project and idea. You rock. Are you this happy all the time? 🙂
Ha ha. I am rather happy most of the time. (Except when I got to the dentist. Or the DMV. Or when my flight is delayed.) But most of the time! And especially when I’m making things with my hands or riding bikes with my hubby. That’s when I’m most happy!
Thanks for popping over, Marni! Love your blog!
What a fun project!
I CANT wait to try the temporary tattoos! how cool would it be for son to go as daddy for Halloween?!? complete with matching tattoos and all!!! 🙂
Oh my gosh, Amy – – great idea! You could even use the tattoo paper for faux facial hair! Brilliant!
The chipboard!
I’ll always be a follower!!
What a kind thing to say, Taramarie. I’m so touched to have you in it for the long haul! That is what inspires me to keep on sharing my best work!
Everything–but the magnet paper would be so fun for our Grandchildren to play with…
So sweet of you to think of your grandchildren, Sandy!
chipboard!
Love the DIY photobooth props – they look like a ton of fun!
Thanks, Carrie! We tested them out last night at our costume party, and I dare say, they were a hit!
I would have fun with the magnetic paper! OH, the adhesive papers too!
I would love to try the magnetic paper to make my son his own special dinosaur magnets.
Love that idea, Angelica! How fun would it be to hang up his artwork on the fridge with those magnets?!
LOVE THEM!!!! 🙂
OMG….you weren’t kidding!!! These are A D O R A B L E!!!!
Ha ha. Thanks so much for your enthusiastic response, Tanya! It means a lot!
OMG…..I love them all. One question….I may be overlooking it, but how do you know what size to make them?
Tanya, I mentioned it briefly, but it might be easy to miss – – because the freebie props from Oh Happy Day were already sized properly, I just used those as a guide for my new ones. But you could always just use the ruler tool in your Designer Ed. to make sure the glasses were actually sized for a regular human-sized face!
Pick me!! Pick me!! I would love to win so I can make some props as well. I’m getting married soon and one of my top must haves is a photo booth and this would be great so I can DIY my own. 🙂
Congrats on your upcoming wedding! So exciting Jamie! And a photo booth at your wedding would really amp up the fun factor. Here’s to hopin’….
i’d love to win a silhouette portrait!
Your props turned out amazing!
I would love to have a Silhouette; the adhesive papers would be fantastic!
Thanks, Gypsi (coolest name ever)! Yes, the adhesive papers are sort of rocking my world right now…. Hoping you get to try them!
I couldn’t even imagine trying to decide which media to try first!!!
If I don’t win one, I’m definitely asking for one for Christmas!
That’s how it went for me last year, Kimberly! I entered a million and one Silhouette giveaways, didn’t win any, and must have mentioned how much I wanted one enough to my hubby that he surprised me with one for Christmas. It was worth every penny of our money and then some!
I love the magnetic paper!
Well, that’s something I don’t have. But it looks like fun to use.
Oh! Please save me the red lips and the top hat!! It will totally go with my get-up! Ha ha! I am bummed that Florida is not a car ride away!! Have fun, friend!!
You would rock them so well, Candace – – I can almost see it now! And I, too, am lamenting the fact that we don’t live closer. The fun factor in my life would be THROUGH THE ROOF if Candace could come over to play!
Super cute! How’s the glitter and flocking staying on? Do they seem OK with a lot of handling?
We had our party last night and these props were put into action, and they are still going strong. The flocking is on there REAL good (haven’t noticed any coming off) and of the glitter, the Silhouette brand glitter probably stays on best because it’s so thin…I’ve noticed some flecks of glitter here and there, but nothing too crazy. I’ve used spray shellac on glitter before to “seal” it and might consider doing that with these just to preserve them for the long haul. Overall, I’m really impressed! This adhesive is my new favorite product!
All of those different specialty medias to try? Sign me up!
My kids would LOVE the printable tattoo paper!
I love your blog because I always get new ideas…I love the photo props…what a great idea.
Laura, what a sweet comment! I’m so delighted to know you get new ideas during your visits here to The Thinking Closet. That seriously motivates me to keep creating quality content for my awesome readers.
Love them! Photo booths are so fun and I mean really…who doesn’t want to be Batman??
Kenley
My thoughts exactly, Kenley. The Batman mask was the first one my husband reached for last night. Can’t wait to share party pics later this week!
🙂 you look so cute in those pictures 🙂 & yes, your photo booth props are super cute too; really like them Lauren!
Aw, thanks, Ingrid. I’m such a goofball – – but I’m glad it reads as “cute.” Ha ha.
I am super excited about the printable canvas ! It would be a great way to make holiday gifts for the grandparents!
You’re so right! Thanks for getting my mental gears turning, Leslie.
Love the props! Thanks!!
Thank YOU, Debbie! Best of luck!
The magnet paper would be fun to use.
I haven’t busted into that yet, but I’m excited to try it! Oh the possibilities….