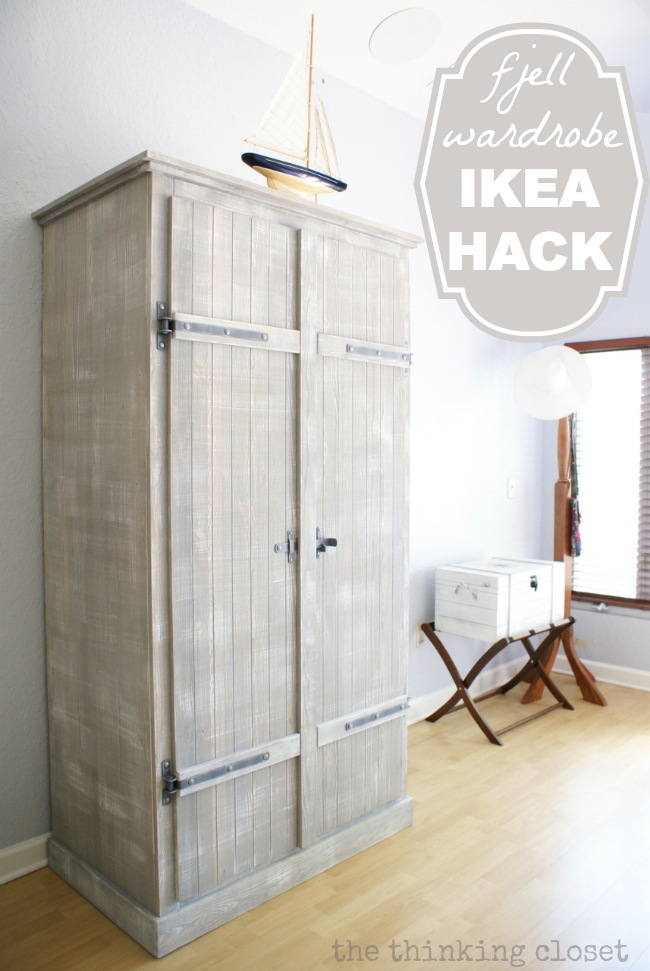
IKEA Hack: Whitewashed Fjell Wardrobe with Pallet Shelves
Mark and I recently completed our first “IKEA hack.” What’s an IKEA hack, you ask? Well, here’s the definition according to ikeahackers.net:
Essentially, an IKEA hack is a modification/repurposing of an IKEA product. Why I chose to call it a hack? In it’s own little way, it breaks into the IKEA code of furniture assembly and repurposes, challenges and creates with surprising results.
So, there you have it. Some of you may have seen a sneak peek of our hack on Instagram last week:
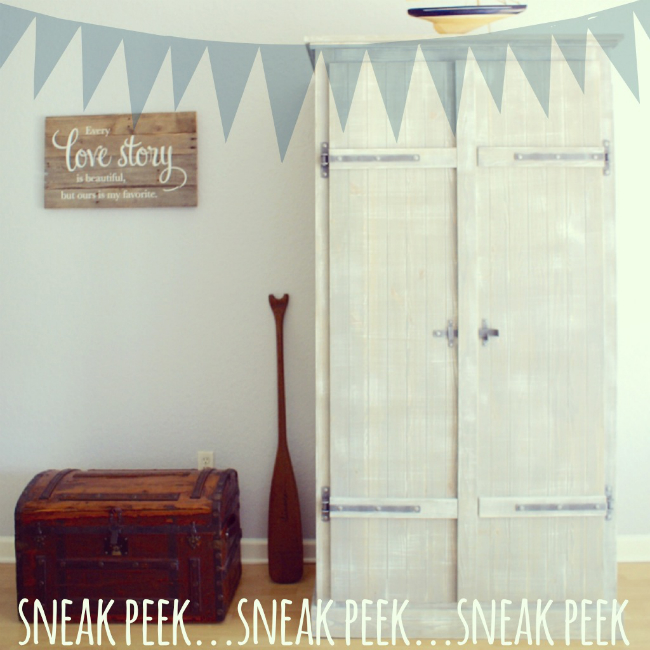
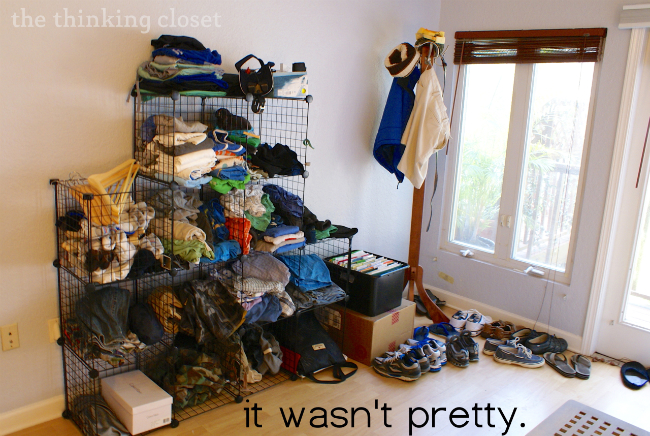
If only you knew what a vast improvement this was to our old system. You see, Mark brought into the marriage a seemingly inexhaustible collection of metal wire cubes that he has had since his med school days. Don’t get me wrong, they’re great for storage in the garage, but they somehow grew legs and found their way into our bedroom! It’s like something out of an interior designer’s nightmare.
Since the closet in our bedroom only had room enough for my things, Mark has been using the wire cubes as cubbies for his clothes. They’re the kind of piece that makes you skip showing the master bedroom on a house tour. See what I mean:
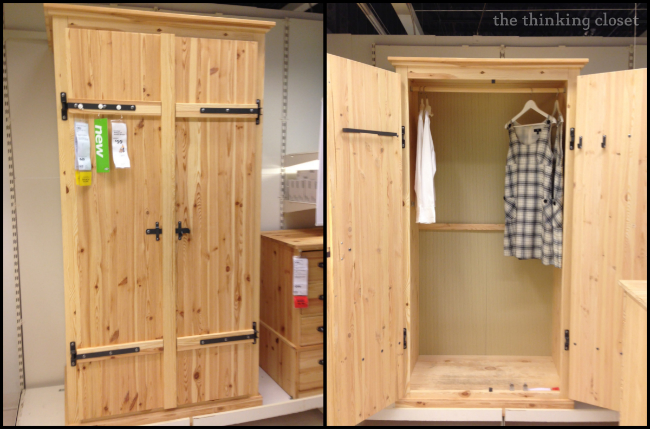
“We” always knew those wire cubes were a “temporary” solution. We needed a wardrobe. Desperately. And nearly a year later, we found one that fit the bill. Well, almost. Enter, the FJELL wardrobe from your favorite Swedish home furnishings store and mine: IKEA.
On a run to IKEA, Mark face-timed me to show me a few different wardrobe options, but of the three, I could tell he was most excited about the Fjell. Not only was it made of solid wood and was well-constructed, but it was the tallest and deepest, and he seemed confident that he could get all of the items from the cubes into the wardrobe without a problem.
I mean, check out these dimensions:
My only concern was that unfinished wood and black hardware looked a little too “log-cabin” for the beachy decor of our bedroom. So, with the caveat that we would whitewash the Fjell, we purchased it. Now, with a pricetag of $449, the Fjell wardrobe is more expensive than typical for IKEA, but we decided the solid wood construction was worth the investment. This is not one of those IKEA pieces that is going to be falling apart anytime soon. Especially not after what we did with it.
Let’s Get to Hacking!
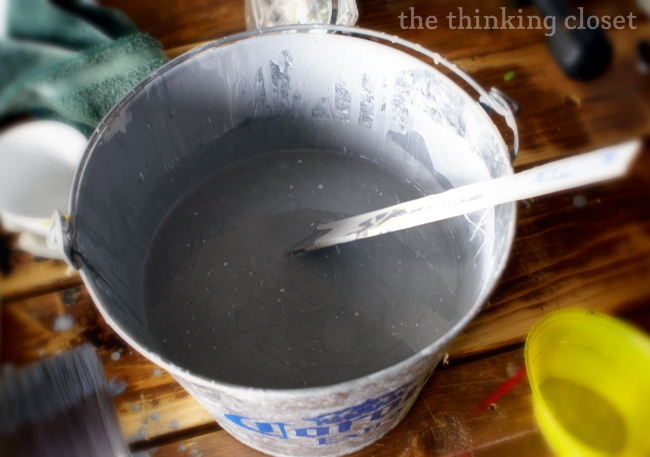
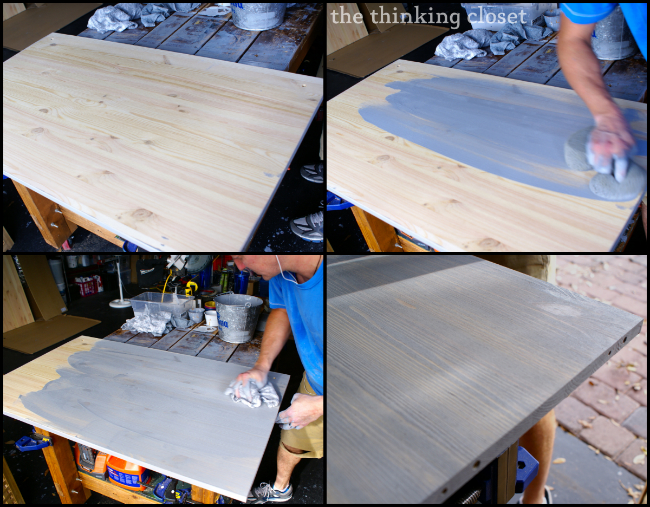
We unpacked the boxes and set to work with painting. We decided to go with a dusty gray wash, which we made using gray water-based latex paint, white paint, and water. (There was not a lot of science to mixing it all up. A little of this. A little of that. A little more of this. Until it looked like the light gray we were hoping for. The ratio of water to paint was roughly 2:1.) We ended up with a one-of-a-kind color we like to call, “Just After Dusk.” (Just kidding. We never called it that. I just wish we had.)
Then, Mark took a sponge ran it over the boards, going with the grain. Almost as soon as he wiped that paint on, he then took a rag and wiped most of the paint off. We really wanted to see the wood grain and really just tone down some of the harsh yellow to the wood by bringing in some cool tones. We were both in love with the results!
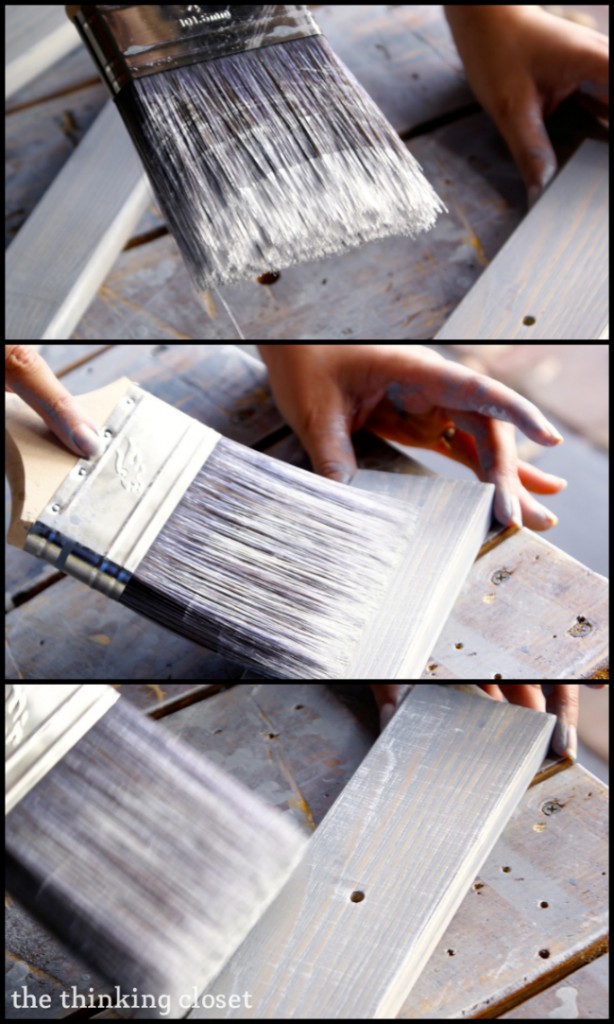
The next step was doing some dry-brushing. Here’s where rolled up my sleeves and did my part! I dipped just the tips of a dry brush into white paint and brushed it onto the wood against the grain! It took at least an hour and a half to get through all of the pieces, but it was fun. There was a bit of an art to getting the paint to take heavier on some parts, and lighter on other parts. We wanted it to look regularly irregular…if that makes sense.
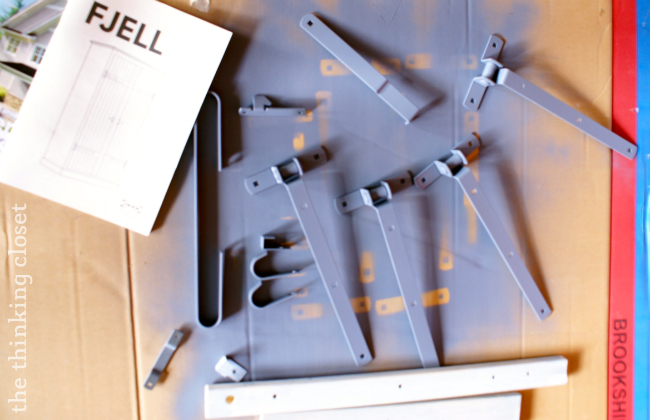
We used the gray spray-paint primer from my subway art project to spray paint the black hardware. Later, we used the dry brush technique on the hardware, too, to give it that rustic look.
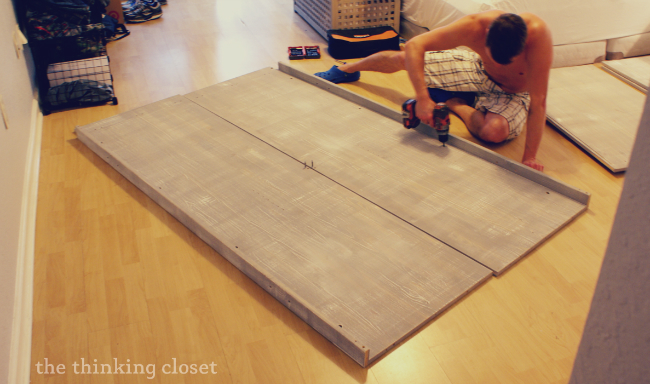
Next, Mark brought the pieces into the bedroom to assemble them. Cue the Jeopardy music while we wait for IKEA to send us the second box of hardware they forgot to include with our purchase!
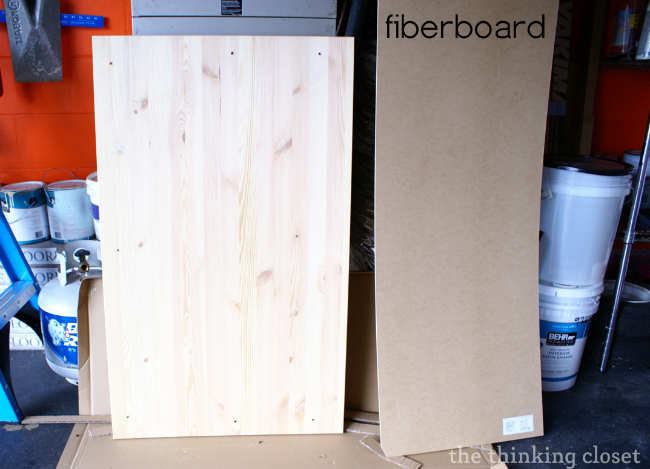
Once the Fjell was almost completely finished, an idea struck my clever, clever husband. Instead of applying the flimsy piece of fiberboard that came with the Fjell to the back of the wardrobe…
…what if we used pallet boards instead!
I loved it. He loved it. The rest is history.
I don’t have photos of the play-by-play here because the rest of this was Mark’s handiwork, and there’s nothing that ruins your carpentry mojo more than having a chatty wife over your shoulder snapping pictures every step of the way. So, I let him work his magic in peace, and took a bunch of “after” pictures to hopefully fill in the blanks.
Also, the master carpenter was kind enough to take over my blog for a spell to explain his side of the “hacking.” And yes, he named this bit himself. I present to you:
Mark’s “Konstruction Korner”
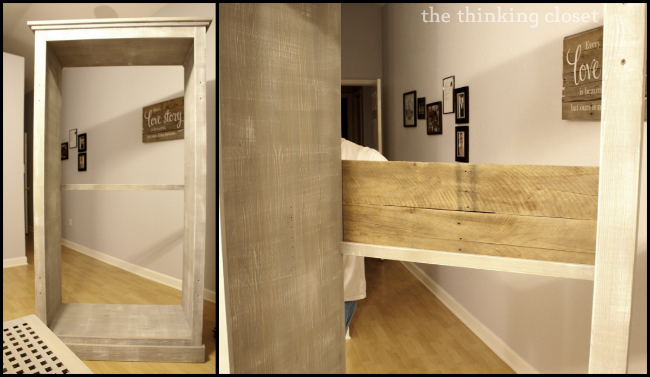
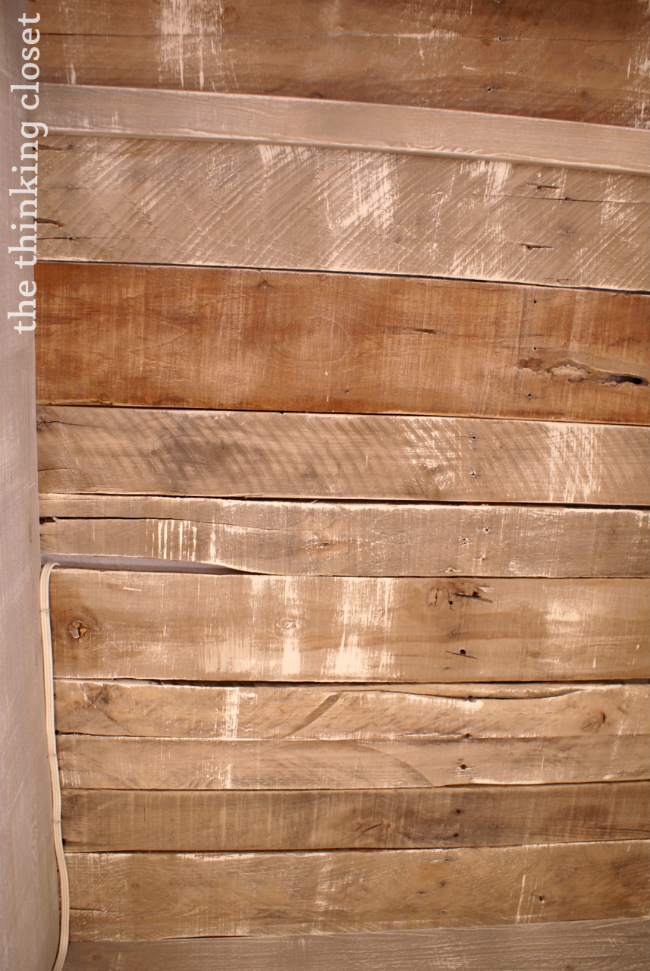
“This is a well-designed wardrobe, in general, but there were a few flaws that needed hacking. First, the back of the wardrobe was a flimsy fiberboard that didn’t add much strength, and frankly, didn’t look good. I cut the finished pallet boards to the width of the wardrobe, and laid them down piece by piece on the face-down wardrobe, train track style. I fastened them down with 1 and 1/4” wood screws. It is important to pre-drill the oak pallat boards, but not the pine (it is soft and tends not to split). There were some natural gaps and knots in the boards, which made the final look more interesting.
In terms of pre-treating the boards, I decided to do some light white-washing. For this step, you really want to clean and sand the surfaces well. The rough-cut boards tend to splinter, which is a hazard for your fingers but also will snag your clothes when you place them in the shelves. Put on a pair of gloves and run your fingers over the surface to test it, then white-wash with a dry brush, cut, and install.
Another design flaw we corrected was to add reinforcement underneath the floor of the wardrobe, which I accomplished with 2 x 4 chunks fastened underneath the floor at two points in the middle of the floor. This way, you can actually walk into (or hide in) the wardrobe w/o the bottom falling through. {Love that he thought that this might be a possibility.}
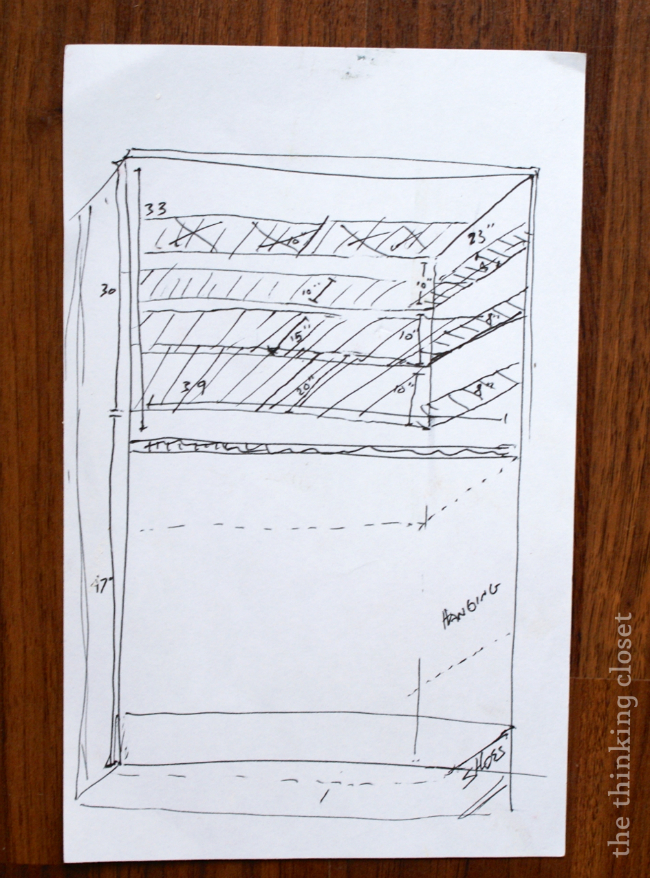
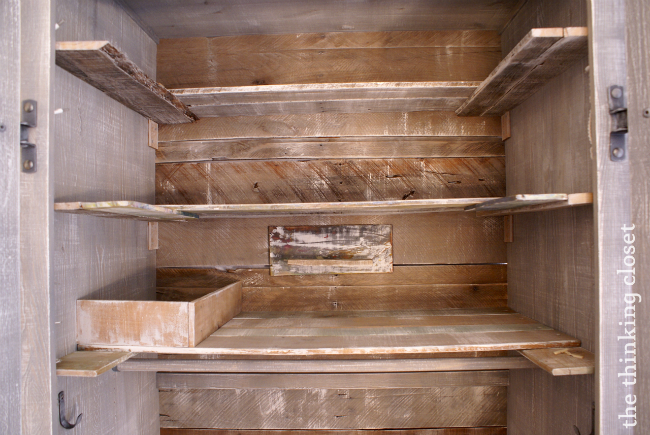
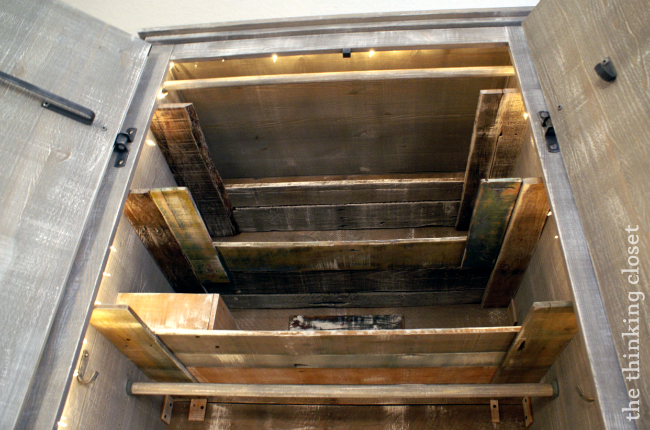
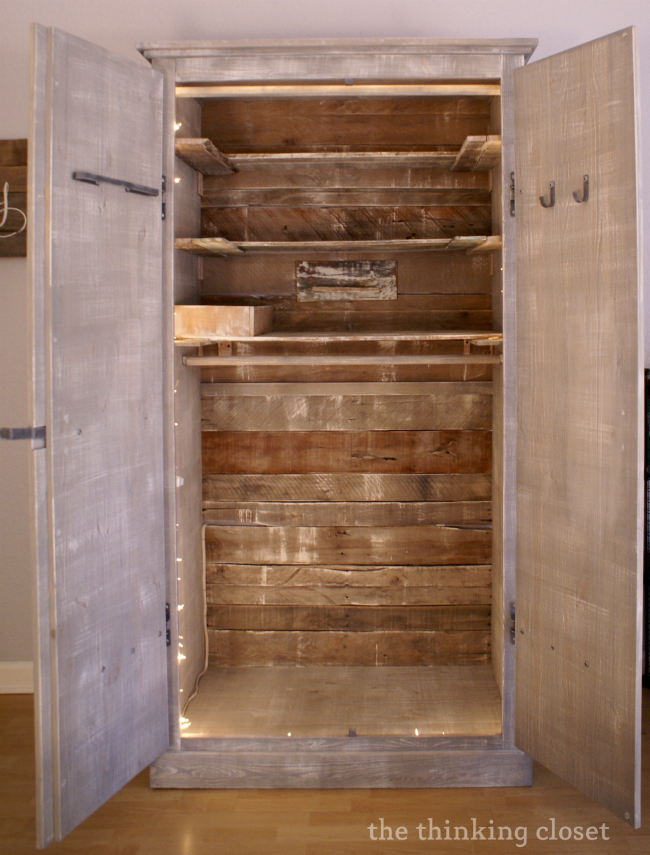
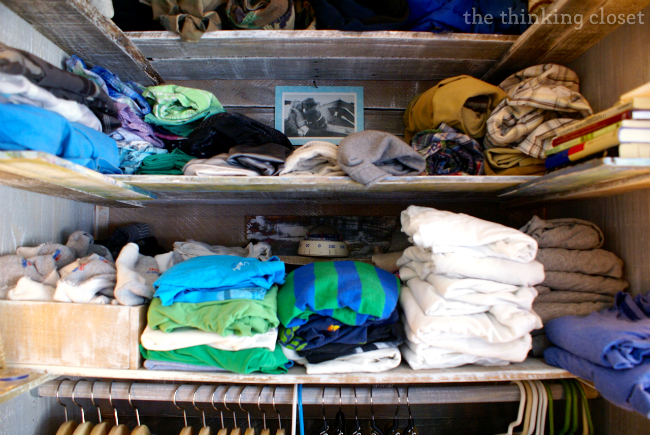
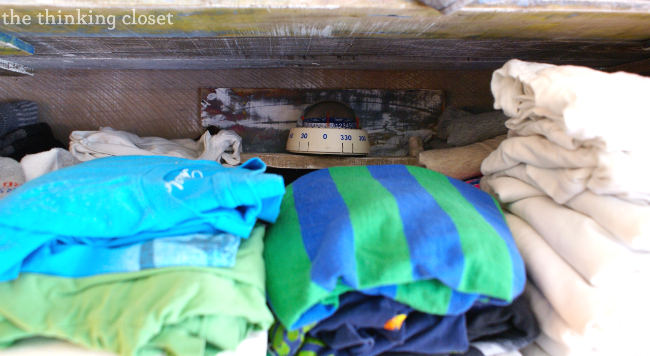
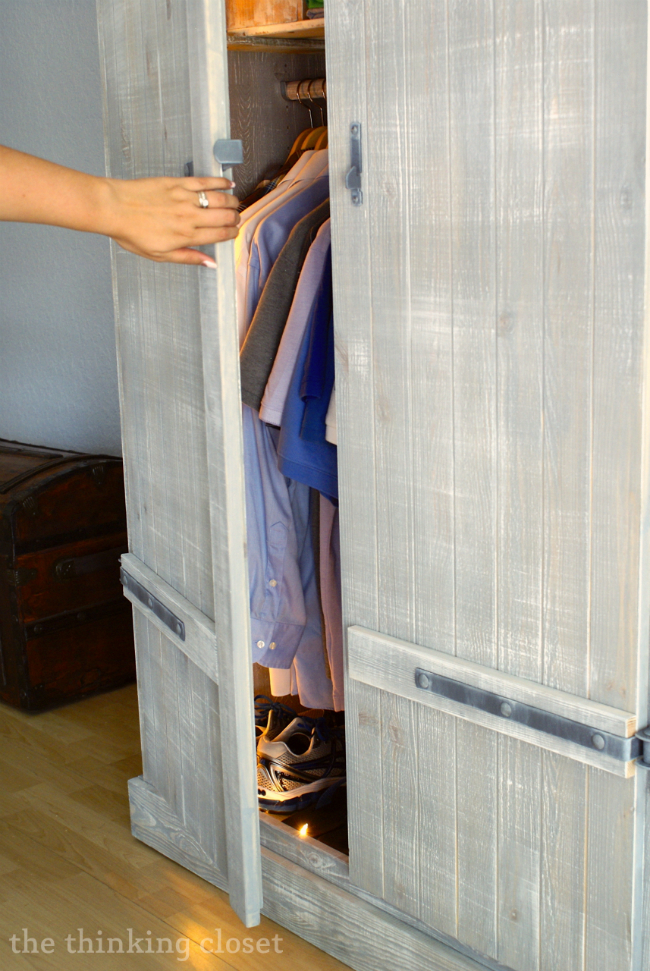
The shelving I installed using perfectly cut boards that just fit in to the width and depth of the space. The finished product had a “U” configuration, which makes the high space useable, and allows you to access the deep space more easily. The 3 shelf layers are terraced, so that the lowest shelf is deepest. The key to this process was fastening the pallet boards to each other and to the shell, which required drilling a few holes in the side and back.
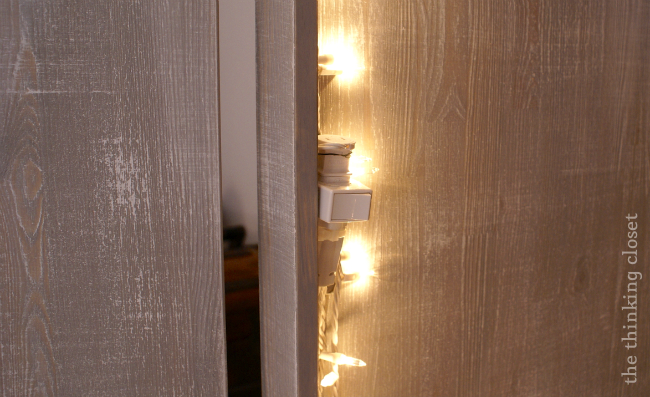
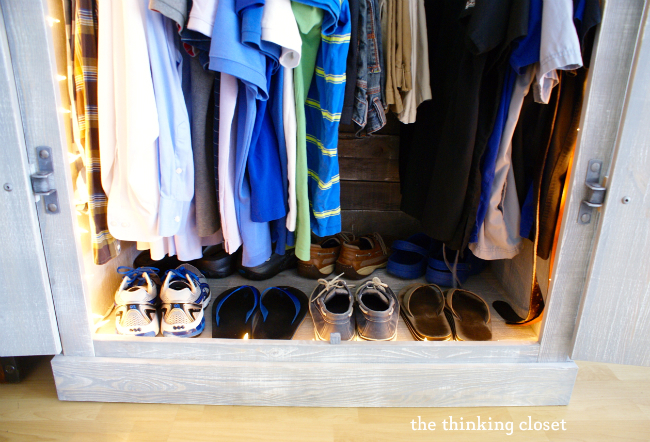
Finally, an electrical cord was run in through one of the gaps in the back, and white string lights placed behind the ledge that the door hinges attach to. The result of this was indirect lighting that is uniform and allows us to see each of the shelves as well as the hanging and shoe space, without any other lights in the room.” -Mark
Annnnd, scene!
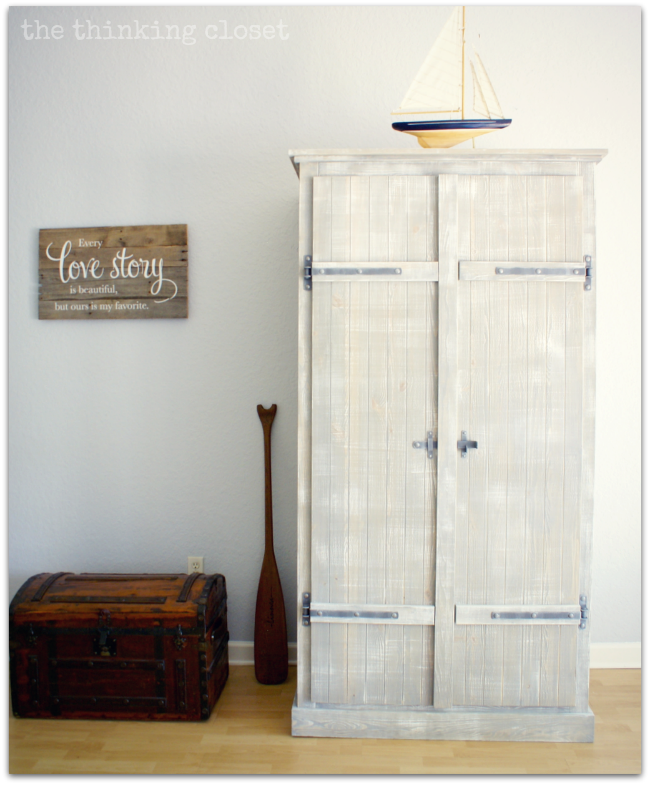
The Finished Look
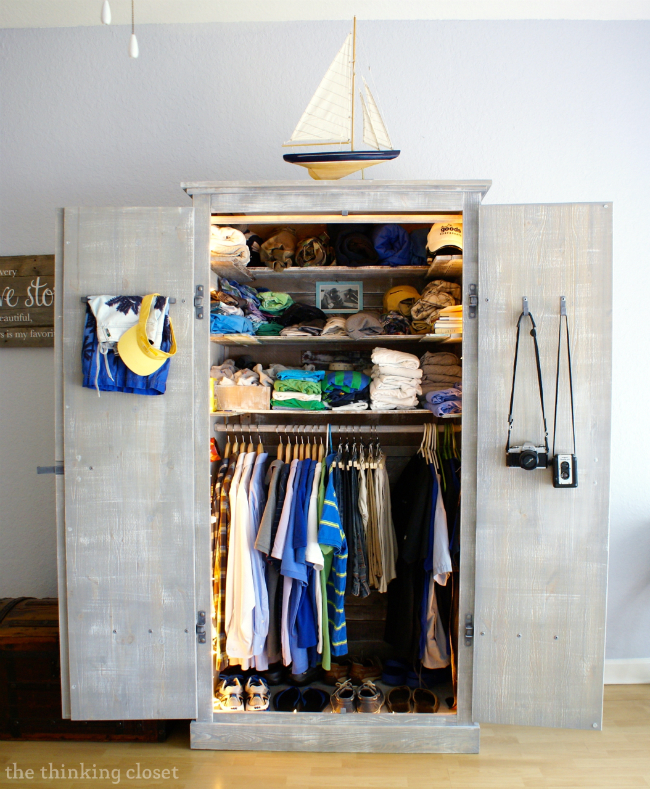
So, did his clothes all fit in our new-and-improved Fjell Wardrobe? You betcha. And then some!
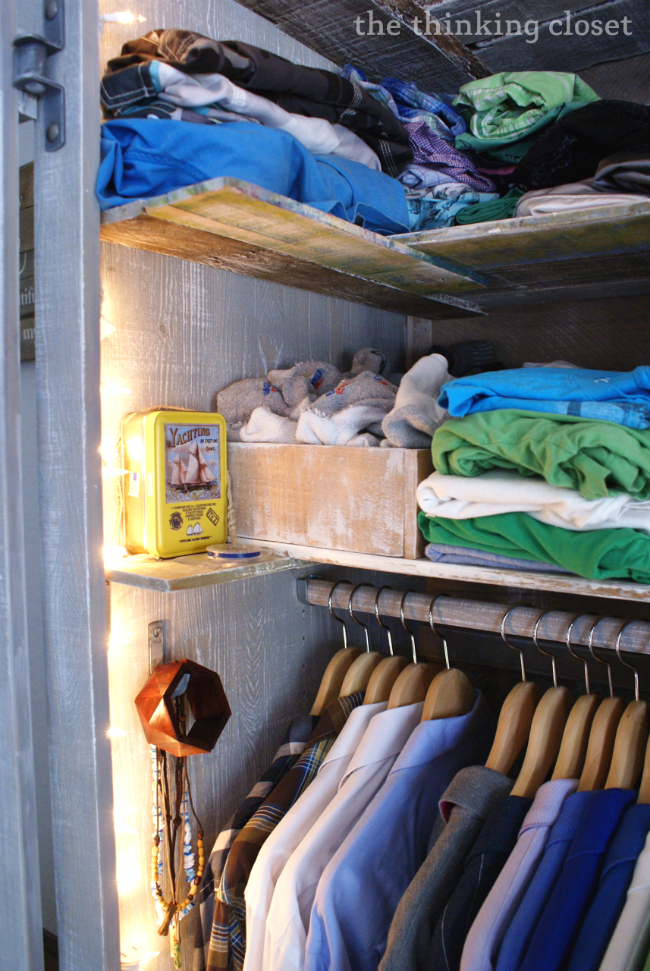
With the addition of the terraced pallet shelves (and a trough for his socks), he was able to fit all of his summer clothes, some winter gear on the top shelf, hanging clothes, and even shoes.
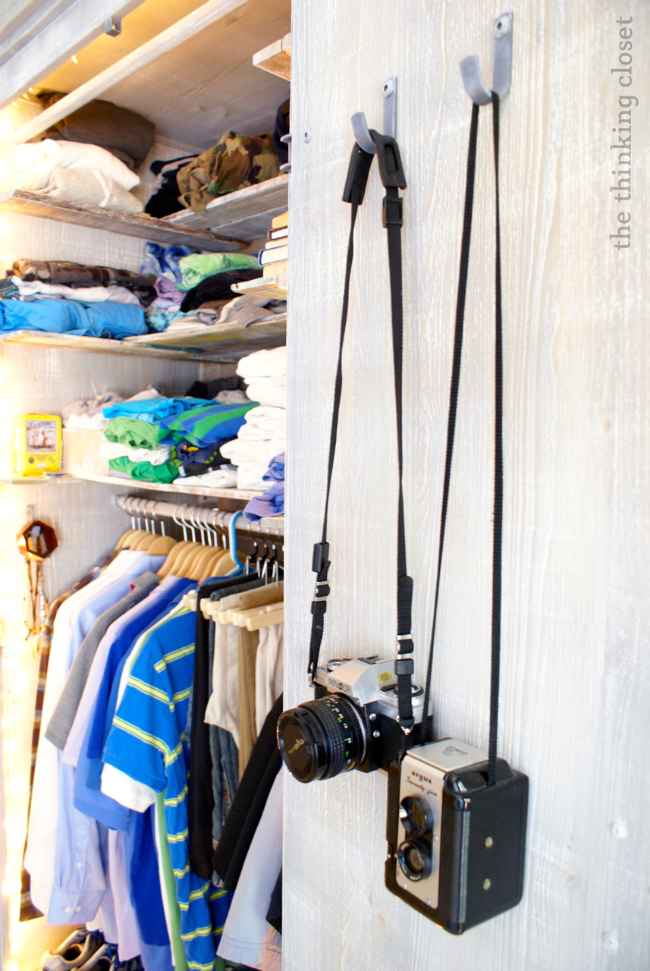
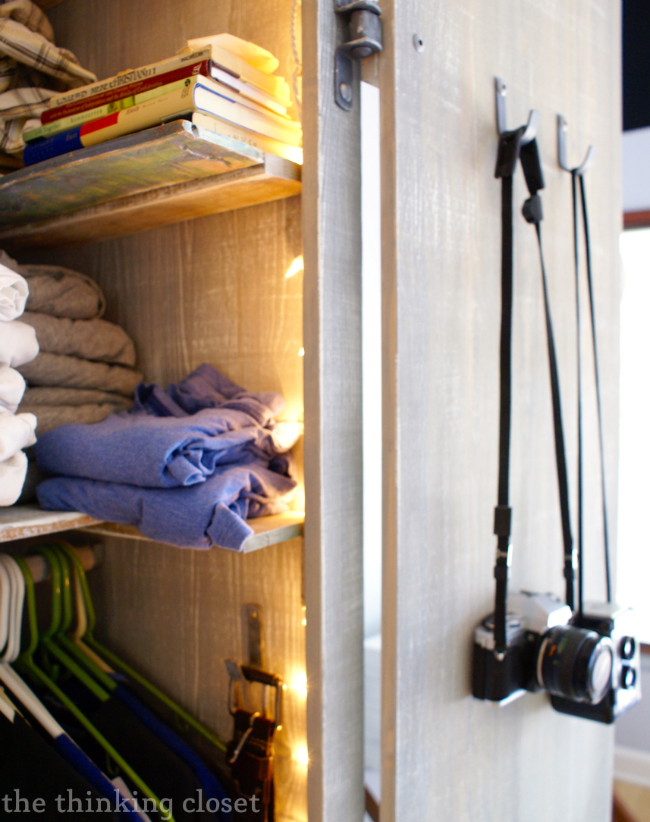
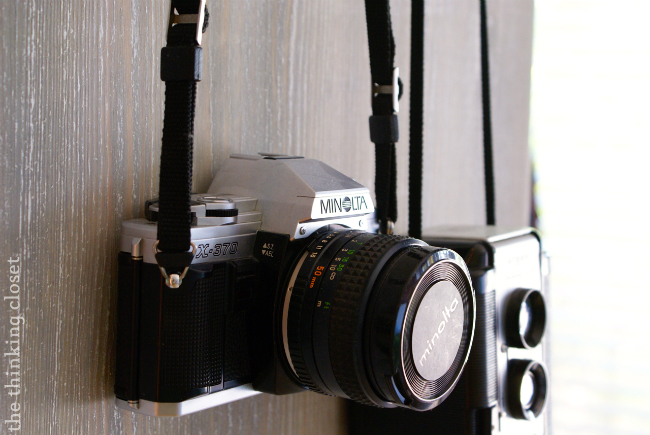
I also love the little details he added. A shelf for special treasures. Extra hooks for belts and necklaces. And of course, mood lighting a la white Christmas lights. Who needs a night light?
And that corner that had formerly been taken over by those wretched wire cubes is now wide open space. In fact, we have plans to refinish a roll-top desk for that bright corner. It will probably be next year before that reveal, but that’s okay. We’ve got a hacked Fjell wardrobe to enjoy in the meantime.
And the token “before-and-after” shot:
See you in Narnia!
Update!
Our “hacked” wardrobe became the inspiration for an entire Rustic Nautical Master Bedroom Makeover! Check out the grand reveal HERE and all of the other posts in that series:
If you’re just tuning in, be sure to check out the other posts in this series!
- Rustic Nautical Master Bedroom Makeover: How We Found Our Shared Style
- IKEA Hack: Whitewashed Fjell Wardrobe with Pallet Shelves (you’re here)
- How to Stain Wood with a HomeRight Finish Max Sprayer: Video Tutorial
- How to Build a Custom King Size Bed Frame
- So You Want to Build a Pallet Headboard
- IKEA Side Table Hack: Such Great Heights
- The Thrifty Girl’s Guide to Coastal Decor
- Nautical Anchor Pillow Tutorial
- Felt Fish Pillow for the Nautically-Inclined
- Roll-Top Desk Makeover: Business on the Outside, Party on the Inside
- Desk Styling 101: Say Goodbye to Styling Anxiety
- Adding Scallop Stencil Details to a Roll-Top Desk




Lauren,
I was going to use a different wardrobe template using pallets. While I won’t be investing in the Fjell piece, I am inspired by the design!
I’ll be using 1 bys and 2 bys, possibly on a pallet base. The 1bys are on clearance for $.23 at the local home store. The pallets were free. Of course, the hardware is where the greatest investment is made…but, #OMG I’m about to have a wardrobe for less than $50. 🙂
Thanks for the inspiration.
Shonn
Hello,
I’m interested in using a hack like this, except I’d like to use the Fjell wardrobe as a standalone kitchen pantry. Do you think the Fjell is strong enough to hold items like cans, flour, and pasta? Obviously, we might need to adjust things for this purpose, but do you feel the “bones” of the Fjell support such an undertaking without significant effort?
Thanks.
The Fjell could be modified to hold up to cans and heavy pantry items, but it would have to be reinforced and braced similar to what we did on our tutorial. The back panel should be replaced with strong boards, well fastened to the wardrobe, and some diagonal boards would be beneficial too. Inside, just make the shelving solid and anchor them to the sides and back of the wardrobe with screws and metal brackets. But in answer to your question, the “bones” are there if you made the shelves strong and reinforced the back to prevent shifting. We think you can do it! And would love to see pics of your finished project. Best of luck, Ruth!
Nice transformation. I have an old wardrobe that would also work, but I’m think it would be easier and more practical to install a ready-made closet organizer unit.
Oh, yes – – it’d definitely be easier and more practical…but try telling that to my husband! Lol. 😉 Thanks for the warm words!
Awesome Awesome job guys, Loved what turned out, I am actually on my way to pick one right now lol.. I actually made up my mind after seeing your hack. Will be copying your design, well most of it 🙂 Do you want a royalty check?
Where sis you get the rear pallets from , I guess home depot?
We’re so flattered that you found inspiration in our IKEA hack! Copy away! 😉 As far as the pallets, we have called Home Depot before and they allowed us to pick up some pallets. But our go-to move is our local lumber shop. They always have a huge pile of pallets stacked by the dumpster that they let us pick through. Any local business that does shipping likely uses pallets. Here’s a follow-up post we did on tips for working with pallets. https://www.thinkingcloset.com/2014/02/24/so-you-want-to-build-a-pallet-headboard/ Hope it helps! (And if you think of it, I’d love for you to send me a pic of your finished wardrobe so I can feature you in my next Reader Showcase!)
How did I never see this… what an amazing hack and the paint job–just beautiful!
I always love IKEA hacks but I’m really obsessed with this one <3
Hi Lauren! I love this fabulous transformation so much that I am featuring it today at the Get Your DIY On Challenge! Come by at 7pm EST to grab your button and bring along a holiday sign project if you have one to share! Hope your weekend has been awesome:)
~Krista
Love it! One of the BEST makeovers of an Ikea piece I’ve seen. Pat the hubs on the back for great work!!
Wow! That’s high praise, Mrs. J! Thank you so much for your kind words…and I’ll be sure to pass that pat-on-the-back on to my hubby. 😉
Hopping over from Better After! Love your IKEA hack! I’ve seen that armoire at IKEA and thought that it has a lot of potential with a little work but you made it look even better than I would have expected!
Thanks for stopping by, Kris! And I love that you had your eye on this very same armoire. Of all the ones we looked at, it was definitely the strongest structurally…we just needed to give it a little makeover so it better suited our style. I’m so delighted you’re a fan!
That’s a marvelous transformation, but a hearty LOL to the thought that *ALL* his clothes AND shoes fit in there. I’d have to start with at least three of those and see how it went. Great job.
Ha ha. Ya know what, Leslie? I’d have to do the same with my shoes and clothes. In fact, come to think of it, I feel a massive purge coming on. There’s such a thing as fall cleaning when it comes to your wardrobe, right? 🙂
Hi, I saw this linked on Miss Mustard Seed – it’s BEAUTIFUL! And I love the Narnia thing – I so want to build a wall in the basement and have the entrance to a hidden room be through a wardrobe!
Deb, thank you so much for stopping by and for your kind words. And YES you HAVE to build your basement Narnia! That would be every child’s dream space…heck, it’d be MY dream space. 😉
Oh I’d totally be building a wardrobe entry to a hidden room for ME! 🙂 Just a big kid over here …
A woman after my own heart….
Yowzah! This might be my most fave ‘the thinking closet’ project, yet. I do love how you and Mark complimented each other so well on this one. Those lights and shelves and the paint just hacked the wardrobe to a whole other level! I, too, can’t wait to see it in person…I’ve always wanted to go to Narnia. Might be the end of the age of the Pevensies, and the beginning of the Castelli/Lankers!
OMG, love this! Thanks so much for linking up with OPC and The DIY Show Off to support Habitat for Humanity. Featuring you on the blog and FB tomorrow. Thanks again!
Thanks so much, Jocie! I so appreciate your enthusiastic response to our IKEA hack and the features on your blog and FB page!
Looks great! What an amazing hack.
Thanks so much, Becky! And I love the photo on your blog header by the way. Makes me sigh for the northwoods of Wisconsin.
I just LOVE this, Lauren!!! And what fun to DIY, decorate, and organize all at the same time! You and your beautiful blog always leave me dazzled! 🙂 Hugs, Katherine
“Dazzled.” Compliment of the day from Ms. Katherine Scraper, ladies and gents. Thanks for taking the time to check it out. I’m still so enamored by your awesome giveaway idea.
Enhorabuena!!! Me ha encantando, el resultado es increible!!!!
¡Muchas gracias! Estamos muy contentos con el aspecto acabado. Gracias por venir y por tu comentario. ¡Ciao!
Lauren, I can’t even tell you how much I ADORE this project! I have wanted something like this in our house for years! What a perfect way to store all the clothes. I love that your hubby was creative and figured out a better backing! I hate those flimsy backs too.:)
Thanks for your enthusiasm, Kadie! I know, Mark was really clever in how he approached the backing. I figured just painting the exterior gray and doing the white-wash would be enough of a transformation, but he just kept going and going and going…and I’m so glad he did. 😉
GUUUUUUUUURRRRRRRLLLLLL….You knocked this out of the park! I can’t even believe it started out as an Ikea piece! Fabulous job!
Ha ha…I love that I can hear your voice in this comment, and I haven’t even had the joy of meeting you in person yet. (That’s a sign of some good writing!) Thanks for the sweet words, Christine!
Ha ha ha!! I am such a DORK!! Can I tell you that when I saw the opening pic, I thought that the blue banner was totally painted on the wall and then over onto the wardrobe!! I thought… O-M-Goodness! What a cute idea!? After reading the post, I went back to look at the photo and realized that it was a graphic.. Ha ha!! Well, I’m gonna try it, anyway!! You inspire… even when you don’t try!! Ha!! 🙂
You’re far from a dork! More like a creative genius who thinks outside the box. And I love that you found inspiration even where I didn’t intend it. THAT is awesome.
I LOVE Ikea hacks and this one is GORGEOUS! Did you submit it to Ikeahackers? ~M.
http://www.redesignedbym.wordpress.com
(sorry if this is a repeat comment… I didn’t know if my previous one got posted!)
Btw, I just followed you everywhere. 🙂
Wow That is a huge transformation. I LOOOOOOVE it! Ilove what you did with the paint, using th sponge and the rag, interesting technique! Thanks so much for sharing this with me at Bewitch Me & Titi! Hope to have you back tomorrow with more awesome shares! Hope you are having a great weekend!!!
Hugs
Cami @ TitiCrafty by Camila
Came over from Flamingo Toes. Well done you two! My favorite part is the shelf for treasures. I laughed out loud at that since I’ve a guy friend who always needs a separate little space for his treasures as well 🙂
Lauren, this is amazing!! You did such an amazing job. I’m so happy that you were one of the first smiling faces we saw at Haven! Hopefully you’re having an awesome time. And, as I told you, you’re being featured over at Huckleberry Love today! I hope to see ya again before the conference is over. 🙂
Absolutely love your wardrobe, Lauren. Seriously stunning and it’s totally my favorite IKEA hack ever! Beautiful
WOW found you through the Redoux party. Love what you did to this cabinet!! Love the cabinet to begin with but you’ve done such a fabulous job of this makeover I am blown away!
Great job!
Great transformation Lauren and Mark. Featuring you today at Shabbilicious Friday.
I love this project!!! I love your blog! I am so glad you linked up, this is how I find the coolest blogs I didn’t know about! Sharing at my party tomorrow.
BTW, my husband is a Mark too. Lawyer, not a doctor. He is originally from NYC, moved to Syracuse as an older kid. Went to Stonybrook on Long Island for his undergraduate. We live on the opposite coast, in California. We did our entire relationship long distance too. I made him move out to California, no way was this California girl dealing with New York Winters!
Thanks SO much Karen! That means so much to me as I am huge fan of your blog and linky party…and I’m 99% sure you’re going to be at Haven this weekend, which means I can thank you face to face for the feature. Also, I delight to know how much we have in common, especially with the long distance dating thing and your husband being from NY. So excited to connect with you, Karen! Okay, now I had better get back to packing so I can catch some shut-eye before the trip tomorrow. Eek!
What an amazing IKEA Hack! I’d love for you to share it at my Twirl & Take a Bow party at http://www.houseontheway.com. Have a great week.
Leslie
Thanks for your enthusiastic comment, Leslie! I’m so glad you like it! I appreciate the invite and hope that your week is fantabulous as well.
OMG! This is amazing! Loving the hack! If you get a chance, please link up to my link party: http://suburbsmama.blogspot.com/2013/07/sunday-linky-18.html
TY! I’m deeeelighted you’re such a fan!
Oh, my goodness! I am so impressed…You completely transformed the IKEA wardrobe into a gorgeous armoire! I love what you did to it, especially the color! {Sigh.} I am feeling the sudden need to go to IKEA asap…
Thank you for sharing this, and I hope you have a lovely day!
Blessings,
Jenni
I think we’re on the same wavelength with colors, Jenni…your sunbleached stain on that Ana White farm table y’all built was to die for! And I’m sure it’s the Swede in you that loves IKEA. It’s the closest I’ve ever been to Sweden myself; hope to get there someday….
Wow Lauren! You and your hubby did a fantastic job. It looks so beachy and fits perfectly in your room. What a way to make an IKEA piece your own. Great job!! Thanks for sharing on Tell Me Tuesday and you are featured this week! Take care!
Whoo hoo! Thanks so much for the feature, Tori! And the wardrobe has been a great jumpstart to doing some d.i.y. projects for the bedroom (it was much neglected in the past). Next up, Mark hopes to tackle building us a bed-frame and headboard! (Yes, we still sleep on just a box-spring and mattress…it’s like we’re camping. Ha ha.)
That is one amazing hack job! I love it! The wash is beautiful. I’d love it if you would share this at “What We Accomplished Wednesday,” at Green Willow Pond. It goes live on Tuesday nights at about 6 PM EST. Have a great week!
Hugs,
Deborah
Thanks for the kind words, Deborah, and I appreciate the invitation!
What an awesome project! I love how rustic it is now, and those pallet shelves are perfect! I know you already saw that I featured this on my blog today, so I’m just stopping by to pin it and say thanks again for sharing!
I sure did see it! Thanks again, Jessi…for the kind words, the pin, and the generosity of featuring it today.
Wow, It looks great! I love the pallet board back too!
Erin @ Elizabeth Joan Designs
Thanks, Erin! That’s my favorite part, too. I feel like once we figured that part out, the rest really fell into place. 😉 Take care!
Wow, what an amazing difference between the before and after. I really like how you painted it and the color your picked.
Thanks for the feedback, Manda! Ya know, it ended up an even more dramatic transformation than I think either of us anticipated. I guess IKEA hacking is a slippery slope, but a fun one at that! 😉 Hope your weekend was wonderful.
This is the best Ikea hack I’ve seen. Love the lights idea, and it does look like a very expensive piece from a high end furniture store. Great work guys.
Wow, Justine! That is high praise! Thank you so much. Mark surprised me with adding the lights, but I fell in love with it, too. It brings a magical quality to the finished look…and we use it as a nightlight all the time! 😉 Hope you have a great week and thanks for the comment-love.
Don’t you just love Ikea. Great organization solution and looks good too from one Lauren to another. LOL! I’d love it if you check out my blog. I do a lot of Ikea hacks. My style is pretty out there though.
http://www.ifitsnotbaroquedesignblog.blogspot.com/
Yay for Laurens in blogland! 😉 Great to “meet” you, and I’d love to stop by and see your hacks. This was our first one…but now I’m hungry for more! (And “out there” is awesome in my book.)
Wow – this turned out amazing! It was a great piece to start with, but I love the way you transformed it into a weathered, beachy wardrobe. Love.
Rhonda, thank you for the kind words! You’re right in that the piece was already wonderful to start – – but now it feels really RIGHT for us and our space. And now, we’re on a weathered beachy kick, so who knows what we’ll hack next! 😉
Amazing Job. Now all you have to do is enjoy your new organized and updated space. ;o)
Thanks, Paula! Yes, NOW is the best part! (Although we mustn’t rest on our laurels for too long. Much of our home calls for “hacking” of its own.) Happy weekend!
GREAT job!
Thanks, Monica! I feel the love.
This looks awesome!! I love the color and that pallet wood and shelves are genius!
Thanks, Katie! And I appreciate you sharing it on your FB page. Made me smile!
This is just beautiful, Lauren! I love the pallets added (and the lights!) and the wash is perfect. You say Beachy… I say Rustic ~ it’s great!
~ Megin of VMG206
Join me for DIY Showcase Link Party ~ and Summer Giveaway~
Thank you for the kind words, Megin! I’m so glad you enjoy the details we added…and you’re right: it’s certainly rustic, especially from the inside! Have a wonderful weekend.
Awesome, awesome hack!
Lovely lovely! Just so perfect and useful for that space! I love how you completely transformed the IKEA cabinet beyond recognition.
This is GORGEOUS!! I never would have thought to make any of these changes to it. We’ll be featuring this over at Someday Crafts tomorrow!
This is so awesome! I found you via Centsational Girl. I think your “hack” job looks a million times better than the Ikea version!!!
That is so stinkin’ awesome!!! I love it. Perfectly hacked and super duper functional. High five!
Lauren~ just saw your design on Best of the Blogosphere. Congrats! Super Ikea hack and really creative way to use pallets.
Love it! There’s no IKEA in Jacksonville Florida sadly! Cant wait to see whats next. New follower!
I LOVE this! Y’all did a great job! And I also love that you’re sooo a blogger by the way that the clothes in the wardrobe coordinate by color! Definitely photoworthy. ;0)
WOW! What can I say, that not been said already?!:)
This looks amazing! Nice job!
I think IKEA has the best furniture to revamp.
Love your blog;))
Love and hugs
Lydia
I absolutely love that he made sure to reinforce the floor so people can hide in it. Also, can you guys make me one? 😉
Ha ha, I know! So funny, right? And yet, as a hide-and-go-seek fanatic, it makes me love him all the more. 😉 And I’ll ask Mark about making you one. Though I think he is already scheming our next big d.i.y: a king-sized bed. Yeah, we’ve been sleeping on the mattress and box spring without a bed-frame for all four years of marriage. #classy
This is awesome! I love the color. I need one for my husband so I can have the closet to myself. 😉
Lol, wise woman! And since he moved his hanging clothes from the closet, I have had no trouble filling in the gaps. Funny how that happens! 😉
Wow! This is just gorgeous. What an improvement on the original piece! You two make a great pair! Sounds like Mark has a new hiding place… good thing he has some winter clothes in there, just in case he finds himself in Narnia one day!
Good thinking! Yes, a wooly sweater would most definitely come in handy in wintry Narnia, especially if that White Witch is still at large. That’s pretty much the only reason why we’re saving our winter clothes. Oh, and of course to visit our beloved friends and family up north! Looking forward to seeing you in a few days, my Giannita!
That’s beautiful! I love Ikea, but I’ve never seen that wardrobe. Very nicely done!
I think the Fjell line is fairly new…I had never seen it before until we were browsing around on the IKEA website. It was one of three wardrobe contenders and when Mark saw them all in person, he said there was really no contest for which one was the most sturdy and well constructed. Anyway, thanks for checking it out, ChiWei and for the kind words!
I LOVE LOVE LOVE this!
Thank you for your enthusiastic response, Stacy, and for taking the time to stop by! Love your linky party!
Now this is a great IKEA Hack job. You both have really personalized something that could be a real bore. Great job!
Ha ha. Yeah, the unfinished wood on the Fjell, although fitting for some settings, wouldn’t have quite looked right in our bedroom. But I love that it was unfinished and didn’t require any sanding or stripping to paint it. It’s almost as if IKEA is asking for a hack with this one. 🙂 Thanks for the encouraging words, Jenny Lynn!
AMAZING job, Lauren and Mark! WOW! You took this from a stock piece to a one-of-a-kind masterpiece that is the perfect addition to your beachy bedroom. I love how you really made it unique to you, and the Christmas lights have to be the coolest thing I’ve ever seen in a wardrobe. Love this so much!!
~Abby =)
Ha ha! If Mark had his druthers, our whole house would be lit with white lights. 🙂 But I really do like the white lights in the wardrobe, too. It was a real surprise when I first saw it. Ya know, he thinks outside the box in ways that I don’t…it’s really inspiring! I joke that if Mark had a blog, it would leave The Thinking Closet in the dust! He’s the real creative one between the two of us.
Thanks for your sweet remarks, friend. You always bolster my spirit. Hugs!
This is so beautiful and creative. You two are a great team!! I love all the special spaces for things, hooks, etc. Can’t wait to see it in person one day soon, I hope!! Love to you both and thanks for the inspiration and for thinking outside the IKEA box!!
I cannot wait for you to see it in person either…maybe you can even crawl inside it j.b.c. you can! Ha ha, and clever there with the IKEA box pun. I think Dad has probably rubbed off on you a fair bit after 33 years of marriage. Although I have no doubt that you have always been the wordsmith, you English major and “friendly pen,” you.
See you soon!!!
Loved being together with you two clever/creative ones for your anniversary and beyond! Wishing you a life-time of creative projects together!
Aw, thanks, Mama! We receive that wish! And know that we so treasured our time with y’all on the Jersey shore last weekend. Relishing in the sweet memories (and intentionally forgetting about the “sweat” memories…ha ha). But seriously, we wouldn’t have wanted to spend a heat wave any other way. 🙂
Cute about the sweet vs sweat! And this past weekend was so cool and breezy! Who knew? The heat bonded us in more ways than one! xxoo
Happiness is a purpose built space! It worked out well and your husband (Mark) will feel good every time he uses it. I had some similar (but nearly as good or interesting) cupboards built years ago (my wool room being one of them) and I can tell you, they never lose their specialness. His wont either. 🙂
“Happiness is a purpose built space!” I love that quote, Sharon! And I think you’re right about feeling good when you use something that was made just for you and your purposes. And those cabinets sound lovely…and the fact that one of them is a “wool room” makes me smile. Oh, to get a tour of your creative spaces…that’d be such a treat!
Nicely done Lauren {and Mark}!!! That is one amazing hack and I love how you made such great use of all of the interior space – not an inch of space is wasted…genious….and the color is perfect!
Ha ha. You noticed! Yes, my husband thrives on efficient use of space. In fact, I never heard someone use the word “efficient” more than he does. 🙂 Thanks for the sweet feedback, Jeanie.
You did such a great job!!!! What a beautiful piece! 🙂
Thank you, Emily! Now, I want to raid IKEA and hack everything I can get my hands on. It’s addicting!
WOW! Lauren, you guys did an amazing job! I love almost everything/furniture pieces that are from IKEA and this is one of my fav! it’s solid and perfect to hold all your clothes 🙂 Now, I want one too! ha!ha!
love the color, love the rustic look, love everything! 🙂 again, you guys did a great job! 🙂
You are the best cheerleader a gal could ask for! Thanks, Ingrid. Yes, the Fjell wardrobe really is one of IKEA’s more solid pieces with a great design…it really didn’t NEED the hacking…we just can’t resist the opportunity for a d.i.y. project I suppose! 😉
I love it Lauren! I am impressed with both your fabulous new wardrobe, and the fact that you got your hubby to willfully replace his metal boxes. Pre-marital assets can be so hard to dislodge!
Ha ha. How true, how true. And I don’t know if we’ll ever fully get rid of those cubes…but at least they’re back in the garage where they belong. 😉
Looks amazing! I love the gray color and the distressing details!
Thanks for your sweet comment, Selene! I wasn’t sure how the gray would take to the honey-colored wood, but it almost has a taupe and gray look to it now, which works well in the space. Phew!
Wow! IKEA owes you big!! Y’all did An. Amazing. Job. on that wardrobe. Very inspirational…. “Honey? I need you to look at this…”
Ha ha. Thanks, Maaike! It was a little risky messing with an already beautiful piece, but it ending up turning out even better than I first imagined it, thanks to my husband’s creative thinking and artistry with power-tools. #twoarebetteroffthanone
those dimensions are huge- this piece is well worth the investment. it looks really great and very beachy!
Yeah, I feel like the pictures don’t even accurately depict the height and depth to this sucker. Our ceilings are tall, too, so it helps fill the space to have such a monster of a piece! (Reason #467 why the wire cubes just weren’t cutting it.) Thanks for the kind words, Kelly!
This is AMAZING! I never would have thought to do something like this to a piece of IKEA furniture! It turned out perfect!
Thanks, Jessica! The concept of IKEA hacks was pretty knew to me until I started blogging and seeing them around blogland. I was so inspired by the creativity that people had to take an IKEA piece and run with it; it really opened up a world of possibilities for us. I highly recommend trying an IKEA hack at some point, Jessica, if only to be able to say that you “hacked” something. 😉
Fabulous! Plan on seeing it in person tonight! That was alot of work, but totally worth the effort. Putting your heads together, you guys come up with some goodies!!
You were our first guests to see it LIVE in person! Thanks for the awesome pre-anniversary dinner and euchre game…even though you ended up slaughtering us in the end! (No mercy. Ha ha. We’ll getcha next time!)
This turned out awesome! I love the rustic look 🙂 Ikea is such a great place to get inexpensive pieces and then have fun customizing them!
Why thank you, Angela! I know, I’m feeling the itch for an IKEA run soon to see what we can “hack” next! Ha ha.
haha I LOVE that Mark was like “but what if we need to hide in the closet – better reinforce the floor!”. Perfect.
The finished look is amazing! You’re so luck to have such a handy husband 🙂
Ha ha! That is totally what was going on in his mind. I’ll admit, at first, I thought it was overkill. But now, seeing it all finished and glowy with lights, I’m like, “Of course. This is totally the kind of closet you would want to hide in. Genius!” And now, I want to invite all the neighborhood kids over to play hide-and-go-seek just so we can utilize that reinforced floor!
Yes, so so thankful for a handy hubby! Especially today…as it’s our 4-year anniversary! (Awwwwww.)
That is an amazing restyle. I love doing ikea hacks but this one is by far the best I’ve seen!
Wow! That’s high praise! Thanks a million, Laura.
Wow, it looks fabulous!! If I didn’t know Mark was a dr. I’d be convinced he’s an engineer. He seems to tackle projects and details and building much like my mechanical engineer man. You two make a great team. And I love the Narnia reference thrown in at the end!
You know, I never before thought of him having an engineer’s mind, but he totally does! He loves to take things apart and put them back together again…loves to know how they work and why they work and how they can be improved to be more efficient. Hey, do you think maybe he and your hubby could be besties? Then, together, we could be bestie couples? 😉 #dreamcometrue
Wow, Lauren! This is one impressive hack!!! Great job! I would have never thought it could look so gorgeous in the end! Pinning!
Thank you so much, Jenna! Ya know, it sort of exceeded our expectations, too. Love it when that happens! Thanks for the pin-love, too!
woah!!!!! absolutely amazing… great work!
I appreciate those exclamation marks, Jamie! Thanks for the smile!
Ooooh! I love that!
It looks so pretty! Not sure if I love the whitewashed or the pallet-wood-back more… Both are incredible ideas!
You should sell your design to IKEA! 😉
Love, Midsommarflicka
Ha ha! Not sure how IKEA would feel about us “improving” upon their already awesome design. But I’m glad at least you approve, Midsommarflicka! That means a lot coming from you, Ms. Furniture Transformation Queen! 😉
Ms. Furniture Transformation Queen – I take that title, thanks! 😉
Seriously amazing hack! Love the way this turned out! Wanted to stop by to thank you for choosing the baby changing table turned cocktail cart at the CSI project! 🙂
Thanks, Heather! And I really did love that dramatic transformation you did with the baby changing table. Such a creative revamp! I appreciate you stopping by to say hi and for your oh so kind words. Hugs!
You sneaky little turkey, you. I am so surprised and wowed! Great job. I love everything that you did to make this a substantial and attractive piece of furniture. Great choice with the gray wash.
Nothing makes me smile more than your humorous little comment quips like “you sneaky little turkey, you.” Ha ha! And your praise means a lot considering all of the amazing furniture transformations I’ve seen you tackle. Let us not forget those magical emerald and gold side tables. Just popped over to Decorum DIYer to see all that you’ve had your hands in lately. You’ve been a sneaky little turkey yourself! Love how the Moroccan shapes and colors are manifesting themselves in your bedroom…so luxurious!
Great hack! Those wire cubes can’t hold a candle to this handsome wardrobe!
Ha ha. Thanks, Shannon. Good riddance to those wire cubes!
LOVE IT!! The color is so pretty! Great idea with the pallet boards, just saw one whole wall done with that at Nordstrom and fell in love with it.
Aw, thanks sweet Elena! Believe it or not, our church has a wall made up of reclaimed wood pieces…so pretty much every Sunday, we walk by it and stare at it and drool. Clearly, it has had it’s influence on us! We are pallet obsessed these days!
Hope you and the fam are having a great summer. Mom says it’s gearing up to be a heat wave this week. Stay cool!
LOVE IT LAUREN!! Love the FJELL, it’s one of my fav IKEA cabinets (and you know me and IKEA) and you guys did such a great job on it!
Yes, you and IKEA are like Bonny and Clyde…minus the whole criminal thing. So, of course, I was really excited to hear what YOU of all people would think of this. So glad to know it earns the Alex stamp of approval. I feel like now I can heave a sigh of relief. Ha ha. Thanks for the comment and Twitter love, Alex!
I’m like a whole week behind on emails and comments on the blog and blog reading, but I saw this on Pinterest and had to comment. It’s amazing! I can’t even out into words how impressed I am and how amazing this is!!! I pinned it. Twice. You guys are totes incredible.
Thanks for bumping me to the top of the list, Thalita! I’m honored! (Especially because I totally understand being a week behind. I’ve felt that way most of the summer! Ha ha.) And double-pin-love? I think that’s the first time anyone has ever done that for me. Double-thanks, girl! I’m tickled that you’re such a fan!
Wow! You guys did an incredible job with that IKEA Wardrobe! The finished project looks like you paid at least $2,500 for it! That hubby of yours is a keeper…nothing more attractive then a handy man… (mine is too)
Love the beachy look! I bet you smile every time you look at it…and using the pallets as well as the lights, what fantastic ideas!
I LOVE it!
xox
Aw, thanks for your enthusiastic response, Sharon! And like you, I really am so thankful that I married a handy man. Not only can he come to the rescue for fix-it projects around the house, but he can really help bring my d.i.y. dreams into reality. I’d probably be hot gluing pallet boards together if it weren’t for him. And thankfully, he loves it! Maybe you and I need to start a Handy Man Appreciation Day for our hubbies…. Hmmmm…. Ha ha. Have a fantastic rest of your week, Sharon.
What a fabulous job you two did! I am super excited for you and in love with the results! Love how you mixed your paint too! Bravo!
Thanks, Bev! And I forgot to tell you, but thanks to that post you turned me on to, Mark ended up buying a sawzall to help get the boards off of the pallets. In fact, NO JOKE as I am typing this right now, I can hear it whirring in the garage. He’s like a kid with a new toy at Christmas! Thanks for that awesome tip, friend.
Great job on this….and the back panel…great idea. Shall be using along the way…
#Sawzalls rock