Fabric Applique Onesie Tutorial & Free Cut File
“Rubber ducky, you’re the one. You make sewing appliques lots of fun! Rubber ducky I’m awfully fond of you. Bo-bo-bo-di-o.”
Yes, I was a child of the 80s, and yes, I grew up learning my letters and numbers with Big Bird and The Count on Sesame Street. So, inevitably, when one works on one’s first applique project involving a cute rubber ducky shape, one inevitably hums Ernie’s bath song. It’s just what one does.
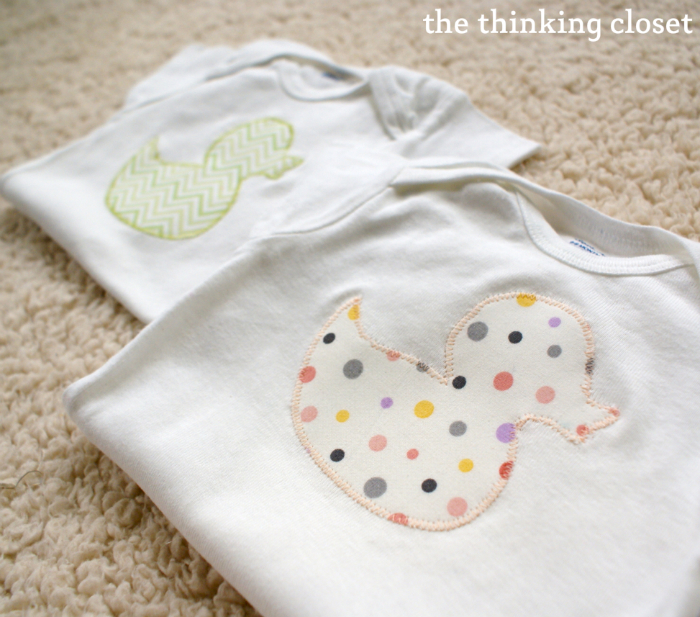
I’m going to give the skinny on the whole shebang, from using sewable fabric interfacing to cutting my duckies using my Silhouette machine, to sewing the shapes to some onesies.
Before you tune out on me and start watching old episodes of Sesame Street because you think this sounds too hard, hear me out: all of these were firsts for me! From cutting the fabric with my machine to sewing an applique. And I consider myself a beginner sewist. So, you can totally do this thang.
Tutorial
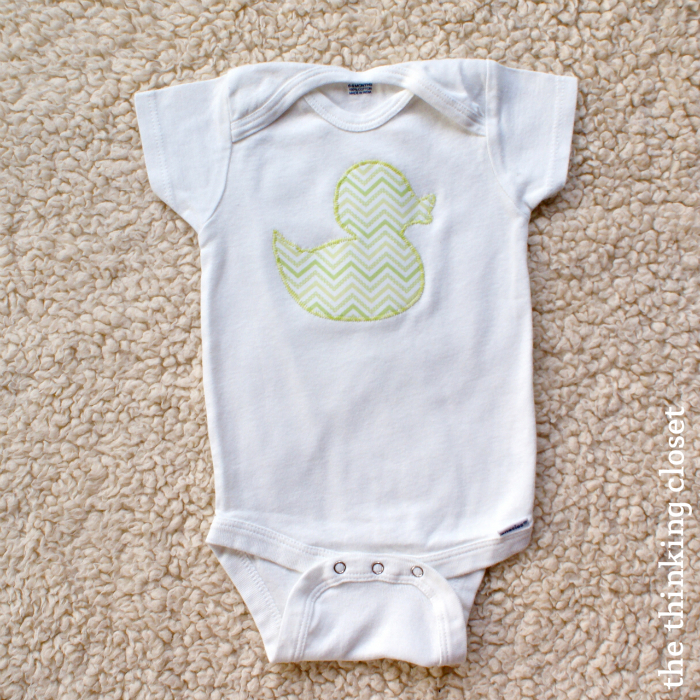
Step 1. Create your design in Silhouette Studio. If this is your first applique project, go simpler than you think you need to. I thought my initial duck image was simple, but I ended up simplifying it even further, trimming off the extra head and tail fluff. (Sorry, ducky.)
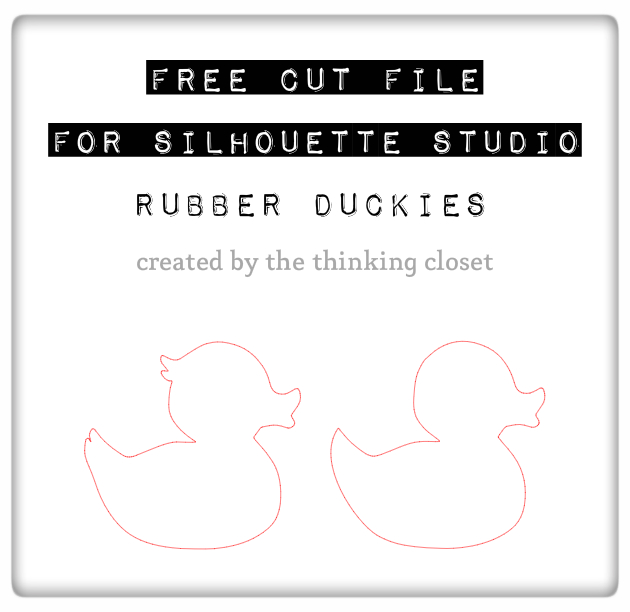
Free Cut File
You can download both duck shapes for free to make your life easier. You can sign up to download your free cut file using the nifty form below or by clicking HERE. {Fine print: this design is for personal use only and is not to be used for commercial purposes. Thanks!}
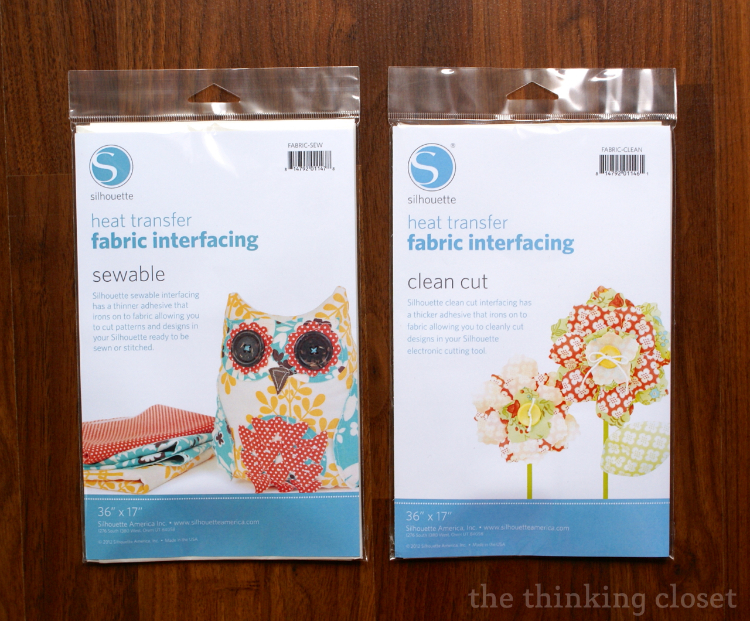
Step 2. Adhere sewable interfacing to your fabric.
- Cut your fabric and interfacing slightly larger than your design.
- Place the rough side of the interfacing on the back of the fabric and iron it using the temperature setting recommended for that fabric. Silhouette recommends applying the iron for 2 seconds, but I found mine needed more time…more like 30 seconds.
- Remove the liner from the interfacing (it should peel off without any interfacing residue remaining on it).
Step 3. Cut your fabric shape.
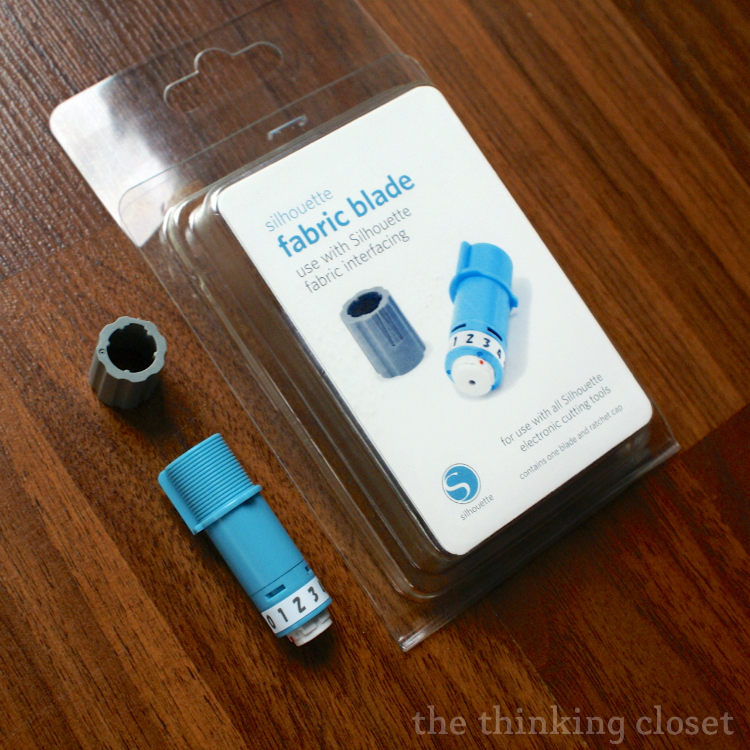
- Install your fabric blade into your machine. Silhouette has a special blade just for cutting fabric to help maintain its sharpness, just like you probably do with scissors! The fabric blade is a pretty blue color, so you can tell it apart from your standard blade.
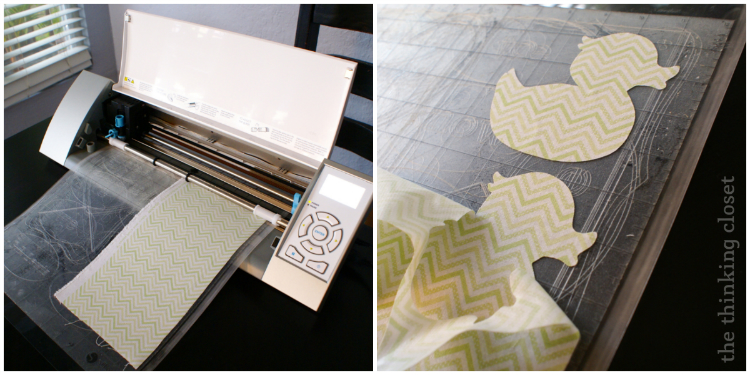
- Place your fabric onto the cutting mat, interfacing side down.
- Be sure to select the “fabric” cut setting (mine recommended a blade setting of 3), and let your machine work its wonders. I was really impressed with how quickly and cleanly it cut through the fabric. I was able to weed out the excess material in just a few seconds.
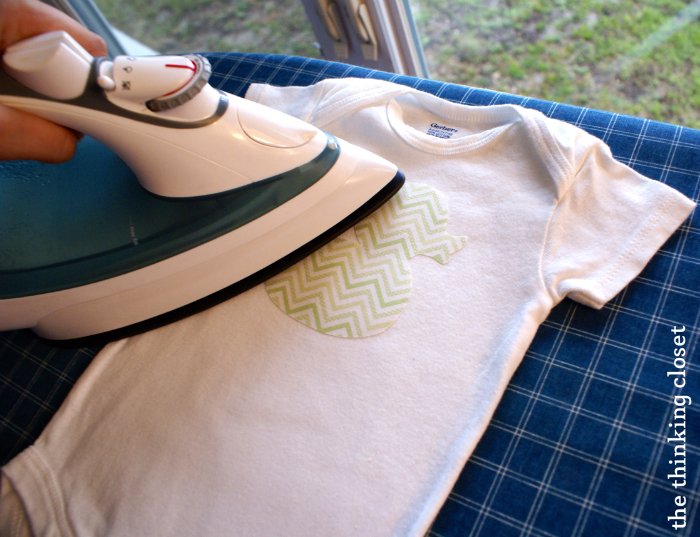
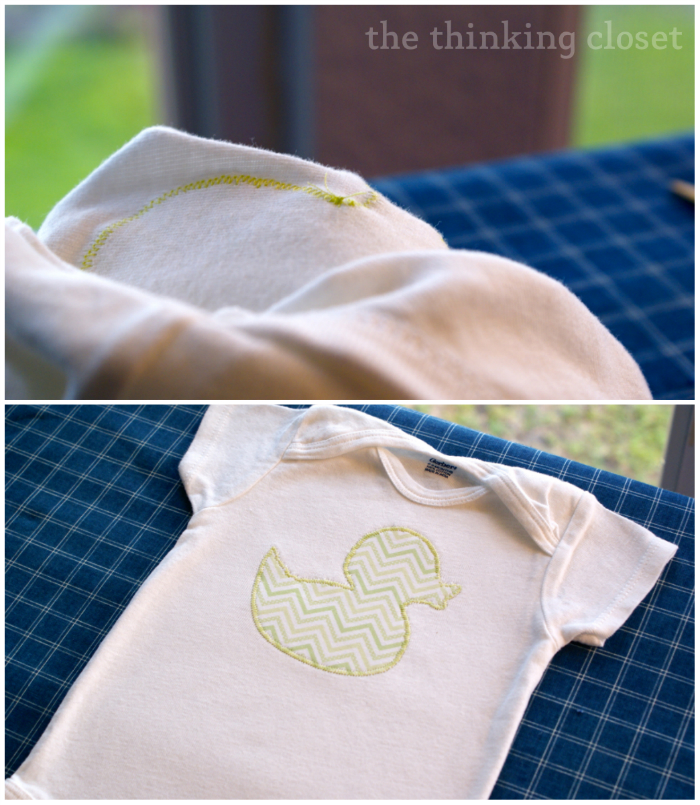
Step 4. Iron your shape onto your onesie or other material. Place your design on your material where you’d like the applique, and once it’s set, iron it for 30 seconds or so (Silhouette recommends 8, but I found that wasn’t enough). It will temporarily bond to your material while you sew or hand-stitch it in place. If you have a design that isn’t intended to be washed, then you can use Silhouette’s clean-cut interfacing instead.
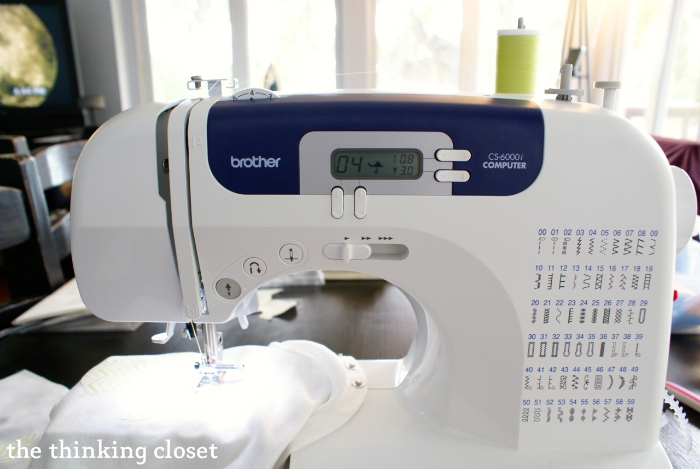
Step 5. Practice your applique skeelz. For those of you who have never before tried sewing on a fabric applique, I highly recommend getting in some practice first. So, take some of the excess fabric that you weeded from your cut design, iron it onto a scrap of material, and remove any storage compartment on the front of your machine if you can (for more maneuverability) . Then, set your machine to a zig-zag stitch, and practice! Play around with stitch length and width to see what your eye prefers. Get a sense for how to work around curves. Make mistakes. (Lots of them.)
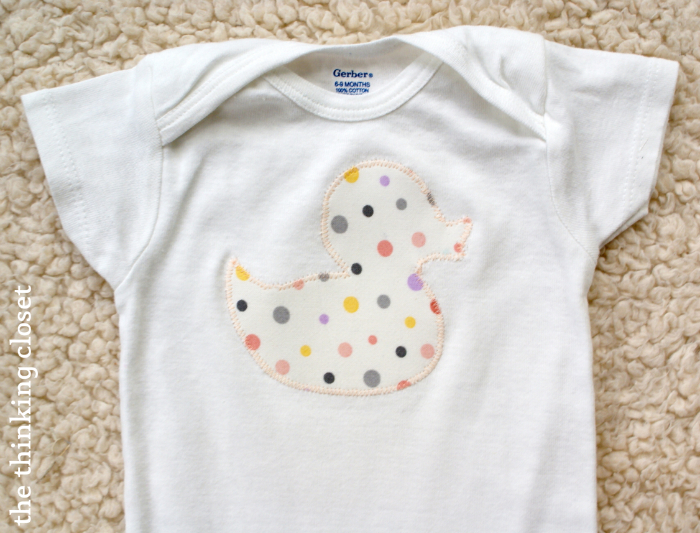
After my “research” phase, I decided to use a zig-zag stitch with a length of .8 and a width of 3 because I thought it would look best with my design. Depending on your design, you might even consider using a straight stitch! This is one of those “follow your heart” moments.
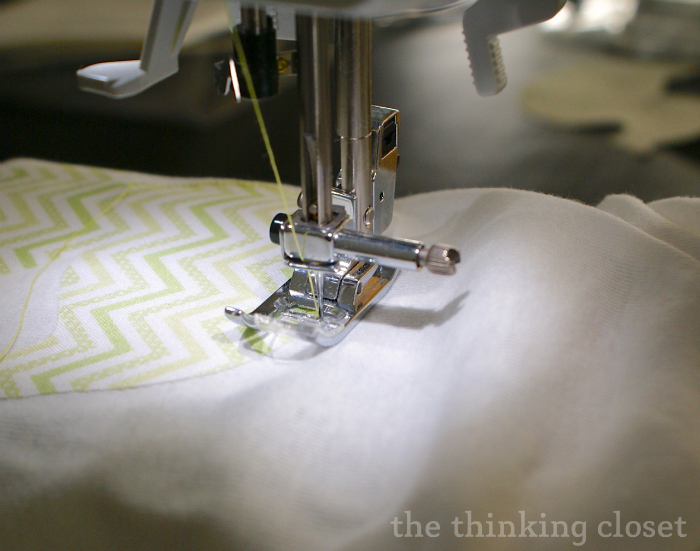
Step 6. Sew your applique. Now, I am far from an expert at sewing an applique. All I know is that my ducky will not be falling off my onesie any time soon. But here are a few tips I might offer to a fellow beginner (and experts, feel free to weigh in down below in the comments with your sage wisdom).
- My best advice is to “be the needle.” While I know I may sound like I’m channeling Mr. Miyagi from The Karate Kid, stay with me here. My best sewing was done when I was hyper-aware of the needle’s zig and zag and knew exactly where the next stitch would be placed even if I paused to raise the presser foot and rotate my fabric. If I lost track of whether I was on a zig L or zag R, that’s when my stitches became sloppy or erratic.
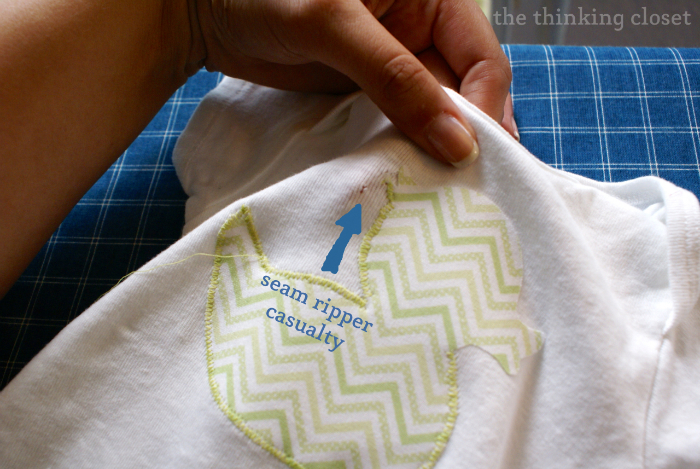
- My second piece of advice is to go slowly. In fact, I went so slowly around those tight curves, sometimes I even spun the wheel manually with my hand instead of using my pedal just because it gave me more control. The duck’s mouth was the most intricate section by far, and that was all done turning the wheel with my hand. And if I had gone more slowly the first time around, I wouldn’t have needed to use a seam-ripper to back-track, and I wouldn’t have accidentally jabbed a hole in the onesie, ruining my first attempt. Sigh. It was then that I was really thankful I had cut out two ducks.
- When working around tight curves, sink your needle (remembering whether it was zigging L or zagging R), raise your presser foot, and rotate your fabric. I did this a lot.
- I read at Angel Lea Designs that when doing appliques, aim for 2/3 of the stitch ON the fabric and 1/3 off. This was a helpful guide for me as I went along.
- It won’t be perfect. Not even close. But a zig-zag stitch is forgiving, and so are friends who receive gifts handmade with love.
Step 7. Finishing touches! I read at Sew Like My Mom that rather than backstitching to knot your thread, you should use a seam ripper or needle to pull your top threads to the back of the fabric, and tie everything together back there by hand. It makes for a prettier finished product. Then, you can press your applique one final time to give it that professional look.
And you’re done! If you’re giving away your onesie as a gift, consider pairing it with a handmade burp cloth or two, made from complementary fabric.
It feels good to be able to cross not one but two items off of my crafty bucket list: cutting fabric with my Silhouette and sewing an applique. And perhaps I’ve encouraged some of you to give them a whirl, as well? That’s my hope!
More Applique Inspiration
Three of my blogger buddies have recently tried their hand at fabric appliques, too, one of them being Cindy…who won my very first Silhouette giveaway back in April. Yeah, she’s already cutting chocolate labs out of fabric and sewing them onto hoodies like a pro. Props to her!
Here are pics and links to their creations. Check ’em out!

Spring Hoop Home Decor by Daily Dwelling
Anchors Away Fabric Applique Tutorial by Lil Mrs. Tori
Full Disclosure: I was not compensated for this post, but I did receive a free pack of sewable and clean-cut interfacing, as well as a fabric blade. This post contains affiliate links, meaning that if you make a purchase after clicking through, I may receive a small commission. Please rest assured that as always, I only recommend products that I use and love.




I know this is a very old post, but I have been searching for tips to perfect my technique. I have started using applique with onesies and find that I need a stabilizer. I very much dislike tearing the paper away (pieces get stuck in my blanket stitch) and do not want to add any additional stiffness by using something permanent. I notice on your tutorial you did not have a stabilizer step. Is this something that you do and if so what type do you use? When I experimented with not using any, I practically shredded the onesie fabric. Thank you for your time! Love your design!
Hi Beth! Thanks for the warm words. Now, I’m ashamed to say I haven’t carved out the crafting time to create more applique onesies since my original set (sad-face), but I only used interfacing on the back of the cloth – – no additional stabilizer, and it held up well! Perhaps it’s the Silhouette brand of interfacing I used or the difference in our machines / stitches, but thankfully I didn’t face any shredding issues.
Wish I could offer more help and suggestions to you as you perfect your technique! I do have a Silhouette Facebook Group I coordinate (with over 1,000 members) where folk might be able to lend some helpful suggestions, though. Here’s the link if you want to request to join us! https://www.thinkingcloset.com/the-silhouette-challenge-facebook-group-new-members-welcome/
cute project – thanks!
No, thank YOU for your sweet words, Annette!
Hi.
Lovely onesie! so cute.
I have a question though. What happens to the applique when the onesie fabric expands, when, for instance, it’s being pulled over a larger tummy? The applique does not “give” whereas the onesie fabric does.
Thanks for your reply.
domirel
Appliques aren’t really meant to stretch much…so ideally, the onesie shouldn’t be skin tight. But otherwise, it’s no problem at all, especially on a flat area like the chest. (Think of it like a patch.) Hope that helps paint a clearer picture of what to expect. Happy creating!
Thanks so much Lauren. I understand what you mean. I saw a onesie with a nice patch on the back side and it seemed such a good idea because many babies spend their time laying on their tummies and it’s so cute – but I was wondering how to attach the applique so that it would not stop the onesie fabric from stretching as it is designed to be…
Thanks again for your attention.
domirel
thanks its beautiful
Thank you, Salome! Hope you have fun creating a onesie of your own! I’d love to see pics of your finished onesie if you give it a go. Featuring my readers’ projects in my quarterly Reader Showcase is one of my favorite things to do!
My favorite line that made me lol (as you could probably guess)= “It’s just what one does.” Also, the lil ducky is so cute! I like his little puckered lips! I’m enjoying a lazy, fun Sunday catching up on some awesome TheThinkingCloset blog posts!
Ha ha. I love that you noticed the detail of the puckered lips…I can almost imagine you imitating the duck lips now and coming up with a duck voice befitting of such a character! So glad that you were able to enjoy The Thinking Closet during your down-time yesterday.
I loved this tutorial. I have making things like this for a while but loved the extra tips the 2/3 rule and the pull thread to the back. Great advice. I love your blog, your heart and am obsessed with your projects
Chrissy, thanks so much for you specific feedback and kind words! I’m glad to know that some of my beginner applique tips were on track…. And it turns out I’m a huge fan of you and your heart, too! Happy to have found you in this great big blogland. 😉
Thanks for linking up to my party! I wanted to let you know I picked your link to feature this week! See my post and grab my feature button here http://handmadecuddles.com/2013/06/create-inspire-69-picks.html
Thanks for the feature, Stephanie! That’s really exciting news. Already grabbed the button and am wearing it on my FEATURES page with pride.
I love this! I have not done applique yet, but I really appreciate your details! Thanks again for linking up on Much Ado About Monday!
Karla
“Details” is a nice way to put it. “Wordiness” could be another! Ha ha. But I do hope it’s of help to you someday if you do venture forth into the land of appliques. I’ll warn you, it is addicting! (And thanks for hosting another great linky party. I adore the Huckleberry Love gals.)
Love these – soooo cute!
Thanks so much for sharing at the Friday Baby Shower – Alice x
Thanks, Alice! And I love your party, so I’m always glad when I have a new baby-related project to offer. Thanks for stopping by!
Lol. Be the needle:) So true!!! I’m so impressed. Your duckies turned out so cute!
Hi Lauren,
Did you mend your onesie with the casualty? I have an idea if you haven’t. Just make it a girl duck and put a bonnet on top to cover the hole. Another “Gem” idea!
Ah yes, that is indeed gem #689! If only I had heard your sweet suggestion before foolishly trying to fix the casualty with little bubbles. Turns out it’s even hard to sew a tight circle than a tight curve. But I certainly gave it the old college try and chalked it up to an investment in my education as a beginner sewist. (But a bonnet would have been oh so sweet!)
Super cute Lauren! I am still amazed at what the silhouette is capable of! Maybe one of these days I’ll get around to buying one! 🙂
I like that idea rather much. In fact, I can just picture a Silhouette fitting in perfectly in your crafting corner!
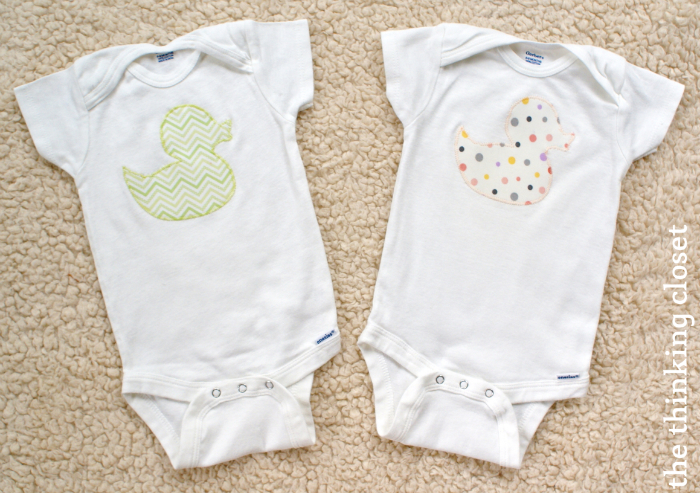
Oh how cute! You did a great job with this, and the duck is so cute! Love the chevron and the polka dot fabrics! Adorable!
Thanks, Maria! Shopping for cute fabrics might be my favorite part of sewing! 🙂
The Silhouette sounds wonderful! I am so not good at cutting shapes out with scissors.
It can be time consuming can’t it? Yes, the Silhouette is great for saving you from that tricky hand-cutting work! My hands are so thankful.
Lauren, that is WAY too stinking adorable!! I love the little appliqueed onsie, and your zig zag stitch turned out perfectly. Well done! Another great way to use the fabric blade on your Silhouette. 🙂
Debbie
Thanks for the enthusiastic support, Debbie! I definitely felt like I had summited Mt. Everest with this one. Or maybe it was more like Kilimanjaro (with sewing dresses with zippers being more along Mt. Everest height)…but still, this beginner sewist felt some pride for sure. And that fabric blade cut like a dream. I’m so excited that you’re going to have one to play with, too!
Cutest Onsie Ever! 🙂 (And I was singing right along too!)
Kenley
Thanks, Kenley! Knew I could count on you for the singalong. (We seem to share an appreciation for the same throwback movies and tunes.)
This is so cute, and the tutorial is great, thanks! I’m stopping by from Market Yourself Monday linky party.
Thanks for stopping by, Tai! Just came back from a visit to your corner of blogland and my oh my am I inspired about tiny ceramic molds of furniture re-dos! You are so creative.
Adorable!! I’m so proud of you for tackling so many new skills, you (now) intermediate sewist, you. Seriously I love doing applique and I would probably love it more with a Silhouette. Thanks for providing the step by step guide and your usual humor. I really enjoyed your rendition of the rubber duckie song.
Woah. My heart kind of skipped a beat to see you call me an intermediate sewist! I’m not sure I’m quite ready for that title, but if you say it’s so, I’ll try to believe it. 😉 Oh how I’d love to learn some of your applique tips, Jessica (especially for those sharp curves).
I have that same zigzag green fabric that you used on the duck. I love it! Thanks for the chance to win.
Yay! I just picked it up last week at Jo-Ann’s…I’m now regretting only buying 1/4 yard, I love it so much! Out of curiosity, what are you using yours for?
I got mine at Joann’s also. I’m making a “guest book” quilt for my daughter’s wedding. I’m going to use the green zigzag for the binding. I also used some of it in the quilt itself. I’m thinking about going back and buying some more just to have in my stash ’cause it’s so darn stinkin’ cute!!
What a wonderful project, Mary! I’ve never heard of having a quilt as a “guest book.” I’m guessing folk will sign the fabric using fabric markers and you’ll sew the pieces together after the fact? Just lovely! Ha ha. And I know what you mean about wanting more of the zig zag; I’ll have to pick up some more during my next run to Jo-Ann’s, which if we’re honest, won’t be long now.
Tried to pick up more of the fabric yesterday, but alas, they only had pink left. I did buy some pink, but I’ll keep checking back for the green! You’re right on about the quilt. My daughter, Megan, wanted the whole quilt top on display at the reception, so I’ve sewn all the blocks together and hopefully the guests will be careful! We’re going to have some people stationed at the quilt while people are signing. I’ll have it quilted after the wedding. Megan thought it would be more fun to snuggle under all the memories than have them stuck in a book that she will probably never look at. The pattern I used is called “boxed in”, and provides a lot of areas for signatures.
Good idea to have folk there to help guide the fabric-signing process; oh, it’s going to look so magnificent at the end! And I love Megan’s vision of “snuggling under all the memories.” How lovely! We had our guests sign ceramic serving dishes that we use whenever we have guests over; it’s such a wonderful reminder of our special day and the folk we got to share it with.
Rubber Duckie…. You’re the one! Thanks
You are welcome, DB. And I’m glad you enjoyed that throwback number to the Sesame Street days of yore.
So adorable!
Thanks, Kara! Little duckies are pretty irresistible, aren’t they? In real life, in bath toy, and in applique form.
I love the creative ideas you’re posting on your blog. You never fail to amaze me with projects I never thought would be easy and possible. I mean you could design your clothes using simple materials, and personalize it to your own liking! :))
Mei, I never thought it would be easy or possible to cut fabric like this even just a few months ago! So, I’m about just as surprised as you are! 🙂 And it really is so much fun to be able to personalize apparel. It makes for great gifts!
Oh Lauren! Those duckies are adorable!!:) You did a much better job stitching the appliques on than I did…slow and steady rather than just winging it makes a big difference!;) Thank you for sharing my humble Lab hoodie…I’ll be using your techniques next time I do an applique!
Aw, you flatter me too much, Cindy! I find your lab hoodie anything but humble. I love the pop of blue in the collar and that you made the doggy ear out of stitching. I hope to get good enough to the point where winging it is even a possibility! Slow and steady is all I can muster right now. Ha ha.
I would love to win this! So many possibilities!
Indeed! Since I saw that you have a shop full of cute earrings, I thought I’d share that one of the items on my Silhouette to-do list is to make some paper earrings. Like these: http://pinterest.com/pin/273312271108384366/
ty!
yw!
All my friends have started having babies, so this would make the baby shower gift giving a lot easier.
There must be something in the water then because all of my friends are having babies, too! 🙂
My parrot would be all: Bwok, FINALLY!
And I’d be like: I KNOW.
Please give me my silhouette so I can make these adorable onesies. Please?
It has been a long time coming, hasn’t it, Kelly? And you know, if you won, it would be the perfect excuse for us to get together before Haven: Silhouette 101 course! Kelly’s place! That way, I could take your amazing house tour in person and leave a path of drool behind me. (How’s that for the grossest compliment you’ve ever received?)
I totally have a baby shower to go to tomorrow. Definitely, going to do something like this! What an adorable idea. And, so customizable! (I don’t actually think that is a word, nor did I spell it right. The the letter ‘Z’ is just way under used and I am sure he feels really left out.)
Happy Saturday!
– Dusty.
Customizable totally IS a word and WAS spelled right, so you get two gold stars for that. But it’s your fondness for the letter “Z” and commitment to giving it more air time that just makes my heart melt…so a whole pack of gold stars to you, my friend! 😉 Happy Saturday to you, too, and have a blast at the shower tomorrow!
These are precious like duckies! I’m old school and usually cutout the shape and attach it using wonder under. Then I hand sew around it. Gotta say you’re way looks a lot easier….
Ha ha. I’m not sure if the sewing part is easier…I seriously considered hand-stitching around the more intricate section (the mouth), but my sewing machine talked me out of it. And it all worked out in the end! 😉
Thank you for the fantastic tutorial on sewing an applique! I’ve been wanting to try this forever, but I was too scared. After reading this, I think I just might be able to handle it!
Also, thanks for hosting the Silhouette giveaway–I’m dying for one (crossing my fingers)!
Michelle, so wonderful to “meet” you and visit your inspiring corner of blogland. I’m so glad you you feel a bit more courageous to try appliques after reading my post (you can do it, girl!) and that you entered the giveaway. Silhouette-ing (yes, I totally made a verb out of Silhouette) would definitely be a fun one to add to your ever-growing list of hobbies!
These appliques turned out so well! You do make it look easy and the fabrics you chose are very cute together! Had to laugh out loud about the rubber ducky song and Sesame Street. We should have sung that song today in addition to Mares Eat Oats…
Can’t wait to hear who your Silhouette winner is on Tuesday! xxoo
Lol. “Mares eat oats” is definitely still on the brain after our fun family sing-a-long en route to the airport Friday. I’ll have to see if I can get creative and find a way to insert THAT song in a future blog post. Hmmmm….
And thanks for your enthusiasm about the Silhouette winner! I’m antsy to find out who wins, too!
now THIS is the project you should have worked on during our craft day! Can’t wait to try it out, especially now that you have a sale on the goodies I need!
I remember you mentioning that day how you had wanted to try your hand at cutting fabric; I had no idea what I was doing then, so it would have been like the blind leading the blind…though I’m sure that between the two of us, we could figured it out eventually. At least, I’d like to think we would have! Oooo, and I’m just imagining what your quilting appliques will look like once you get your hands on a fabric blade and some interfacing. In my imagination, it all looks AWESOME!
These are so CUTE!! Any new mom would love to get these as gifts. And I am seriously impressed by your applique “skeelz”! 🙂 Have a wonderful weekend, Miss Lauren!
~Abby =)
Thanks for the kind and encouraging words, Miss Abby! Also, the fact that you used “skeelz” makes me smile oh so big. Happy Memorial Day weekend to you and yours!
Too cute! With my niece being born on Monday, I’d love to give this a try. Thanks for sharing the inspiration and tutorial.
How exciting about your niece, Karla, or should I say, Auntie Karla! And how fun that she’ll end up with a birthday on Memorial Day. A day to remember indeed!
Very cute, I would love to make some applique t-shirts for my grand-daughters.
Thanks, Vicky! And whenever my grandmother would sew us things when we were little (stuffed animals, Christmas stockings, dresses), we felt so loved and so special! I’m sure your granddaughters will feel the same about your appliquéd T-shirts.
Adorable! 🙂 I really like it; too cute! great tips too! 🙂 Hope you will have a beautiful weekend Lauren! 🙂
I’m glad to hear that it gets the Ingrid stamp of “adorable” approval. That makes me sit a little higher in my chair. 😉 And our day was so lovely today, thanks for the well wishes. Sending ’em right back at you for a fantastic Memorial Day weekend with your family!
I think you got the lyrics wrong…
“Thinking Closet, you’re the one. You make sewing appliques lots of fun! Thinking Closet I’m awfully fond of you. Bo-bo-bo-di-o.”
Oh, Laura, you seem to always know how to make me smile. And yes, I totally sang your comment aloud when I read it. When given the choice to sing in my head or sing out loud, I always choose the latter. I have a feeling that you’re the kind of gal who does that, too. 😉
Amazing, Lauren! I’ve yet to brave anything fabric but your tutorial makes it feel so do-able. 🙂
It really was so do-able, Mel! And I’m glad that you feel a few steps closer toward working with fabric. I just know you’d have great success with it.
See this is where you rock b/c I’d have stopped after the ironing part. I to this day, cannot master the fine art of sewing around an object. Circles? Oh those are fun. And I feel this overwhelming need to email Silhouette and ask them to expand their contests to Canadians. *hint hint*
Alex, I feel that overwhelming need along with you! So many of my nearest and dearest bloggy buddies are in the land of Canadia (you, Ingrid, Thalita), and it pains me that they can’t just send the Portrait a few miles beyond the US border to some very crafty ladies up north…who I know would work such fabulous wonders with their new machines. And can’t they build you some Hobby Lobbys and Jo-Ann’s close to home while they’re at it? Please and thank you.
as always – super cute- I love the polka dot ducky the most! don’t tell the other one I said that
– it seems really cute for a boy or girl, but out of curiosity- how long did the sewing part take?
Indeed, I was hoping the duck was gender neutral enough…and I even bought that green chevron thinking it could work for boy or girl. The polka dotted fabric is one of my favorites that I picked up for the burp cloths I made…I’m so glad that you liked that little ducky (and don’t worry, your secret is safe with me – – tee hee).
Re: your question on the sewing, first time around, it took me longer (maybe 45-50 minutes?) but keep in mind I put in time practicing, then I got halfway finished with one when the whole violent-seam-ripper-causing-a-hole-in-the-onesie incident occurred, so I had to start all over again. But maybe only 15-20 minutes for sewing the second time around? I think you could definitely knock it out during nap time. (Pending that your children do indeed take naps.)
So cute! I’ve been wanting to try my hand at appliques! Maybe I’ll get up the gumption soon!
(Entered the contest too! Fingers crossed!)
Sending a big dose of gumption your way…did you receive it yet? Good! Now, let’s just keep our fingers crossed about the giveaway so you can get to creating those appliques stat.
Your applique turned out so cute! Now I’m going to be singing rubber ducky all morning long. Hehe!
Thanks, Bethany! And apologies for getting the rubber ducky song stuck in your head. Apparently, it has been stuck in mine since I was 5! Ha ha.
What a cute project! My granddaughter would look adorable in one of these onesies with the duckie (but she always looks adorable!). Thanks for sharing your file.
Aw, your affection for your granddaughter is so heart-warming, Marilyn! And you are so welcome for the file. I hope it proves of use for you!
Cute, cute, cute! I’ve been wanting to use my Cameo to make appliques but haven’t yet. You’ve inspired me…it’s on my “to do” list for next week!
Yippee! This comment excites me to no end, Jeanie. Let me know if any questions crop up when you do take the plunge into the lovely land of appliques. I’d be happy to offer any help I can! (Even if that help is just being a cheerleader for ya.)
Ha! I was just looking at your tutorials for the HTV onesies and burb cloths because I have a few (more) friends having babies soon and saw this “recommended post” at the bottom. I thought to myself “how did I miss the ducky applique?”, then I realized it was just posted today…perfect timing 😉 But, I think HTV might be more my speed right now to try. My sewing machine and I rarely get along unless my mother intervenes!
Wow! I’m glad to hear that the timing of this post worked out so well for you, Christine…this does seem to be the time of year for babies! HTV is definitely a great starting point (and you could totally take the duck file, add an eye circle, and cut it on HTV if you wanted)…but don’t wait too long before trying your hand at a fabric applique. It felt really empowering to conquer it!
Great idea! Would love to win the silhouette. As a beginner I need all the help I can get stocking up on tools and supplies. And you make the appliqué process look so easy!!
Thanks, Paula! After seeing some of the handiwork you’ve done on your blog (i.e. that bubble quilt), I think you’d have no problem trying your hand at an applique. Now, we’ve just got to get you a Silhouette to help with that tricky cutting bit!