Burp Cloth Tutorial for the Beginner Sewist
With my friends having babies left and right, you didn’t think I would stop at the rhinestone and heat-transfer vinyl onesies, now, did you?
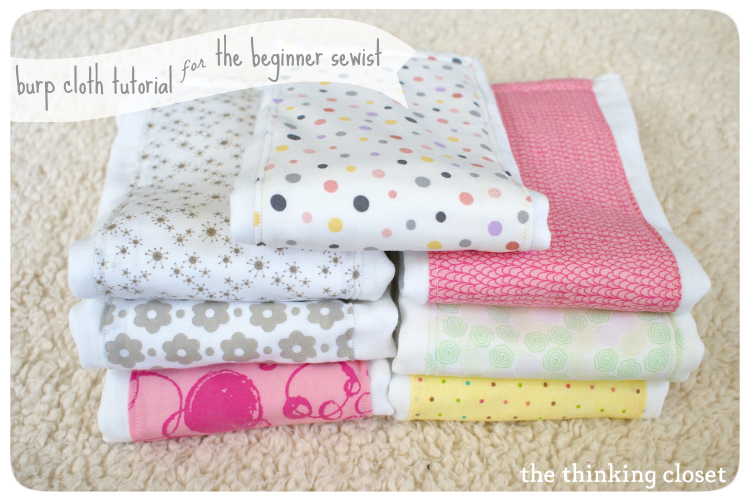
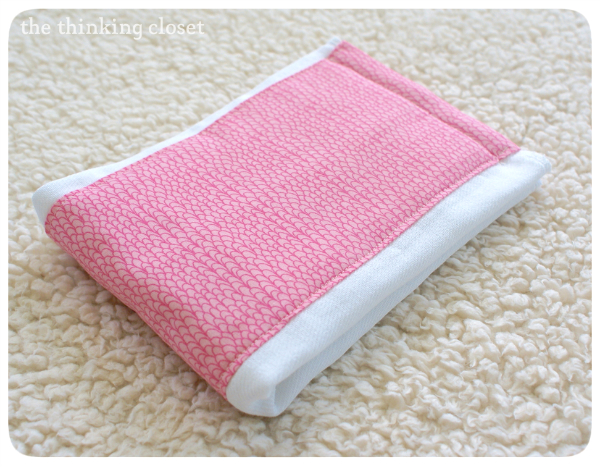
No siree, Bob! Time to bust out the sewing machine for some super cute, super easy burp cloths:
I have to credit my M.I.L. for inspiring me with this one (and she credits her friend, Robyn!). Last year, she made some burp cloths for expectant mothers, including my two sisters-in-law, so, I’ve gotten to see these babies in action (pun intended). These burp cloths are both cute and practical…now, that’s my kinda project!
Here’s a tutorial, so you, too, can make your own burp cloths. This is an ideal project for the beginner sewist. How do I know? Well, because I am one, silly!
Burp Cloth Tutorial for the Beginner Sewist
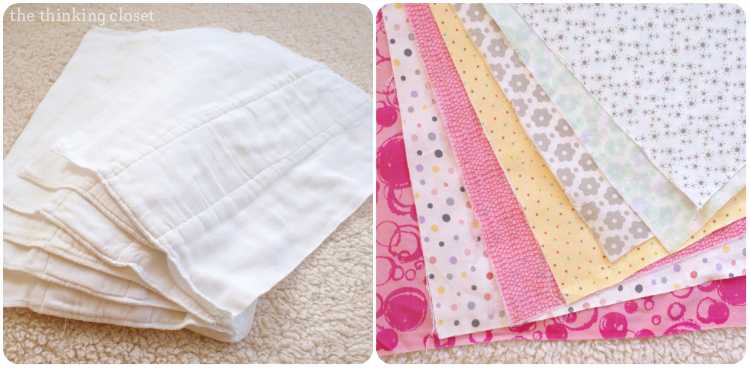
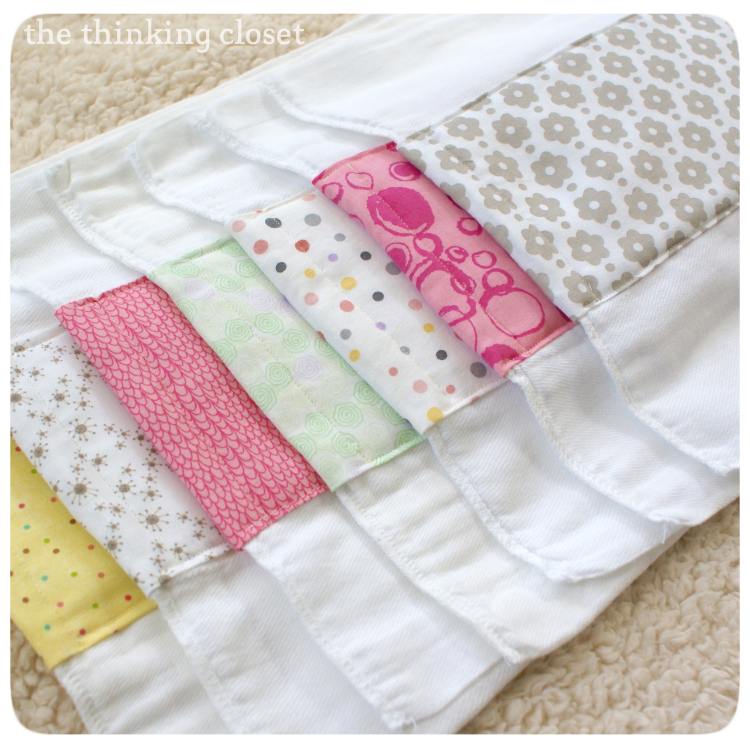
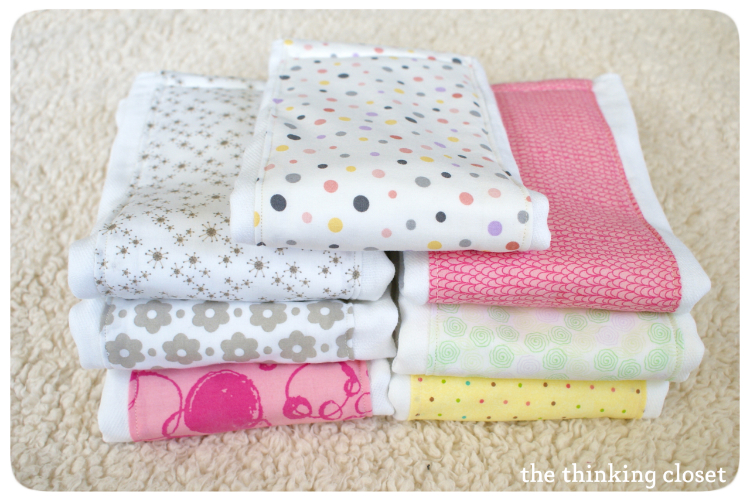
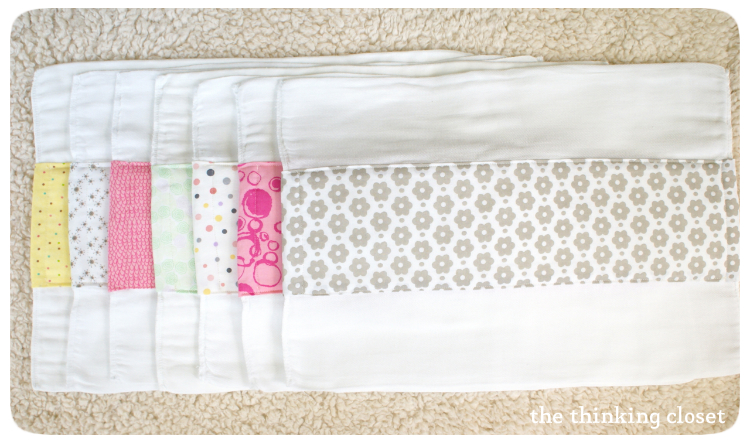
Step 1. Gather supplies. I purchased a ten-pack of prefold premium 6-ply cloth diapers with absorbent padding from Target, and some cotton fat quarters from Jo-Ann’s. The nice thing about using fat quarters (22″ x 18″) is that you won’t need to re-cut the length, and you don’t have to wait at the cutting counter for half of the day! I chose 7 different fabrics to work with; each fat quarter provides enough fabric for 3 burp cloths.
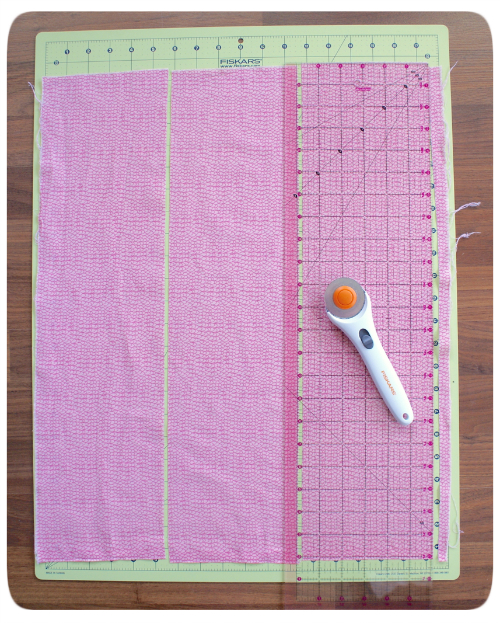
Step 2. Prewash, iron, and cut your fabric. I put both the cloth diapers and fat quarters in the washer and dryer to remove “road dirt” and to preshrink them. After ironing, I cut my fabric into strips that were 22″ long x 5 and 3/4″ wide. Don’t stress too much over perfect dimensions. We can fix that in the next step.
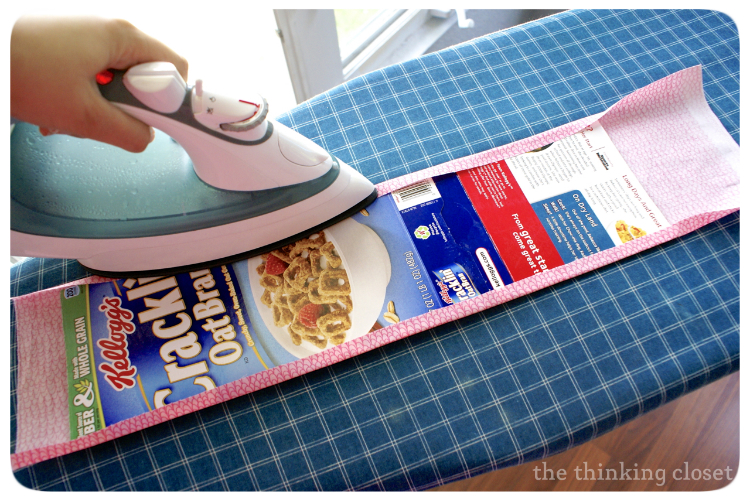
Step 3. Press your fabric using a cardboard template. Here’s a nifty trick I learned from Diary of a Quilter when she created her own burp cloths. I used a cereal box to create a template that was 4 and 3/4″ wide x 17″ long. The width is the most important dimension, and it’s okay if your length is longer than your cloth diaper. Using a template instead of a seam gauge will end up saving you loads of time when pressing. Just place your fabric down wrong side up, pop in your template, and press down 1/2″ on either side quickly and easily. Leave about 1 and 1/4″ from the top, and don’t worry about the bottom edge for now. Note: ironing cereal boxes smells like apples. Also note: I am not a leftie; I only play one on TV in tutorials.
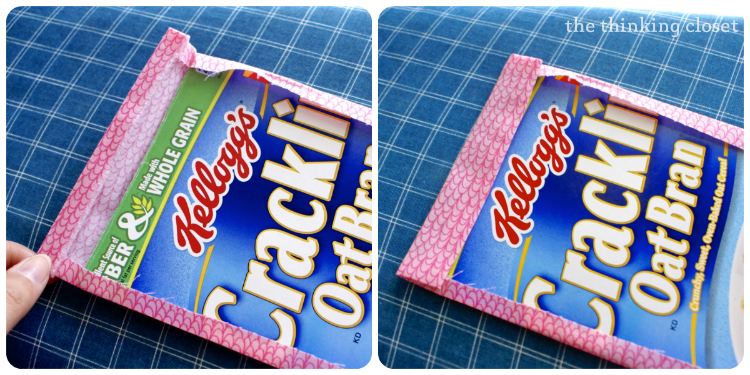
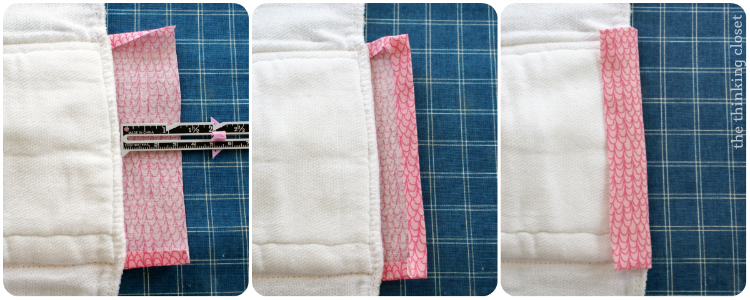
Then, this is probably the trickiest part of the whole shebang, and it’s not that tricky really. I tried a lot of different methods for dealing with the top edge, and this one worked best for me. I simply folded about 1/4″ of fabric underneath, and then pressed the rest of the edge over the top of the template, creating a crisp, clean look.
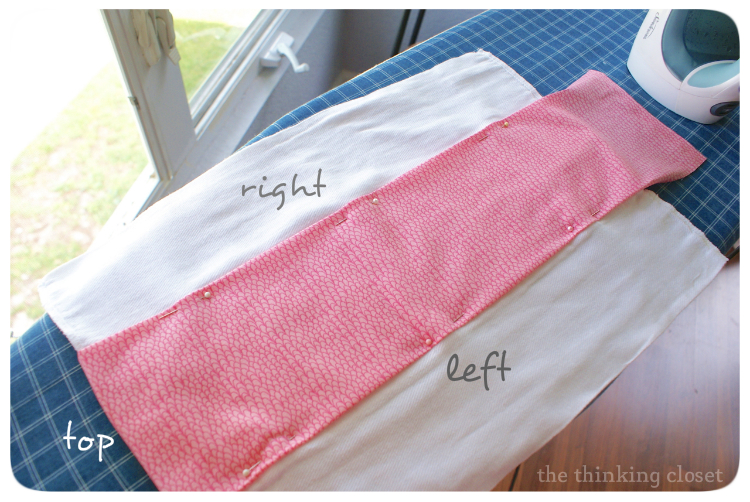
Step 4. Pin your fabric to the cloth diaper. If you’re a perfectionist like I am, this step could drive you crazy because, I learned, not all cloth diapers are created equal. You’ll find wonky dimensions on each and every one! So, simply nest the pressed edge of your fabric over the middle of the cloth diaper, and center it as best you can the rest of the way down. Mine always ended up with around 4 inches on either side, give or take a quarter inch. And when the dimensions weren’t working out, I just trusted my eye. I pinned the fabric to the cloth diaper in three places on either side. Notice that my pins are facing down on the right side, up on the left, which makes for easy removal (something I figured out after my 5th attempt).
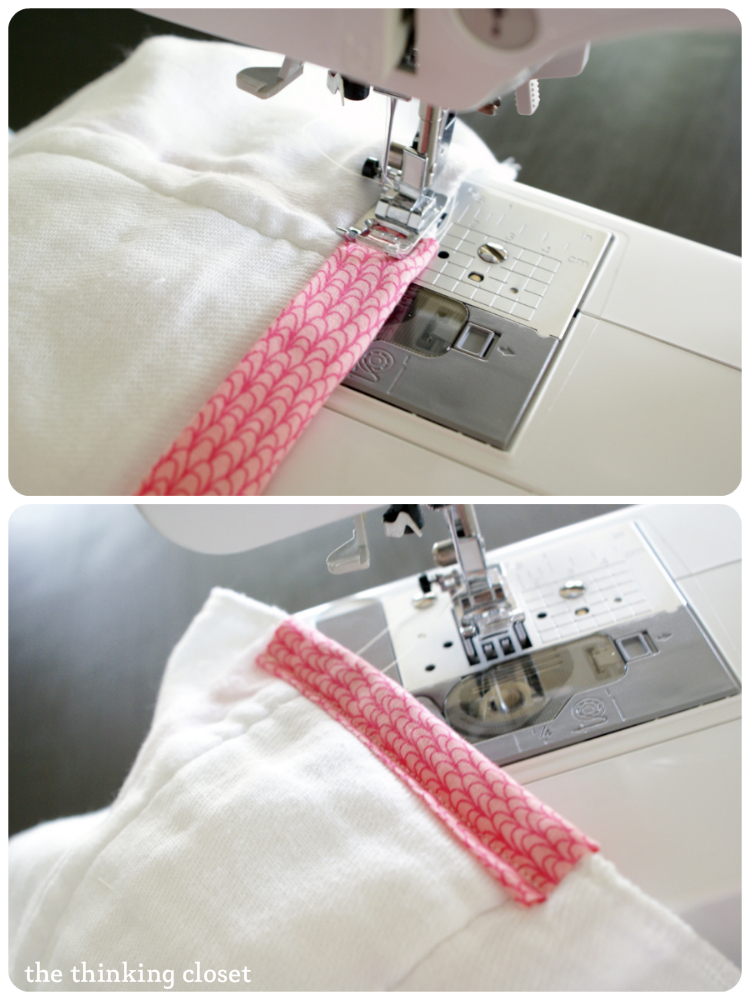
Step 5. Stitch across the top edge. Carefully turn the cloth to the backside and run a straight stitch across the top edge of the fabric. I used 2.5 stitch length, needle set to the left, and simply lined the left side of my presser foot up with the left side of the fabric and ran the stitch across. I started and stopped just before running off of the fabric onto the cloth and backstitched at both ends to secure the stitch.
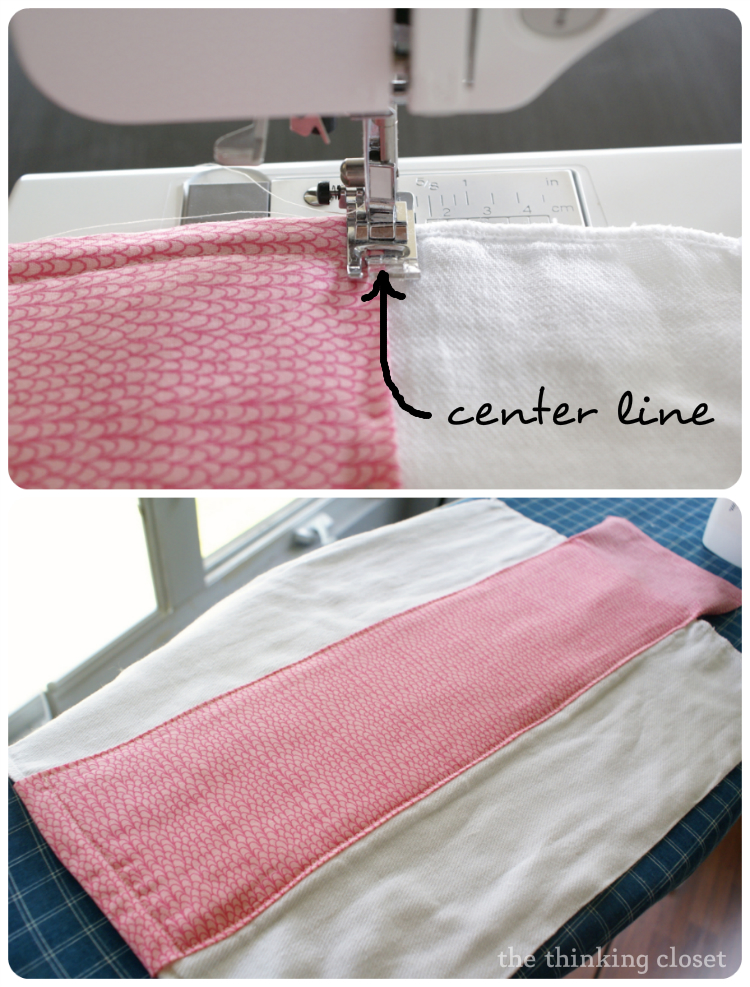
Step 6. Stitch down the right edge and up the left edge of the fabric. After flipping my cloth back to the front, I used the ever-so-faint center line on my presser foot to line up the right edge of the fabric. You really want to get pretty close to the edge on this part, pulling out pins as you go. After backstitching at the bottom of the right edge, start a new stitch up the left side. This is great practice on sewing a straight (or in my case, straight-ish) line. You should now have the top, right, and left edges stitched up.
Step 7. Press the bottom edge. Cut off the excess fabric at the bottom so you end up with about 1 and 1/4″ remaining. You’re going to press the fabric the same way you did the top edge. You can probably guess what comes next….
Step 8. Stich across the bottom edge. Same as before. Then, press your seams, and….
…voila! You’ve created a super cute, super easy burp cloth. And you’ll be surprised at how quickly you can knock out a bunch more once you find your groove.
As I always say, if babies are going to spit up, they might as well spit up in style. Am I right, or am I right?
Now, I can pair a few of these puppies together with a rhinestone onesie for our friends, Adele and Tavie, expecting a baby girl this July.

And how about some gender-neutral burp cloths to go with a gender-neutral onesie?

So, to my beginner sewist friends, may you no longer let intimidation keep you from creating cute baby gifts. If I can sew a straight-ish line, so can you!
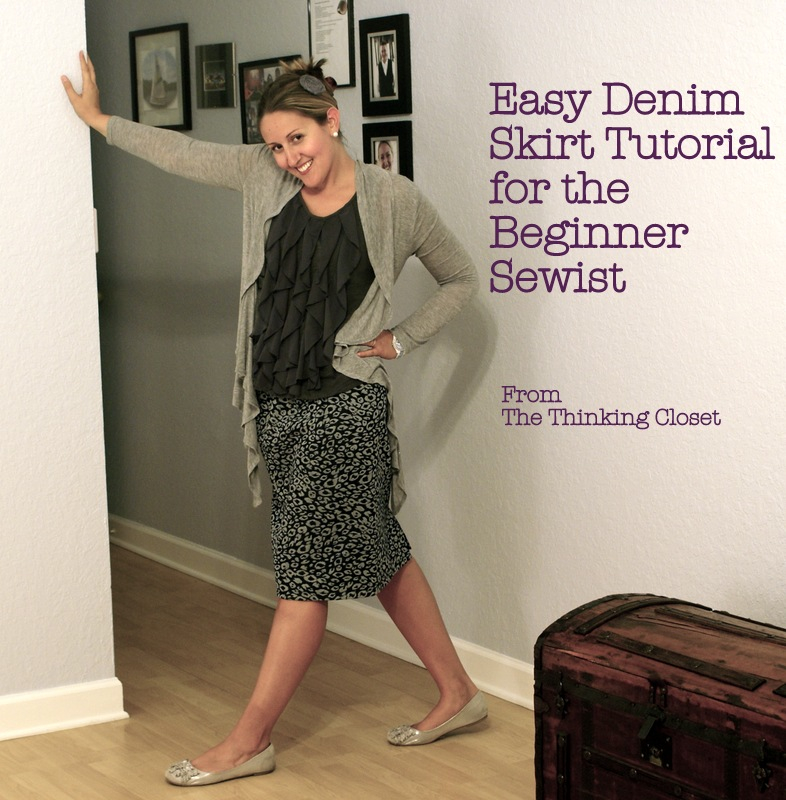
Looking for another cute n’ easy sewing project? Check out my Easy Denim Skirt Tutorial for the Beginner Sewist:
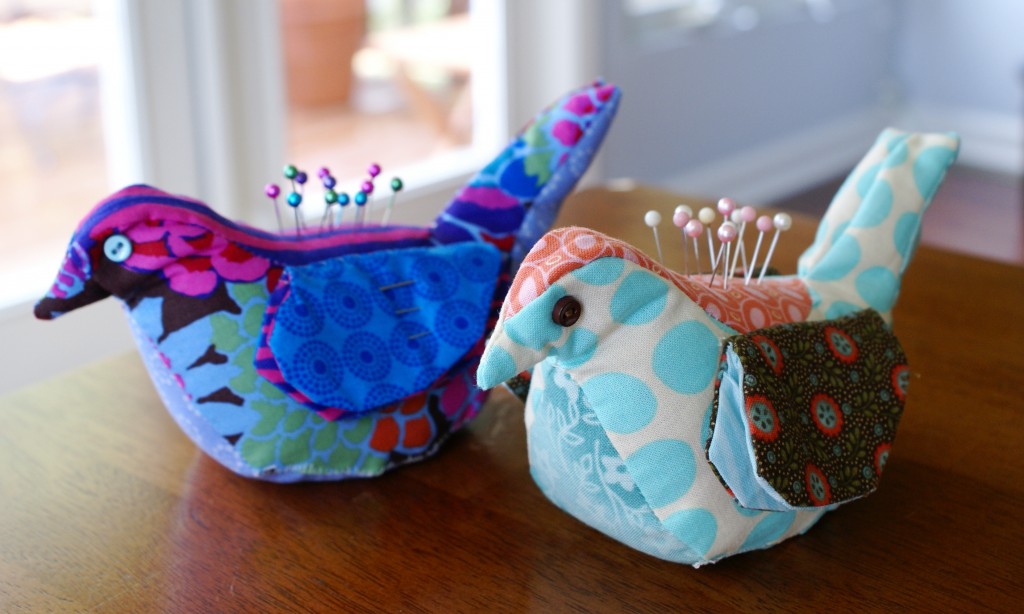
And for those with a little more time and courage, how about a cute yet not-so-easy bird pincushion and needle-keep? (The cuteness makes the not-so-easy part so worth it, though. Trust me.)
Happy sewing, friends! {Linking up here.}
Thanks for a great tutorial, and especially for spelling voila correctly!
Ha ha. You’re so very welcome!
I prewashed my diapers and they have little balls all over them. The more I use the lint roller the worst they look. Crazy me washed 15. Is there a way to salvage these diapers. Appreciate any help. Love your tutorial.
Oh no! I’m sorry to hear that! I wish I knew a fix. I know there are tools out there for “shaving” off pilling balls. But I’m guessing by now, you have the problem solved!
This is wonderful!! Do you happen to know what exact brand diaper cloths you bought?!! Thanks in advance 🙂
These are adorable, thanks for sharing them with us. 🙂
It was my joy! Thanks for the kind comment, Tina.
I use my prefolds for everything except diapering! Do you put the fabric only on one side? Does it affect absorption at all?
Yes, just on one side! I don’t have a little one of my own, but my guess is that over time, the cotton fabric becomes more absorbent…and the two sides of the cloth diaper would help, too. Some folk are saying that flannel material works great for absorbing AND is pretty, too. That might be worth a try!
I made my granddaughter these burp cloths for her baby shower last October. They were politely set aside on the day of the shower, considering all the wonderful things that showed up. HowEVER: after the baby was born, the burp cloths came in handy every day! In fact, now that the baby is six months old–my granddaughter has asked me to make some more burp cloths. That made my day.
After prewashing the prefolds there was pilling all over them. How did you avoid this?
I love the burp cloths!
Just made these and they turned out great! Thanks so much for giving this beginner a helping hand!
They look great Lauren! And you just reminded me that I should go and make a bunch for my (not much younger than me) niece, as she is due in a little over a month. As a mother to 3, I can vouch that they make great gifts – and the prettier the better! 🙂 The only thing that intrigued me was that you pre-shrunk the fabric and nappy. Most baby clothes are not pre-shrunk, as it makes the fabric softer on their baby-soft skin. So I guess it would depend on if you are the kind of person who likes a dryer. I Like to hang mine in the sun, but that is a personal preference.
Sheree
Wow…they look like the cloth diapers I used on my girls when they were babies! but alot cuter. lol
I’m so glad to hear this from someone who has actually used cloth diapers as burp cloths!
Whoo hoo! Glad to hear you’re a fan!
Your tutorial saved my sanity while I was in the hospital last week trying to convince my baby she didn’t really want to come two months early. I had actually already set up all the burp cloths and fabric and had them pinned together. So when I found myself in the hospital for two weeks I had my husband bring them to me and I actually just sewed them by hand. It gave me something fun to do while stuck in that bed. Thank you so much.
Oh you have no idea how happy that makes me. I’m so glad that it gave you some comfort and a welcomed distraction while in the hospital, Serenity! Wow, and you’ve taken this project to a whole new level of awesome by handstitching them with love. Way to go, Mama! And congrats!
I love the burp cloths! I’m expecting a little one in April and have already started thinking of things I can sew for it and burp cloths was one of them. Quick question…how much overlay did you have for the top of the cloth?
Thanks!
I am going to a baby show at the end of the month and wanted to make something that was needed and handmade. So thanks for sharing this great information. I am not someone who sews but willing to figure it out.
Hi Nice tut. I do mine almost the same way: cardboard template and press over the edges. Such a time saver. I do a couple other things which have been nice touches and time savers. I have an embroidery/sewing machine and embroider the childs name and sometimes an applique or picture on the fabric FIRST. Also I’ve started glue basting almost everything especially trims or ribbons. Whe putting ric rac on either side (ric rac is torture to keep straight) I glue baste it first then sewing it down.
Thanks for this tute! The cardboard makes it so much easier than having to measure out sides perfectly.
I’m SO glad to have discovered that trick; and now I’m using it other sewing projects to save time. Glad it has helped you, too, Sam!
Hi…what side of the burp cloth. is up!!…when u lay it on ur shoulder????? Im guessing the white absorbant diaper part………and the colored side is for. pretty???????yes? no?…..I have seen my girlfirneds have the pretty side up…buy, Im always thinking..if the baby truly spits up..its going to slide off……thanx!!
I love these burp cloths and have made quite a few. I’m curious as to which side is showing as well. I have found that the printed cotton material is not very absorbent. Will this improve with use?? Thanks.
Ya know, these are great questions! I don’t have a little one of my own, but I have seen the pretty side up. My guess is that over time, the cotton fabric becomes more absorbent…and the two sides of the cloth diaper would help, too. Some folk are saying that flannel material works great for absorbing AND is pretty, too! That might be worth a try!
I’ve started to practice with the cloth diapers to make fancy burp cloths. I’m having trouble with the diaper bunching up in the middle. I haven’t been able to iron it out smooth. Any suggestions? I bought Gerber 3 ply cloth diapers. Should I use something different?
Hmmm…mine were 6-ply cloth diapers. I wonder if that makes a big difference. I’ll be heading to Target tomorrow to pick up some more of these anyway – – I’ll see if I can check out the 3-ply ones to try and offer you some pointers, Brooke!
Just love your Thinking Closet Ideas, and I am super charged up to make these adorable little burp cloths! I have a few nieces that would just love these. Did you use the Silhouette for the onesie? So darn cute hmmm, I wonder if I could practice my Free Motion on them! 2 birds in one stone, and a sure excuse to practice and play. Thank You Thinking Girl, you are amazing, funny and inspiring!
Sandy, first of all, you calling me “Thinking Girl” made me smile from ear to ear. I think I may need to start calling myself that here! Tee hee. And second, it makes ME charged up to know you’re itchin’ to make some of these burp cloths. I’m actually due for my second batch since I’ve given away all the ones I made last year…and my friends are slowing down at all on the baby front! Lol.
Yes, I did use my Silhouette for both the rhinestone and heat transfer vinyl onesie; I’m a bit obsessed when it comes to Silhouette onesie projects. Have a few more of those on the docket, too! I’m sure you’re talented enough to Free Motion. Or, have you heard of Freezer Paper stenciling? It’s pretty amazing and while I cut mine on my Silhouette, you can actually print on freezer paper and cut it out with an exacto knife! Here’s an example so you can see what I mean: https://www.thinkingcloset.com/2013/08/12/keep-calm-onesie-with-freezer-paper-stenciling-silhouette-winner/
Let me know how it all goes! You’re an exuberant soul, and I’d love to stay in touch, Sandy!
Best one I’ve seen! Thank you!!!
I have watched several tutorials for these types of burp cloths. Yours is by far the best I have found thanks so much. Looking forward to more of your tutorials.
Thank you
Lawana guy
At the end of your instructions for making the burp cloth, which I absolutely love, was the cutest bird pin cushion and needle keep. I would love to have the pattern but haven’t been able to find it on your post. I found the instructions but no pattern. Could you please let me know where to find your pattern. Keep up the awesome stitchin!
Love that bird pincushion! Glad you do, too. In my post, I link to the book with the pattern, as well as a free option that is similar. Let me know if you have trouble tracking either of those down (they’re in the last paragraph): https://www.thinkingcloset.com/2012/10/06/bird-pincushion-needle-keep-a-k-a-just-leave-it/ And thanks for the encouraging words!
Holy moly was this tutorial awesome. Not only was this the first time I have EVER used a sewing machine (so I had to look up youtube clips on how to thread it and set it up), this was the first time I’ve ever attempted at trying to sew anything. I successfully made my very own burp cloth! I can definitely use the practice with my straight line stitching, but even with only doing one did I learn so much, especially what to do for the second one, that more fabric is always better than less fabric, and that the sewing machine is a lot less intimidating than it appears to be. This gave me the courage to try bigger projects with the sewing machine! Thank you so much for posting this blog!!
Gabriela
Holy moly, did your comment make my day or what?! Gabriela, I am so proud of you for diving into your first EVER sewing project and so honored that you chose my tutorial to try out for your first go! Phew, I’m so glad it wasn’t a crash-and-burn experience, but that you’re feeling encouraged and inspired at the end. Yeah, I myself can still use practice with the whole sewing on a straight line thing (slow and steady wins the race), but I think it’s fabulous that you stuck with it and came out with something awesome to show for it! Also, I loved hearing the things you learned; I just know that burp cloth #2 will be even better and burp cloth #3 will be a masterpiece and so on and so forth.
I agree 100%…the sewing machine really isn’t as intimidating as it looks. In fact, thanks for the reminder for me to get mine out and play with it again!
Oh, and if you have a spare moment and want to rock my world even more, I’d love it if you sent me a photo of one of your finished burp cloths! See, I have this quarterly Reader Showcase that I do, and I’d be delighted to show you and your creation off to the world next time around. (If you don’t mind.) Here’s an example of my past Reader Showcase, just to give you a glimpse.
Thanks again for sharing your experience with me, Gabriela. Seriously, this is why I blog!
Thanks for the tut, I used your idea of the cereal box template, it made the process so much easier, here are some pictures of my own: http://thethreadedchickadee.blogspot.com/2013/09/burp-rags-and-boppy-covers-oh-my.html
Thanks for the link to your awesome post. I really am head-over-heels for that guitar fabric. Will have to keep my eye out for something similar during my next Jo-Ann’s run! And keep an eye out for my Reader Showcase in a few weeks. Your burp cloths just might be featured!
Thanks for the great tutorial! I just made 5 burp cloths using your method and I did blog about it. I have a link back to you if you want to check it out. Again, Thanks!
They turned out fabulously! Love the pretty pink fabrics you chose, too. You can bet I’ll be featuring this project in my Reader Showcase at the end of the summer, so look out! 😉
Really nice. I use flannel when I make these. They’re softer. Lots of cute prints in flannel too!
Good idea! And perfect for winter burp cloths. Will definitely try some flannel during my next round of burp cloths. Thanks for the tip, Tonya.
Hey Laur,
Just wanted to let you know that I sewed up three of these for Steph’s baby shower coming up next week. They turned out so cute and your tutorial is the best! I’ve been using other tutorials for other things and I have to say I really appreciate all the details and instructions you give. Can’t wait to make more! Love, g
Yay! This makes me so happy, friend! I know Steph will love them…not only because they’re practical, but because they were handmade by YOU! Okay, so you know what I’m going to say next: could you please, pretty please, take a photo of your creations and email them to me? You know I’m going to have to feature them in my next Reader Showcase! Love you, G.
Cloth diapers are the best and I LOVE how you updated them into burb cloths…very clever!
Thanks, Marilyn! Yes, I’ve seen the light where cloth diapers are concerned…and I don’t even have kids yet! 😉
I can’t find the ‘good’ cloth diapers. All I can ever find are the ‘gauzy’ ones. Do they even make the ‘real cotton’ diapers any more? I had the good, soft, fluffy ones with my kids 30 years ago and in fact still have a couple of them hanging around and in good shape that I use when I need a really soft cloth for something (wiping eyeglasses).
Oooo! I feel so out of touch! I didn’t even know there were “good” cloth diapers out there. The gauzy ones definitely look a bit like they were stitched by a blind person…that’s why the strip of fabric helps so much! (To cover up some of the erratic stitching.) But I’d love to check out these super soft cloth diapers you speak of…they sound heavenly! Have you searched around online? Ebay perhaps?
Hey! I learned how to operate my machine 8 days ago and just made these! Granted, my lines are NOT straight but as the woman showing me around my machine said, if a man riding by on a horse couldn’t see it, it’s fine. Love this tutorial, thanks!
Lol! I love that about the man riding by on a horse. I’ll have to remember that as I continue to tackle more beginner projects. We beginners need all the encouragement we can get, am I right or am I right? And I’m so impressed that 8 days after learning how to operate your machine, you’re already churning out burp cloths. Wow, girl. I see a long, successful sewing career in your future!
Love the design of the burp cloths with the fabric design strip down the middle! Also, of course I love the cereal box…should be a staple in every home. Looking forward to increasing my sewing skillz one of these days to try these do-able sewing projects. You really do make them look not too difficult, which is perrrrrfect for me! Your friends’ little one will love the gift, I’m sure!
Knew you’d appreciate the Cracklin’ Oat Bran! Made sure Mark picked up a new box to replace the one that we just ran out of today. It’s just so darn yummy! And fiber-tastic. But enough about fiber…I really do look forward to the day we can work on a sewing project together, Lisbeth. Maybe some head-scarves to start?
Yes! I was just thinking I need some new headbands…and head-scarves don’t seem like they’d be too tricksy. It’s going on the list!
It’s a date!
Lauren! I’m so excited about this!! My sister in law just had a baby, and this is perfect! especially cause I’m no sewing expert!! Thanks for sharing 🙂
Xo, rach
That’s right! I remember you throwing that shower for her! I’m sure you’ll pick out some fabulous fabrics if you take on this project…and seriously, don’t be too intimidated. It’s a great beginner project! Have fun, girl.
Great tutorial! I’m featuring it on my Terrific Tuesdays link party
Thanks so much for the feature, Rachel! That’s exciting news.
Adorable gift! Thanks for sharing the tutorial so OUR friends will think we are awesome too! 🙂 Like the template idea, too. You are featured this week on Busy Monday at A Pinch of Joy! Pinned.
You are so welcome, Charlene! Writing up tutorials helps cement in my head what I’ve learned, so it’s a win win! Or should I say win-win-win? (Because of the feature at your party.) Thanks, girl!
Oh wow these are too cute! I love finding fun & useful projects for the newbie sewist! Definitely pinning 😀 This is my first time to your blog & I’m excited to stay for a bit & check it out!
Hooray for newbie sewists! It seems like there are a lot of us out here in blogland, which is encouraging. Safety in numbers, right? And thanks for checking out The Thinking Closet! I very much enjoyed my visit over to Rise and Shine Life. Love that jewelry organizer you whipped up.
Thanks so much for linking up with us!! I’m so glad you did, because we’ll be featuring your beautiful burp cloths tomorrow on Huckleberry Love! Be sure to stop on over and grab our “I Was Featured” button. We hope you’ll link up again with us next week! 🙂
~Emily
http://www.huckleberrylove.com
That’s super exciting! Thank you, Emily. I’ll be sure to stop by and grab a button later for my Features page. Cheers!
These are such a great idea!! I know our readers would love to see this post. Your pictures are gorgeous. We’d love for you to join us at our weekly All Things Thursday Link Up Party at allthingswithpurpose.com. Hope to see you there!
Thanks for your kind comment and compliment on my photos! I had never really used a DSLR until I started this blog back in September, and thanks to a lot of fiddling around and my husband’s help, I’m hopefully learning a thing or two. I appreciate the invite to your party!
Featuring this on my blog today. Super cute 🙂
Jessica
http://myworldmadebyhand.blogspot.com
Thanks, Jessica! That’s exciting news, indeed. Have a happy weekend.
These are so cute! My niece is having a boy after two girls so I’m going to try these for her. Thanks for the great tutorial and for linking it up to Think Tank Thursday.
You have been featured today!
http://www.saving4six.com/2013/04/welcome-to-think-tank-thursday-24.html
Thanks for the feature, Carrie! And I’m glad to know you might be able to put this tutorial to good use and create some burp cloths for your niece’s baby boy. And thanks for hosting your linky party each week!
These are beautiful! I love the colors that you chose. And what a clever idea to use a cereal box as your template! Definitely pinning this one for future baby gifts. 🙂
We’d love for you to link this up at Much Ado About Monday! http://www.huckleberrylove.com/2013/04/much-ado-about-monday-no-3.html
~Emily
http://www.huckleberrylove.com
Thanks, Emily! I’m glad to know it earned a pin from you. And thanks for the party invite. Heading over there right now!
There are brilliant – love the fabric so much, Alice x
Thanks, Alice! If I could have a job where all I did was pick out fun fabric for sewing projects, I’d take it in a heartbeat. I’m like a kid in a candy shop when shopping for fabric!
I’ve got to get busy sewing. You are providing such cute things to make and I need baby gifts. ;o)
I’m having so much with all of these…I can’t stop! Ha ha. Hope you have as much fun with your creations, Carla!
This is fantastic! I’m definitely a beginner sewist, so small words and lots of pictures help! Plus, those Target diapers are the BEST for burp cloths – SUPER absorbent and fabulous. Trust me, I had a professional barfer. Super gross.
Totally stalking your blog now – I like you because you’re fun! Hope you’ll check my blog out!
Kaylynn
AmongTheYoung.com
Hooray! Honestly, the whole reason I create such detailed and photo-laden tutorials is for other beginners…and they say the best way to learn something is to teach it, right? So, it’s a win win.
And thanks for the blog stalking. Ha ha. I popped over to your site last night and love your sense of humor! That header you have is simply uh-ma-zing. I think you and I share similar philosophies on life: “To have the maximum amount of fun allowable by law.”
Have a great rest of your week, Kaylynn!
Thank you for sharing on Blog Stalking Thursday! I have featured this project on Pinterest as well as my blog on Blog Stalking Thursday Features. I would love for you to stop by and grab a feature button, you deserve it!
Thanks so much for the feature, Katie! Just grabbed a button and have added it to my features page. Thanks for hosting a linky party and taking the time to feature various projects from week to week. I know it has got to be time consuming, but this blogger appreciates it very much.
Very cute! And how simple too! Which is even better in my book. Love love love! Great post darlin’! Thanks for sharing 🙂 Krista @ http://ahandfulofeverything.blogspot.com/
There is something to be said for simplicity, isn’t there? I need to remind myself of that…sometimes I can tend to be over-the-top! And I happen to be a theatre teacher, too…hmm…strange coincidence. (Wink wink.) Thanks for your sweet words, Krista!
So lovely!!! Super cute idea! Thanks so much for sharing the great tutorial! Would love to have you visit me sometime.
Have a fabulous week!
Hugs from Portugal,
Ana Love Craft
http://www.lovecraft2012.blogspot.com
You are welcome! And I can see from your blog that you are definitely not a beginner sewist…but perhaps an advanced one! So, your sweet words mean all the more. Thank you, Ana!
Wonderful tutorial! What a great tip to use cereal boxes to help get your edges pressed and create a template for making multiples. So much fun to see all the baby stuff you are coming up with!
Thanks, Bethany. I was so delighted to discover the template idea myself! Sewing is tricky as it is for us beginners, so anything to make the process easier is welcomed. Glad you’re enjoying the baby posts and not getting sick of them. 🙂 I have at least one more coming atcha later this week!
This is a great tutorial! I’m definitely going to be using it!
Hooray! That makes me oh so happy. Hope you’re enjoying your 10 day vacation, Nina! Soak it up.
Cute! I love the strip of color down the middle!
Thanks, Jessi! I loved the padded diaper strap you created recently. Seems like baby gifts are being made all over the place these days!
These are adorable. I loved using these “cloth diapers” as burp cloths, they are the only thing that worked. And these are just so pretty with the pretty colors. Awesome tutorial. Please link this to my linky party. http://suburbsmama.blogspot.com/2013/03/sunday-linky-party-1.html
I’m so glad to hear this from someone who has actually used cloth diapers as burp cloths! Sounds like they’re not just a pretty face, but hold up in action. Thanks for the comment! (Rescued it from somehow getting eaten by my spam folder.) :-{
I actually made one of these just yesterday for a sweet friend that’s due in a month! I also free-stitched an initial with the same fabric to a basic white bib. She loved it!
Love that you’ve already created one of these! Was it on your own or using the tutorial? I love the idea of creating a basic white bib as a complimentary gift with a customized initial. That I’ve gotta try! I’d love to see a photo of your handiwork if you have one. My email address is thethinkingcloset {at} gmail.com.
I actually found the tutorial after making mine after saying “surely there must be an easier way!” And yes, yours was definitely easier (made another one last night!). I’ll email you a picture!
Thanks for the photo! I’m so impressed with your handiwork and beautiful fabric selection. I bow down to you for the complimentary bib creation, as well. Would love to read a tute from YOU on that! 😉
What a lovely gift! I’m a beginner sewer, too, but I think I could manage this. Thanks for the step by step!
I’m visiting from Six Sisters Linky. I hope you can stop by my blog and leave a comment, too!
~ Megin of VMG206
Spring JOY Frame ~ Printable
My pleasure, Megin! Thanks for dropping by. I’d be happy to visit your blog and check out what you’ve been working on. Thanks for the invitation!
This is absolutely cute!!! Pinning!
Great share
Hugs
Cami
Thanks Camila! I appreciate the pin love, as well. Have a fantastic weekend! (Hugs back atcha.)
What a cute tutorial! My name is Katie and I hostInspired Weekends, open from Friday to Thursday. I would love to have you link up!
Thanks, Katie! I’m glad to hear you enjoyed it. Thanks for the invitation to your link party, too. So kind.
Love it! I, too, have a lot of friends having babies. I really like that this gift is cute, handmade, but also very important-something practical new moms can use. Adorable paired with the onesie.
Your friends are all having babies, too? There must be something in the water then (ha ha). Thanks for the sweet words, Jess! Always brightens my day to hear from you.
Very cute! Can never have too many burp clothes!
Thanks for linking up to this week’s Catch a Glimpse party. I’ll be featuring this tomorrow! Happy Easter!
Hip hip hooray! Thanks so much for the feature, Allison. What a sweet surprise. Happy Easter to you and yours, as well!
So impressed with your sewing skills on this craft and love the cereal box template idea. The burp cloths are just precious and, as you noted, so practical!! The “spit up in style” phrase made me sit up and smile!! 🙂 Love you!
Ha ha! You made me chuckled with your “sit up and smile!” phrase. Love how much my family delights in wordplay. 😉
Laughing out loud right now! Love this, my train of thought followed yours exactly, loving the Castelli wordplay.
Lisbeth, I think we owe our delight in all things wordy to our witty parents!
ADORBS. I gotta say, the cutesy handmade baby gifts are always fun to receive, but a lot of times they don’t actually get any action once baby arrives because they’re impractical. NOT SO with the cute burp cloths! You can’t have too many, especially when they’re this cute.
Glad you approve, Kelly! I love it when a project is not only fun to create and cute, but practical, as well. And on a sidenote, ever since reading your amazing post on cloth diapering, it seems I’m hear about them everywhere! #loveitwhenthathappens
Oh how I wish I were crafty like you. I can’t even sew in a straight line … I’m serious: I have a bathroom curtain to show for it! xo
You may not be able to sew in a straight line, but you can put a gorgeous outfit together like nobody’s business! And you can craft sentences like an artist molds clay. If we all had the giftings and passions, this would be a pretty boring world now, wouldn’t it? 🙂
I made oodles of these a few summers ago. The cereal box template sure would have saved a lot of time and burned fingers! Good thinking!
Yikes! I’m no stranger to burned fingers…though it’s usually related to the hot glue gun. Glad I avoided a similar fate with this project! 😉
Hey Lauren, these are awesome! I’ll be making a stack for our twin grandbabies for sure! The template is a good idea – if you’d like another possible method, try this one:
Cut the fabric to size, then machine baste (stitch a line using large stitches) down the edge you want to fold, just shy of where you want the fold to be. The fabric will fold easily along the basted line. If you are working on a garment and any of the stitches show, they are easy to remove – on burp clothes it won’t matter! This works well on a curved edge as well and is effective when you are only making one.
Have fun!! XOXO
Lisbeth showed me your post on FB with the exciting news of your twin grandbabies! Wow, what a great surprise! And with your sewing skills, I’m sure you could even add more embellishments to the burp cloths – – maybe even trim! (Although perhaps the simplicity would encourage more use….)
And thanks for the great tip on using a basting stitch to help with folding…especially for curved edges. You are a bevy of useful information, especially when it comes to sewing!
Sending congratulatory hugs to you, grandmama-to-be!
Lauren
those are great- that white color that they are all made with is begging for an upgrade- plus it hides all the stains- I always felt weird giving one to someone when they burped my baby – even though it is clean – it is stained and I never loved that about the plain color- thanks for sharing- I will be doing these the next time around!
Yes! I forgot to mention that, but I think it’s great to chose a fabric with a pattern to better hide the stains that are bound to show up. And since you’re a Mama of two, Kelly, perhaps you can answer this question for me – – how long does a baby require burp cloths? I have a few friends who have rapidly growing babies, and I’m wondering at what point would a gift of a burp cloth be “past its prime”?
You know- I think it tool a while for the kids to stop burping and be able to hold everything down…maybe they were anywhere from 6 months to 8 months…it still happened occasionally after like when they rolled over to soon, etc…but I then took all the burp cloths and those things and I now use them as cloth diapers on days when I run out of disposables and I also ripped some and use them as hand towels in the kitchen etc…if your friends are creative, there are hundreds of uses when they go past their prime! hope that helped Lauren!
Yes, that helps immensely! Thanks, Kelly. (And that’s great to know that burp cloths can be multi-purpose! Even better.)
Oooh! So cute. I can handle this! I’m pinning this for my next preggo friend. I think my favorite part of your post was the use of the word “wonky,” Wonky perfectly describes my sewing style! 🙂
Ha ha, I’m glad you latched onto the word “wonky.” It can definitely be used to describe so much of my crafting! Can I just say I love your use of the word “preggo?” Something about it just makes me chuckle. I do love abbreves!
Just want to hug you for this one 🙂 I’m so excited that your friends are having babies, because it’s loading your blog up with all kinds of great ideas I can use! True confession!??!? I have a brand new, sparkly sewing machine and it’s in a box 🙁 I know – it ‘s horrifying!!! This is the first project on my list once that poor thing gets to see the light of day!
Hug received! Ha ha, and I’m glad you’re diggin’ the baby posts, Erika. I actually already have at least one more in the works, so look out!
And thanks for your confession. I know you’re not alone (Christine mentioned the same thing)! If you’re wanting to simply get to know your machine and its capabilities, I highly recommend Raechel Myers’ Sewing 101 course. I’m working my way through it, slowly, but surely…and it has really boosted my confidence as a beginner sewist. Still, many miles to go, but I feel like I at least know the parts of my machine and a variety of different stitches and techniques! You can do it, girl. http://www.raechelmyers.com/sewing-101/
You are a fountain of information! Thanks so much for the link 🙂 I’ll be sure to give you a heads up when I get some projects up and running 🙂
You had me at beginning sewist!! All I need now is a sewing machine and to learn how to thread a needle. 😉 These are seriously cute and the tutorial makes me feel like this is something I could accomplish. Pinning for when I buy the sewing machine. 🙂
Kenley
You could totally do it, Kenley! I know you’ve really empowered me in the culinary arts…and hopefully I can do the same for you with sewing. If you’re looking for a great beginner sewing machine (that actually has a lot of great features for quilting and 60 stitches), I can recommend mine. It’s over 66% off on Amazon right now – – I think that’s cheaper than when I bought it: http://www.amazon.com/Brother-Feature-Rich-Built-In-Auto-Size-Buttonholes/dp/B000JQM1DE
Pretty!!
Thanks, Diana! I’m a sucker for fun fabric…and I already have enough fabric to keep me going through many projects. No more trips to Jo-Ann’s allowed for me! (Maybe that’s going too far…ha ha.)
I went ahead and ordered 6 ply from Target. We only have a Walmart where I live and they only carry the 3 ply. I could see as soon as they came out of the package that they looked different but the minute they came out of the dryer I knew it was all over!
Thank you so much for the tutorial. I can’t wait to get started.
Great tutorial! I am impressed with your skills and imagination. Any mother (or even father) would be honored and impressed to receive such a thoughtful and hand-made set of gifts. I have a sewing machine still in the box. I guess I need to break that puppy out?
Oooo! Yes, you’ve totally gotta bust that puppy out. I’m amazed at how many “beginner” tutorials I’ve been able to find online…and after each project I get under my belt, I have a little bit more confidence for the next one. It’s certainly not as intimidating now as it first was back in September.
I can only imagine the d.i.y. curtains and decor you would create with a sturdy sewing machine at your fingertips!
I don’t often link up with other blogs but this week there must have been a reason. I have a seven week old and I think these will now be on my to do list! They look great and may be my skill level… beginer!
Thanks so much.
Wow, Vicky! First of all, congrats on your seven week old! How exciting! And it thrills me to no end to know that my lil tutorial might have inspired someone else to give it a go. Let me know if anything is unclear in my instructions or if I can offer you any assistance. I think you’ll really love how they turn out! Especially if you can pick up some fat quarters you’re really swooning over. Have fun, Vicky!
Where were you when my babes were spitting up? These are adorable! I loved your tutorial. Several years ago when all my friends were reproducing at once, burp cloths were my go to gift because as you said, they are cute and you can make a bunch pretty quickly with so many fat quarters. However, you are way more precise than I ever was, suggesting that your burp cloths are top notch!
I really liked the tip of cutting a cereal box template. Gonna try that next. Now that you are an expert at a “straight-ish line”, give some embellishment stitches a try too! Nothing says please spit up on me like a cute little heart or floral stitch.
Aw, I wish I could go back in time and whip up some baby gifts for your kiddos!
And thanks for the encouragement to explore some embellishment stitches. What a great idea to try some on burp cloths! The thought never crossed my mind, but it’s brilliant. I feel like I need a day just to play with embellishment stitches; I imagine it’s going to be so much fun! Especially after seeing some of your lovely work.
And your last line had me in stitches (pun intended). “Nothing says please spit up on me like a cute little heart or floral stitch.” Ha ha. Ain’t it the truth?!
Super cute burp cloths… I too have at least 5 friends preggo right now–need to start making gifts STAT!
It’s that time of year, I guess! Or that time of our lives! Ha ha. Thank goodness baby gifts are so darn fun to make. 😉
With the onesies and the cloths you’ve made such a wonderful gift set for your expecting momma friends! I am sure they will be incredibly pleased 🙂
Thanks, Allison! I’ve had so much fun dabbling in the land of baby gifts, and I’m really excited to start mailing ’em out to my expecting momma friends! Especially since some of them are due in early April. Yikes! I best get on that.
I love these! You’re going to be SUPER popular with your expecting friends (although I know they ALREADY adore you!!!) 🙂
Thanks, Katherine! And I know your friends adore you and your sew-tastic self! You are seriously one of my sewing role models.
Beginner Sewist! Yup! that’s me! ha!ha! I don’t post anything about my sewing projects; I’m so ashamed but yours is; beautiful! 🙂 these burp cloths turned out beautiful, I love the colors! I’m sure your friends Adele and Tavie will love it! (great tutorial Lauren) & Yes, you are right; if a baby is going to spit up, might as well do it in style! 🙂
Well, don’t look too closely at the stitching. You’re sure to find imperfections! But I figured, it’s a burp cloth, not an evening gown. A few crazy stitches ain’t gonna hurt anyone. 😉 Ha ha. Thanks for your enthusiastic response, Ingrid! You’re the best.
During all my 60 + years of sewing, my mother and sister sewed for the public, and my sister owned a fabric shop, we were always referred to as a ” seamstress. ” my homemaking teacher also said that was the proper title for our gift of sewing, crafting, or anything that was made with the use of a sewing machine, or hand sewing. Of course that was many years ago, things do change
Lovely tutorial, as usual! I don’t have a sewing machine but I’ve been tossing around getting one (although I’m sure Josh won’t appreciate my crafts and projects taking over our apartment lol). When the times comes (and it will–sorry Josh), I will definitely give these a try! Cute fabrics too–love ’em! Keep it up! (like I need to say that 😉
ALSO, I linked to The Thinking Closet in my most recent post about moving (or not, as the case was) to WordPress. Thought you’d like to know! 🙂
Hugs,
Gabby
http://www.essentiallyeclectic.com
Saw your post already, Gabby, and I hung on every word! (Thanks for the sweet shout-out…you’re a doll.) I really enjoyed corresponding with you as you worked through the process of migrating. I admire your gusto for giving it a go on your own. You are certainly braver than I!
And Mark has already said that when we buy a home, we’ll need a room designated for my craft projects. Between my Silhouette machine and sewing machine (plus all of the accessories and supplies I’ve been building up), it seems that every closet and drawer is spilling with craftiness around here! Good for you for trying to curb the machine purchases for now. 😉
Did you know that making c4aft projects that are straight stitches you do not need an expensive sewing machine. Most stores carry a small machine that is electric or battery operated that makes an even straight stitch. They cost under $20.00!! I got mine at Walmart but often I have seen them in CVS drugstore or Walgreen. Great first machine . Also great for us grandmoms who cannot lift the heavy portables to put on the table any more. Good Luck sewing. Often you can find inexpensive sewing classes at adult evening classes taught in local high schools in the evenings.