White Letters on White Canvas – D.I.Y. Artwork Tutorial
Floating around on Pinterest are some pretty cool canvases with white wood lettering by the U.K. design team Gorgeous Graffiti. The only hitch is that they’re selling for $300 – $500. Egads! Right?
Actually, the same effect can be achieved quite inexpensively as some other bloggers verified like this one and this one, so that gave me the courage to create my own with the title phrase from one of my favorite hymns, “It is Well with My Soul.” I also added my own twist on the project and incorporated an image on my canvas. The result?
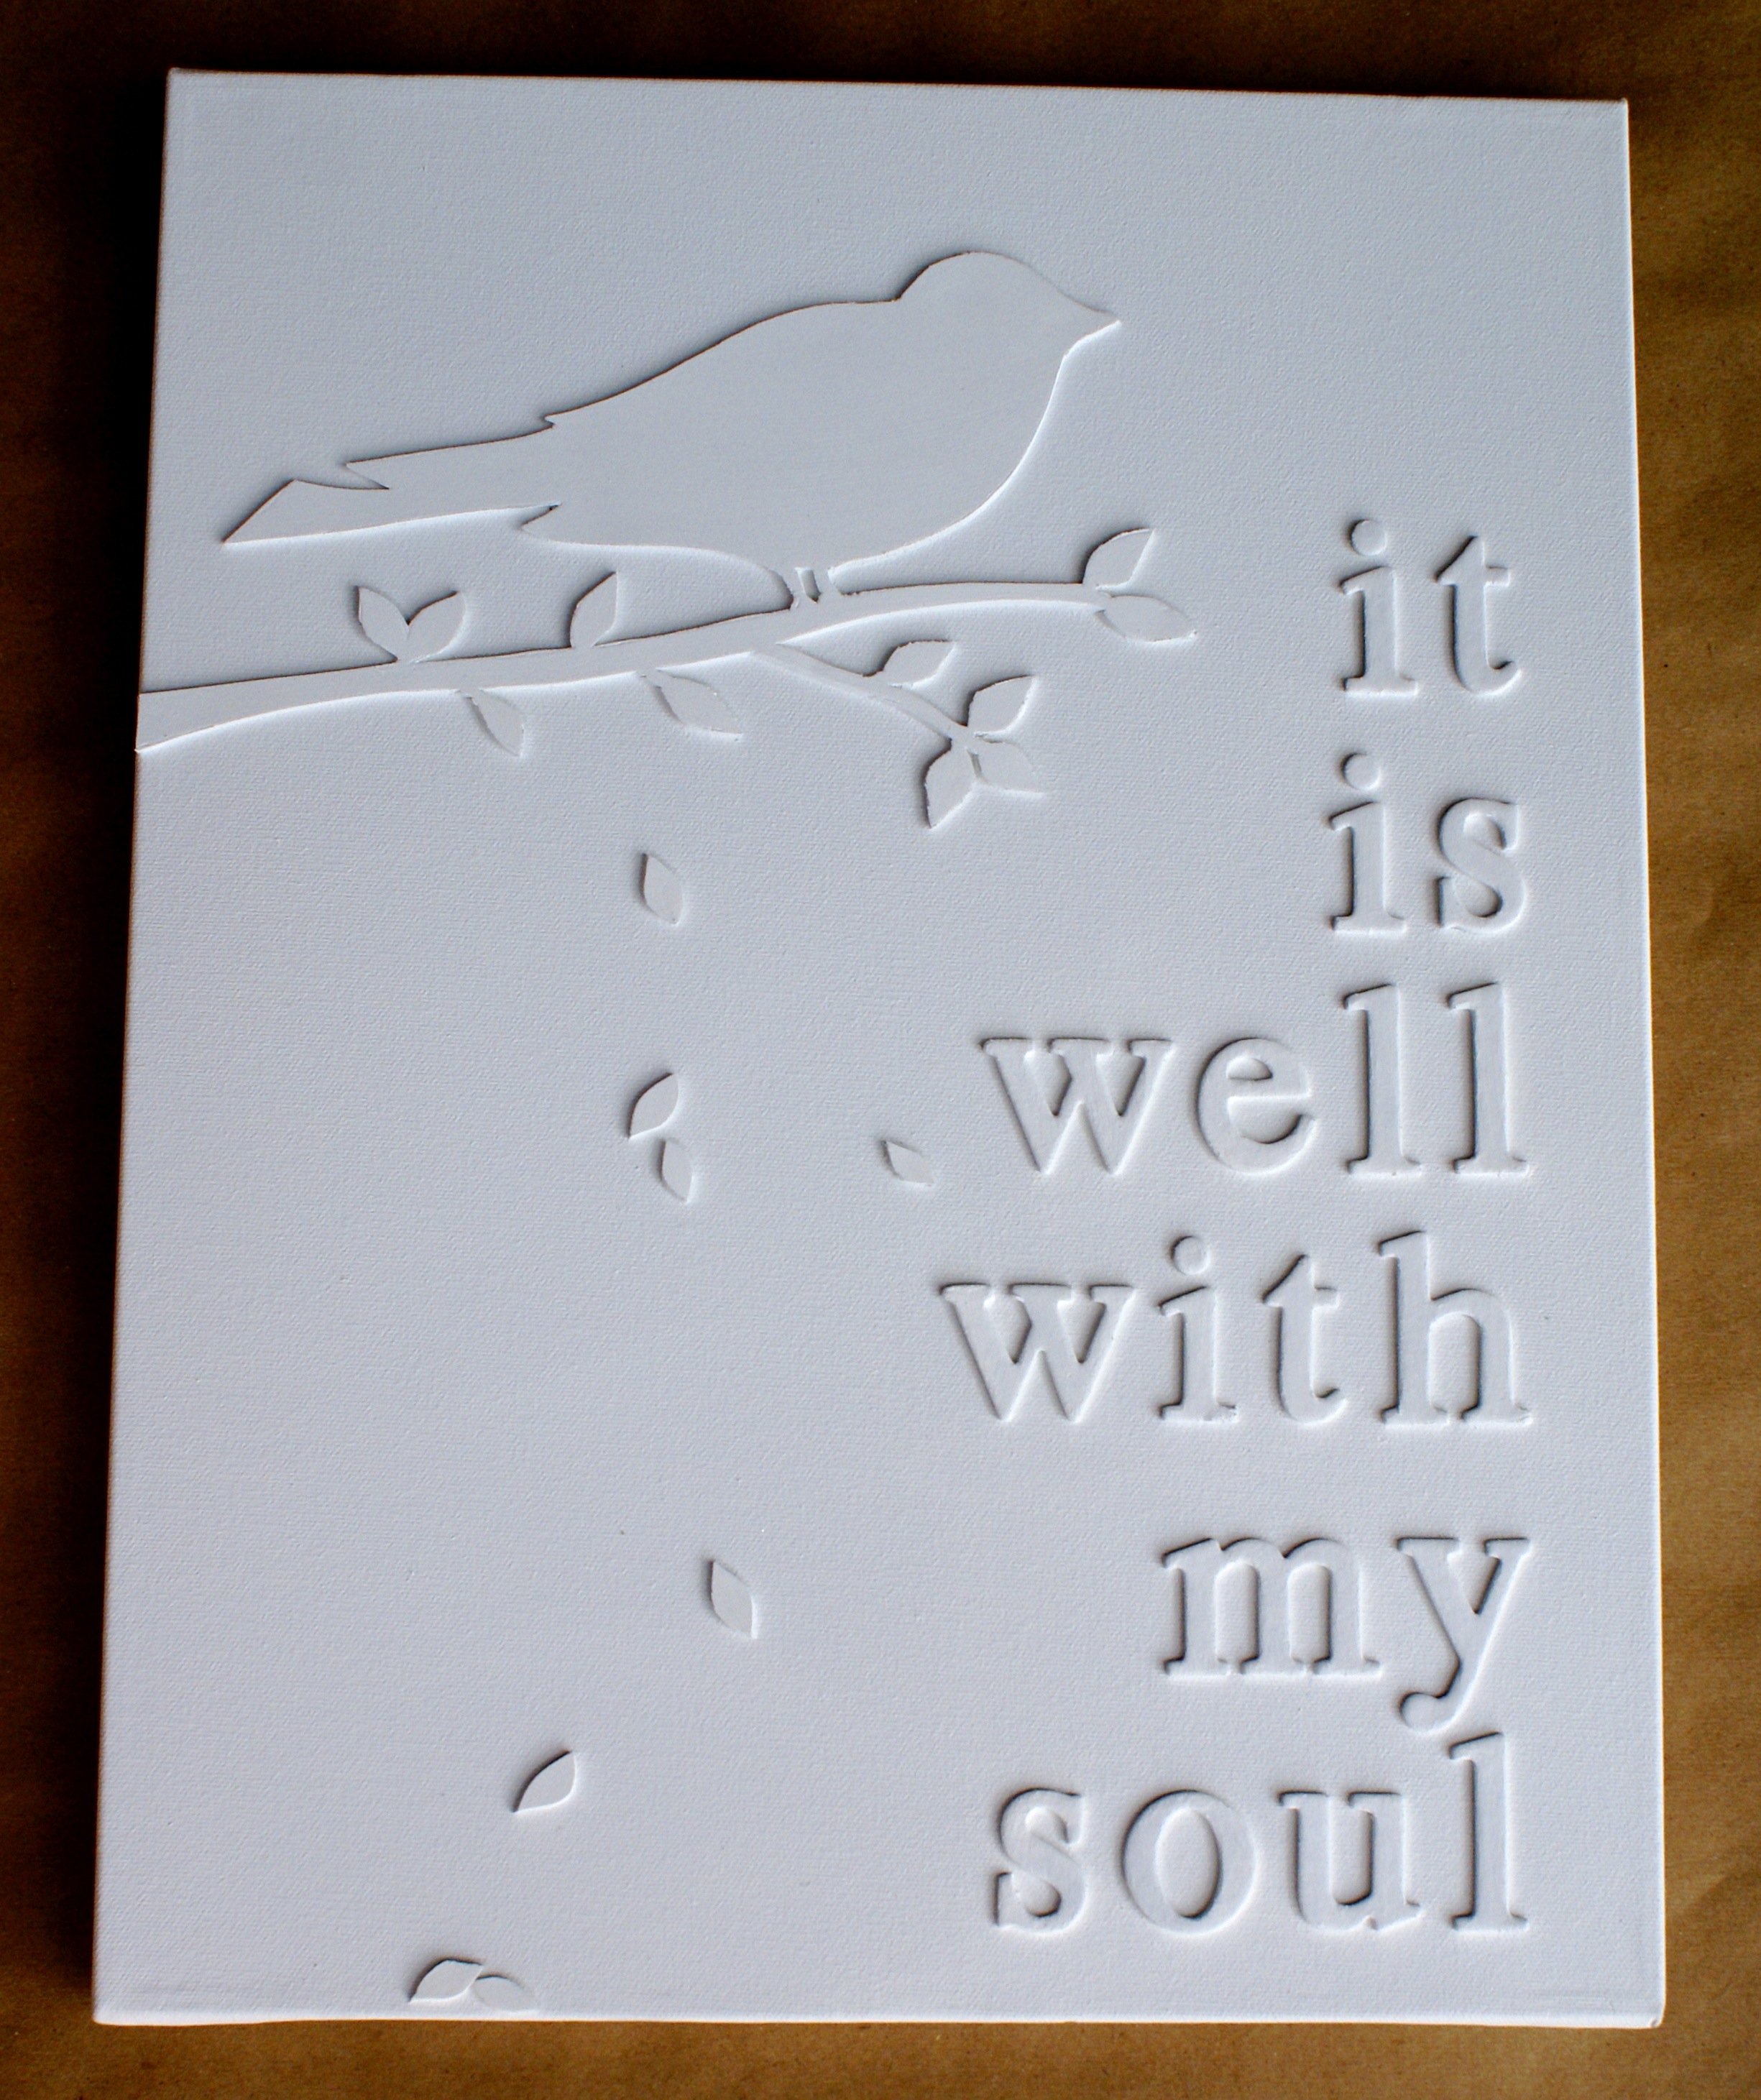
And all for only $25. Seems more reasonable, doesn’t it? Now, onto the tutorial, so you can make your own.
SUPPLIES:
- Canvas: size 14″ x 18″ sells for $8.99 at Hobby Lobby
- Chipboard letters: one set of letters A-Z sell for $2.99 at Hobby Lobby – – my project required three sets
- Sheet of white foam: size 12″ x 18″ x 2 mm. sells for $.89 at Hobby Lobby
- White acrylic paint: already had a small bottle – – can pick up for a few bones at any craft supply store
- White spray paint: Krylon Indoor/Outdoor Semi-Gloss White Spray Paint sells for $5.99 at Hobby Lobby
- X-acto knife: already had; they run about $3 – $7 at any craft supply store
- Adhesive: spray-adhesive, craft glue, or super-glue – – already had
- Other tools: yardstick, scissors, tape, pencil, foam brush, small bristle brush
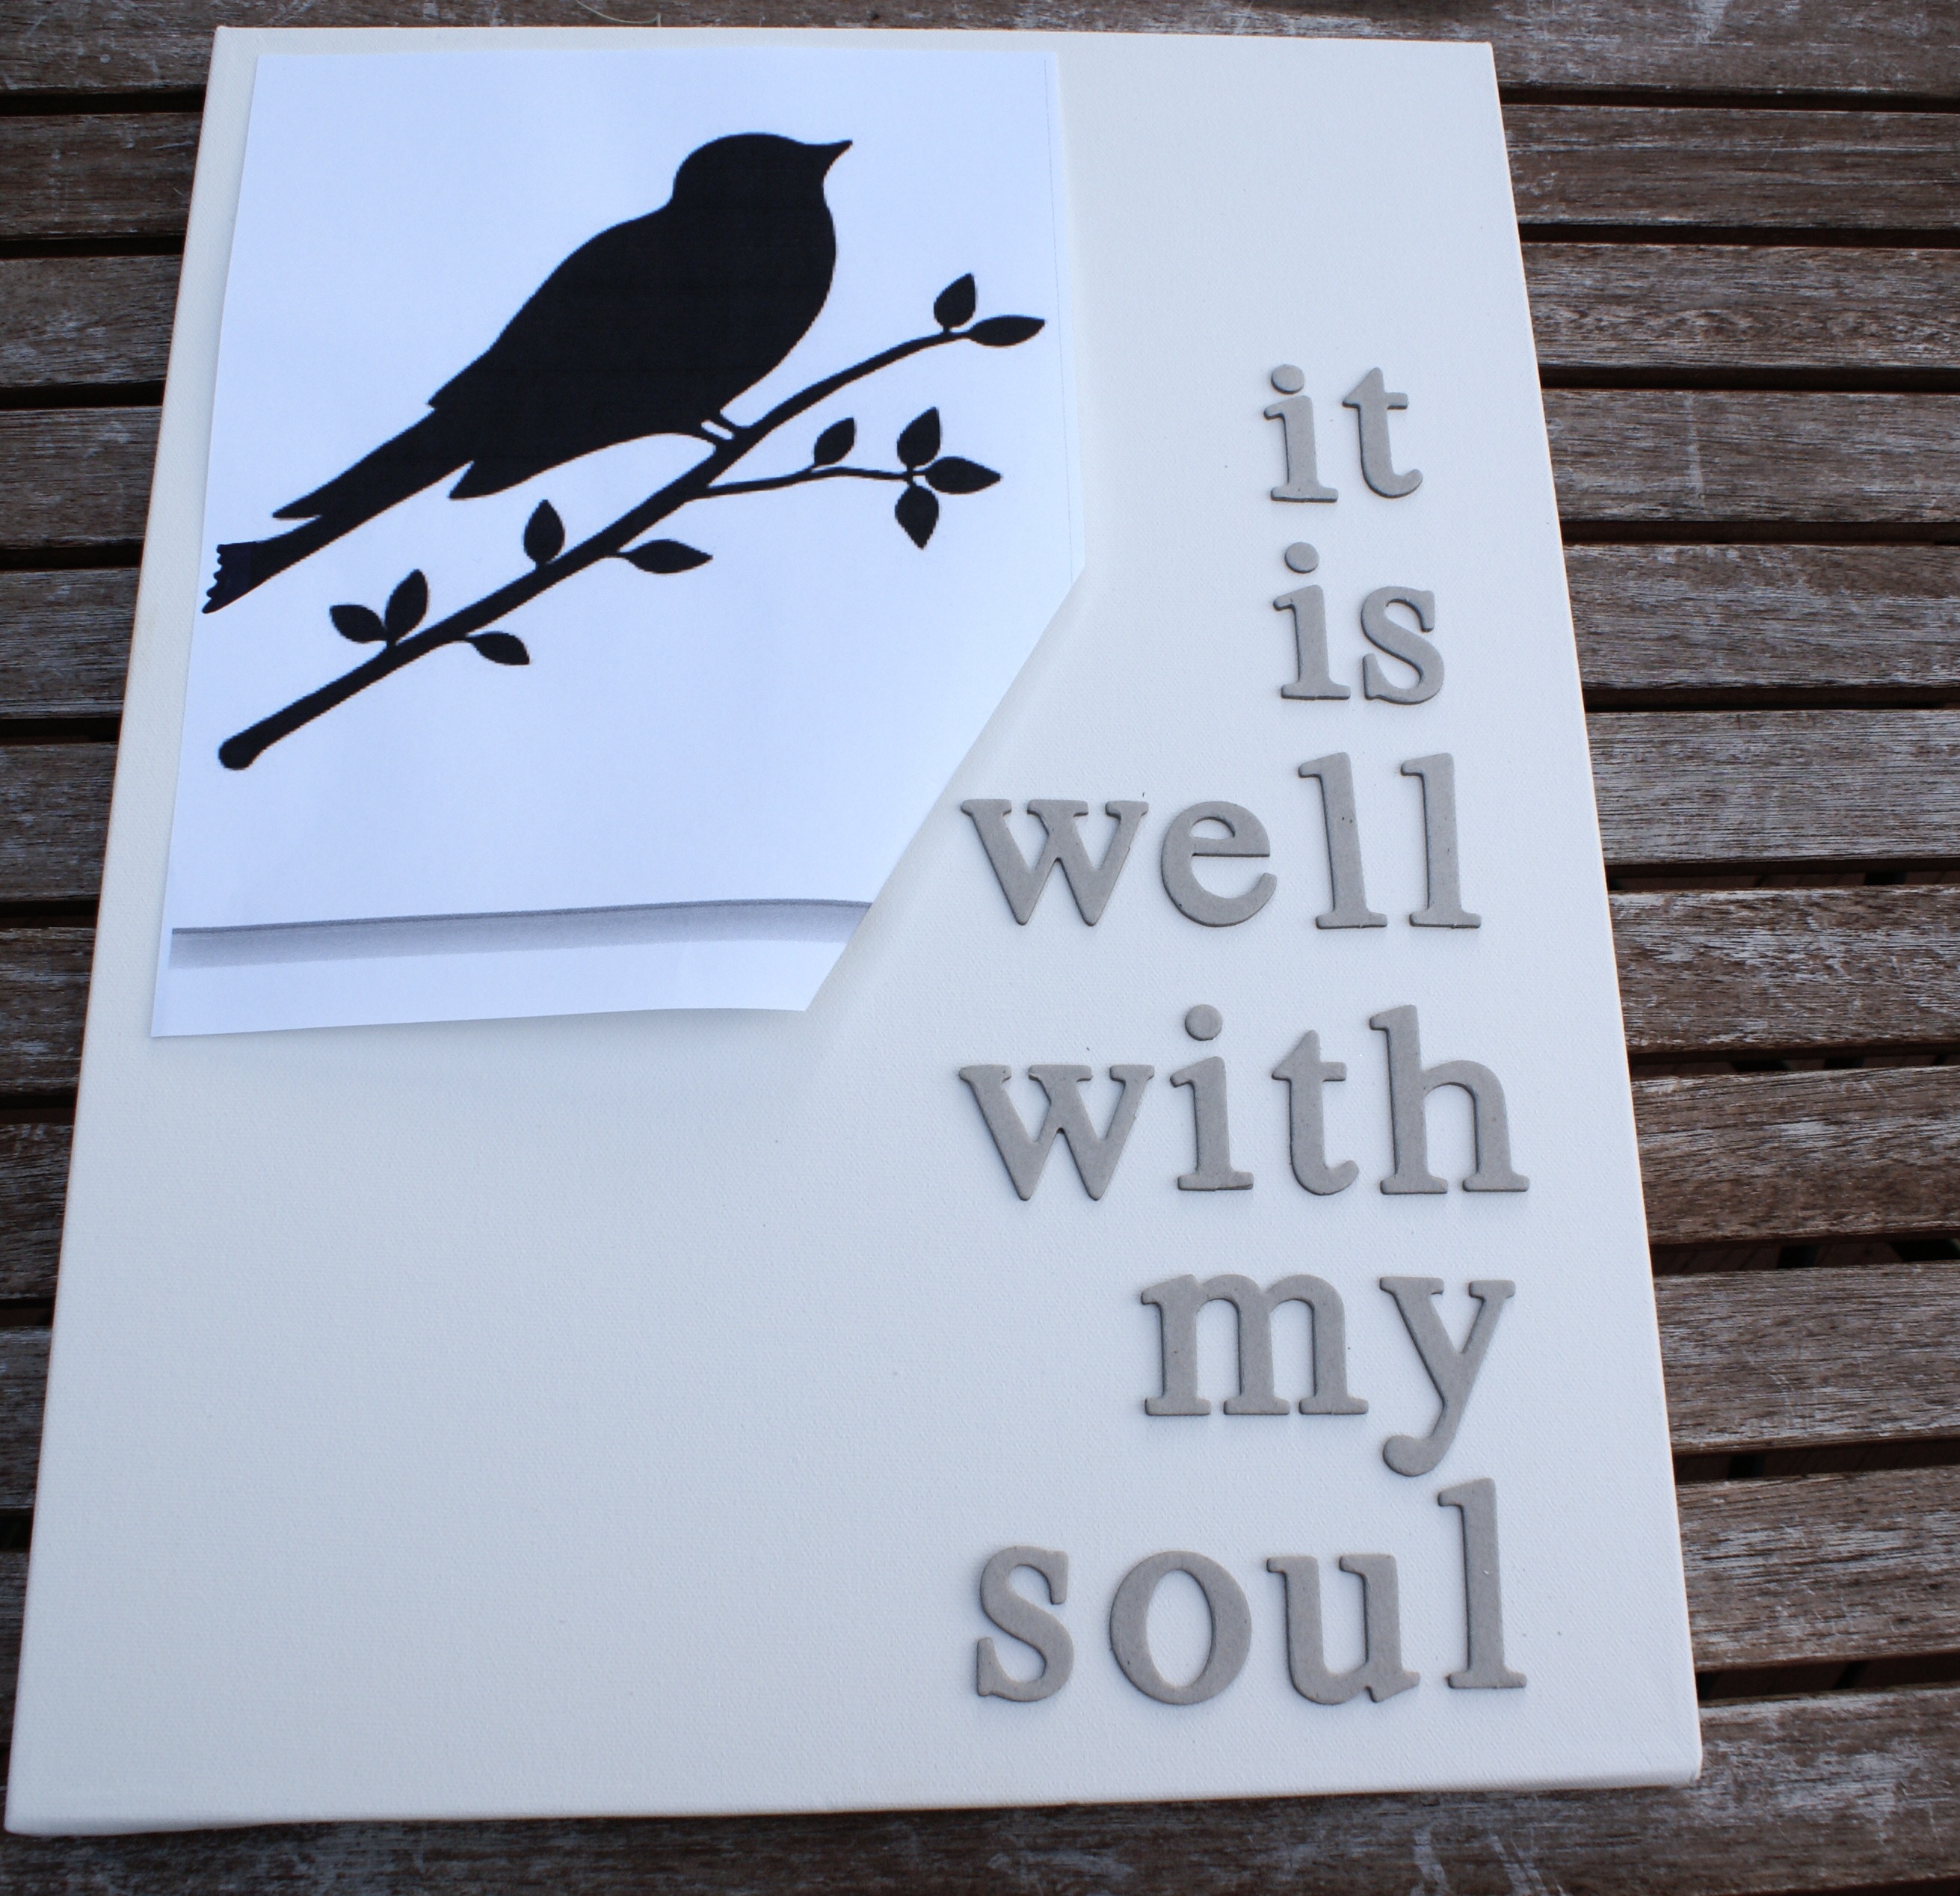
1. Lay out your letters and (optional) image on your canvas for sizing and spacing. I just did a google image search for “bird on branch silhouette” and found a plethora of options from which to choose. I enlarged the image in Microsoft Word before printing.
2. Cut out your image to create a stencil.
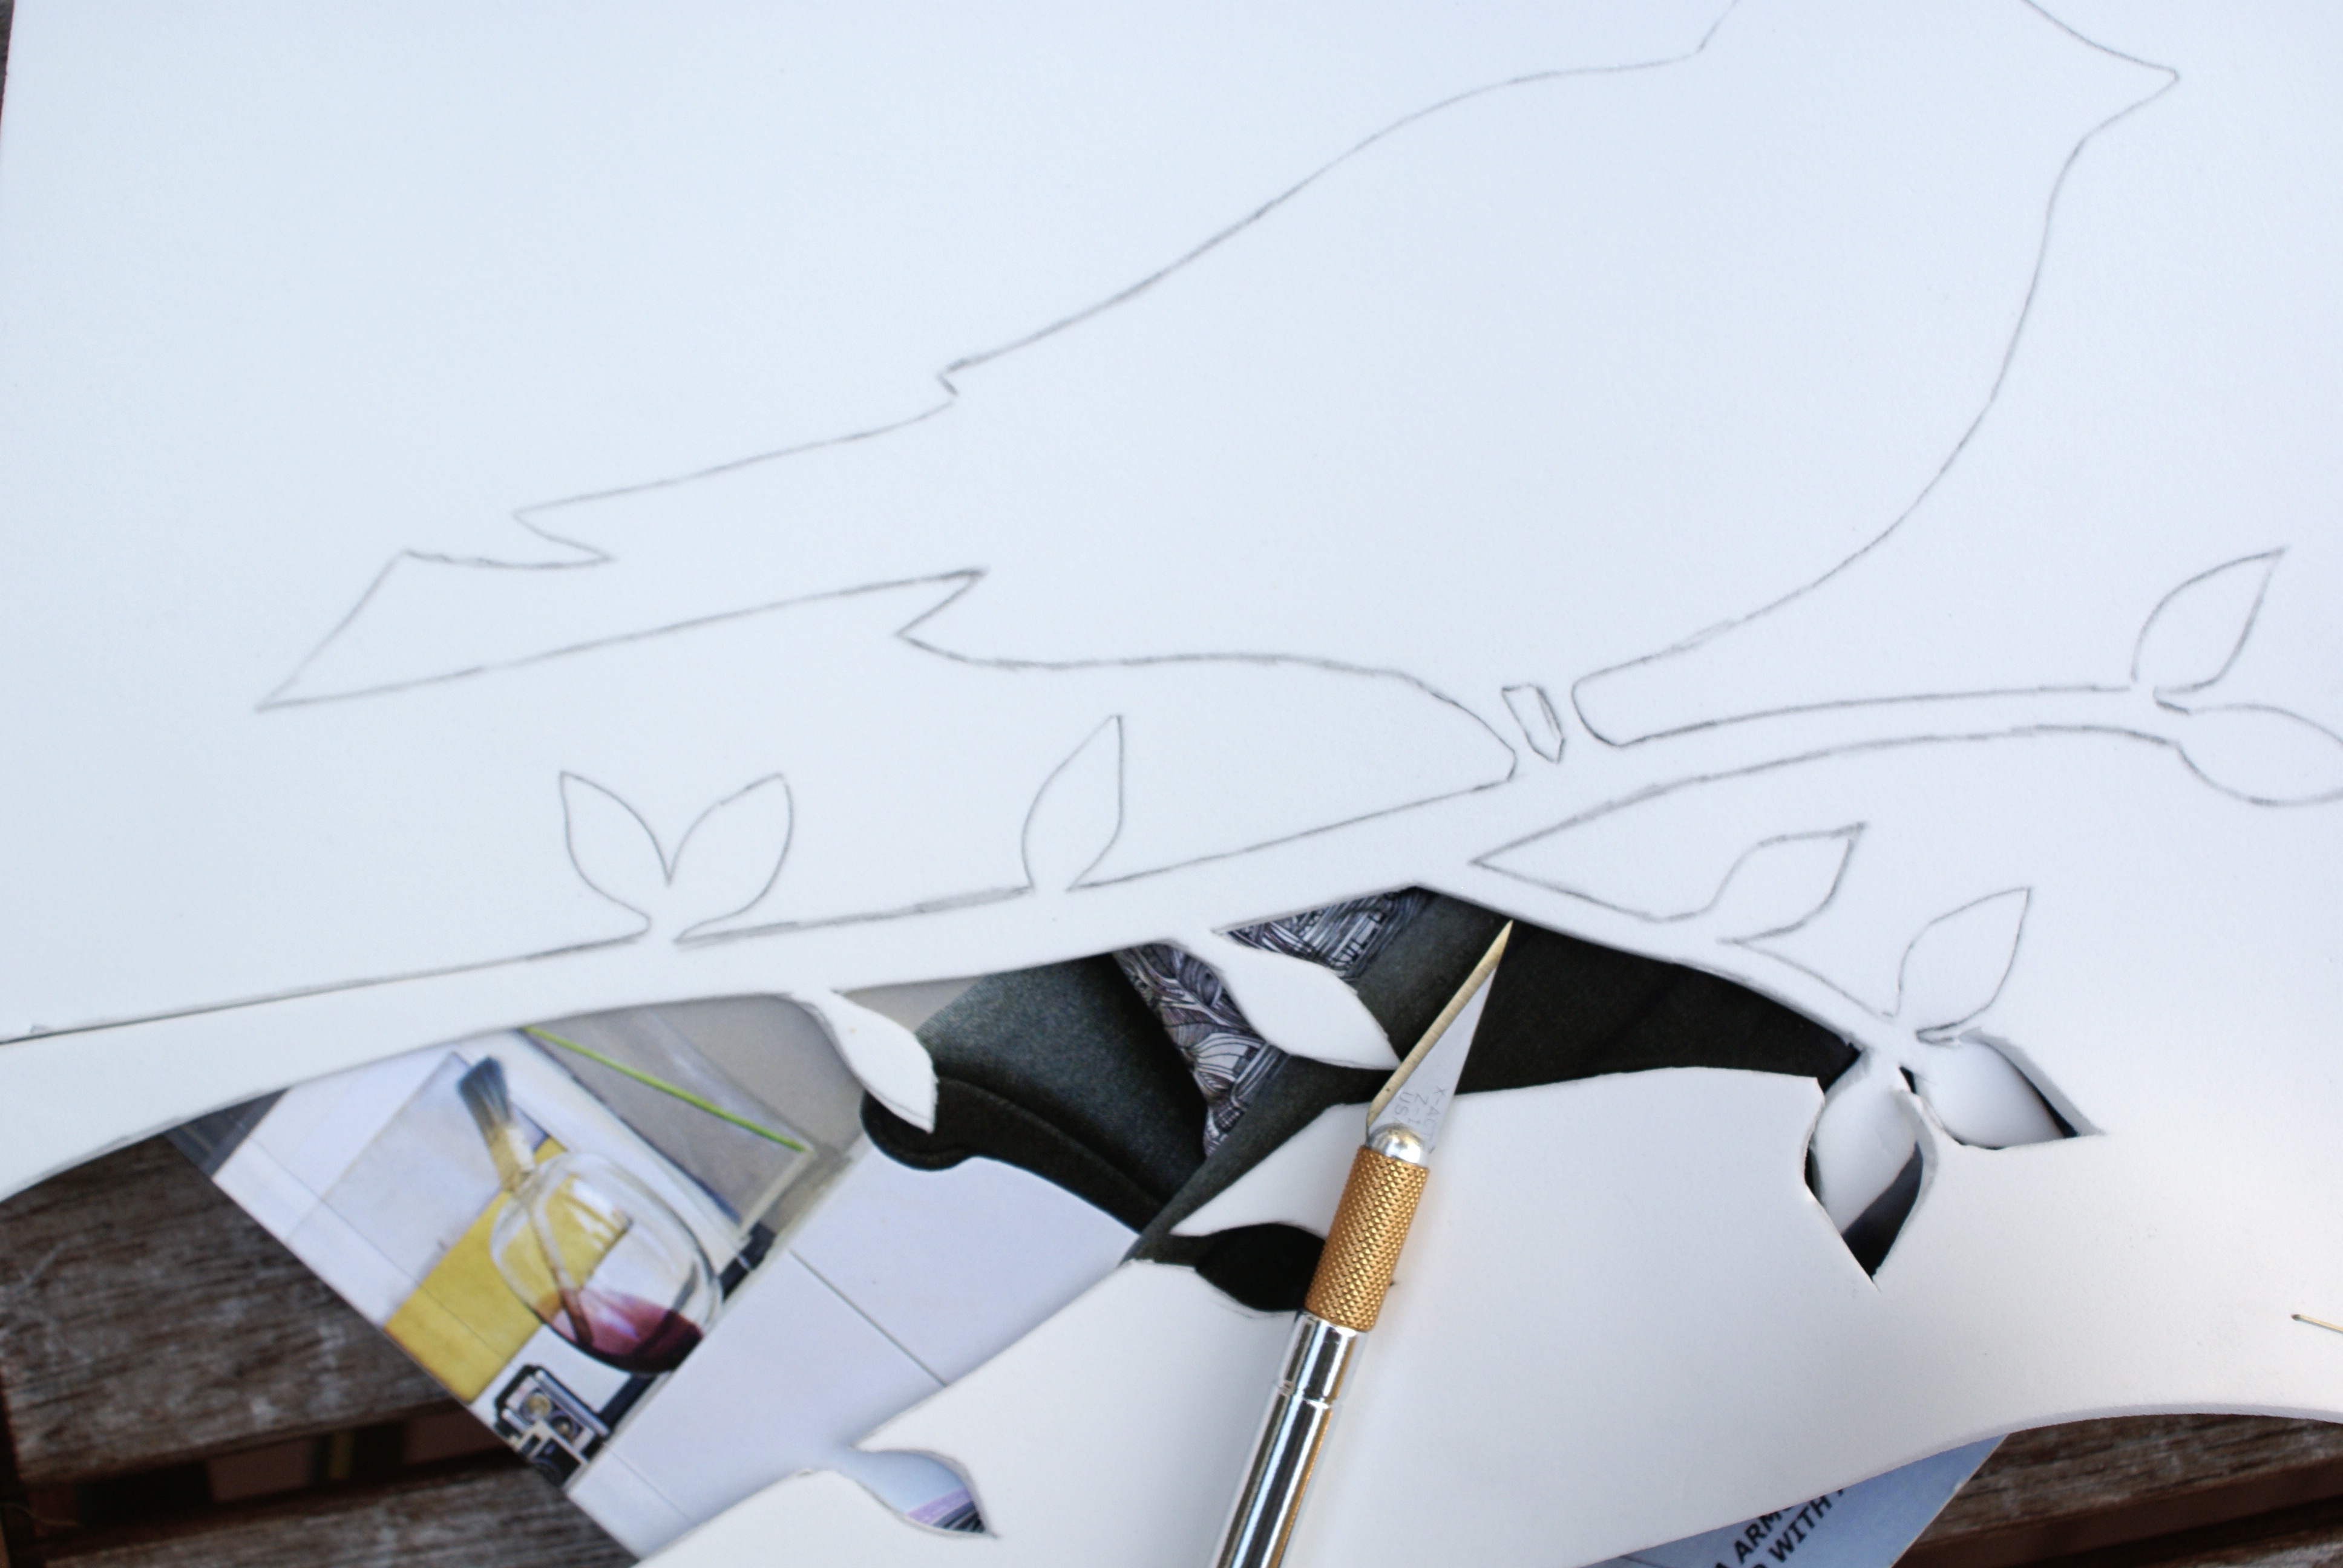
3. Trace the shape of your image onto your sheet of white foam using a pencil. I recommend securing the printout to the white foam on one tiny spot (i.e. on the bird legs), so your image doesn’t wander too far while you’re tracing.
4. Remove your stencil, place your white foam on an old magazine, and use an x-acto knife to cut out your image. Make sure your blade is sharp; it should cut through the foam with ease. Try to keep as fluid a motion as possible to avoid snags and rough edges.
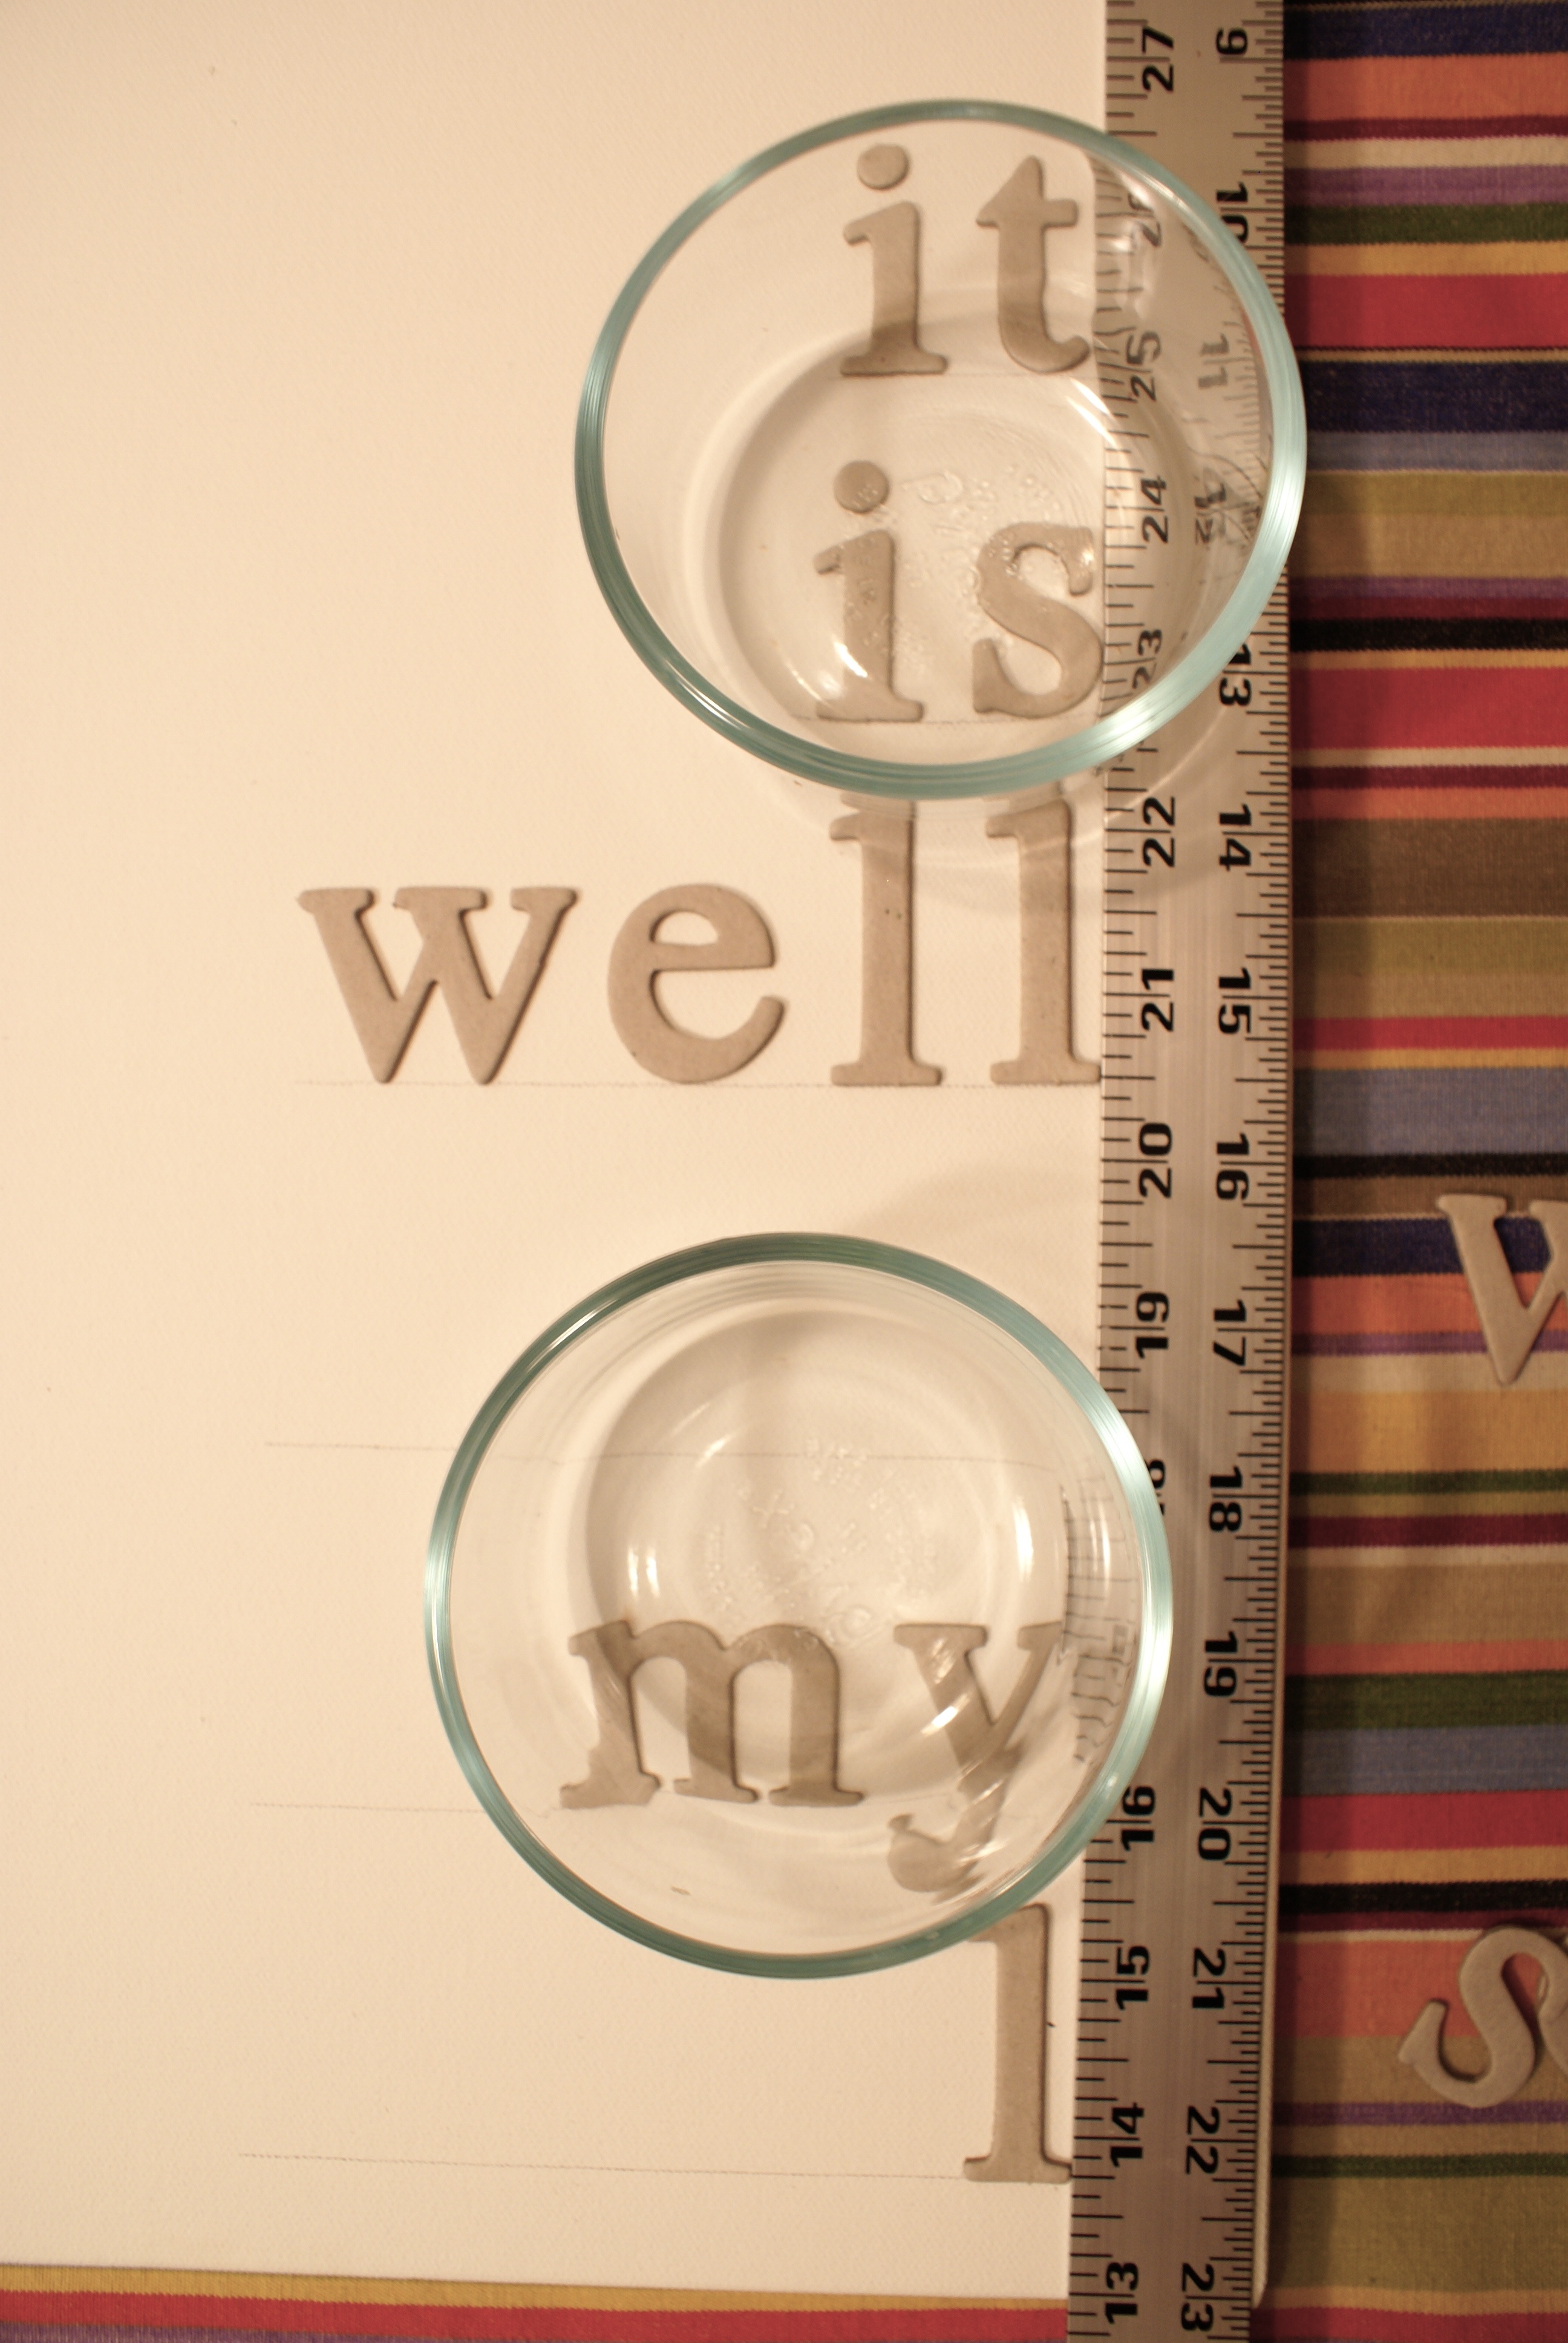
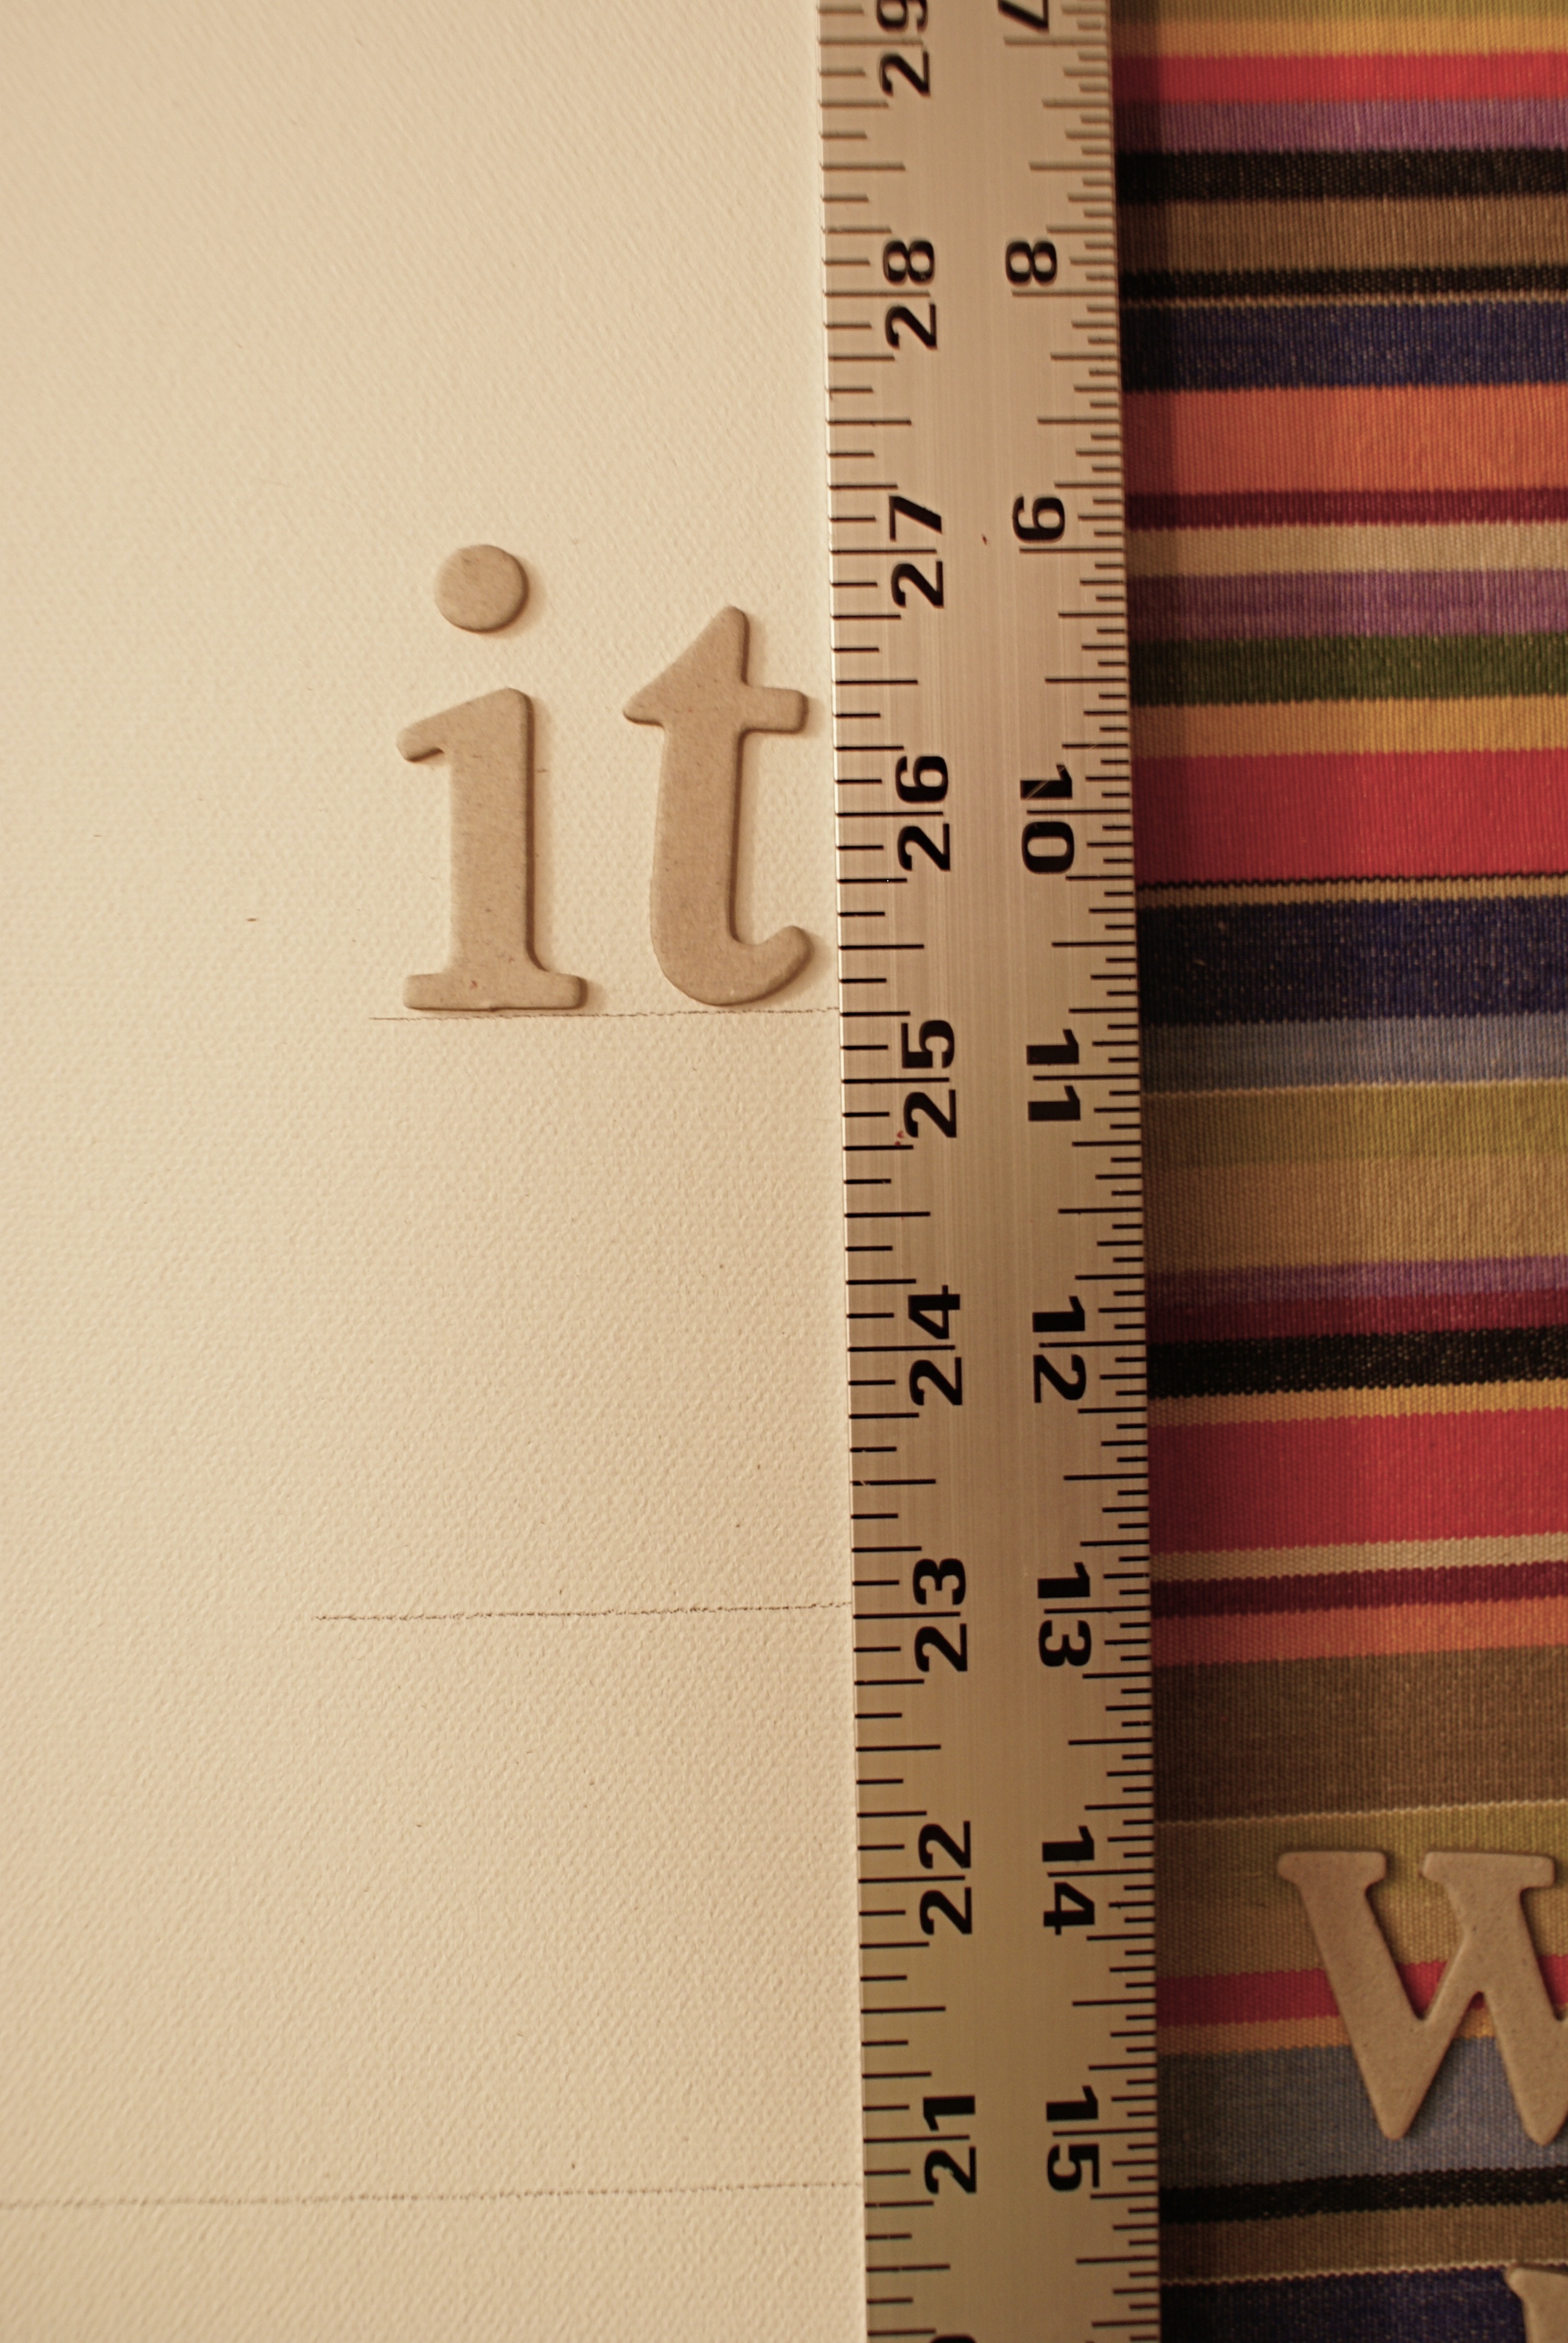
5. Prepare your canvas for the letters. This step is the most meticulous of the entire project, but if you’re not picky about straight lines or your design doesn’t include them, but all means, skip it. However, if your goal is for straight-as-an-arrow text, dust off that yardstick, grab a pencil, and set up shop in a brightly lit area. Here was my approach. Looking at my layout, I figured out a standard distance between the bottom of the letters on one line to the next. It turned out to be about 2.25 “. Then, I figured out how much space I wanted to leave on the bottom margin and decided on 3/4”. I drew very faint lines with my pencil where the bottom of my letters should hit, so the first line was 3/4″ up from the bottom, and then after that, I spaced out my lines 2.25″ apart. I only drew lines on the right-hand side where the letters would be at an approximate length to fit the words. In terms of how far to go on the right-hand margin, 1″ seemed right, so I left my yardstick on the right-margin of the canvas as a guide. Phew. That was wordy. If you’re still trackin’ with me, congrats!
7. Glue your image to the canvas. I traced little lines on the left side of the canvas where the branch should lie, then I super-glued the foam to the canvas in sections. First, I did the main branch – – held it down until it dried. Then, the tiny off-shoot, followed by the bird. This enabled me to secure a strong bond between the foam and the canvas, and since the foam is bendable, it’s very easy to glue in parts. Something seemed missing with all of that blank space on the left-side of the canvas, so I decided to cut out some foam falling leaves. I felt it really completed the picture and brought even more depth to the piece as a whole. Through all seasons of life, I can say, “It is well with my soul.”

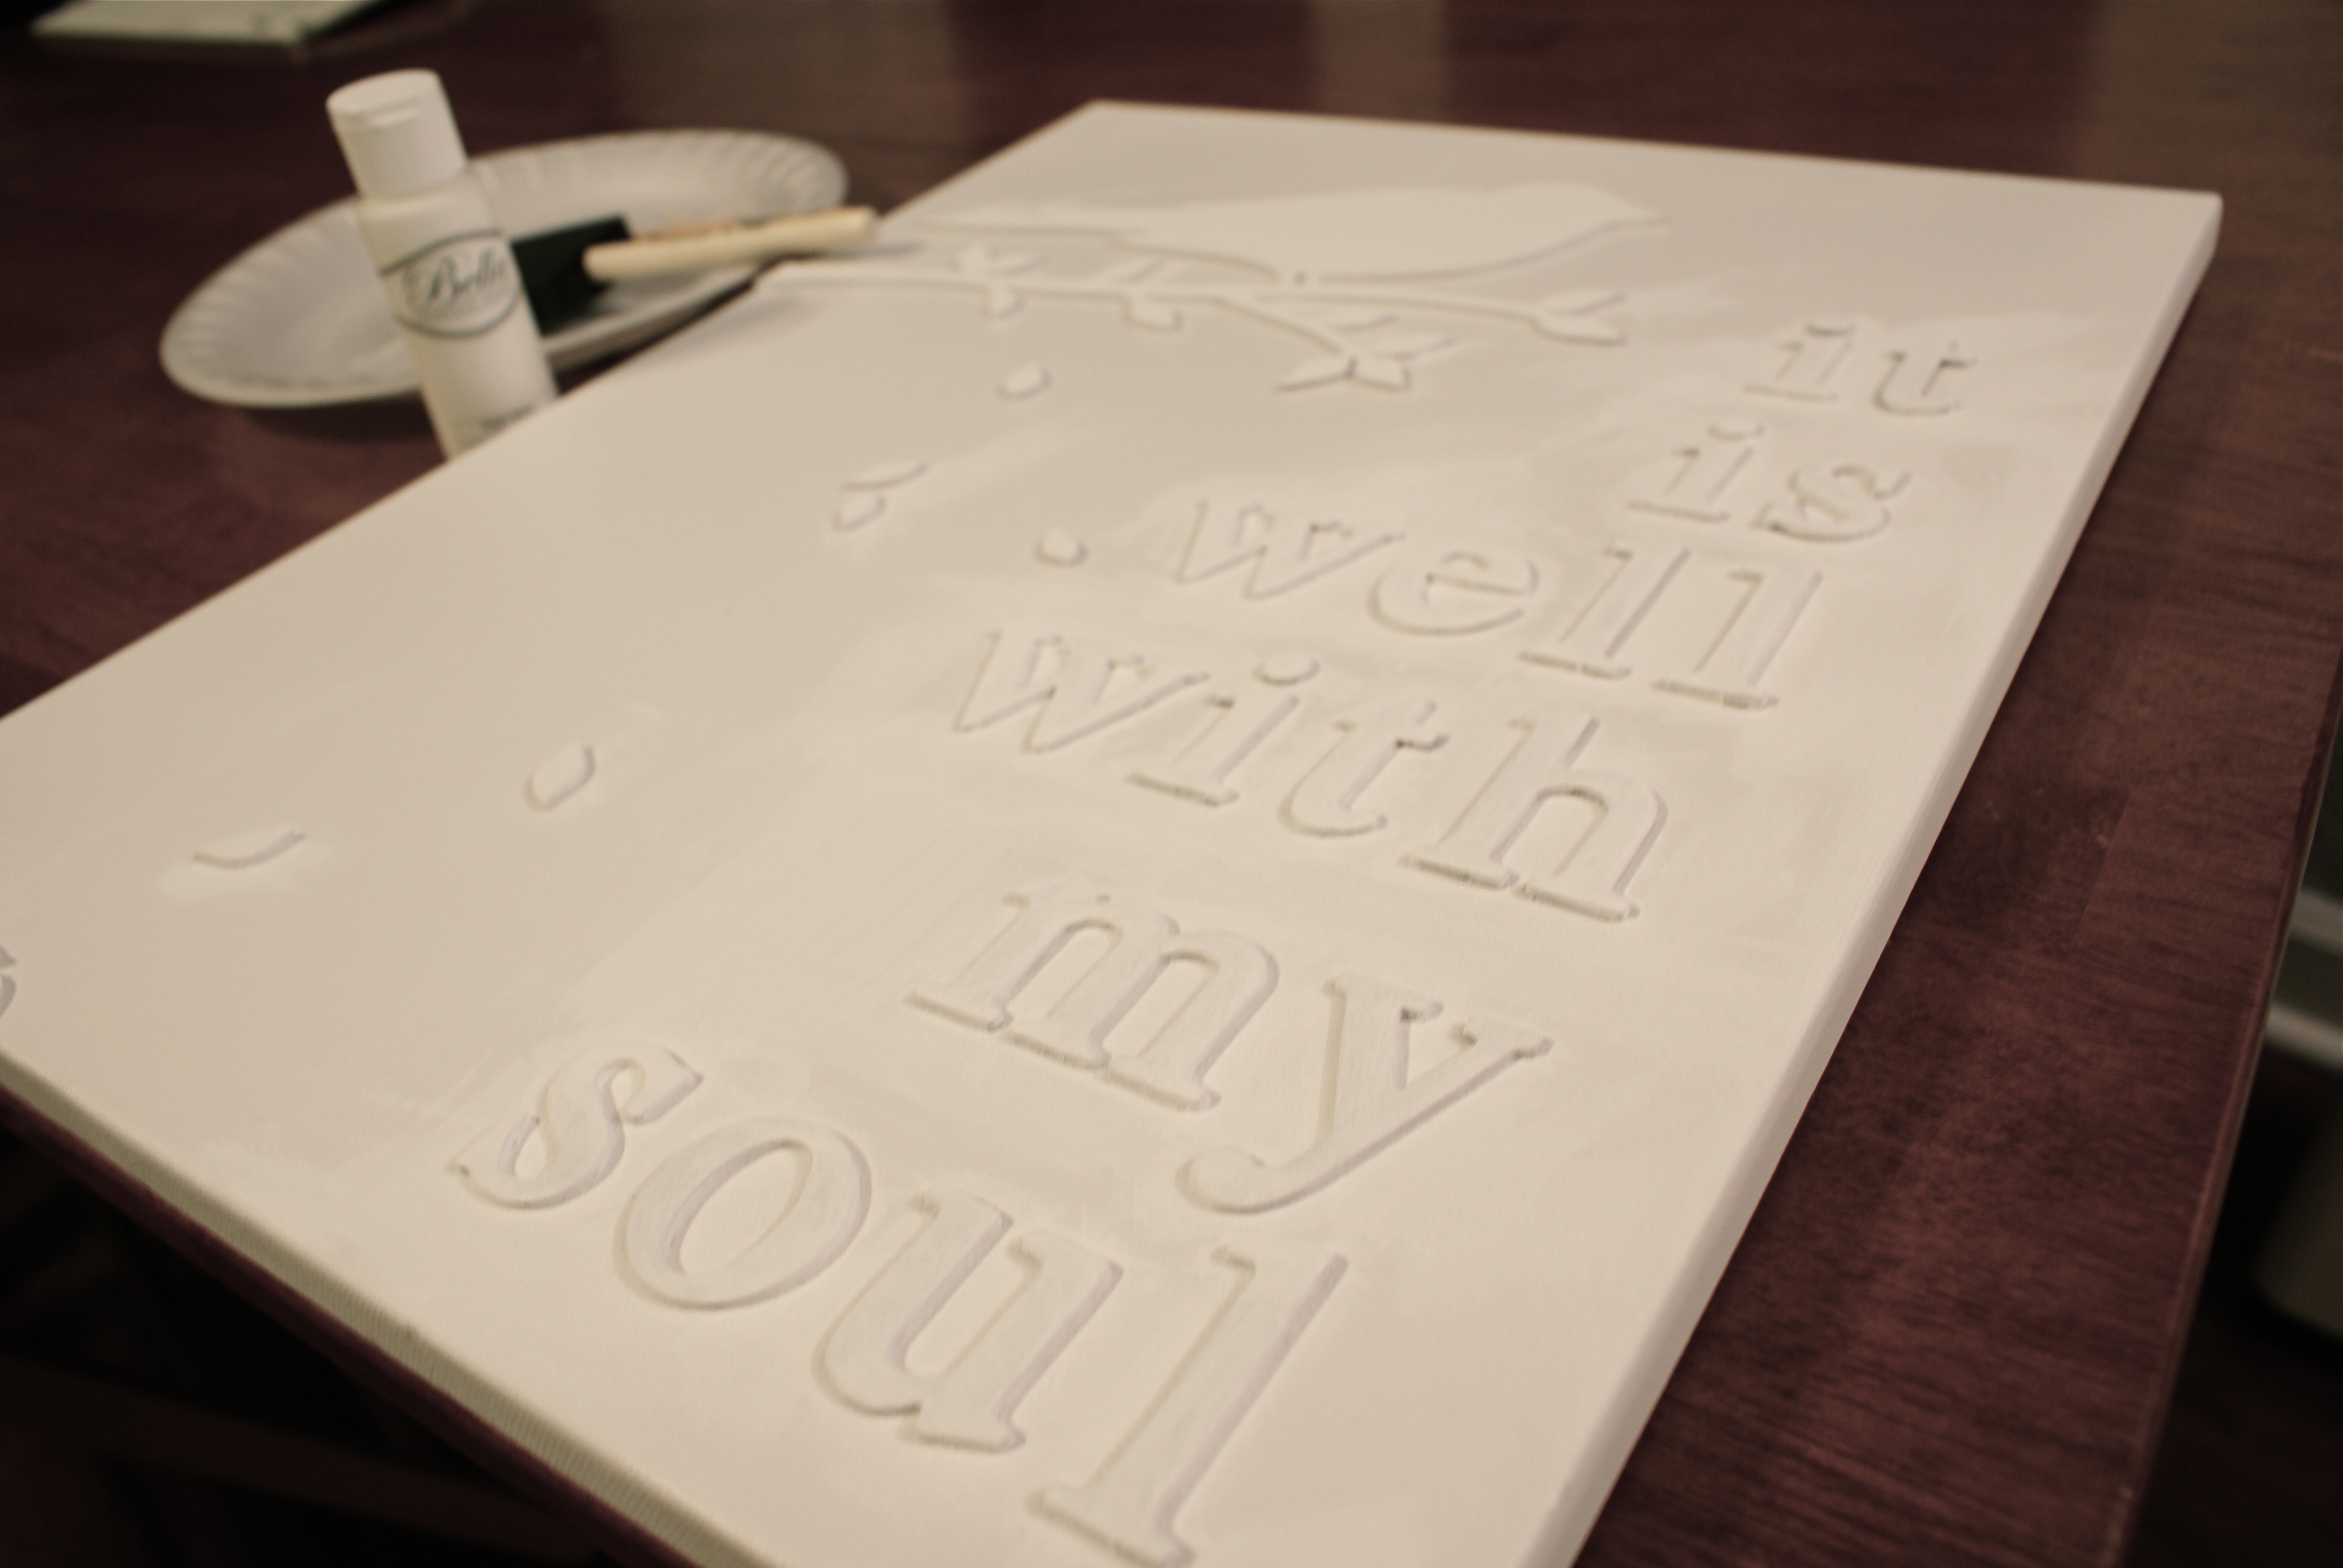
8. Apply a base coat of white acrylic paint to your letters and image. I learned the hard way that no matter how many coats of white spray paint you apply, you won’t fully be able to cover the pencil marks or get a bright white on the letters without a thick base coat. I used a foam brush and tiny bristle brush to get into the nooks and crannies of each letter and had it dry overnight.
9. Apply several coats of white spray paint to the entire canvas. In a well-ventilated area (i.e. the great outdoors), give the canvas several sprays. Let it dry 24 hours…or as long as you can wait.
10. Display and enjoy your inexpensive and beautiful D.I.Y. artwork. Our guest bathroom has a mint, white, and blue color scheme going on, and there was a blank spot on the wall where our new piece of art has found a happy home.

There’s something calming to me about the white on white on white. Mark pointed out, “There’s not a lot of color clamoring for attention.”
To close, it only seems fitting to include the inspiration behind my piece, the hymn itself. Feast your ears on “It is Well with My Soul,” as performed by the talented Chris Rice. Then, make a break for Hobby Lobby to start gathering your supplies….
I linked up at: Sew Many Ways, Home Stories A 2 Z, Tip Junkie’s Tip Me Tuesday, Adventures of a DIY Mom, Not Just a Housewife, Sugar Bee Crafts, Uncommon Designs Online, My Uncommon Slice of Suburbia, Sew Much Ado, Ginger Snap Crafts, Creations by Kara, Milk & Cuddles, Pincushion Creations, White Lights on Wednesdays, Home Decor & Organizing Link Party, Create with Joy, Crystal & Co, House of Hepworths, The Shabby Cottage, Somewhat Simple, Shabby Nest, Simple Humble Home, Joyful Stamper, Twigg Studios, Ninth Street Notions.



They look amazing, I love the colour you chose! I’ve made some myself a while back in yellow tones, cause it goes with the rest of my kitchen, but I love these even more! What a cute Mother’s Day gift idea! Please come over and share this at our very first “Sweet Inspiration” Link Party!!
I’m so glad you’re a fan! Ours is still hanging in our home all these years later…and it still brings me great joy. So glad you made one to suit your home and color palette!
in love with this! i have made similar with just wording, but that bird graphic makes it so much better. definitely going to try it out 🙂
Hi! Love your blog, and love this project! Also one of my favorite hymns, and I’m humming it now at my desk at work! 🙂
PS. I’m from florida too! I always love seeing bloggers that are from my home state!
Jamie, thanks for the all the love! Yes, that hymn is so hum-able…and such a good reminder whenever I go into that bathroom! And I’m delighted to connect with another Floridian. After a year here, Florida is starting to feel more and more like home. Great to “meet” you!
I love this idea! Canvas art is something I have gotten into recently. I am definitely going to have to try this!
Thanks for sharing 😀
Keia
It’s addicting, isn’t it? I just keep “acquiring” canvases because I figure I’ll find a way to use them all eventually. Glad you enjoyed the tutorial! Have a great weekend, Keia.
Gorgeous! Love the little birdie! Now I’m just going to let that amazing song play in the background while I play around on the computer. 🙂
Isn’t it the best? I did the same tonight! Must have clicked repeat on that song 7 times. #itiswellwithoursouls
LOVE LOVE LOVE this! What a great idea!
Thanks, Jen! Can’t wait to see yours when you make it.
Thanks for linking up to the pinterest challenge! You are one of our features for October! Don’t forget to head over to the Pinterest Challenge blog and get your featured button!
Whoo hoo! So honored to be among such grand company. Thank you so much!
For anyone who wants to see: http://www.pinterestchallenge.com/2012/10/round-13-winner-and-features.html
beautiful canvas Lauren & such a lovely sentiment/hymn! I’m SO going to try this!!
I’ll be featuring you this week @ Inspire Me Fridays!
Many thanks, Maria. I’d love to see your canvas if you try it!
You’ve been featured! Thanks so much for sharing at Wednesday Whatsits! http://www.whitelightsonwednesday.com/2012/10/wednesday-whatsits-28.html
Thanks for the feature and pin! I’m so excited!
Thanks for a great tutorial and the inspirational song. It is well with my soul is my favorite too! Beautiful.
You’re welcome! Thanks for stopping by. I never tire of hearing that hymn. So rich!
I shared your project over on my facebook page…. Thanks for linking up at Frugal Friday.
Awesome! Thank you so much.
So lovely and peaceful! You are really making your house a home!! The quote and bird are just so calming!!
I guess this is what they call “nesting”…pun intended! Can’t wait for you and Dad to visit our nest in October.
Can’t wait either!! It’s fun to have this “sneak peak”!
Wow, that looks so classic and elegant. I actually thought it was embossed at first! I can’t wait to try this out, and I’m so glad I found you on Ginger Snap Crafts. Have a great week!
Debbie
I appreciate the kind words, Debbie! This was sort of my first big “link up” project…glad to join the party and encounter so many great bloggers like yourself. I read your post on finding time to read through audio books. I used to have a half hour commute to school and would use that time to soak up books as well as podcasts. And my new nook enticed me to take more time to read this summer (i.e. “The Hunger Games”). Hope you have a great week, as well!
This is lovely! I love the white on white.
Many thanks, Bonny. That’s what really drew me to it in the first place. Shadows bring it all to life.
I absolutely LOVE this!
Thanks, Kimberly. I stopped by your blog and loved your pallet wood sign along with your story of a year of blogging. I’m inspired!
WOW this is gorgeous! I have the perfect spot for it and you can’t beat the price! I just posted on FB and am pinning! Thanks for linking up
Of course! Thank YOU for the fb and Pinterest love! I’m honored.
What a cool project. I love the very elegant looking results!
Thanks! I appreciate you stopping by!
This is great! I’m looking for ideas for a big blank spot in our dining nook… inspiring! The quote is great too!
Oooo…one would love lovely in a dining nook. Do let me know if you make your own. I’d love to see pics!
Lauren,
This is beautiful! I love your choice of quote. It is indeed well with my soul. Thanks for stopping my @ my blog.
Thanks so much, Adwoa! I appreciate your feedback and visit to my blog. 😉
Can you come to my home and make this for me? 🙂
I would love to! P.S. Mark and I were recently talking about how fun it would be to plan a Cali trip in the not too distant future. Yay!