
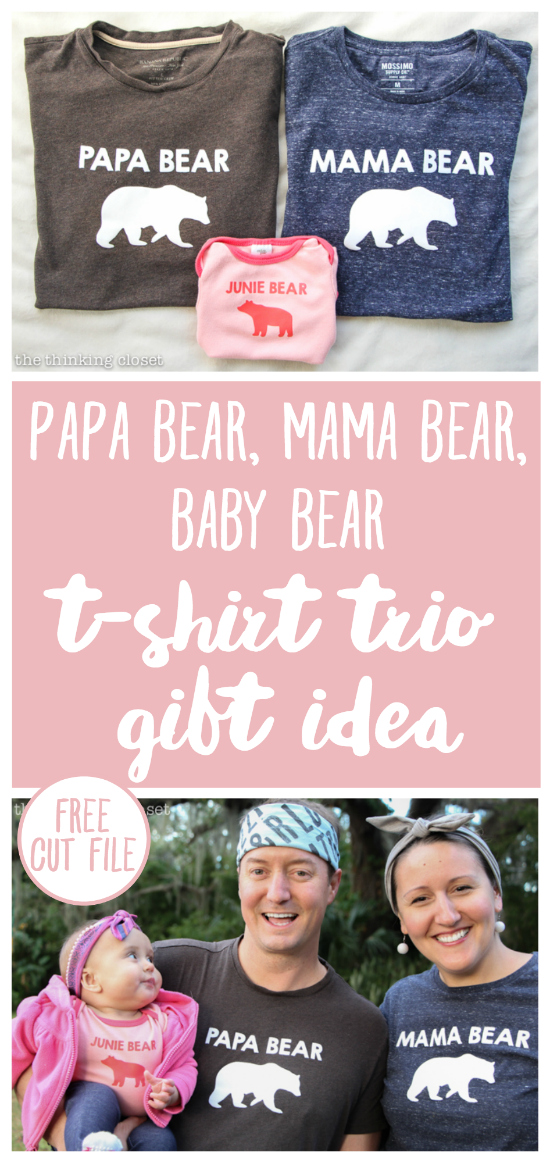
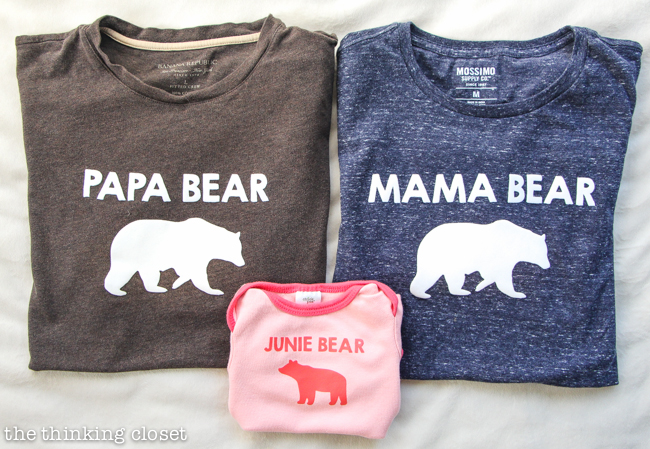
Papa Bear, Mama Bear, Baby Bear T-Shirt Trio Gift & Silhouette Giveaway!
Once upon a time, there was a gal with a great love of heartmade gifts. Soooo great that she sometimes gifted coupons for projects she would complete at a later date. And sometimes that later date would grow and grow up to a year.
And yes, the reason I know this tale so well is because it is my own!
That’s right: last Christmas, I wanted to gift Mark a t-shirt celebrating his new status as Daddy-o, so I gave him a few options he could choose from…and a Papa Bear, Mama Bear, Baby Bear trio won his heart. (And just so happened to be my favorite in the mix, too, whadyaknow?).
It only took me a year to execute, but at long last, I have brought this gift idea into reality!
Though I’m tempted to hang my head in shame about how long this took me, in another way, I’m glad it played out the way it did. Because if I had created these shirts before Juniper’s arrival as I had initially intended, then I wouldn’t have come up with the personalized “Junie Bear” design for her onesie. It’s one of our favorite nicknames for her!
(As if I needed any more encouragement to be a procrastinator….)
But dear reader, you need not wait a year to turn this nifty gift idea into reality. Nope! Because I’ve included the FREE cut file for this design (with the “baby bear” option), so you can warm up that *Silhouette of yours and churn out a super duper gift for that family of three in your life. (Perhaps even your own!)
Oh, and the best part? Stick with me to the end of this post because you have the chance to enter a giveaway to win a Silhouette Cameo 3 (plus a bundle of extras!) so you can make custom t-shirts and onesies all the live-long day. The second prize ain’t too shabby either. And you’ll also find a slew of other holiday projects to inspire your creating this season thanks to my fellow Silhouette Challenge buddies. This will be your one-stop shop for inspiration.
Hold onto your Santa hats!
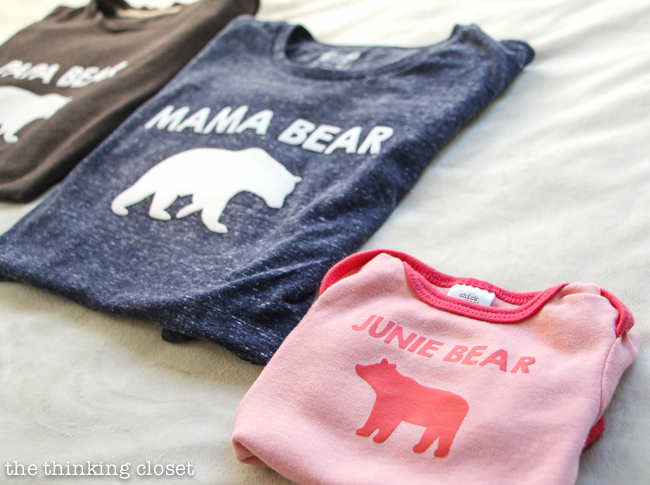
Papa Bear, Mama Bear, Baby Bear T-Shirt Trio
Design Inspiration
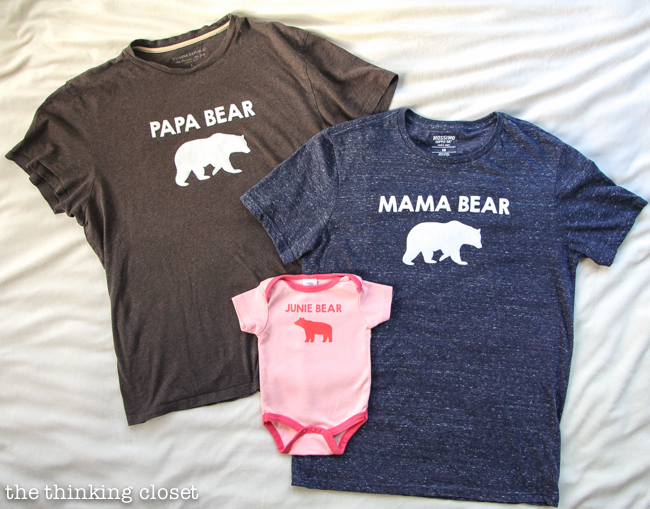
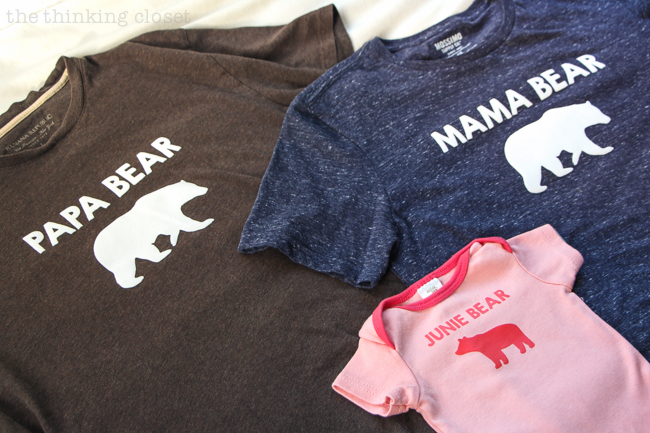
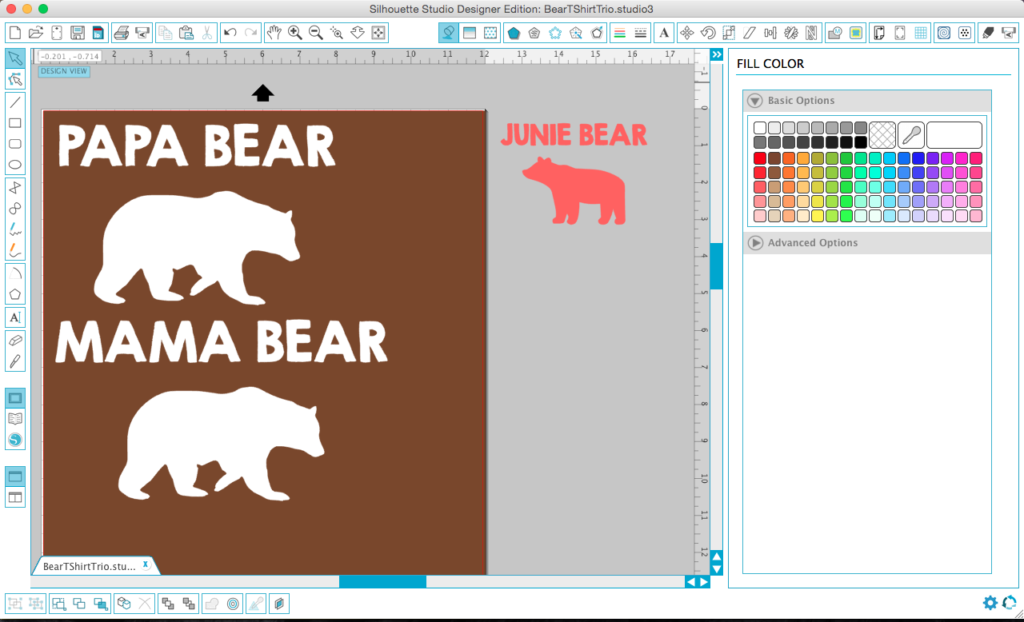
For this design, I downloaded some free clip art files for the adult bears and that precious lil’ bear cub. I knew I wanted the text to be big and bold, so I opted to use all caps. And with the help of my favorite wordmark.it font preview and Mark’s expert opinion, I narrowed the font selections down to KG Second Chances Solid. I love the subtle handmade quality it possesses.
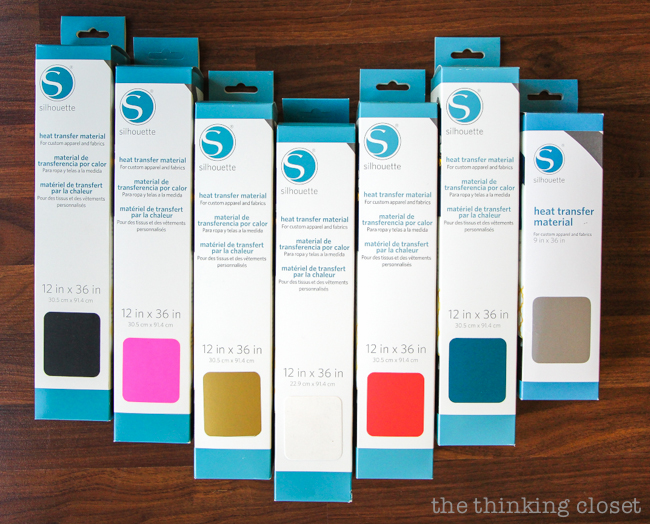
For HTV (heat transfer vinyl), I chose white flocked heat transfer vinyl to give it a fuzzy-wuzzy-wuz-a-bear type texture on Mark and my shirts. And for Junie’s, smooth salmon HTV fit the bill.
TIP: I often preview my design in the colors in which it will appear on my apparel…just to help me get a sense for the final look.
Tips for Working with HTV
I’ve gone through detailed step by step tutorials for working with heat transfer vinyl (HTV) a few times before (here & here), so I’ll just share some quick tips n’ tricks here:
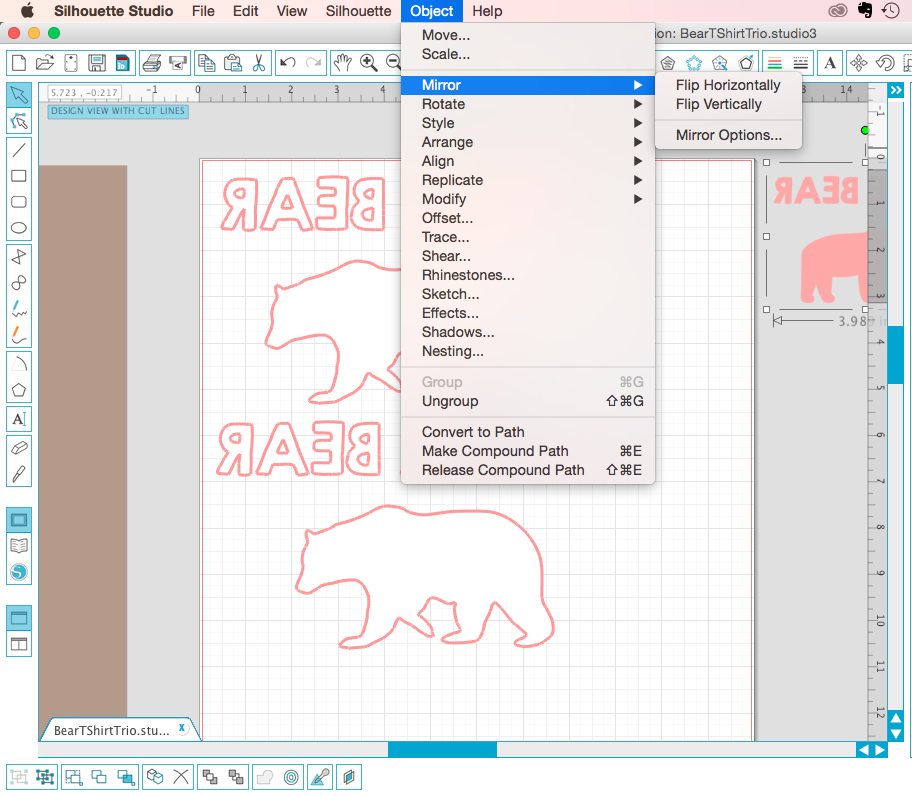
- Do NOT forget to flip your design horizontally before cutting. It should look like the mirror image. No one wants to waste perfectly good HTV.
- Feed your HTV into the machine (or stick it to the mat) shiny side DOWN. The shiny side is actually a plastic film that will peel away after ironing. You don’t want to cut through that!
- If you’re working with flocked HTV, rather than working from the roll, I recommend cutting it down to size and using painter’s tape to secure it to the mat. I attempted to cut it on the roll and because of the curled end, it caused problems during the cutting process. Learn from my mistakes, friends!

- Always-always-always do a test cut before sending your design to your machine. If only I had heeded my own advice in the past, I would have saved myself from ruining some perfectly good HTV. When you run a few test cuts, you can determine if your blade needs to be higher or perhaps lower with a double-cut (in the past, the recommended setting of a 2 is sometimes too sharp with a brand new blade). You don’t want to cut through the entire sheet. But instead, aim for that “kiss cut” that cleanly cuts through the HTV only.

- Use a hook tool to peel away the negative space of your design.


- Pre-warm your pre-washed onesie with a dry iron before placing your HTV pieces on it.
- I like to use a ruler to make sure my design is properly centered.

- Place a thin cotton cloth or piece of parchment paper in between your iron and the onesie.

- Apply good solid PRESSURE when pressing your garment with your iron, approximately 20 seconds per section.
- The plastic film should peel away with ease when the HTV is properly applied. If not, allow it to cool 30 seconds and re-press.

- Be sure to turn your garment inside out and press the back-side, as well.
- Washing instructions: low heat, inside out. And if for some reason your HTV starts to peel up, you can always iron it back down again! However, it should not peel up if you’ve applied good solid pressure in the first place.
Phew! That list was pretty much a tutorial, but I never want to leave y’all in the lurch. Let me know if you have any HTV questions in the comments below. And don’t be too intimidated. It’s a really fun medium to work with…especially when it comes to matchy matchy family shirts.
Free Cut File
I’m offering all three designs (including the more relevant “baby bear” design) fo’ FREE download to my lovely newsletter subscribers. Just sign up using the form below or by clicking HERE, and you’ll receive access to the .studio3 Silhouette cut file. {Fine print: These designs are for personal use and not to be used for commercial purposes.}
And happy gifting!
T-Shirts In Action
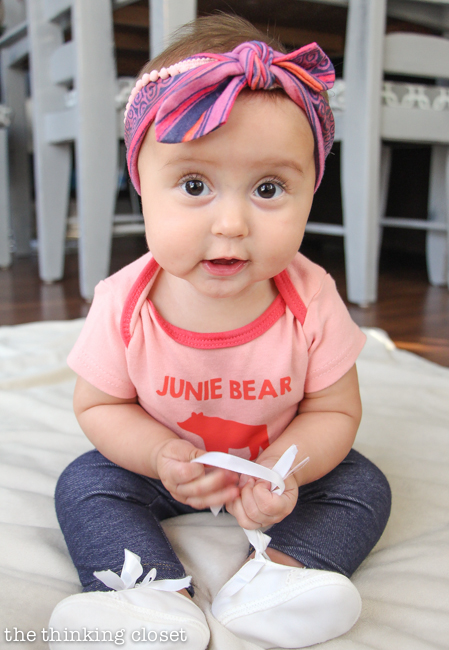
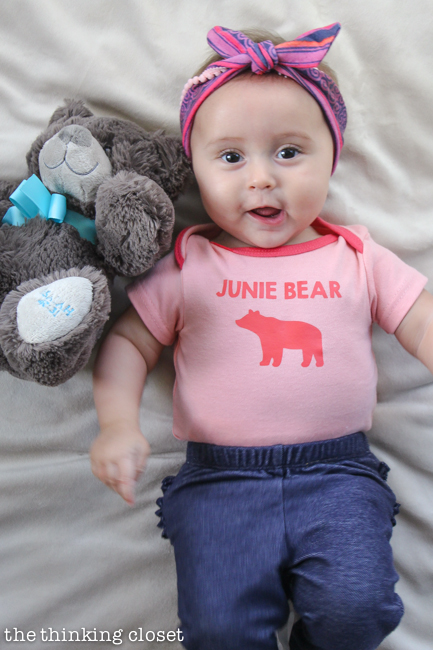
Here’s our Juniper modeling her new made-just-for-her onesie!
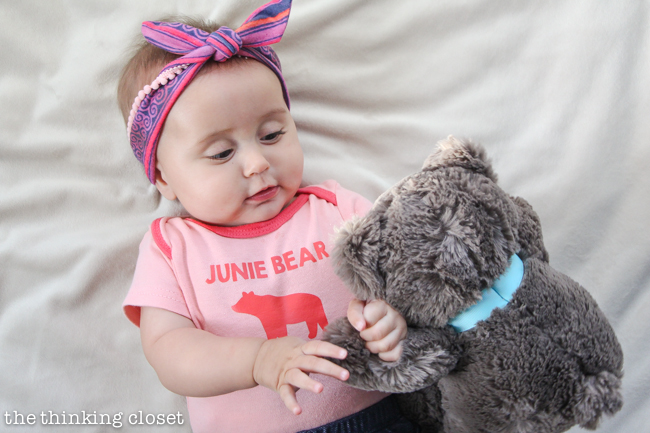
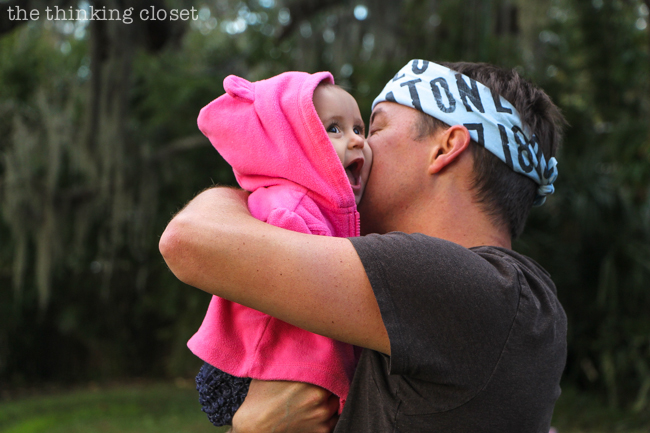
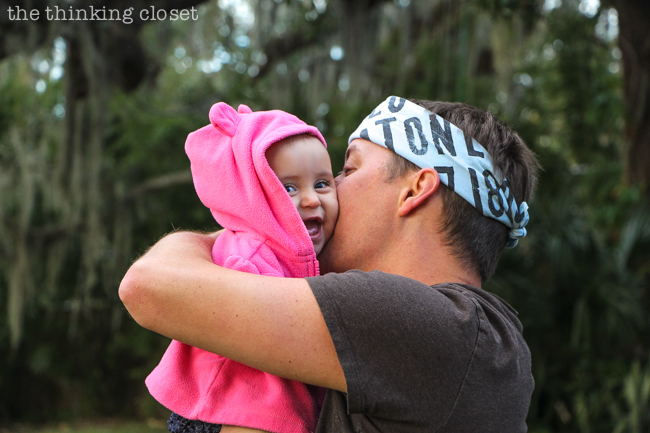
Just a coupla’ bear cubs.
And because I can’t resist an opportunity for a family photo shoot, here are a few more we snapped in the backyard, all dressed up in our matching bear tees.
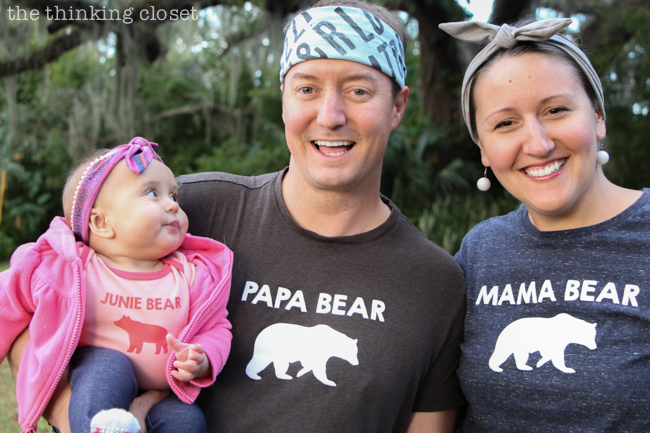
Love the way she looks at her Daddy! They share a special bond, those two.
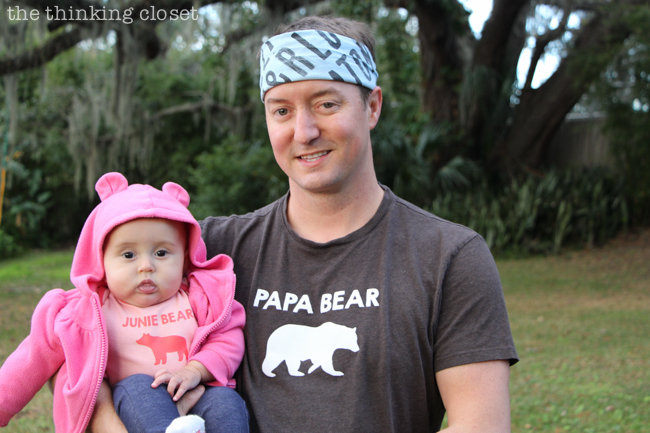
Oh yes, and Juniper wore her bear cub hoodie, as well, because it was just too perfect not to.
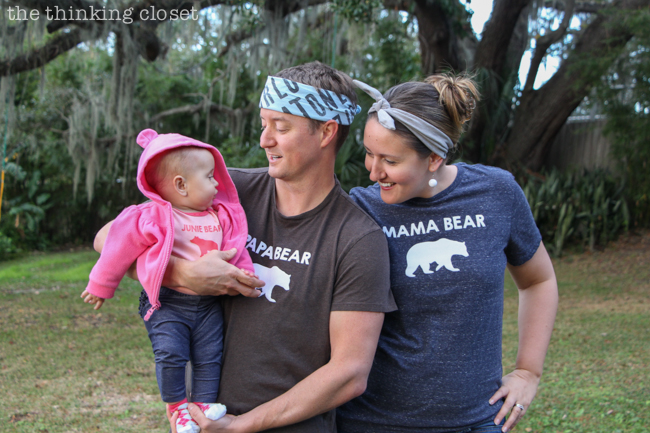
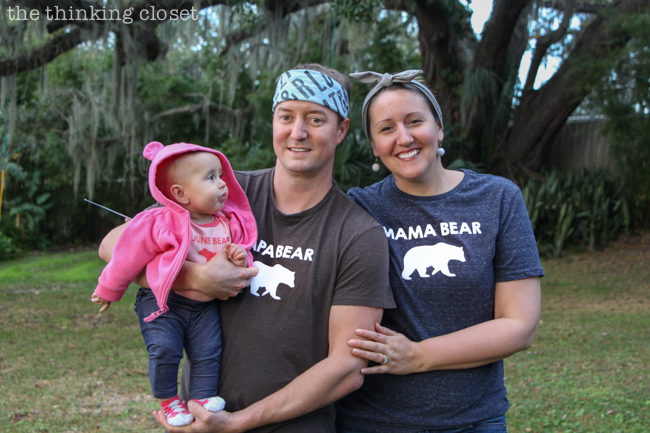
This next one is one of my favorites in part because we’re each looking at someone else!
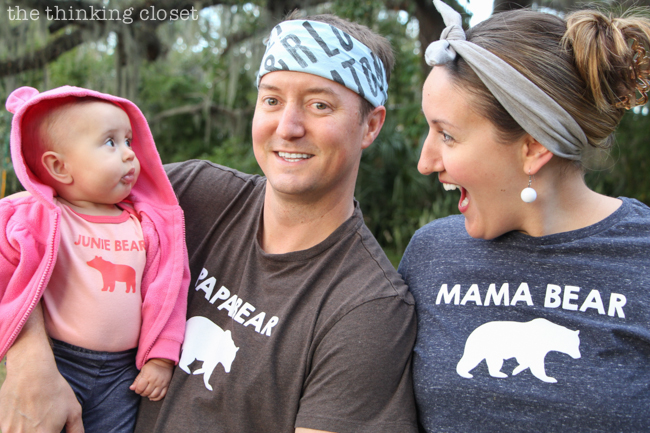
Merry Christmas 2015, Mark! Hey, better late than neva’, right?
And if you’re curious about Mark’s headband…that was another one of my custom gifts for him! It’s actually a stamped word search scarf! Here’s the video tutorial for that gem.
Want to Check Out More Silhouette Projects?
My Silhouette Challenge buddies and I are all sharing projects on our blogs today, so peruse the projects below for a wealth of Silhouette inspiration!

1. Small Stuff Counts // 2. My Paper Craze // 3. HaberdasheryFun // 4. Create & Babble // 5. Creative Ramblings // 6. Cutesy Crafts // 7. GiveMeAPaintbrush // 8. Architecture of a Mom // 9. The Crafting Nook // 10. Get Silvered // 11. Where The Smiles Have Been // 12. Curly Crafty Mom // 13. unOriginal Mom // 14. Ginger Snap Crafts // 15. Practically Functional // 16. Sisters, What! // 17. The Thinking Closet // 18. Dream a Little Bigger
Silhouette Giveaway
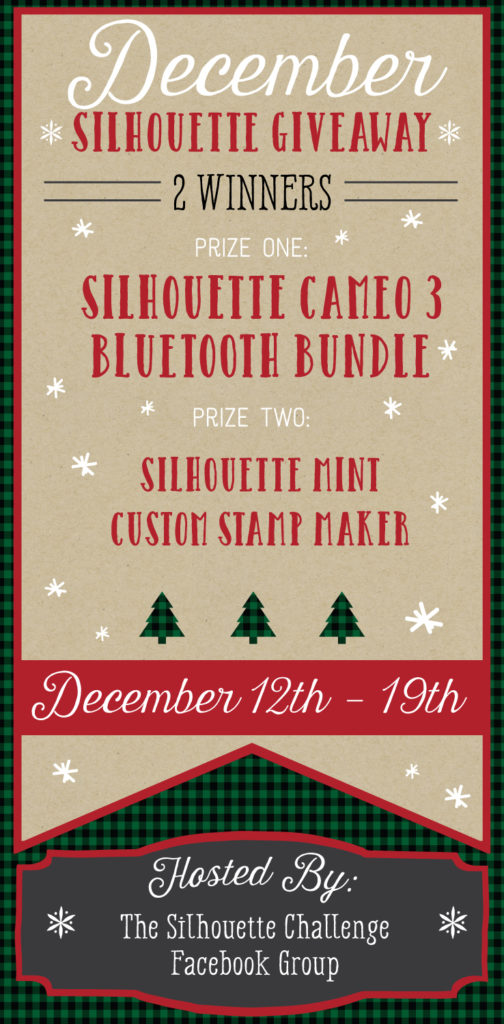
And I’ve saved the best for last. My Silhouette Challenge buddies and I in partnership with Silhouette America are hosting a mega-huge giveaway for TWO lucky winners! The prizes up for grabs?
- First prize: Silhouette Cameo 3 Bluetooth Machine Bundle. $250.00 value.
- Second prize: Silhouette Mint Custom Stamp Maker. $129.99 value.
Sweet, huh?
To enter: just complete the entries in the Rafflecopter widget below. Because of my many blog friends who helped make this giveaway possible, you have 33 potential entries, which means a lot of winning power. So, hurry up and enter!
{This giveaway runs from today through Monday, December 19th at 11:59 p.m. eastern and is open to anyone 18 years of age or older with a U.S. or Canada mailing address. You can read the rest of the terms and conditions in the widget below.}
*Full Disclosure: This post contains affiliate links, meaning that if you make a purchase after clicking through, The Thinking Closet may receive a small commission at no extra cost to you. Thanks for helping to support this site!
![]()
junie bear is the cutest. Loved the tutorial and its so easily explained with details anyone can make it reading it 🙂
Thanks for sharing 🙂
Have a great day:)
Aw, you are too kind! Thanks for the comment-love. I’m so glad to hear you enjoyed the tutorial, Richa!
So cute, such a beautiful family!
Thanks for your kind comment, Carol!
So cute!!! I’m thinking I might need to try a little project like this for our little family. Raj would love it too. And those pics of Junie and Mark are just so lovely! I can’t help but smile at her sweet face!
You are unstoppable with that Silhouette machine of yours! Love that we get to inspire each other’s creations…. Thanks for this sweet comment both back in December when I first read it…and again now when I decided to stay up past my bedtime catching up on comments. It brought me two different floods of joy and I am grateful! Love you.
These are adorable shirts.
Thanks so much for saying so, Vanessa!
I love that salsa tee. I am 2 months from having my very own bundle of joy so I will like to try making my own, lovely family and cute Tees. Thanks for the chance, Happy Holiday shout out from Canada.
Aw, thanks, Camasha! And I just realized, your bundle of joy is now in your arms. Congrats to you all the way in Canada!
Eek! I cannot even handle how stinkin’ cute your little Junie Bear is, and these shirts are adorable!
Stop it with that sweetness of yours! (Then again, don’t stop. ha ha.) Hugs to you, friend!
Ahhh, SO dang cute. I love the Junie bear tee the most 🙂 Your family pic is just perfect, love the headbands you and your husband are wearing, too!
Carrie
curlycraftymom.com
Tee hee. Thanks, Carrie! Yes, we sure are a headband-loving family!
I love the T-shirts, so adorable!! Beautiful family*
Aw, thanks, Carisha! You made me smile so wide!
Kudos for following through and finishing this most adorable project. As the queen of unfinished projects I’m encouraged whenever I or anyone finishes a promise even if it takes a long time! Great tutorial and precious photos!
Thanks mama! I still have many an unfinished project on my list, but it does feel so rewarding to knock one out. And now I realize that when you wrote this comment, you were finishing a project over 30 years in the making…my quilt! Well worth the wait!
Oh Lauren, that first picture of sweet Junie Bear is soooooo adorable!
Thanks so much, Maggie-dear. That’s one of my favorite captures ever!
Too precious! Of course, the tees and onesie are super cute but not nearly as adorable as the family in them 😉 And see, procrastination sometimes pays off! #procrastinatorsunite
You always know how to make me smile. Thanks so much, Meredith! Yes, #procrastinatorsunite #tomorrow.
love your ideas!
Thanks so much, Maria! You are kind!
Love it! What a gorgeous family you are. The T Shirts are just brilliant.
That means a lot coming from you, Pam. Many thanks, friend!
So cute!
Appreciate it, Madelyn!
Hello from the challenge.. Cute cute cute.. Your husband is such a fun model and your babe is adorable 🙂 Have a great week – Marni
Ha ha. He puts up with me and my crazy photo shoot antics…he’s a keeper! Thanks for the warm words. Hope your 2017 has been fantastic thus far, Marni!
Nailed it again, Lauren (as always!). Thanks for the great project inspiration!
I think the same thing about YOU every time I see one of your creations. Thanks, Becky!
Love Junie Bear! Love your family shirts! And the Salsa one too…lots to love about visiting your page as always!
Aw. I FEEL that love, Bev. Thanks for always being such a light in blogland.
Adorable family! 🙂
Thanks, Ginger! I think of you every time Junie rocks her #LittleBlogger onesie!