
My Haven Business Card SWAG: Temporary Tattoos!

G’day mates! Just got back from my sophomore year at Haven Blog Conference in Atlanta, and boy did I have fun! The kind of fun that plum tuckered me out (I actually went to bed last night before the sun went down, which is a rarity for this night owl). Looking forward to sharing a recap of my experience later in the week {UPDATE: it’s HERE!}…but you’re going to get a sneak peek at my business cards TO-DAY!
Actually, my business cards themselves are the same as last year because I ordered a ba-gillion of them. Remember my MOO cards, the back of which were a variety of options?

Well, since I’m incapable of doing the same exact thing twice, I decided to spice them up a bit by including a little bit of SWAG this time around.
Let’s pause for a quick spell to define the word SWAG.
S.W.A.G. = “stuff we all get” (for free at conferences and such!)
So, what was the SWAG I gave out at Haven this year?
Temporary tattoos! Who doesn’t like a temporary tattoo? Especially when it speaks to one’s affinity for all things crafty and D.I.Y. Here were the three designs I came up with for my temporary tattoos:

And here’s how I made them….
{Note: you do not need a Silhouette machine to make these. Yes, it will make it easier, but it’s totally do-able with a pair of scissors. I promise! It’s one of my favorite Silhouette supplies for that very reason. So, stay with me.}
D.I.Y. Temporary Tattoos Tutorial
Step 1. Get your hands on some of Silhouette America’s Printable Temporary Tattoo paper. You can buy it in their *online shop, on Amazon, or sometimes, at your local craft store (our JoAnn’s has some in stock right now). You get 2 sheets’ worth of materials in one pack: 2 printable tattoo sheets (white) and 2 adhesive sheets (green).

Step 2. Create your tattoo designs! If you are going the non-Silhouette-machine route, you can create them in any design software – – you can even copy and paste free clip art into Microsoft Word! It’s that easy.
For Silhouette users, you’ll open up Silhouette Studio and set your paper size to 8.5″ x 11″ in the Page Tools Window and select “show registration marks” in the Registration Marks window. The registration marks let your machine know where your images are; that way, it cuts exactly where you want it to. Registration marks are necessary for any print-and-cut project. You’ll want to make sure your tattoos are inside those marks and aren’t touching any of the gray hashmarks.

In general, I tried to make my designs no bigger than 2″ so they could be easily worn on hands. Although, if you re-sized them, they’d be great for t-shirts or crafty tote bags, doncha think?
I also used the offset tool to create cut lines just a smidgen outside the design. It’s really important to mirror the image, so they look backwards when you print. Just select all of the shapes, go to Object, Transform, Flip Horizontally.
Free Cut Files
If you’d like to download any or all of the three tattoo designs I created, well then, you can! I’m sharing them with y’all fo’ free, along with the cut file for the arrow stickers I made for the envelopes with the instructions for how to apply the tattoos (more on those later on).
You can sign up to download your free cut files using the nifty form below or by clicking HERE. {Fine print: these designs are for personal use only and are not to be used for commercial purposes. Thanks!}

Step 3. Print your designs on the Tattoo Paper. I recommend using your printer’s photo printing settings, so it prints at the highest quality it can. We have a regular inkjet printer, nothing fancy, and it printed really well! Just make sure your color ink cartridges are full, load your white printable tattoo sheet so it prints on the glossy side, and hit “print.”


Step 4. Apply the adhesive to your tattoo paper. After your printed paper has dried, next, it’s time to apply an adhesive sheet over top of it. I learned from my very first temporary tattoo project that this step can be tricky, so I made sure to work slowly on this step. You’ll see there’s a strip of the green backing that you can remove so it’s easier to line up the adhesive on the tattoo paper.

Then, I just used my scraper tool to gently push that adhesive down as the green backing slowly peeled off. (You can also use a credit card.)
And it’s not the end of the world if you end up with creases here and there. Eventually, this layer gets peeled off and the adhesive remains behind on the design, so as long as you smooth out the creases as much as possible, you’re good to go!

Step 5. Cut out your tattoos. Go back into Silhouette Studio, open up the Cut Style window (the little scissors), and select “No Cut” to everything except the outer outline of the tattoo (which you DO want cut). Everything left in bright red will be cut by your machine.

Although my machine’s recommended cut settings for each material are usually on point, I always run a test cut. I’ve ruined too many materials not to at this point. And when you only have 2 sheets worth of tattoo paper in one pack, you can’t afford to waste any.
I found that instead of the recommended blade of 4, I needed a blade of 5. So once again, the test cut saved me!

I also keep a flashlight nearby to shine onto my machine while it is reading the registration marks. This helps ensure accurate cutting!

Remember, if you don’t have a Silhouette, you can still use this paper! You’ll just be cutting out the shapes out by hand, but since the shapes work best with a margin anyway, it’s mega-easy.
Step 6. Pop out your cut tattoo designs. No hook tool needed for this part! Since the designs are double-cut, they popped out of the tattoo paper with ease.

And that’s a wrap for the temporary tattoo tutorial. However, I went a few steps further to include these inside an envelope with my business cards.
Step 7. Create a set of instruction stickers. I whipped up a design for some instruction stickers in the shape of an arrow that would alert my biz card recipients to the tattoo treasure awaiting them inside the envelope. (You can use mine as a jumping off point for your own and download it with the other freebies listed above.) The fonts I used are KG Hard Candy in solid and Heiti SC, which came pre-loaded on my Mac (similar to Century Gothic).

I used the Printable Adhesive Kraft Paper to create my stickers (which you can find online in the Silhouette Shop and Amazon). I thought it would jump out more compared to clear or white stickers.


And here’s a quick visual of how to follow these step-by-step instructions:

Easy as pie!
Step 8. Assemble your business card envelopes. Then, I created a little assembly line station with my glassine envelopes ordered from Paper Source…

…three piles of tattoos, three types of washi tape, and instruction stickers. This is great to do while catching up episodes of Parks & Rec (for example…smile).

I decided to use a different type of washi tape for each tattoo so I could easily know which one to grab at Haven when handing them out.

And some of my fellow Haven Mavens even made special requests! Which warmed my heart because it meant they had seen my Instagram teaser:

So now, dear reader, you need to tell me: which of the three designs would you want to receive with one of my business cards?
1. Kill Them With Craftiness

2. I D.I.Y. What’s Your Superpower?

3. KEEP CALM & D.I.Y. ON

Want to Check Out More Silhouette Projects?
My Silhouette Challenge buddies and I are all sharing projects on our blogs today using some of our absolute favorite Silhouette supplies, so peruse the 31 projects below for a wealth of Silhouette inspiration!
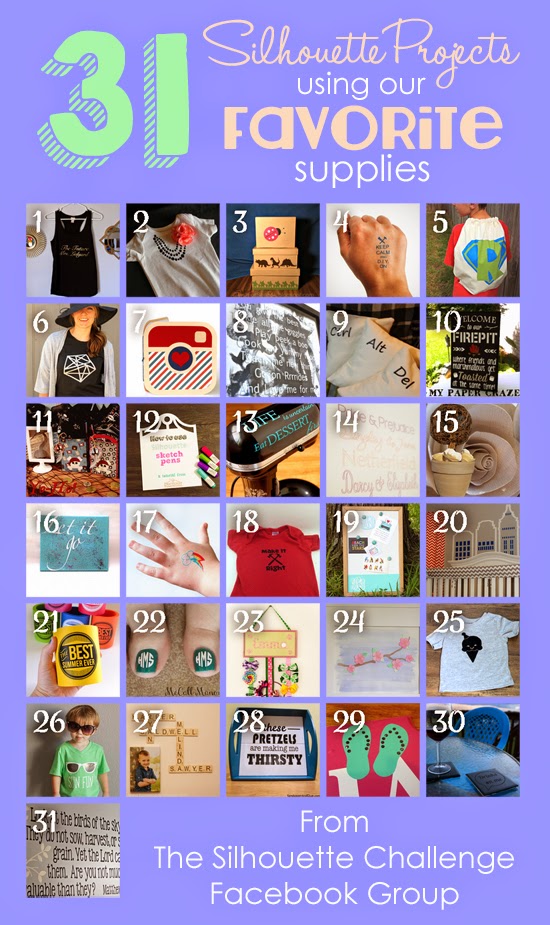
1. Just a Girl and Her Blog // 2. The Frill of Life // 3. A Time For Seasons // 4. The Thinking Closet // 5. Ginger Snap Crafts // 6. Grey Luster Girl // 7. Simply Kelly Designs // 8. Home At Eight // 9. Please Excuse My Craftermath… // 10. My Paper Craze // 11. Mama Sonshine // 12. Practically Functional // 13. Adventures in All Things Food // 14. Two Purple Couches // 15. Dragonfly & Lily Pads // 16. Sowdering About // 17. Cutesy Crafts // 18. My Mom Made That // 19. Pitter and Glink // 20. Pineapples And Pinecones // 21. Dream a Little Bigger // 22. McCall Manor // 23. TitiCrafty // 24. unOriginal Mom // 25. Persia Lou // 26. Lil Mrs Tori // 27. Home. Made. Interest. // 28. Sandpaper and Glue // 29. Silhouette School // 30. Creative Ramblings // 31. My Favorite Finds
P.S. Shout-out to Tori from Lil Mrs. Tori for inspiring the “Kill Them With Craftiness” phrase! So cleva’.
P.P.S. {Linking up here.}
*Full Disclosure: This post contains affiliate links, meaning that if you make a purchase after clicking through, I may receive a small commission at no extra cost to you. Thanks for helping to support this site!
![]()
Oh, the killer one, of course!! I’ve craving one right now!!
And Periscope sounds incredible! But I don’t do videos on my phone, so…. 🙁
I love that these can be made at home. So cool. I really need to get a new printer now.
Stopping by from Inspire Me Please link party. I can’t wait to try making removable tattoos. Pinning!
Love it Lauren!!!!
This is sooo clever, Lauren! I bet you had people seeking you out at Haven just to get one of your business cards.
These are so cool! I still love all the “Keep Calm And …” things, although I may be late with this. But still, I think they’re fun! And so is your tattoo design! 🙂
It’s wonderful idea to make something different! It’s temporary and nice. Good idea! Eliza
These are seriously awesome Lauren!! I loved mine… and pinned this – I think this would be such a fabulous bday party giveaway too!!
Lauren you are amazing! I have loved following your website over the past year or so and you are just blooming into this awesome blogger! Very inspiring… 🙂 Keep up the good work!
ANAZING IDEA! Love them so much!
These are so much fun! I love how you presented it all in the envelopes and even included instructions. Amazing 🙂
The tattoo paper is one of my favorite mediums. I so wish I could have gone to Haven this year, especially since I just moved 30 mins south of ATL. Maybe next year and I can finally meet all you awesome crafters! Love the glue gun tattoo, so creative!
Very cool Lauren! They’re all so fun!
I am so mad that 1. I didn’t get to spend more time with you and 2. I didn’t get one of these stellar tattoos! These are awesome, Lauren!
Lauren,
Yo are one creative lady with plenty of SWAG! The Tattoos are a terrific way to give your cards out and be remembered. I do find it hard to believe someone might forget, that contagious smile, zest for life, and that happy aura encircling you. I am so glad you had a good time at Haven. I was pleading for a Head shot on a paint stick, with Pretty Handy Girl. I was at a family wedding, this was to be my rookie year. I look forward to having you show me around your junior year.
XOXO,
Karen Marie
Dragonfly Lily Pads
You sure know how to win a blogger over…I mean free goodies and everything! Still have mine…will have to put that bad boy on and instagram it. SO lovely meeting you for real sweet friend!!
You know I LOVE this!!! I have to say-I was hoping for a song this time around, too. You know, like from the Sound of Music LOL! These would be PERFECT for party favors, too. LOVE!
I am still in love with this idea – I bet they were a HUGE hit at the conference! But even better, I love all three of your designs…I don’t think I’d be able to choose which one I wanted! The instruction stickers turned out fabulously. I have got to try this printable tattoo paper!
Lauren, you thought of every detail……My favorite is Keep Calm and DIY On!!
These are SO cute and appropriate for a DIY bloggers conference! I especially like Keep Calm and DIY On but I would enjoy wearing all of them. So glad you had a great time and could add to everyone’s SWAG!
Lauren, Man are these the cutest tats ever! So creative and soooo happy I was able to get one at Haven. Great to see you!
These may be my favorite swag of the weekend! So clever, and of course, perfect for all the Mavens and diyers out there!
Thanks for including me in your post my dear! My tat is still holding on, though a little worse for wear… probably due to all the dancing I did at the Ryobi party! haha!
It never occurred to me that temporary tattoos could be made at home! A great tutorial, thanks for sharing
How is it possible I missed these! Too much talking on the Florida caravan 🙂 I’m definitely taking the “Kill them with Craftiness” tattoo. So nice to meet you in person and to be able to share such an awesome experience with you this weekend. Hugs!
So stinking cute and clever! I am sad that I wasn’t able to get to Haven this year, but there is always next year!!!
Looove these and I bet Emma would love it too!… Geez when I finally order something then there is something new to try LOL. hahaha the hot glue gun is too much!
XOXO
LOVE these! My favorite is the glue gun. 🙂
How stinking cool are these!?!?!