Rhinestone Onesie Tutorial: Part 2
Good mornin’, lovelies!
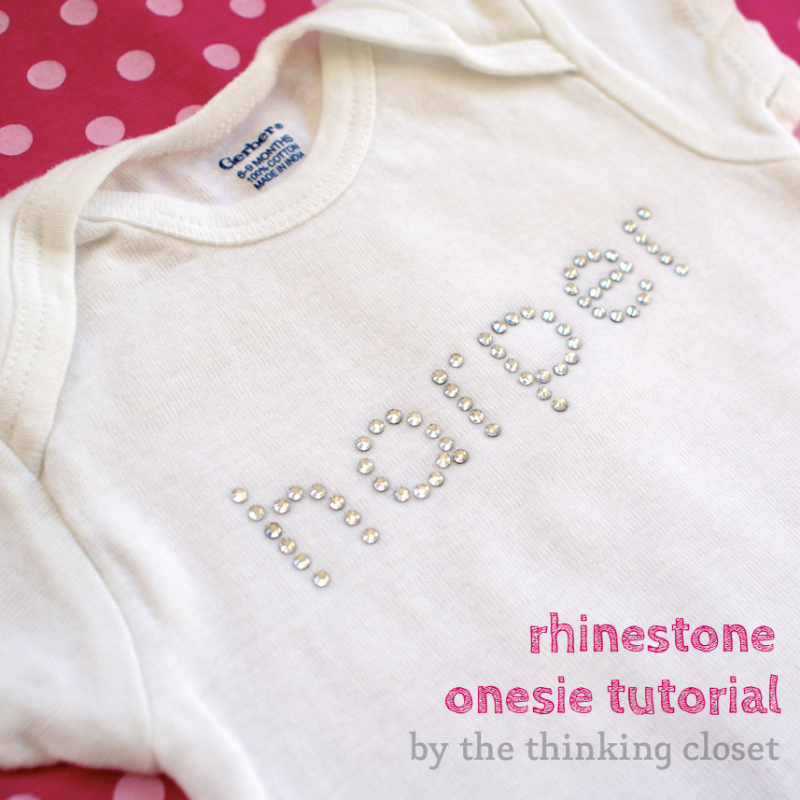
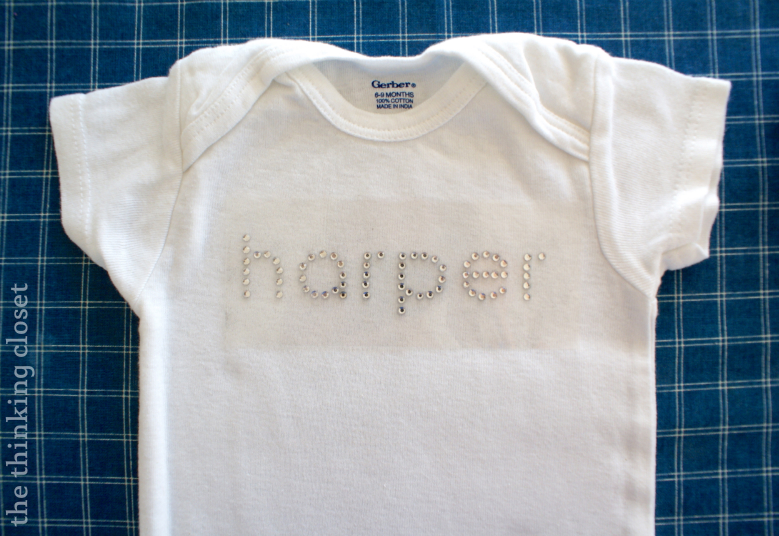
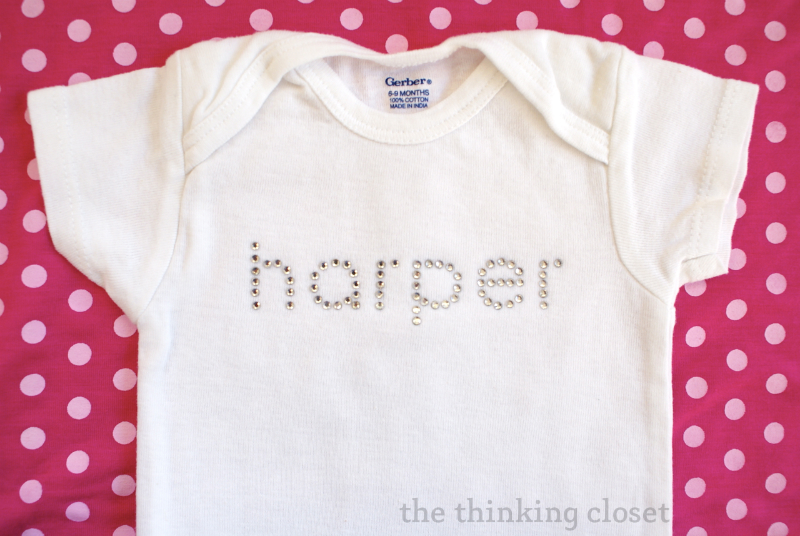
Last week, I shared a tutorial for how to create a custom rhinestone name design using the Silhouette Studio Designer Edition software. As promised, I’m back today to show you my completed onesie along with a tutorial for how to use the Rhinestone Template Kit to apply the rhinestones. But don’t worry, I won’t make you wait until the end to see a photo of the blinged-out onesie. Here she is in all of her glitzy glam glory:
I have at least five friends who are pregnant right now, and at this rate, there are bound to be more, so I figured I’d buy a bunch of onesies to have on hand for making personalized gifts for expectant couples. Now that I have the Designer Edition of the Silhouette Studio software, it’s just so darn easy whip out a rhinestone design as a cute little embellishment. Today, I’ll show you how I completed the rhinestone onesie project I started last week for our friends who have already named their baby girl Harper. She is due to arrive in a few weeks!
(If you missed Part 1 of this tutorial and would like to see how to create your own custom rhinestone name design in the Designer Edition software, click here.)
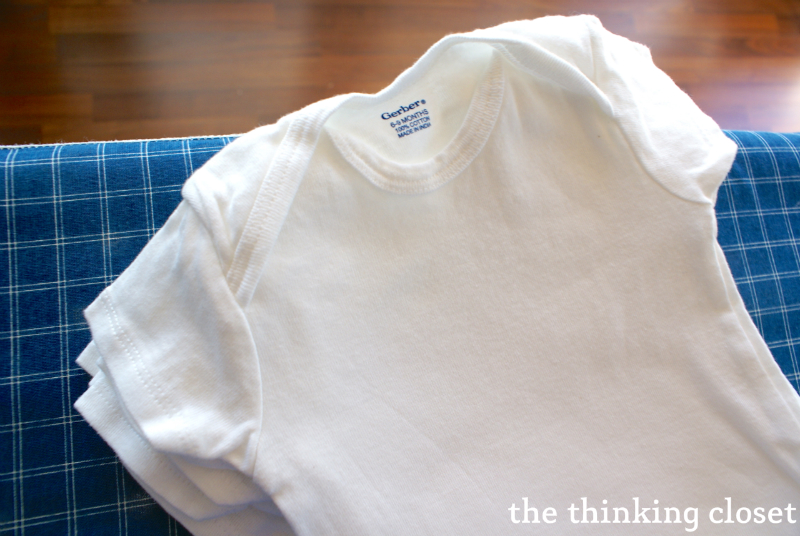
First things first, I bought two 5-packs of onesies for $9.99 each at Target, size 6-9 months. I washed, dried, and pressed them.
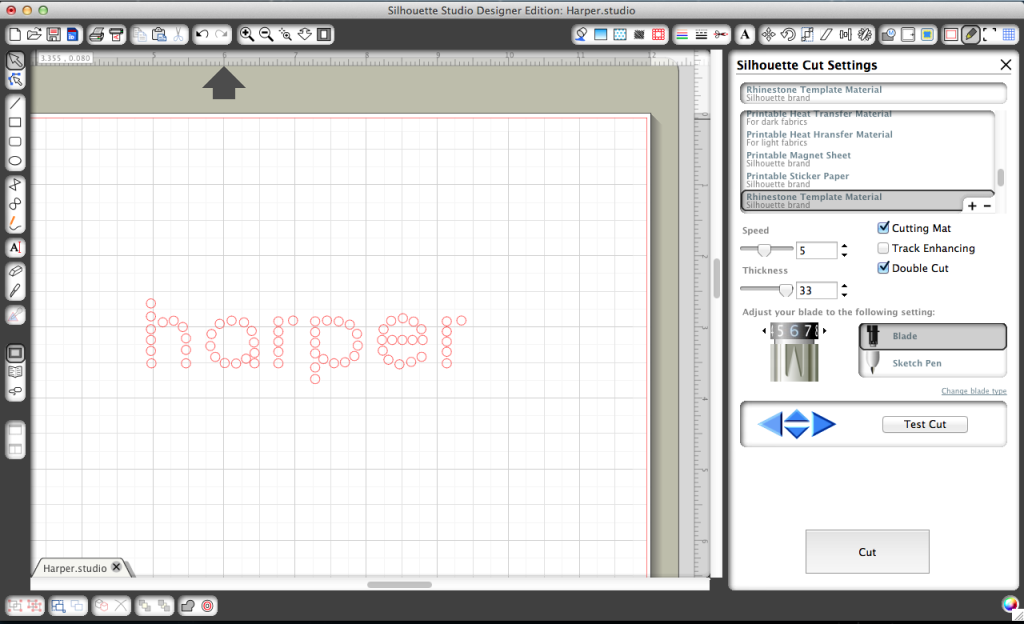
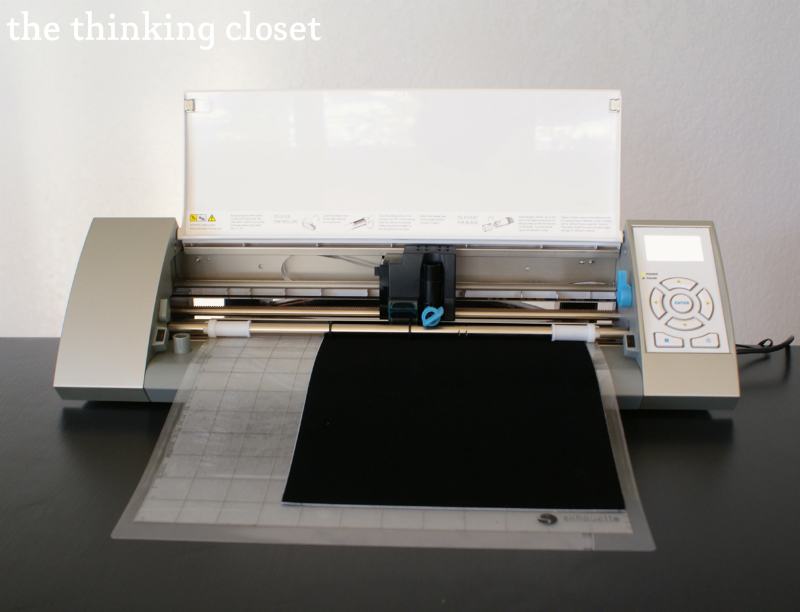
Next, I cut my custom design of Harper’s name. Here’s a screenshot of the cut-setting. I didn’t change a thing; this is what automatically pops up when you select “Rhinestone Template Material.” You’ll want to set your blade to 6 and do a double-cut.
If you’ve purchased Silhouette’s Rhinestone Template Kit, it comes with a great photo guide for how to take it from here. But I’ll show you my version to satiate the curious…and demonstrate just how fun this portion is.
How to Use your Rhinestone Template Kit
1. First, place your template material (the black fuzzy sheet) onto your cutting mat, and feed it into your machine. Double-cut. Don’t worry if it doesn’t look like anything cut at first. It can be hard to see the cuts through the fuzzy material. They should be there!
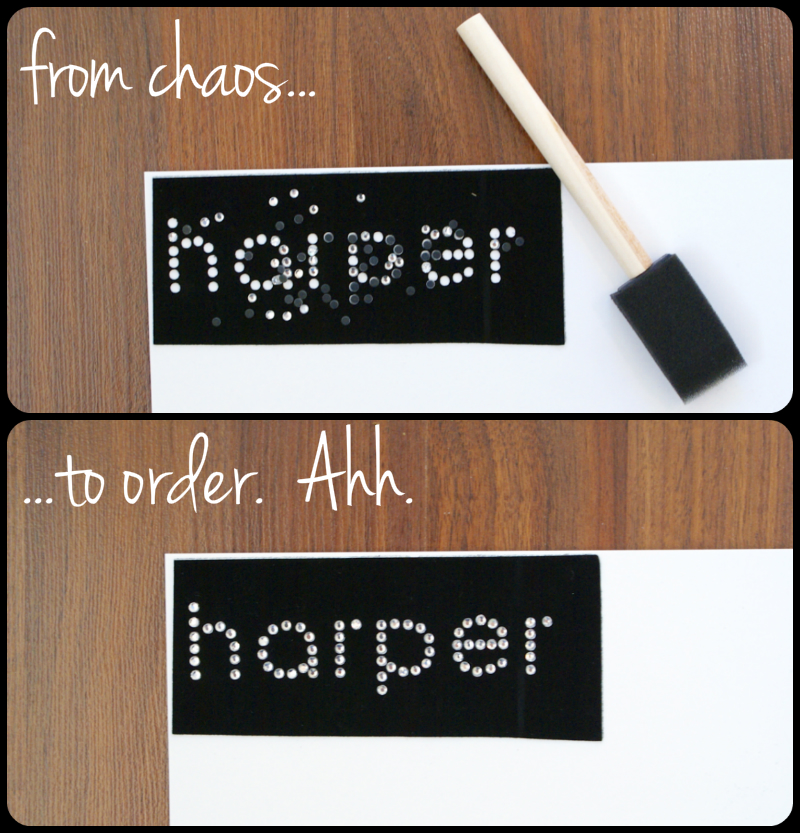
2. Remove the template material from your cutting mat, then use scissors to cut out the section with your design. You can save the rest of the template material for a future project. Now, peel the backing off of the template material in one quick motion. The faster, the better! The goal is to leave behind as many of the circle cutouts as possible, but if you have some remaining, just use a toothpick or the Silhouette hook tool to poke them through.
3. Then, affix the template material to the white backing board. Here’s a photo of what you want to end up with:
4. Now, the fun begins! Pop open your bag of rhinestones, sprinkle some onto your design, and use the Silhouette brush that came with your starter kit or a foam brush to help guide the little buggers into the slots. This part is a little meticulous, but proved to be strangely therapeutic to me.
5. Now, it’s time to get a piece of transfer tape (clear sheet) from your kit, cut it to match the size of the your design, remove the backing, and place it sticky side down onto the design. This is another scenario where it’s better to be quick and decisive rather than not. You don’t want to accidentally jostle the rhinestones in the process or pull them up. Give it one solid press down.
6. After you’ve given your transfer paper several good hard presses, you’re ready for the next step, which I affectionately call, No Rhinestone Left Behind. Slowly lift the transfer tape, which should have the rhinestones attached. If you see any rhinestones that remain on the template material, re-affix your transfer tape and do some more pressing. Remember, No Rhinestone Left Behind!
7. Now, place the transfer tape with rhinestones to your onesie or garment exactly where your want it.
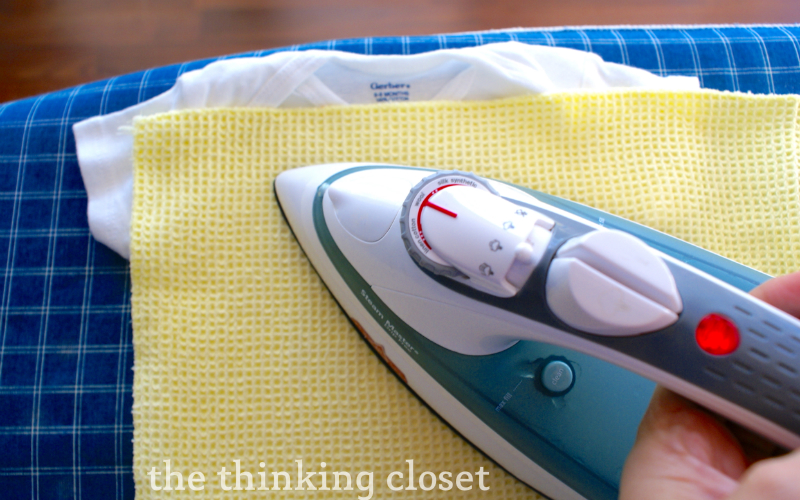
8. Place a cloth over the design and iron it on the “wool setting.” Silhouette recommends 45-60 seconds, but mine took more like 2 minutes, perhaps because I used a thicker piece of cloth. If when you start to peel away the transfer tape the rhinestones aren’t sticking to the fabric, continue ironing for longer or on a higher setting.
Then, turn the garment inside out and repeat this process to draw the glue into the fabric. According to Silhouette, washing instructions are simply to wash and dry your rhinestoned garments inside out.
And voila: the finished onesie!
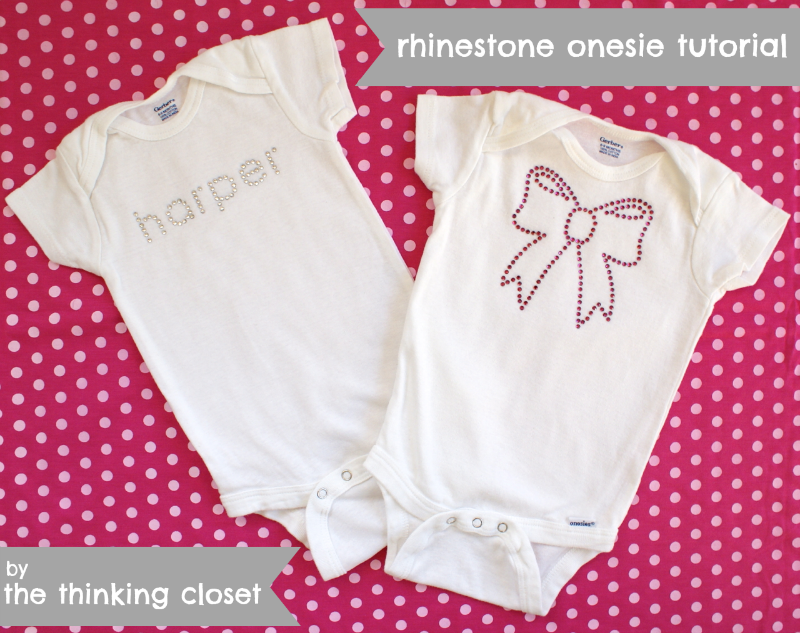
I even purchased a rhinestone bow design from the Silhouette store for 99 cents and whipped up a second onesie for our friends who know they’re having a girl…but the name is a surprise! (I just can’t resist bows.)
And here they are, looking all bling-i-fied together.
Welp, I hope you enjoyed this tutorial! If you’ve used your Designer Edition of the Silhouette Studio software to tackle some rhinestone projects, let me know in the comments section; I’d love what you’ve come up with.
And if you’re wanting to jump on Silhouette’s March promotion, you can click here and use the code CLOSET. This promo code will give you access to any of these three offers:
- 1 Silhouette Portrait™ and the Silhouette Studio® Designer Edition Software for $179.99
- 1 Silhouette CAMEO® and the Silhouette Studio® Designer Edition Software for $269.99
- The Silhouette Studio® Designer Edition Software for $24.99
You have until Friday, March 8th Sunday, March 10th (promotion extended!) to take advantage of these deals, so don’t delay. Click here to access this special promotion by Silhouette and enter the code, CLOSET, at checkout.
Linking up here.
Cheers,
Full Disclosure: I was not compensated for this post, but I did receive a free copy of the Silhouette Studio Design Edition software.




Thanks! Have an old Studio 18 Rhinestone word with no direction of how to affix. Steam? Dry? Hot? The Onesies are a great idea but how to affix my “Wish” was just what I needed. I have a nice white shirt that got a stain I couldn’t remove but I couldn’t get rid of it either. Finally I was inspired to cover the spot with something? was that the first button or embroidery? well it is a collection of things found now and a lot of fun to wear and getting better all the time. Thanks again.I remember now my last rhinesone iron-on project took a little extra effort. Warmer and longer will probably solve the problem.
I love that you thought of a creative solution for covering a stain…and what better way to cover something than with glitzy glammy rhinestones?! And yes, I do always find that warmer and longer are the answer to my ironing woes, be it rhinestones or heat transfer vinyl. Best of luck with your project, Gramma Marcy! Would love to hear how it turns out.
IN LOVE! So many possibilities! Awesome tute as well!
THANK YOU for linkin up to my Sunday FUNday party! Hope to see you tonight!!
Kristine – The Foley Fam {unedited}
Thanks Ms. Kristine! You’re so sweet to take the time to stop by and drop me a comment. Will be by to link up today!
Love these “bling-i-fied” onesies! I love the personal-ness of a gift like that! This is so much sweeter than just giving generic baby clothes…may have to purchase my own bedazzler, I mean, silhouette, someday! 😀
Ha ha. Yeah, I’m a bit addicted now. I don’t think I’ll ever be able to gift a generic baby onesie again!
Lauren….I featured this on my Wowza Weekend Link Party at The Patriotic Pam. Congrats! Great idea!
Pam
All I can say is, Wowza! 😉 Thanks for the feature, Pam! Super exciting.
This is such a cute idea!!! I hope you’ll stop by and link up to Make It Wear It Thursday on thetraintocrazy.com!
Thanks, Andrea! I linked up! Love your blog. I am also a frequent passenger on the Train to Crazy!
Sharing on FB tomorrow!
You’re so kind, Carrie! Thanks for the link love.
Wow that is easier than I thought! pining to my Silhouette Board! thanks for linking up!
Kim
Thanks for the sweet comment and pin, Kim! And for hosting your lovely linky party.
Great tutorial and supper cute onesie! I have featured you this week and it will be posted later tonight! I would love for you to stop by to grab a feature button and wear it on your blog proudly! You deserve it! Click here to get to your feature!
Woot woot! Thank you so much! I very much enjoy your linky party and will be by to grab a button!
This is adorable! My youngest is almost 18 months, but I’ll pass along to my niece for her baby.
Lori
Whoneedsacape.com
Not Your Average Super Moms!
Thanks for sharing the love, Lori! And I love your blog title and tagline. Super Mom to the rescue!
I need to pin this later. I want to get more adventurous with my Silhouette, and do projects like this. Thanks for sharing at Pinworthy Projects.
Oh, it’s pretty incredible all that the machine can do. And I’m finding it super easy to navigate. Whenever I have a question, someone seems to have the answer in a tutorial or forum…so don’t hold back! Unleash that craft-cutting creativity! Thanks for stopping by, Carrie.
Beautiful work. I’d love to have you share this at What to do Weekends Party also. Following on several platforms. Best wishes, Linda
http://www.craftsalamode.com/2013/03/what-to-do-weekends-9.html
Thanks for all the follow love, Linda, and for your kind words. Looking forward to stopping by your blog for a visit!
Love the baby bling!! 😉
Thank you for partying with the Wildly Original Crowd.
<3 Christina at I Gotta Create!
Thanks for hosting such a great party and for taking the time to stop by and comment! Glad you approve of the baby bling, ha ha.
These are so cute. I’m pinning it as a reminder for my next “girly” project (I don’t get a lot of them with all the boys around).
I tried to bling out a pink Adidas sweat suit as a flower girl gift years ago. I used some kind of bedazzler/embellisher thing and ended up making a complete mess of the whole thing (melted fabric, loose rhinestones, misshapen letters – hot mess literally!). I wish I’d had the silhouette and these transfer sheets then.
Thanks for the tutorial!
Aw…your pink Adidas sweat suit project sounds like one of those “craft fails” that becomes a great story later on. I hope you took photos! And I’m glad it didn’t ruin your relationship with rhinestones forever and that you’re considering trying something like this in the future. Let me know if you do! I’d love to see your finished creation.
Very cute. I love this. I just pinned it. We have a link party called Wednesdays Adorned From Above Blog Hop and would love to have you share this and any other posts with everyone. It runs from Tuesday night through midnight Sunday. Here is the link to the party.
http://www.adornedfromabove.com/2013/03/wednesdays-adorned-from-above-blog-hop.html
We are also having a giveaway this week for a $50.00 Target Gift Card, so head over to enter.
We hope to see you there.
Debi and Charly @ Adorned From Above
Thanks for the sweet words and invite, ladies! And a $50 Target gift card can always be put to good use!
Okay, that is awesome! I never knew how to line up the crystals! You’ve made my day! I did a onesie tutorial this month as well – I used family photos to create a personalized onesie for baby. You can find it at http://ornatesplendor.blogspot.com/2013/03/family-collage-for-baby.html
Glad to be of service, Catherine! And I just checked out your family photo collage onesies – – what a clever idea! I’m sure that was a lot of work, but clearly, so meaningful, and something that will become a keepsake. Thanks for sharing!
Great idea! I’d love for you to check out our Pattern Party! Those with free patterns and templates to share are invited to link up.
http://getyourcraptogether.blogspot.com/search/label/Pattern%20Party
Wish I had a pattern to share! I’m still learning the ropes of my sewing machine and need to work on mastering the art of following a pattern before I venture into making one…but when I do, I’d love to link up.
Lauren, this is adorable! Makes me wish I had another baby I could bling out. Do they make adult sized onesies? I know your friends will really enjoy these gifts!
p.s. Thanks for linking up this inspiring project at my A New Creation link party. I always love it when you make an appearance at my parties 🙂
Aw, thanks! Well, you’ve got one of the best parties on the block! I love to stop by (usually fashionably late, as I am apt to do in real life).
Your rhinestone onesie was featured this week at A New Creation! Thanks!
Ooooo! Yay! So exciting. Can’t wait to link up another onesie project this week…I’m going onesie crazy!
They totally should make adult-sized onesies if they don’t already! (I think we’ve found our next sewing project. Mwah ha ha!)
SO adorable!! I love the No Rhinestone Left Behind slogan! The pink polka dot background is just perfect for displaying the two outfits.
Yeah, that popped into my head during that step. I suppose it was brought up so many times during my teacher training, I’ve been brainwashed! And I was glad to find some fun fabric in my stash as a backdrop. It was one of the many cute knit fabrics that came in my bonanza box from this past fall. Now, I just need to learn how to sew with knits….
Is there something you want to announce Lauren? Hmmm…
Ha ha. Verrrrrrry funny, Alex. Verrrrrrry, funny…. 😉
I love the bow!
Thanks, Coley! I thought it was super cute, as well. And I love that once you’ve cut the template material and affixed it to the backing board, you can re-use it as many times as you like. I might start adding bows to EVERYTHING now!
Love these!!! What a great baby gift!
Thanks, Monica! I can’t wait to give them away…though I have one more thing I want to make to accompany the onesies: burp cloths! I have the materials – – just need to make a crafternoon of it!
The blinged out onesies are delightful and pratical.:) They are the perfect baby gift!
Hooray! If it has the Cindy stamp of approval, I’m good to go. Thanks for the affirmation, friend!
These are too cute! love them! these onesies are a great gift 🙂
Glad you think so! I’m not yet a Mom yet, so it helps to know that I’m not totally coming outta left field with this one. 😉
How fun! What a cute way to personalize some bland baby gear! Who could resist a bedazzled onsie! Do you have blue rhinestones? You should totally do a blue tie for a boy. I love that pink bow!
I wondered if rhinestones would be too much bling for a baby boy, but imagining a blue rhinestoned tie onesie for a little boy is changing my mind now! What a sweet idea.
What a great gift idea! Even better that the laundering care is practical. (Nothing worse than being a new mother (or father) and having ‘dry clean only’ baby clothing.) I tell you, your projects make me wish I had a Silhouette just to copy your ideas. Thanks again! (Oh, and congrats on the promo code – how exciting!)
Ha ha, I know, I’m guessing the onesie wouldn’t get much use if it was dry clean only. I know that new babies can go through several outfits a day…so being washer-dryer-safe is KEY.
And thanks for the congrats! I feel like such a grown up, offering a promo code. And then, I remember, I’m approaching 30! Guess it’s really happening. Ha ha.
So easy 🙂
You know it!